

SUSE Manager 4 server installation walkthrough along with screenshots.

This is SUSE Manager 4 installation walk-through which was done in Oracle VM VirtualBox Manager. The whole installation process can be split into below phases –
- Subscription procurement
- Installation with DVD
- Booting it first time
Let’s go through one by one without any further delay.
Subscription Procurement
The first thing is you need to have a subscription for using the SUSE Manager module. For this exercise, I procured a free 60 days subscription from SUSE. You can navigate to the product page and get a “60 Day free trial” license. You will get to download one Installer DVD after sign up like below.
If you are trying to set up SUSE Manager in corporate setup then your company must have already procured licenses for the same. You can get required subscription details from the respective team. Or you can click buy now on the product page and walk through the purchase procedure.
Once you have downloaded the DVD, its time to boot server with this DVD. Make sure your server meets specified hardware requirements as stated herein the documentation.
Installation with DVD
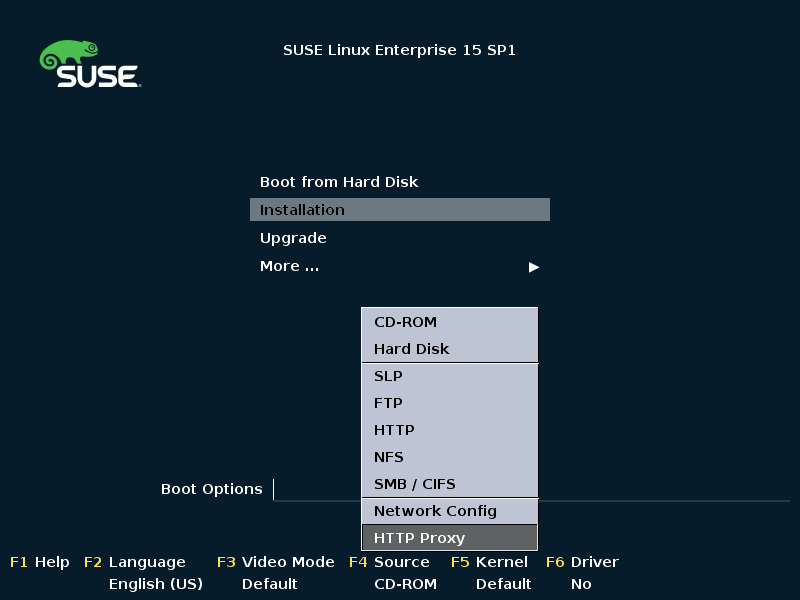
Once your system is ready and DVD is downloaded, boot system with DVD. Halt at below screen and press F4 if you want to configure a proxy for an internet connection during setup. If you have direct internet access then skip it.

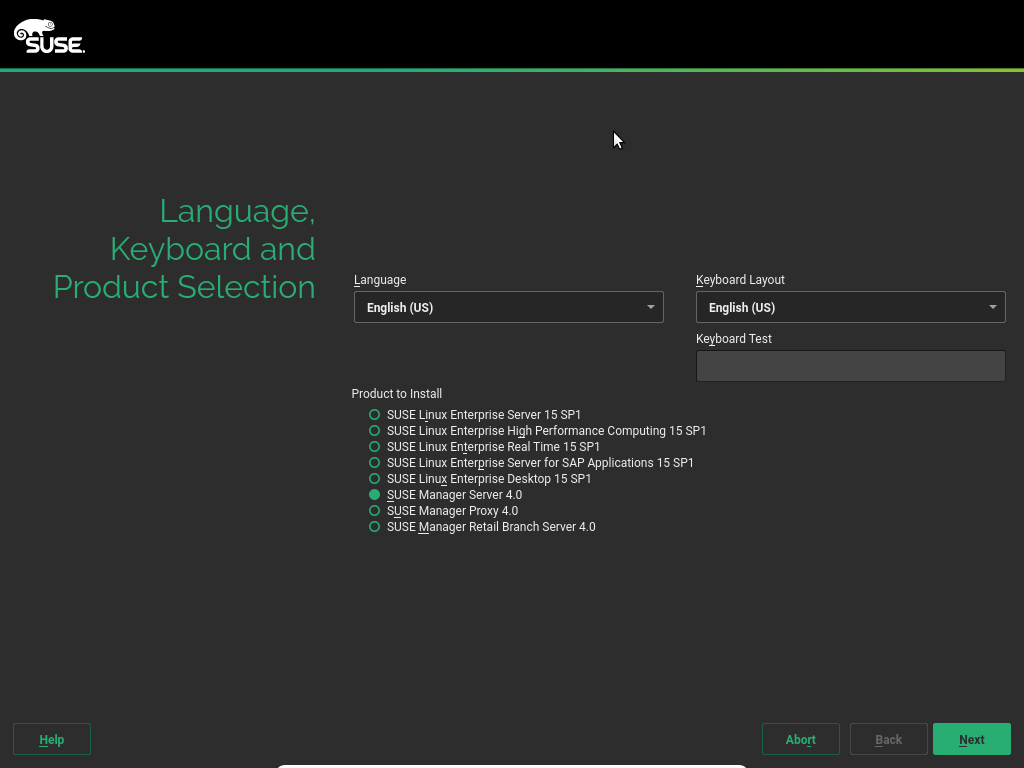
Proceed with installation after proxy config (if applicable) and select product SUSE manager 4 on the next screen.

Click Next. On the next screen accept the license terms and click next. You will be prompted with a registration window.
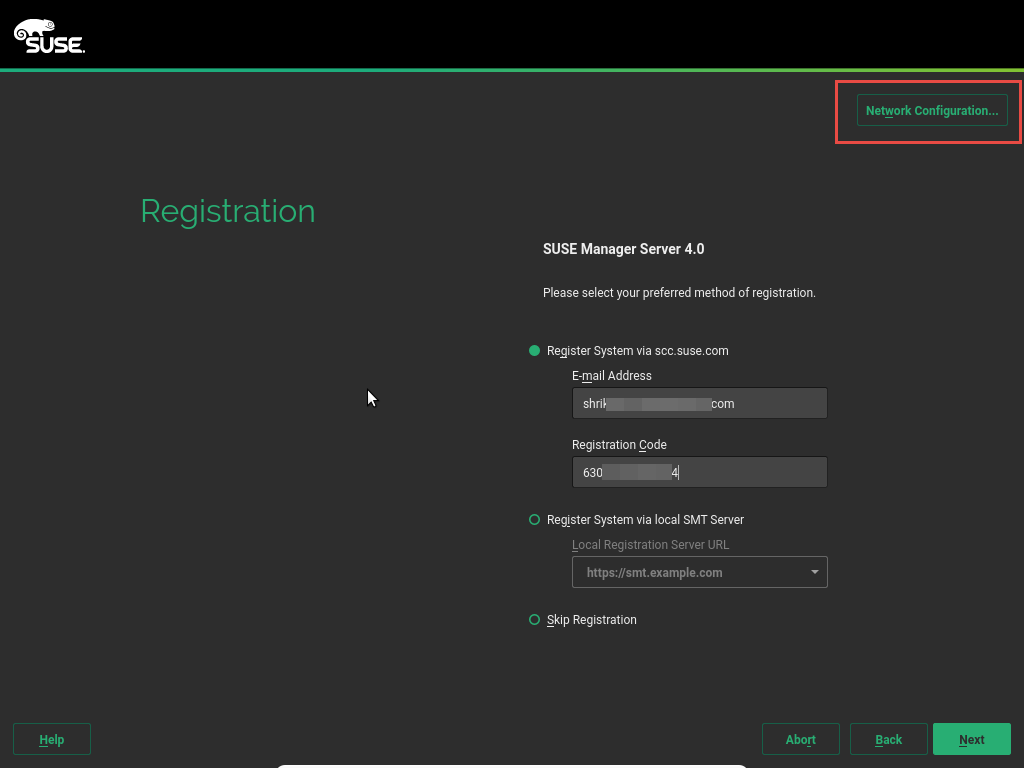
Fill in your registration details. Here you can configure the network by clicking the ‘network configuration’ box above. It will open up the standard SUSE network configuration setup. You can set up IP details, hostname, DNS here so that your system can go online on the network and access the internet for registration. Click next and your system will be registered to SUSE.
After successful registration, you will be offered to enable repositories. Choose accordingly. I prefer to enable them during installation to receive the latest updates.
Post that you will be prompted to select SUSE manager extensions and modules to install. Mandatory are selected already.
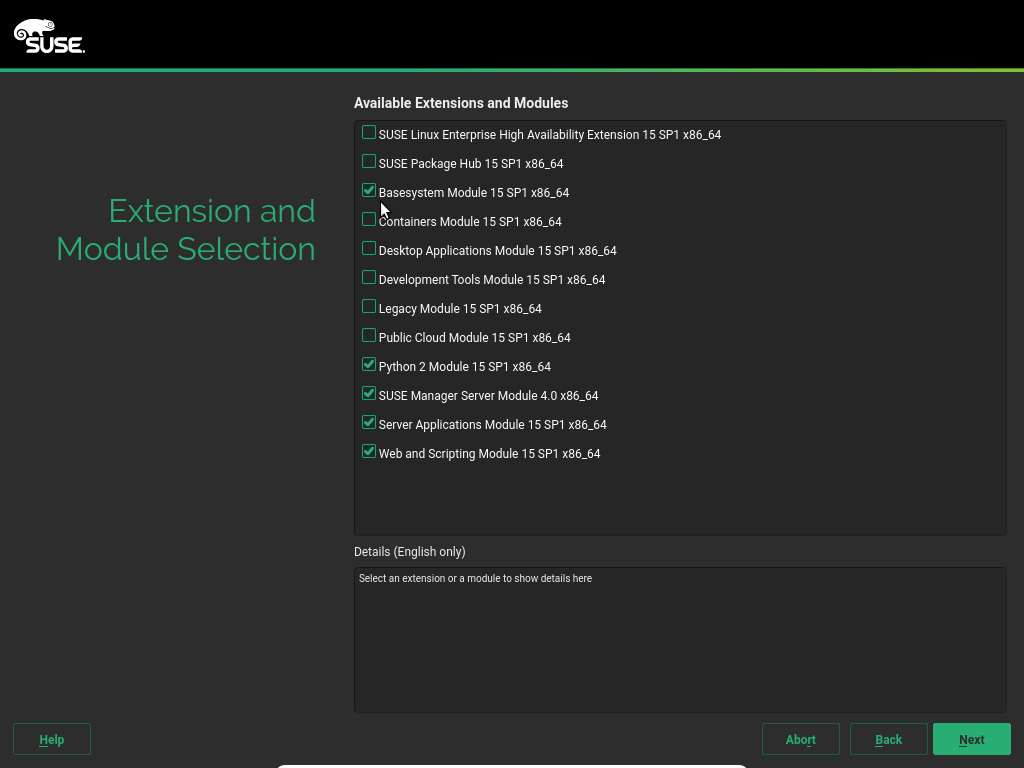
After selection click, next and setup will register modules to SUSE. Remember previous registration was for system and this one is for module/extensions you selected.
On the next screen, you will be prompted to select any add on products you want. I would skip it and click next. It will ask for a system role in the next window.
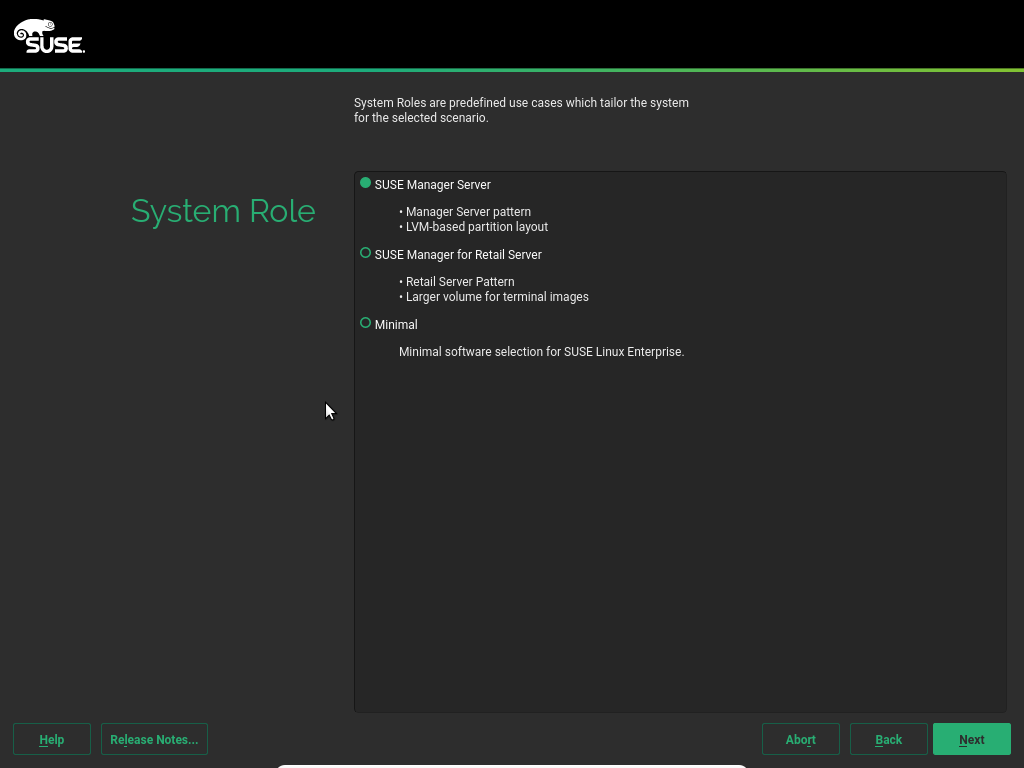
The choice is obvious here! Select the SUSE manager server and proceed. On the next screen disk partitioning can be done.
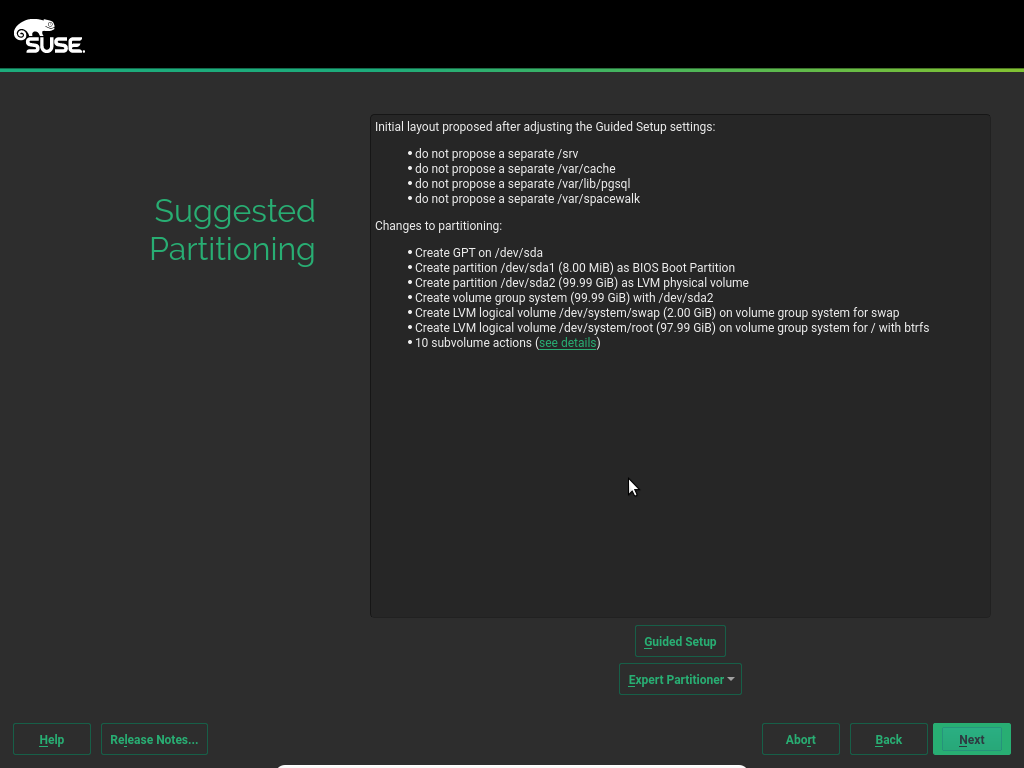
Since this is my test system I will go with the default FS layout which setup offers. You can create a custom layout with expert partitioned here. Especially you need to check /var/lib/pgsql and /var/spacewalk sizes since all patch data going to be dumped here by SUSE Manager.
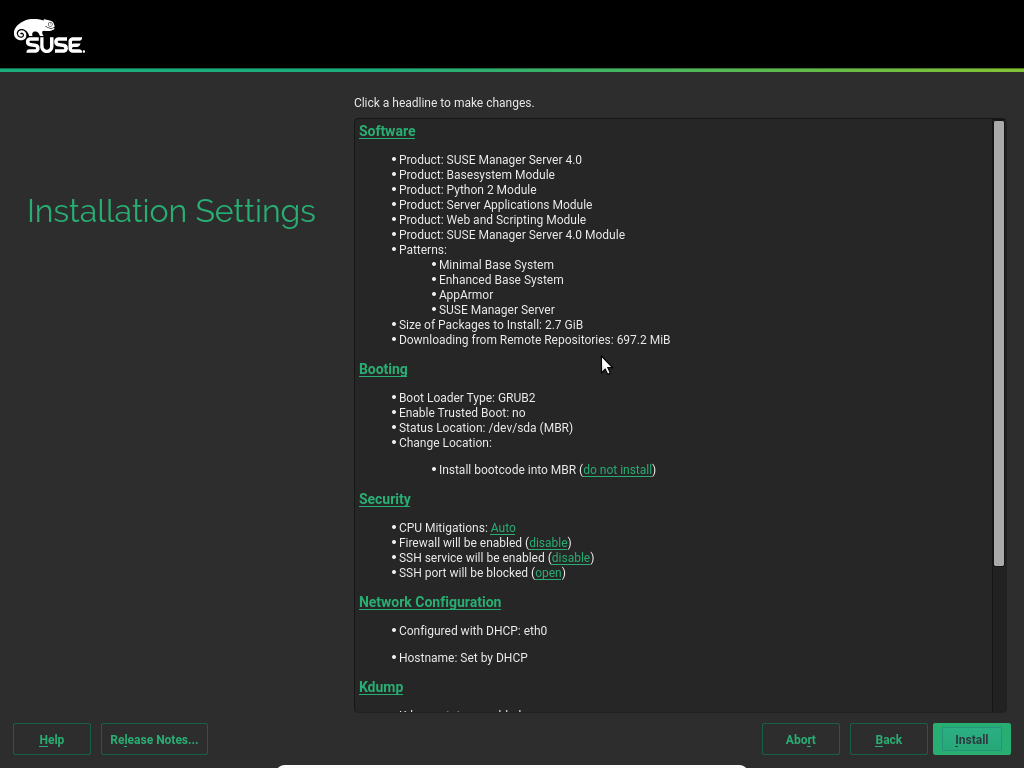
This followed by “Clone & timezone”, “Local User”, “Root password” standard screens which you normally see during any Linux install. I am skipping their screenshots here.
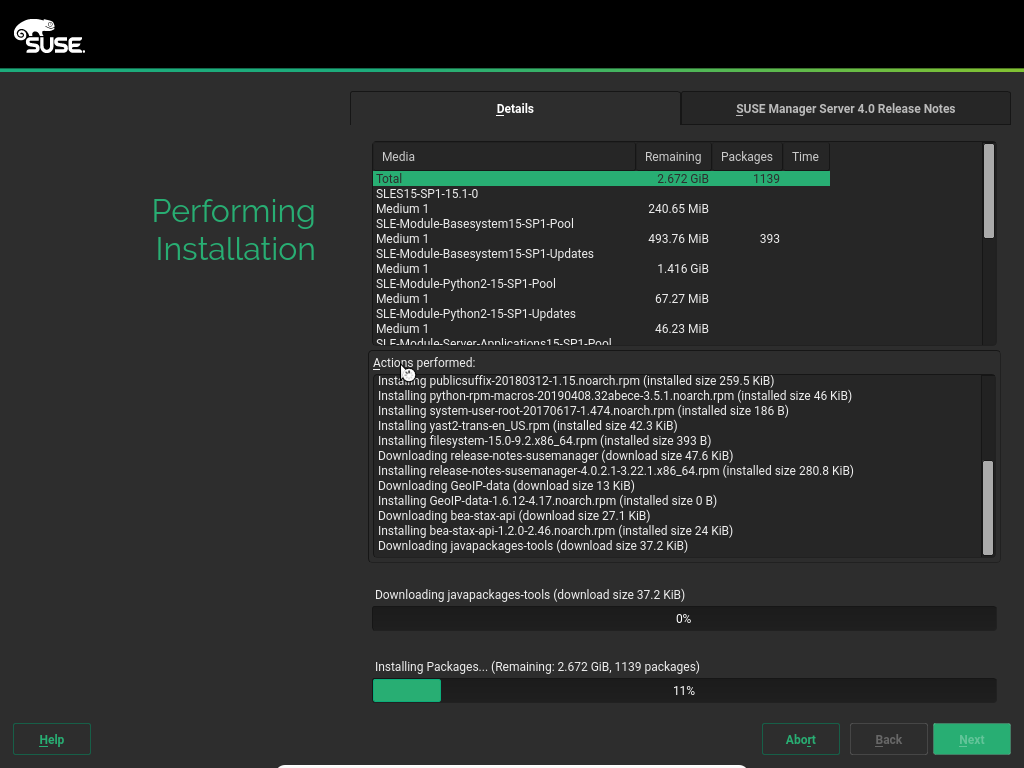
Finally, you will be greeted with an installation summary. Verify things here and change if you want to like firewall etc. and hit ‘Install’ to start the installation.
Now you can see packages are being downloaded from SUSE and then being installed. If you remember we used only 600+ MB DVD to boot system so its obvious it did not have whole OS packages in it. So setup will download packages and complete installation.
Once installation complete, the system will reboot and you are good to login.
Booting it first time
After the system reboot, type in below command to start the SUSE Manager setup!
kerneltalks:~ # yast2 sysemanager_setup
SUSE Manager setup will begin in text mode GUI which we will walk you through in our next post.
You can verify different susemanager packages are installed on the system using rpm -qa |grep susemanager command. Unless susemanager package is installed on server, the above command won’t work. It will throw below error :
No such client module susemanger_setup
It happens mostly when you choose not to register system during setup and opt to install a system with another packages ISO (when your system don’t have internet access). In that case, you just need to register your system with SUSE first and then install susemanager package using zypper and you are good to go.
Follow the next article which explains how to configure SUSE Manager Server 4.0