Monthly Archives: February 2024

Exploring CloudFormation Git Sync!

In late Nov 2023, amazon announced the new CloudFormation Git sync feature. Let’s explore this new feature; how it works, how it impacts CD patterns of Infrastructure as Code (IaC), etc.

CloudFromation Git Sync Feature!

What is the CloudFormation Git sync?

Recently announced CloudFormation Git sync feature lets customers deploy and sync the CloudFormation IaC code directly from remote Git repositories. This will be a game changer in the future as this feature might empower customers to omit the Continuous Deployment tools like Jenkins, GitHub Actions, etc. altogether and hence their maintenance.

In summary, the customer is required to establish a GitHub Connection with AWS and subsequently generate a CloudFormation stack using the relevant IaC template repository information. Once the stack is set up, CloudFormation continually monitors the template files in the remote Git repository. Any new commits in the remote repo, trigger the automatic deployment of the corresponding changes to AWS.

Pre-requisite for CloudFormation Git sync

  • A Git repository with a valid CloudFormation IaC template
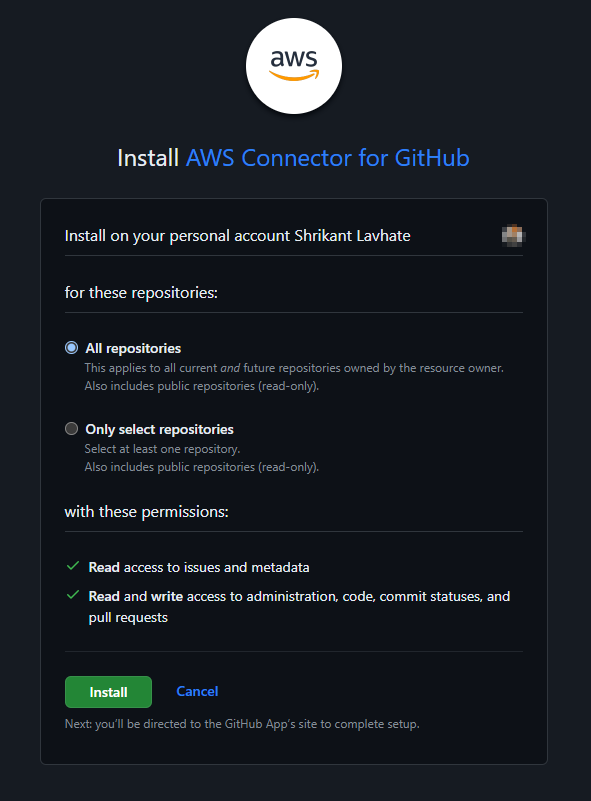
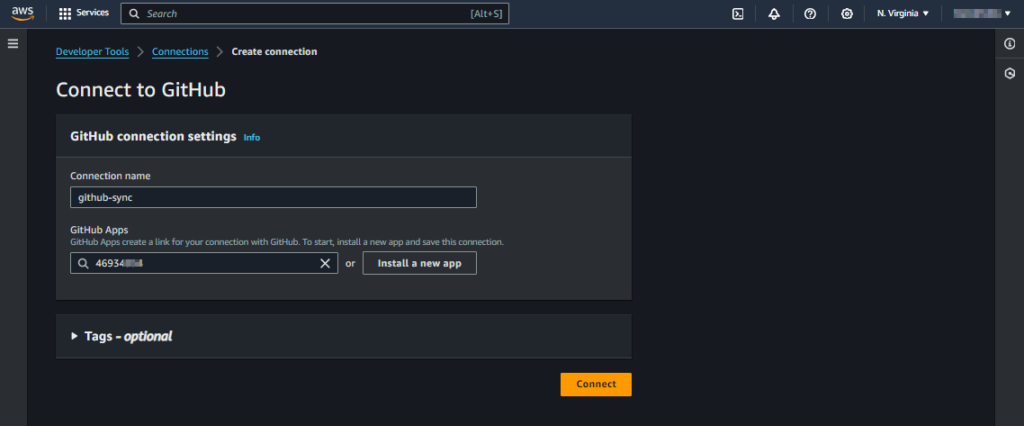
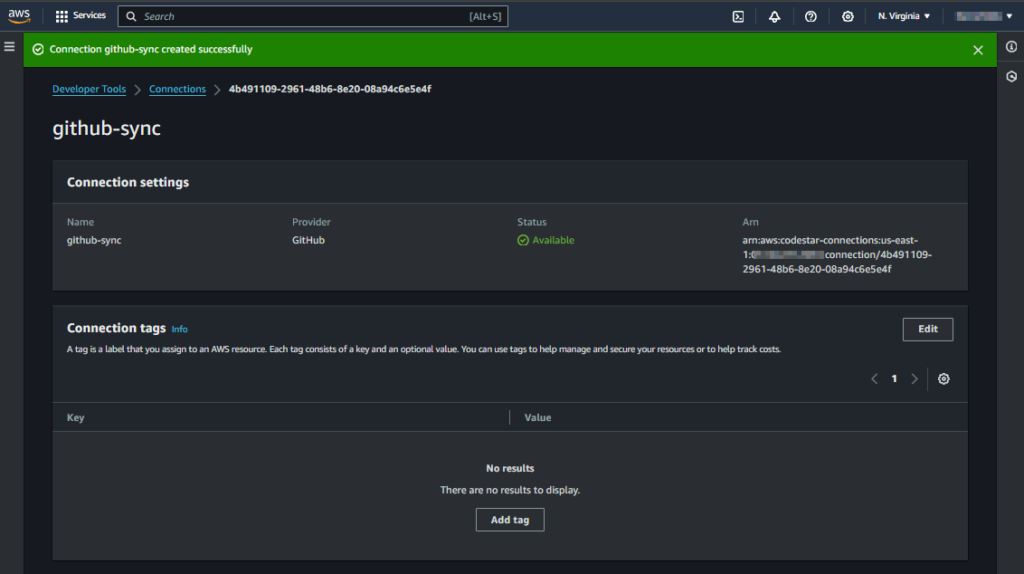
  • A GitHub Connector configured for the target AWS account
  • IAM role for Git Sync operations. It should have –
    • Access IAM policy
    • Trust policy

IAM policy

For tighter security control, one can scope down the IAM policy for certain CloudFormation Stacks using a resource block in the SyncToCloudFormation statement.

{
    "Version": "2012-10-17",
    "Statement": [
        {
            "Sid": "SyncToCloudFormation",
            "Effect": "Allow",
            "Action": [
                "cloudformation:CreateChangeSet",
                "cloudformation:DeleteChangeSet",
                "cloudformation:DescribeChangeSet",
                "cloudformation:DescribeStackEvents",
                "cloudformation:DescribeStacks",
                "cloudformation:ExecuteChangeSet",
                "cloudformation:GetTemplate",
                "cloudformation:ListChangeSets",
                "cloudformation:ListStacks",
                "cloudformation:ValidateTemplate"
            ]
        },
        {
            "Sid": "PolicyForManagedRules",
            "Effect": "Allow",
            "Action": [
                "events:PutRule",
                "events:PutTargets"
            ],
            "Resource": "*",
            "Condition": {
                "StringEquals": {
                    "events:ManagedBy": [
                        "cloudformation.sync.codeconnections.amazonaws.com"
                    ]
                }
            }
        },
        {
            "Sid": "PolicyForDescribingRule",
            "Effect": "Allow",
            "Action": "events:DescribeRule",
            "Resource": "*"
        }
    ]
}

Trust policy

{
    "Version": "2012-10-17",
    "Statement": [
        {
            "Sid": "TrustPolicy",
            "Effect": "Allow",
            "Principal": {
                "Service": "cloudformation.sync.codeconnections.amazonaws.com"
            },
            "Action": "sts:AssumeRole"
        }
    ]
}

How to create a stack using CloudFormation Git Sync?

Let’s look at the step-by-step procedure to deploy a new CloudFormation stack using Git Sync.

Environment setup considered here –

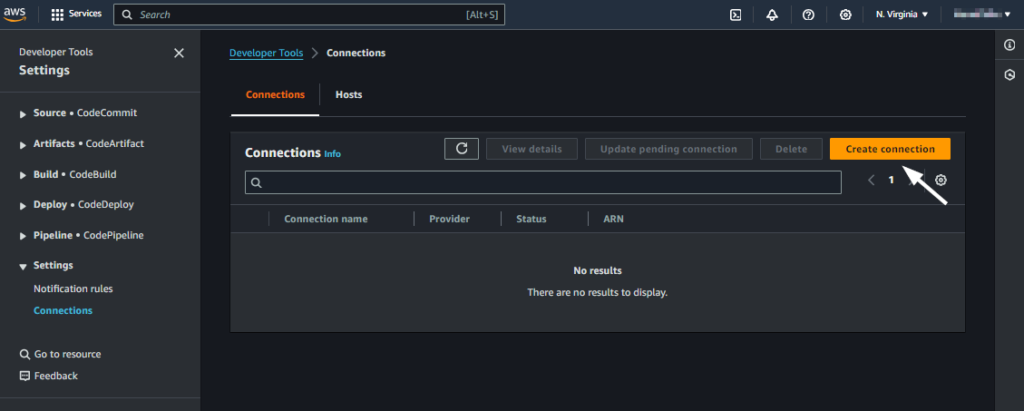
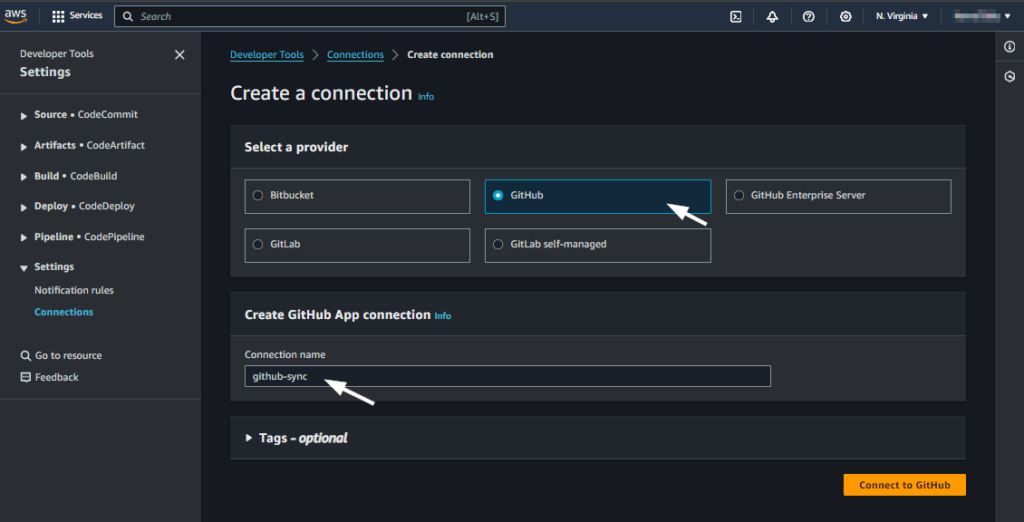
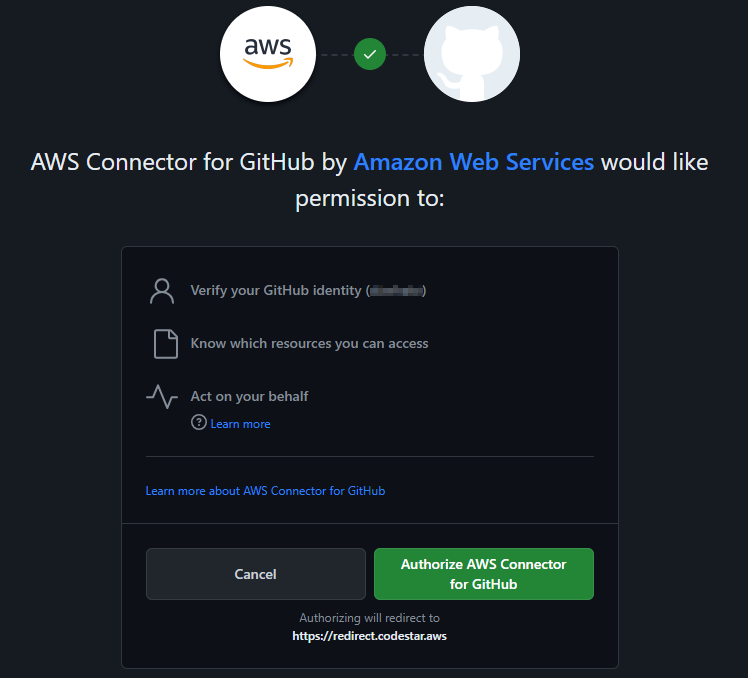
  • An AWS account configured with GitHub Connection in the Developer Tools Console.
  • A Private GitHub repository cfn-git-sync-poc that hosts a valid CloudFormation template at cloudformation/s3-stack.yaml
  • An IAM role was cfn-github-role created on the target AWS account with above stated policies.

Now, it’s time to get our hands dirty!

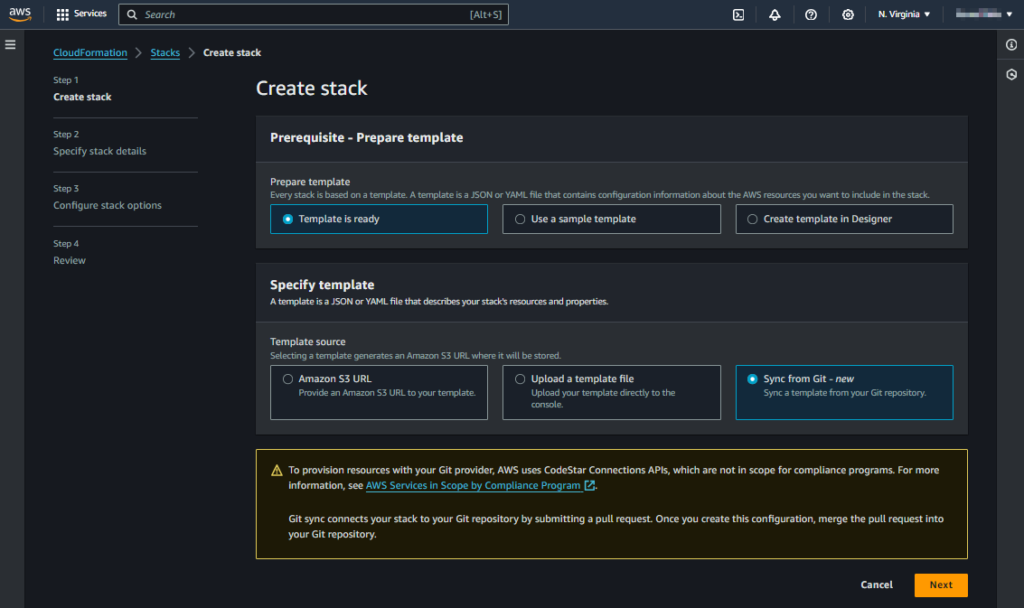
  • Log in to the AWS CloudFormation console. Click on the Create stack dropdown button and choose With new resources (standard)
  • On a Create stack page, select Template is ready and Sync from Git
Create stack using Git
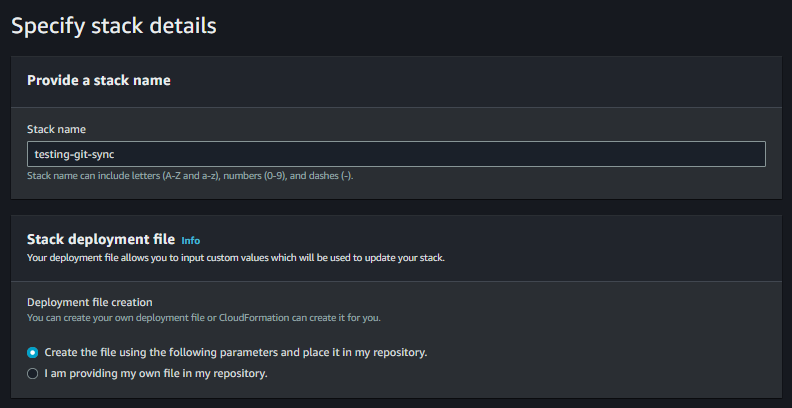
  • Start providing the stack details like the stack name of your choice and select automatic Deployment file creation. If you wish to create a deployment file, please refer to this file format details.
Stack details
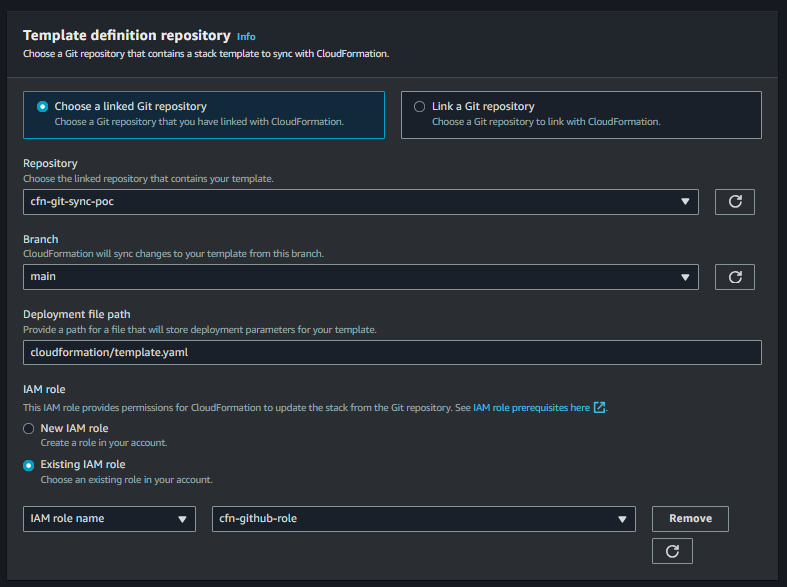
  • Then, specify the Git repository information. Ensure that you have a configured and active GitHub connection to fill in the fields in this segment. Choose the repository containing the Infrastructure as Code (IaC), specify the deployment branch, and designate a Deployment file path where AWS will store the newly committed deployment file. Lastly, furnish the IAM role details that will be utilized for executing Git Sync operations.
Repository details
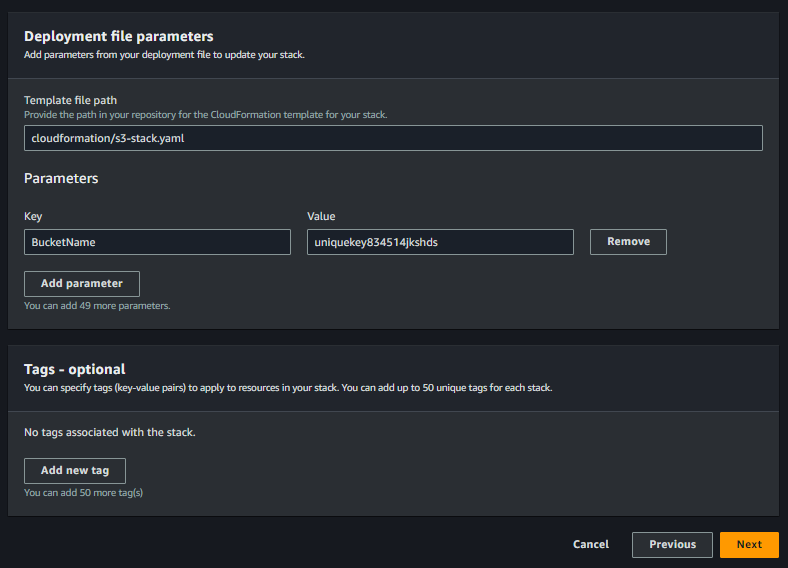
  • Lastly, enter the file path for the CloudFormation IaC template inside the remote Git repo and define the parameters that are declared in the template. These details will be used to build the Deployment file.
Template and parameter details
  • Click the Next button and you will enter the Stack options page.
  • Stack options are the same as any other CloudFormation stack hence we will not discuss them here.
  • After verifying/modifying Stack options click Next button on the page.
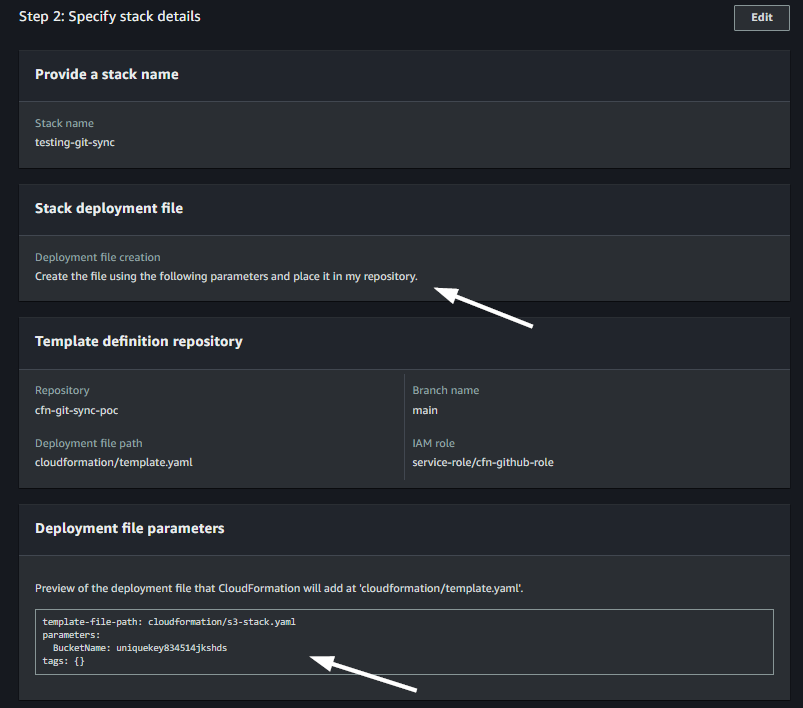
  • Now, you will enter the review page where you can see the Deployment file constructed using the details provided and it will be committed to the remote Git repo on defined location
Deployment file!
  • Review the rest of the configurations and click the Submit button.
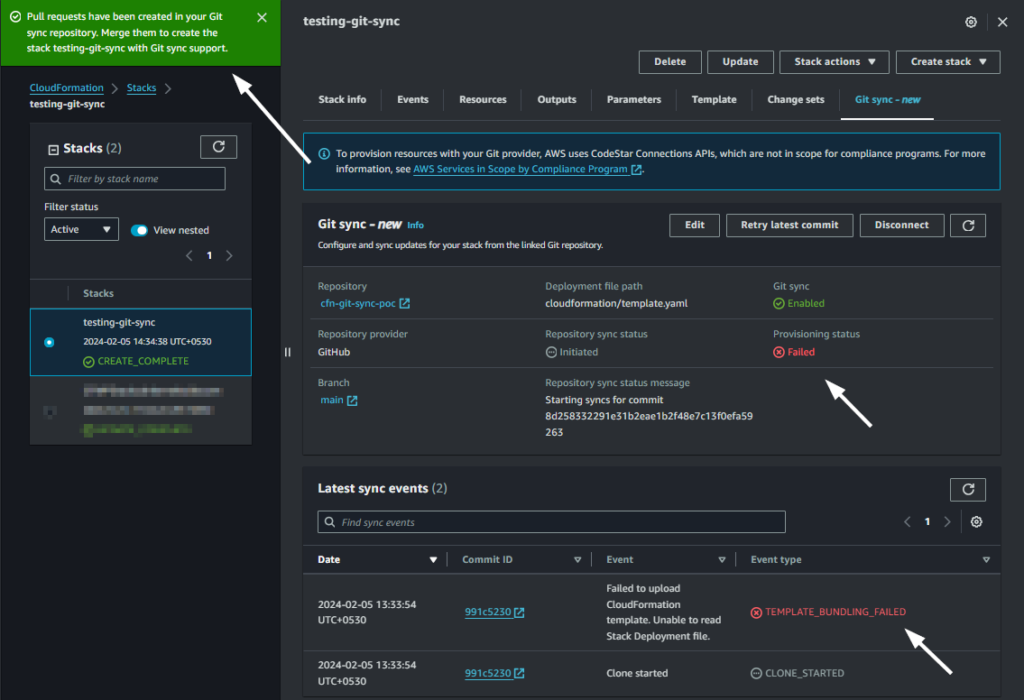
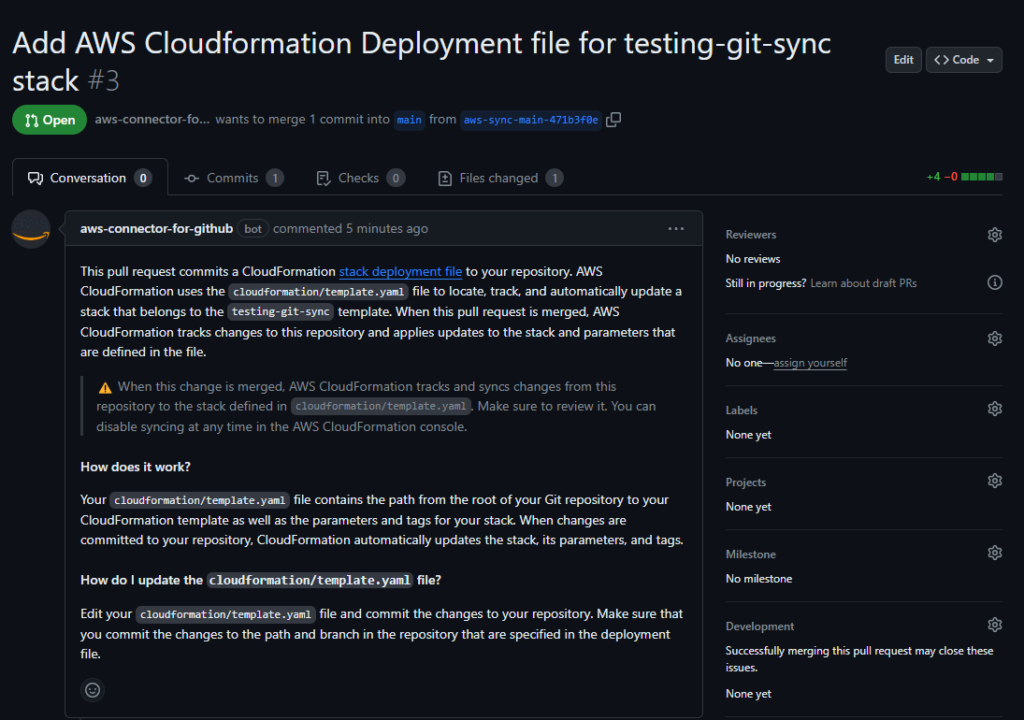
  • Now, CloudFormation will commit and push the Deployment file to the remote Git repo by raising a Pull Request (PR). The message will be flagged on the page. Meanwhile, since the Deployment file is not found in the remote repo, the Provisioning status will be marked as Failed. Once PR is approved, Deployment file will be available in the remote repo.
The First deploy using CloudFormation Git Sync
  • Head over to GitHub and you should see a PR raised by Amazon to commit the deployment file into the remote repo.
PR raised by AWS Connector
Deployment file creation by AWS Connector in PR
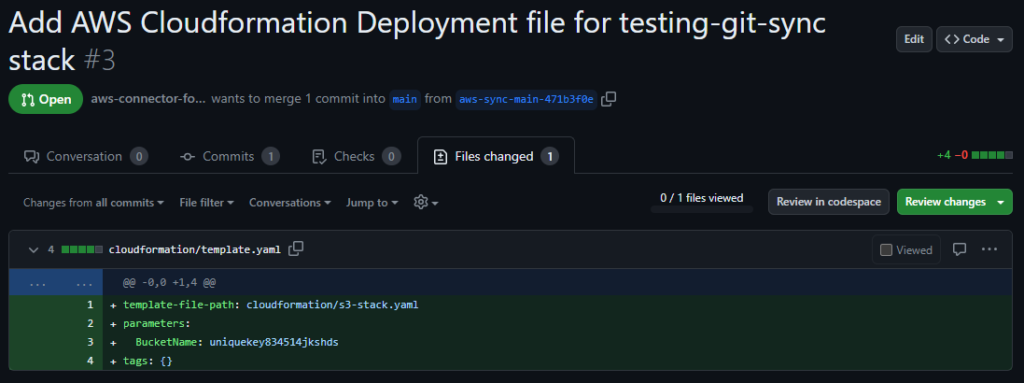
  • Review, approve, and merge the PR.
  • Once PR is merged the code modification is detected by CloudFormation and it starts provisioning the stack.
Stack provisioning started
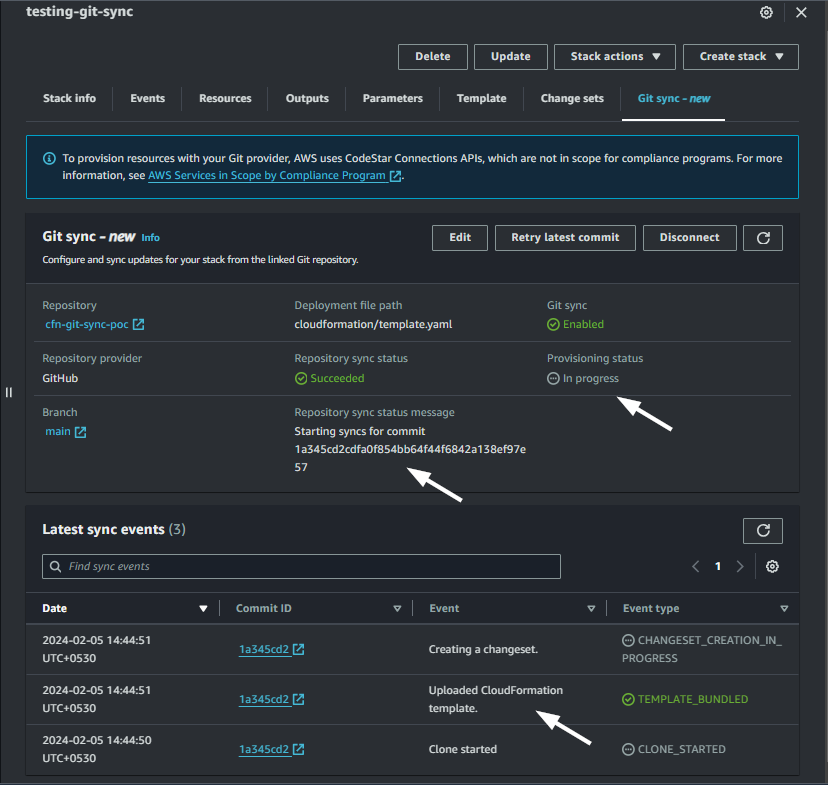
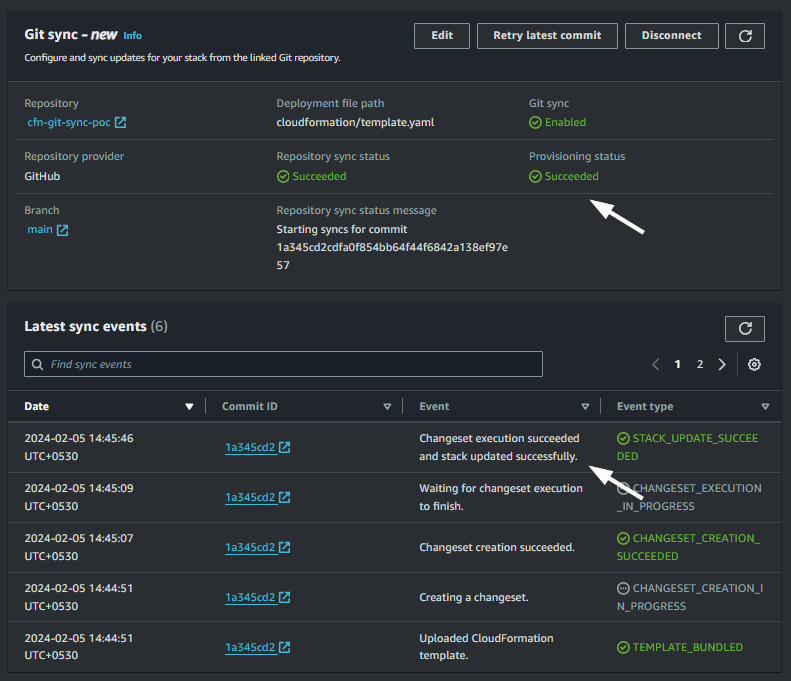
  • Once all defined resources are created, stack creation will complete and CloudFormation keep monitoring the Git repository for any new changes.
The Stack is deployed successfully!

In multiple environments such as development, testing, staging, and production, it’s possible to utilize distinct Stack Deployment files while leveraging a single CloudFormation IaC template file. These varied Deployment files can be organized into separate folders within the same repository for better segregation. By selecting the appropriate deployment file based on the environment where the CloudFormation stack is being established, the process becomes more streamlined. Something like –

cloudformation
├── dev
│   └── deployment.yaml
├── test
│   └── deployment.yaml
├── staging
│   └── deployment.yaml
├── production
│   └── deployment.yaml
└── template.yaml

By selecting the appropriate deployment file based on the environment where the CloudFormation stack is being established, the process becomes more streamlined. I anticipate that the Git Sync feature will evolve with additional capabilities in the future, potentially prompting customers to reconsider the necessity of separate Continuous Deployment (CD) software.

What do you think about this feature?

What are your thoughts on the CloudFormation Git Sync feature? Could it potentially revolutionize the game? Will it make several Continuous Deployment tools obsolete? It feels like an ArgoCD for Kubernetes, operating in a remarkably similar manner. For sure, it may not yet offer extensive control over commit-wide deployments, but the potential for future enhancements is exciting. This feature appears to transform the Infrastructure as Code (IaC) landscape for AWS customers, possibly luring some back from alternative IaC platforms. Witnessing its development and utilization in enterprise productions is going to be exciting!

How to add a GitHub connection from an AWS account?

In this blog post, we will guide you through a step-by-step process to establish a GitHub connection in an AWS account.

Creating GitHub Connection for AWS

What is a connection?

Firstly, let’s understand the concept of a connection in the AWS world. In AWS, a connection refers to a resource that is used for linking third-party source repositories to various AWS services. AWS provides a range of Developer tools, and when integration is required with third-party source repositories such as GitHub, GitLab, etc., the connection serves as a means to achieve this.

Adding a connection to connect GitHub with AWS

Let’s dive into the step-by-step procedure to add a connection that helps your AWS account to talk with your personal GitHub repositories.

AWS Developer Tools Connection console
  • On a wizard screen, select Github and name your connection.
  • Click on Connect to GitHub button
Create Connection wizard
  • Now, AWS will try to connect to GitHub and access your account. Ensure you are already logged into GitHub and you should see below authorization screen. If not, you will need to login to GitHub first.
Authorize AWS connector for GitHub
  • You can review the permissions being allowed to AWS on your account by clicking Learn more link on this screen.
  • Click on Authorize AWS Connector for GitHub
  • After authorizing the AWS connector, you should be back to the GitHub connection settings page.
  • At this point, AWS requires a GitHub Apps detail that will allow Amazon to access your GitHub repositories and make modifications to them.
  • AWS also offers to create a GitHub app on your behalf if it’s not created already. You can use the Install a new app button here to let AWS create the GitHub app in your account.
  • In that case, you need to verify the configuration (repo selection) and then click the Install button.
Installing AWS Connector GitHub App
  • Once the App is created, the GitHub Apps ID will be populated in the wizard or manually enter the ID if the App is already created.
GitHub Apps details for creating a connection
  • Click on Connect button
  • You should be greeted with a success message with the new connection created!
GitHub Connection is created!

Your GitHub connection is now ready. You can use this connection in compatible AWS services and let those services access your Github repositories.

Exploring the Latest AWS Console-to-Code Feature

On November 2023 AWS announced the Preview going live for the new feature AWS Console-to-Code. Two months later, in this blog, we will explore this feature, learn about how to use it, what are the limitations, etc.

AWS Console-to-Code

What is the AWS Console-to-Code feature?

It’s the latest feature from AWS made available in the EC2 console that leverages Generative AI to convert the actions performed on the AWS EC2 console into the IaC (infrastructure as Code) code! It’s a stepping stone towards IaC creation methods in the world of AWS cloud.

The actions carried out on the AWS console during the current session are monitored by the feature in the background. These recorded actions are then made available to the user to select up to 5 of these actions, along with their preferred language. AWS then utilizes its Generative AI capabilities to automatically generate code that replicates the objectives achieved through manual actions on the console.

It also generates the AWS CLI command alongside the IaC code.

The usefulness of the AWS Console-to-Code feature

With the current list of limitations and the preview stage, this feature might not be a game changer but it does have potential in the future. The AWS Console-to-Code feature will surely help developers and administrators to get the IaC skeleton quickly to start from and speed up the IaC coding with less effort.

This feature simplifies the process of generating AWS CLI commands, eliminating the need to constantly consult documentation and manually construct commands with the correct arguments. As a result, it accelerates automation deliveries with reduced effort.

By the way, there is no additional cost to use Console-to-Code so it doesn’t hurt to employ it for initial IaC drafting!

Limitation of AWS Console-to-Code feature

  • Currently, it’s in the ‘Preview’ phase.
  • Only available in North Virginia (us-east-1) region as of today.
  • It can generate IaC code in the listed types and languages only –
    • CDK: Java
    • CDK: Python
    • CDK: TypeScript
    • CloudFoprmation: JSON
    • CloudFoprmation: YAML
  • It does not retain data across sessions. The actions that are performed in the current session are made available for Code Generation. Meaning if you refresh the browser page, it resets the action list and starts recording afresh.
  • Up to 5 actions can be selected to generate code.
  • Actions from the EC2 console only are recorded. However, I observed even a few actions like Security Group creation or Volume listing, etc. are not being recorded.

How to use the AWS Console-to-Code feature

  • Login to the EC2 console and select region N. Virginia (us-east-1)
  • On the left-hand side menu, ensure you have a Console-to-Code link.
  • Perform some actions in the EC2 console like launching an instance, etc.
  • Navigate to Console-to-Code by clicking on the link in the left-hand side menu.
  • It will present you with a list of recorded actions. Select one or a maximum of 5 actions for which you want to generate code. You can even filter the recorded actions as per their Type:
    • Show read-only: Read-only events like Describe*
    • Show mutating: Events that modified/created/deleted or altered the AWS resources.
  • Click on the drop-down menu and select the type and language for the code.
AWS console-to-code recorded actions
  • It should start generating code.
  • After code generation, you have an option to copy or download it. You can also copy the AWS CLI command on the same page.
Python code generated by AWS Console-to-Code
  • It also provides the generated code’s explanation at the bottom of the code.