Migrating from Amazon Linux 2 to Bottlerocket AMI in EKS Nodes

In this post, I share my journey transitioning from Amazon Linux 2 to Bottlerocket as the EKS node OS, aiming for enhanced security with a hardened OS image.

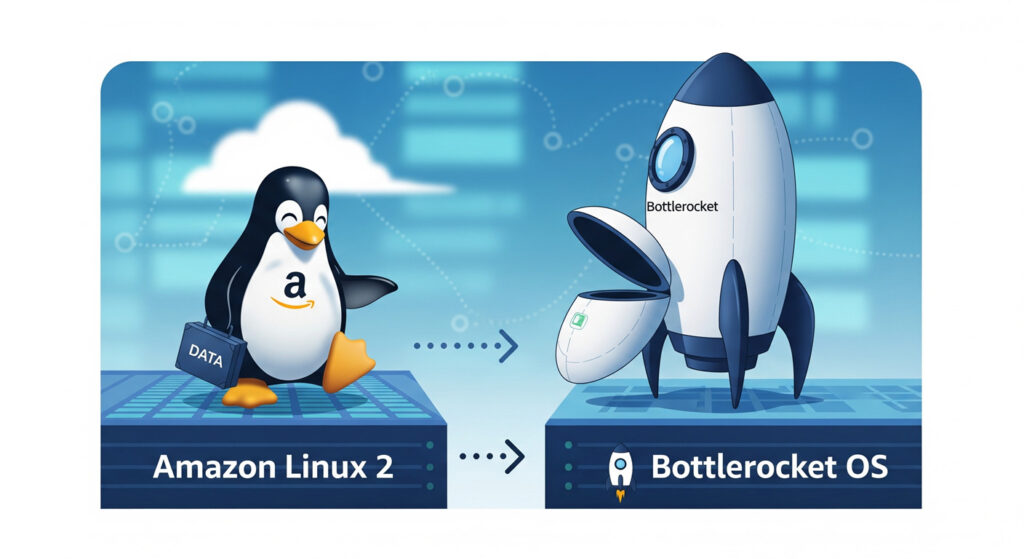
In my envionment, running Kubernetes workloads on Amazon EKS with Amazon Linux 2 (AL2) worker nodes is a tried-and-tested approach. It’s stable, compatible with most tooling, and offers the flexibility of a general-purpose Linux OS.

AL2 is a full Linux distribution meaning it ships with many binaries, libraries, and utilities that aren’t strictly needed for running containers. This fully blown OS increases the attack surface if not hardened properly. If an attacker compromises a node (through a container escape, misconfiguration, or another vector), these extra tools and privileges can be leveraged for deeper intrusion, persistence, and lateral movement.

Hence, it was a wise choice to explore Bottlerocket which is CIS hardened out of the box as a EKS node OS.

Bottlerocket: Minimal, Secure, Container-First OS

Bottlerocket is an open-source Linux-based OS purpose-built by AWS to run containers securely and with minimal overhead. It’s now officially published and supported for EKS and ECS, making it a good alternative to AL2 for containerization platforms. As Bottlerocket is CIS hardened out of the box, it saves so much of manual/automation work of hardening OS image.

Key Security Advantages of Bottlerocket over AL2

  1. Immutable Root File System
    • The root filesystem is read-only and protected with dm-verity (integrity verification).
  2. No Direct Package Installation
    • There’s no package managers (yum/apt).
    • All additional functionality runs in special-purpose containers (control or admin container), isolating changes from the host OS.
  3. No Default SSH Access
    • Bottlerocket blocks SSH by default.
    • Administrative access is through AWS Systems Manager (SSM) Session Manager, meaning you are covered with IAM and CloudTrail.
  4. Locked-Down System & Kernel
    • No direct systemd or kernel-level access from workloads.
    • The OS is configured and updated via a local API (protected by SELinux policies), avoiding risky manual edits.
  5. Atomic, Signed OS Updates with Rollback
    • Updates are applied as a full image to an inactive partition, verified with cryptographic signatures, and made active only after reboot.

Why BottleRocket could be a good choice?

Moving from AL2 to Bottlerocket removes unnecessary OS-level tools and privileges from your nodes, reducing the blast radius. Instead of manually hardening AL2 with CIS benchmarks, SELinux policies, and SSH lockdowns, Bottlerocket bakes these controls in by default.

This means:

  • Lower operational risk.
  • Less maintenance effort to stay compliant.
  • Better alignment with Kubernetes’ container-first security model.

Official Bottlerocket Documentation → https://bottlerocket.dev/en/os/1.42.x/

Our Migration Journey with Karpenter

In the earlier section, we discussed why we focused on Bottlerocket. Now, let’s talk about the how the actual activities we performed during our migration.

Our EKS cluster uses Karpenter for node provisioning instead of EKS-managed node groups. Hence this post focuses on Karpenter-specific configurations for using Bottlerocket AMIs.

Let’s get into the stepwise procedure –

1. Updating the EC2NodeClass Manifest

To provision Bottlerocket nodes with Karpenter, we updated our EC2NodeClass manifest as follows:

apiVersion: karpenter.k8s.aws/v1
kind: EC2NodeClass
metadata:
  name: bottlerocket-nodes
spec:
  amiFamily: Bottlerocket
  amiSelectorTerms:
    - alias: bottlerocket@v1.42.0
  blockDeviceMappings:
    - deviceName: /dev/xvda
      ebs:
        deleteOnTermination: true
        encrypted: true
        kmsKeyID: xxxxxxxx-xxxx-xxxx-xxxx-xxxxxxxx
        volumeSize: 10Gi
        volumeType: gp3
    - deviceName: /dev/xvdb
      ebs:
        deleteOnTermination: true
        encrypted: true
        kmsKeyID: xxxxxxxx-xxxx-xxxx-xxxx-xxxxxxxx
        volumeSize: 30Gi
        volumeType: gp3

Key Points

  • amiFamily must be set to Bottlerocket.
  • amiSelectorTerms.alias specifies the desired Bottlerocket version.
  • Avoid using bottlerocket@latest in production environments. As it points to an AWS-managed SSM parameter, if AWS updates the parameter value, Karpenter detect it as an AMI drift and recycle nodes (default check interval is 1 hour). It shuffles all the PODs in the cluster.

Pro tip: Instead of relying on @latest, you can implement your own AMI automation pipeline. Tag new AMIs with predefined keys (e.g., owner=myteam, version=1.42.0) and reference those tags in amiSelectorTerms.

2. Understanding Block Device Mappings

We explicitly defined two block devices for Bottlerocket nodes:

  • /dev/xvda — OS Volume
    • For Bottlerocket OS!
    • Contains active/passive partitions, bootloader, dm-verity metadata, and the Bottlerocket API datastore.
  • /dev/xvdb — Data Volume
    • Used for everything running on top of Bottlerocket i.e. container images, runtime storage, and Kubernetes persistent volumes.

If you don’t define /dev/xvdb in your manifest:

  • Karpenter defaults it to 20 GB of type GP2. I prefer gp3 for best price-performance ratio.
  • You may end up in insufficient disk space incidents.
  • /dev/xvda may end up larger than necessary, wasting EBS storage for the OS.

By making these changes, we were able to seamlessly migrate from AL2 to Bottlerocket in our Karpenter-managed EKS environment, gaining all the hardened security benefits without disrupting workloads.

3. User Data Script: Custom GuardDuty DNS Mapping on Bottlerocket

Background

In our setup, EKS cluster uses a self-hosted DNS instead of AWS’s default DNS. We’ve also enabled AWS GuardDuty threat detection for the cluster.

When GuardDuty protection is enabled, it creates a PrivateLink VPC endpoint whose DNS name is resolved inside the respective PODs. This PrivateLink is available in the subnets/AZs where it’s created (in our case: 3 subnets, AZs a, b, and c).

For GuardDuty’s DaemonSet to function correctly, all EKS nodes must be able to resolve its PrivateLink endpoint from within the same subnet they launched in.

How We Did It on AL2

On Amazon Linux 2, this was simple:

  • Add a shell script to EC2 user data.
  • Script fetchs the subnet-specific PrivateLink IP.
  • Appends the mapping to /etc/hosts.

The Bottlerocket Challenge

Bottlerocket can not execute raw shell scripts directly via EC2 user data.
Instead:

  • It uses TOML-formatted user data.
  • OS changes are made through the Bottlerocket API (apiclient).

Also, /etc/hosts exists on the read-only root filesystem, so direct edits are not possible.

Our Solution

After researching the Bottlerocket design, we found three possible approaches:

  • Host containers (admin, control): Could run the script but admin requires enabling an SSH keypair, which we wanted to avoid.
  • Bootstrap containers: Run a container at instance boot before the kubelet starts.
  • apiclient API calls: The correct way to update /etc/hosts on Bottlerocket.

We opted to go ahead with bootstrap containers + apiclient.

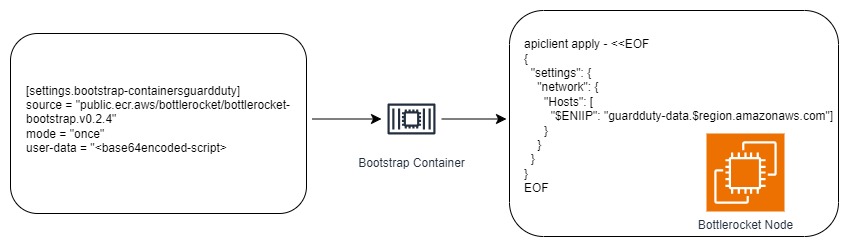
Final User Data Configuration

Here’s the relevant part of our EC2NodeClass manifest for Karpenter:

apiVersion: karpenter.k8s.aws/v1
kind: EC2NodeClass
metadata:
  name: bottlerocket-guardduty
spec:
  amiFamily: Bottlerocket
  amiSelectorTerms:
    - alias: bottlerocket@v1.42.0
  blockDeviceMappings:
    ...
  userData: |
    [settings.bootstrap-containers]
    [settings.bootstrap-containers.guardduty]
    source = "public.ecr.aws/bottlerocket/bottlerocket-bootstrap:v0.2.4"
    mode = "once"
    user-data = "xxxvYmlxxxxxxxxxxxxxxxxxxxxxxxyBXT1JMXX=="

Note: The base64-encoded string shown in the bootstrap-container user-data is only a placeholder. Below are the detailed steps to generate the actual base64-encoded string for your script.

Implementation Steps

a) Create the shell script (myscript.sh)
This script uses apiclient to inject the GuardDuty PrivateLink mapping into /etc/hosts via the Bottlerocket API.

#!/bin/bash
set -euo pipefail

echo "[BOOTSTRAP] Starting GuardDuty host entry setup..."

# Get IMDSv2 token
TOKEN=$(curl -sX PUT "http://169.254.169.254/latest/api/token" \
  -H "X-aws-ec2-metadata-token-ttl-seconds: 60")

# Get metadata
MAC1=$(curl -s -H "X-aws-ec2-metadata-token: $TOKEN" \
  http://169.254.169.254/latest/meta-data/network/interfaces/macs/ | head -1 | tr -d '/')

VPCID=$(curl -s -H "X-aws-ec2-metadata-token: $TOKEN" \
  http://169.254.169.254/latest/meta-data/network/interfaces/macs/$MAC1/vpc-id)

AZ=$(curl -s -H "X-aws-ec2-metadata-token: $TOKEN" \
  http://169.254.169.254/latest/dynamic/<AWS-ACCOUNT-ALIAS>/document | jq -r .availabilityZone)

REGION=$(curl -s -H "X-aws-ec2-metadata-token: $TOKEN" \
  http://169.254.169.254/latest/dynamic/<AWS-ACCOUNT-ALIAS>/document | jq -r .region)

# Get GuardDuty ENI IP
ENIIP=$(aws ec2 describe-network-interfaces \
  --filters Name=vpc-id,Values=$VPCID \
            Name=availability-zone,Values=$AZ \
            Name=group-name,Values="GuardDutyManagedSecurityGroup-vpc-*" \
  --query 'NetworkInterfaces[0].PrivateIpAddress' \
  --region "$REGION" --output text)

if [[ -z "$ENIIP" || "$ENIIP" == "None" ]]; then
    echo "[BOOTSTRAP] No GuardDuty ENI IP found"
    exit 0
fi

cat > hosts.json <<EOF
{
  "settings": {
    "network": {
      "hosts": [
        ["$ENIIP", ["guardduty-data.$REGION.amazonaws.com"]]
      ]
    }
  }
}
EOF

apiclient apply < hosts.json

b) Encode the script in Base64
Bootstrap container user data must be Base64-encoded for TOML.

base64 -w 0 myscript.sh

c) Embed the Base64 string in user data
Paste the encoded string into:

[settings.bootstrap-containers.guardduty]
user-data = "&lt;base64-encoded-script>"

d) Validate execution
You can verify your bootstrap container ran successfully using:

aws ec2 instance --> Actions --> Monitor and Troubleshoot --> Get system log

Key Takeaways:

  • Use the network.hosts API setting for modifying contents of /etc/hosts
  • Bootstrap containers are the best way to run initialization scripts at boot.
  • Avoid enabling the admin host container with SSH just for automation, it defeats the purpose of Bottlerocket’s out of the box hardening.

Final Thoughts

In this blog, we’ve shared the insights and hands-on learnings we’ve gathered while working with Bottlerocket. Since there’s limited practical guidance available online, we thought to share our experience. In a summary: migrating from Amazon Linux 2 to Bottlerocket for EKS node hardening not only strengthens security but also changes how we interact with the underlying OS. While certain tasks like running userdata scripts require a different approach, Bottlerocket’s design ensures a minimal attack surface, immutable infrastructure, and tighter control over system access. With the right methods, such as leveraging bootstrap containers and the Bottlerocket API, you can still meet your operational requirements without compromising on security.

KubeCon + CloudNativeCon India 2025: My experience

From scaling Kubernetes, observability, powering huge AI projects to real stories from PepsiCo, Flipkart, and Intuit, KubeCon + CloudNativeCon India 2025 in Hyderabad was a deep dive into where cloud-native ecosystem is headed. Here’s my personal experience about the event.

I had the chance to attend KubeCon + CloudNativeCon India this year. Its a two-day technical conference packed with thoughtfully curated keynotes, tech talks, and lightning sessions from the people shaping the Kubernetes ecosystem and the cloud-native world. The event also featured ~30 product/solutions booths showcasing solutions to help organizations with Kubernetes workloads, security, scaling, observability, platform engineering and their AI journey. Before we get into more details, take a look at these key numbers and details:

  • Held at Hyderabad International Convention Centre (HICC).
  • Happened on 6-7 August 2025.
  • Sessions
    • 12 Keynote sessions
    • 10 lightning talks
    • 56 Tech sessions on K8s, Observability, Scaling, Security, AI + ML, Platform engineering, etc.
  • Approx ~4000 registrations
  • ~30 product/solutions booth by various companies.
  • The 2026 KubeCon India is announced to be held in Mumbai!
  • Watch this event’s session recordings, available on the CNCF YouTube Channel.
  • Review session slides from speakers who provided them via the event schedule.

With so much on the agenda, it’s very difficult for one person to attend everything. That’s why pre-planning is essential for events of this scale. It was worth creating a schedule focused on the sessions and booths that match your interests. The Sched app made this much easier, helping me build my personal agenda so I wouldn’t miss anything important.

There were these ~30 product/solutions booth at the event (Sorted alphabetically)-

  • Akamai – Akamai Cloud. Simple, Scalable and out of this world.
  • Atlassian – Delivering greatness is impossible alone. Jira. Confluence. Loom. Rovo.
  • AWS – Scalable, Reliable and Secure Kubernetes
  • CAST AI – Kubernetes Automation and Performance
  • Clickhouse + HyperDX – The world’s fastest analytical database
  • Cloudflare
  • Coralogix – Complete Observability, Zero compromises.
  • D E Shaw & Co
  • Digital Ocean
  • Dragonfly – In memory data store. Cut Redis costs by 50%
  • EDB Postgres II by CloudNativePG – Setting the Standard for PostGres in Kubernetes
  • Expedia group – Careers
  • F5 – Optimize, Scale, and Secure Apps in Kubernetes
  • GitHub
  • Gitlab – Develop, secure and deploy software faster
  • Google Cloud
  • Grafana Labs – Open, composable and cost-effective observability.
  • Intel – AI inside for a new Era
  • Kloudfuse – Unified Observability. Your Cloud. Your Control.
  • Kodecloud – Kubernetes learning platform
  • Kong – Kube-native. Platform-forward.
  • Last9 – Ship fast. triage faster.
  • Learning Lounge CNCF – The Linux Foundation Education
  • Microsoft Azure – Achieve more with Azure hosted Kubernetes
  • Nudgebee – AI-Agentic Assistants. Troubleshooting. FinOps. CloudOps.
  • Nutanix – Kubernetes. Virtualization. Data. Anywhere.
  • PerfectScale by doit – Autonomous Kubernetes. Optimization and Governance.
  • RedHat OpenShift
  • ScyllaDB – Predictable Performance at Scale – Anywhere
  • Sonatype – Scalable Artifact Management
  • vmware – Kubernetes Made Simpler, More Flexible and Secure.
  • VULTR – Global cloud infrastructureand manage Kubernetes for AI-native applications

My experience

I traveled with my team to attend the event, and ignoring the travel fatigue, we made it to HICC by 8 AM for the check-in formalities. We were ready after security checks done and we received our event badges. The venue welcomed us with tea, coffee, and cookies – a much-needed warm-up before a day packed with technical deep dives.

By 9:30, as per the agenda, the keynote sessions started. The crowd was so massive that the main hall quickly filled up, but crew arranged adjacent halls with big screens for live streaming. We settled into one of those adjacent halls, but due to some technical glitches with the screen and audio, we decided to head back to the main hall and stand along the sides just to catch the keynotes live. After an hour of inspiring talks (and sore legs :D), we stepped out for a break and then dove into exploring the product and solution booths.

The booths were sparkling with energy! Attendees deep in conversations with booth teams, exploring new features and solutions – it was a energetic sight! It was great to see fresh graduates in the mix, already well-versed in cloud technologies. The enthusiasm was contagious, and of course, no developer conference is complete without a shower of freebies and laptop stickers. We do collected a healthy stash!

The iconic “Kubestronauts” blue jackets were turning heads throughout the venue. It’s a title one can earn by completing five Kubernetes and cloud-native certifications, a badge of honor that carries serious weight in the Kubernetes world today. Seeing a few Kubestronauts proudly sporting those jackets was truly inspiring!

We split up to cover more ground, each visiting different booths. My own highlights are the insightful discussions I had at the AWS and Nudgebee booths. Both offered interesting perspectives and solutions worth exploring further.

The organizers smartly arranged lunch across multiple dining designated areas, which helped spread out the crowd and made it possible for attendees to enjoy a peaceful, crowd-free meal.

We contiunued the second day with similar agenda of attending sessions and booths gathering every possible bit of the information that could help us keeping tab of the Cloud Native and Kubernetes world and industry progress in those domains. ArgoCD scaling, Platform Engineering, EKS Auto mode, EKS dashboards, Observability, AI integration for troubelshooting and Ops to name a few.

I also ran into a former colleague and reconnected with some contacts from AWS I had worked with in the past during the event. Also, got to see some open source community leaders, some well known personalities from Kubernetes/Cloud world in person. These technical conferences are they best way to network and socialize!

A Peek into the Event

1 / 12

Reflections on AWS Summit Mumbai 2025

I had the opportunity to attend the AWS Summit Mumbai 2025 on June 19th. In this post, I’ll be sharing my insights and reflections from the event.

AWS Summit,Mumbai!

AWS Summit is not a AWS re:Invent!

The AWS Summit is a regional tech conference held multiple times a year, designed to showcase majorly customer stories, real-world use cases, product applications, and technical journeys powered by AWS. It’s focused on knowledge sharing and community engagement rather than major product announcements.

In contrast, AWS re:Invent is AWS’s global, annual flagship event. It’s where the company unveils new services, features, and products, alongside deep-dive technical sessions, training, and certification opportunities.

So, if you’re attending an AWS Summit, don’t expect groundbreaking announcements. Instead, think of it as a community event focused on learning, networking, and exchanging experiences with the local digital and tech ecosystem.

AWS Summit Mumbai 2025

AWS Summit Mumbai 2025 was focused on sharing the stories and products that harnesses the power of Cloud Computing and AI for accelerating digital transforming journey of India. Yes, a lot of AI was in the air!

It kicked off with the Keybote from AWS leaders: Sandeep Dutta – President – AWS India and South Asia and Ganapathy Krishnamoorthy VP – Databases – AWS. The keynote also included the the talks from Industry leaders: Dr. Tapan Sahoo (Head of Digital Enterprise and Information & Cyber Security, Maruti Suzuki India) and Rajesh Chandiramani (CEO, Comviva).

Keynote was followed by nearly 40+ breakout sessions in various technologies like databases, AI, observability, FinTech, etc. that showcased how industry in India is leveraging the power of AWS and AI to shape their future.These sessions were categorized into 6 tracks :

  • Building for Scale
  • Generative AI on AWS
  • Migration and modernization
  • AWS for Data
  • Security, compliance & resilience
  • Innovate with AWS Partners

The experiences at the venue included builders zone (offering hands-on to latest AWS services), Industry hub (business tailored, cloud native solution products), Business innovation hubs (convergence point for organizations), AWS Game Day (2-hours hackethon mainely focused on usage of AWS AI services) and AI Hub (Hands-on to AWS AI services).

My experience at AWS Summit Mumbai 2025

The event was really well organized and took place at the impressive Jio World Convention Centre in Mumbai. The venue itself was top-notch, and the food—breakfast, lunch, and high tea—was genuinely delicious.

Even though the space is huge, the number of attendees made it feel a bit crowded at times. There were some cool photo spots set up that captured the spirit of Mumbai, which added a nice local vibe to the event.

The breakout sessions were intense—over 40 sessions packed into just three hours (1:30 PM to 4:30 PM)! Even with a plan in place, it was tough to jump from one session to another, especially with sessions happening in different halls. You’d almost always miss the first few minutes of the next session. A 5-minute buffer between sessions would’ve made a big difference.

There wasn’t much time left for networking or checking out the booths unless you sacrificed a bit of your lunch or break time. That said, the overall vibe was electric—full of tech buzz, especially around AI. I also ran into a few former colleagues, which was a really nice, nostalgic surprise!

A peek into the event

Efficient & Ergonomic: A Look Inside My Home Office Setup

With the rise of remote work, having a well-equipped home office isn’t just a luxury—it’s a necessity. Over the past year, I’ve fine-tuned my setup to strike the perfect balance between productivity, ergonomics, and tech aesthetics.

Instead of overloading the space with gear, I’ve focused on what actually improves my daily workflow. Each item in my setup has been carefully chosen for a balance of performance, comfort, and reliability. From a dual-monitor arrangement and a wireless mechanical keyboard to ergonomic accessories and clear audio gear, these tools help me stay efficient and comfortable throughout the day.

Here’s a quick look at the core gadgets that make up my current setup.

Home Office Setup

Home Office Gear List

A home office is more than just a desk and a chair—it’s the environment that supports your focus and flow. With the right tools in place, you can turn any corner of your home into a productivity powerhouse. I hope this breakdown of my setup helps inspire yours. Have questions or want to share your own workspace? Drop a comment below—I’d love to hear from you!

Load Balancing between two ISPs with TP-Link ER605

In this post, we will walk you through the procedure to configure two ISPs i.e. Airtel Extreme and TATA Play Fiber in load balancing configuration with tp-link ER605 router for high availability of internet at home/small business.

Pre-requisites

  1. Two active ISP lines (We are discussing here Airtel Extreme and TATA Play Fiber)
  2. Both ISP routers in Bridge mode acting as a passthrough.
  3. tp-link ER604 VPN Router (Load balancer)

Before we proceed, Airtel and TATA router’s should be configured in a Bridge mode. We explained how to enable bridge mode in Airtel router here. Please follow below procedure for TATA Play Fiber router.

How to enable Bridge mode on TATA Fiber router

  1. Reach out to TATA engineering team through customer care for below tasks –
    • Enabling bridge mode for your router from backend.
    • Obtain admin credentials to log into the router
    • You should have PPPoE credentials on your email (TATA generally sends them when you receive new connection). If not, then obtain them as well from the engineering team.
  2. Please be noted that enabling bridge mode from backend by TATA engineering team is a crucial step for LAN bridge configuration.
  3. Once both requests are completed, log into the router using the obtained credentials and configure one of the LAN port with bridge.
Enabling bridge mode on TATA router

Additionally, you can disable the WiFi networks on this router as your home/office will be powered by the network created by tp-link ER605 router for high availability.

At this point in time, you should have both ISP’s i.e. Airtel and TATA’s routers configured in bridge mode. Let’s look at the tp-link ER605 configurations now.

Wired connectivity between routers

Now, its time to hookup ISP routers to tp-link ER605.

  • PORT 1: Primary WAN. A CAT6 cable running from Airtel router LAN port to this.
  • PORT 2: Secondary WAN. A CAT6 from TATA router LAN port to this.
  • Ensure ports configured in Bridge mode on ISP routers are used for this wired connecctivity.
  • PORT 3/4/5: Connected to WiFi Access Point i.e. to extend ER605 network over WiFi. I have X60 mesh network in AP mode.

ER605 configurations

Connect a laptop/desktop to ER605 using ethernet cable to any of the remaining port. Start router by plugging it in the power supply. Log into ER605 console at http://192.168.0.1/

On very first login it will prompt for setting up the username and password. Proceed with on screen instruction to setup your account. Once logged in –

  • Navigate to the Network > WAN > WAN Mode
  • Select WAN/LAN1 to enable PORT2 for WAN connectivity and click Save
PORT WAN config
  • The router should restart to apply this configuration.
  • After restart, log in and navigate to Network > WAN > WAN
  • Punch in connection configs for the ISP i.e. plugged into first WAN PORT. In our case, Airtel Extreme PPPoE configs.
  • Once saved, it will automatically try to connect and connection status will be updated in the right panel.
  • There are couple of options that you can configure here as bandwidth and DNS servers.
  • Navigate to Network > WAN > WAN/LAN1
  • Configure the second ISP i.e. router plugged into PORT2 of the ER605. In our case its TATA Fiber.
  • Both WAN should get connected. Verify in the Connection Status.
  • Notice, how I am making use of 4 DNS servers (a pair in each WAN from different companies)
    • WAN1: 1.1.1.1 (Cloudflare) and 8.8.4.4 (Google)
    • WAN2: 8.8.88 (Google) and 1.0.0.1 (Cloudflare)
  • At this point, Internet is made available from two WANs in the network of ER605. Rest of the LAN ports can be used for internet consumers.
  • I am extending this network on my WiFi Mesh DECO system which is configured in AP mode. Hence, all my home wifi clients are now consuming bandwidth from two differnt ISPs and having a very highly available internet connectivity!
  • Navigate to Transmission > Load Balancing
  • Ensure Enable Load Balancing is selected.
  • Select both WAN under Enable Bandwidth Based Balance Routing on ports. It will ensure bandwidth usages will be propertionate between both the WANs. If there is bandwidth up/down difference between WANs, ensure you configure them accordingly in previous connection configurations. So that, bandwith usages will be handeled accordingly.

Load balancing ensures that if one of the WAN goes down (ISP downtime) then all internet traffic is routed through other WAN hence achieving high availability of internet.

Bandwidth-based routing ensures that both ISPs’ bandwidths are fully utilized, preventing the any ISP from going unutilized and costing rentals unnecessarily.

Result!

The highly available Internet services on home mesh WiFi!

The speedtest of this setup should be carried out on two different devices ensuring they are going out on internet through different WANs. Execute the speed test at a same time and test results should show full bandwidth of respective ISPs for both devices. In a nutshell, at any given point in time total of both bandwidth’s is available.

ER605 is a powerful device for home use and there are many different things that can be configured. We did not discussed them as they are out of the scope for this article.

Setting up Mesh Wi-Fi with Airtel Xtreme Fiber

In this post we will walk you through step by step guide for setting up your own Mesh Wi-Fi system with Airtel Xtreme Fiber.

Home Mesh Wi-fi with Airtel Xtreme

I’ve been an Airtel Xtreme Fiber user for many years and am now considering getting a Mesh Wi-Fi system. While the default routers provided with Airtel Xtreme are good, they tend to become sluggish as the number of connected devices increases. I was also experiencing Wi-Fi range issues, so I had to hard wired the rest of the rooms for internet connectivity. This ignited the need to explore the Mesh Wi-Fi setup.

Single router range

After researching internet forums, I found that the information is available but scattered across various threads and discussions. So, I decided to write this post, which I hope will be helpful for others in setting up their own Mesh systems with Airtel Xtreme routers.

The setup goes through several steps –

  1. Enable Bridge mode on LAN port of Airtel router
  2. Configuration on Airtel router
  3. Configuration on Mesh Wi-Fi router

Let’s look at the inventory before we get into the procedures –

  1. Internet type: Airtel Xtreme Fiber
  2. ISP Router: Airtel Dragon Path 707GR1
  3. Mesh Wi-Fi system: TP-Link Deco X20 (Deco X60 is another great choice with more speed capabilities and inbuild extra antenna pair)

Now, we deep dive into configurations and related procedures.

Enable bridge mode on Airtel router

The Airtel router is configured with PPPoE for the Fiber Channel port. Before using another router with Airtel Xtreme, it’s essential to enable Bridge mode on the Airtel router. Bridge mode allows the Airtel router to function as a passthrough, enabling your own router to handle the PPPoE connection for internet access. This setup unleash the full capabilities of your own router and bypass the limitations of the default Airtel router.

Airtel Router with FC PPPoE

To enable bridge mode on your Airtel router, send an email to net@airtel.com explaining your request. You should then receive a call within two days from Airtel to discuss your requirements. Explain that you need to use your own router and specify the port number where you want bridge mode enabled. Within a few hours, you should receive a confirmation callback from their backend team, confirming that bridge mode has been enabled on the specified port. No engineer visit is required (at least for the model I mentioned), as they can remotely enable bridge mode on your router. I oberved on internet forums that always the last LAN port on your router is chosen to enable the bridge mode if not all. So LAN2 or LAN4 depending on how many LAN ports you have on your Airtel router. Dragon Path 707GR1 has two LAN ports so I requested to enable it on LAN2 and its been working good for me.

Bridge mode on LAN2 of airtel router

Verify LAN2 bridge mode by navigating to WAN > PON WAN > select nas0_3 in dropdown on Airtel router webconsole.

LAN2 Bridged

For the next step—router configurations—ensure you have local access to both routers (Airtel and Mesh) by connecting them to your laptop or machine via LAN cables. This will make the configuration process easier.

Airtel router configuration

When using your own router with the Airtel Xtreme router, there are two key configurations to perform on the Airtel router:

  1. Disable the WAN profile to allow your own router to handle the PPPoE connection.
  2. Disable the Wi-Fi networks on the Airtel router so that your own router can manage Wi-Fi signals.

Once bridge mode is enabled, your mesh Wi-Fi router will need to dial in with PPPoE for internet access, so you should remove the WAN profile on the Airtel router. Note down the username in WAN profile. Before making any changes, ensure you have a backup of the current configuration. If the backup option is disabled, take screenshots for future reference.

Removed WAN profile from Airtel router

Since you plan to use a mesh Wi-Fi network, disable the Airtel router’s Wi-Fi networks to prevent interference from the extra signals. At this point, the Airtel router will function solely as a passthrough for your router.

Mesh router configuration

You need to configure the very two things that you disabled on Airtel router in previosu step.

  1. Configure PPPoE
  2. Configure Wi-Fi network

TP-Link Deco Mesh systems are easy and quick using the Deco app. Installation guide here. Use PPPoE protocol for internet connection configuration. Username is alredy known in previous step (copied from the WAN profile in Airtel router) and password should be your Airtel Account ID. If not, please reach out to Airtel and get the credentials.

Airtel-Deco Mesh Setup

TP-Link Deco X20 is a dual band Wi-Fi with band steering. It means both 2.4Ghz and 5GHz emitted on a single SSID. Band steering optimizes which band a device connects to based on signal strength and congestion. When setting up Deco Mesh Wi-Fi network, it’s helpful to use the same SSID and password as your Airtel router. This way, all devices on your network will seamlessly connect to the Deco mesh Wi-Fi without any issues. If you prefer to start fresh, you can create a new SSID for the Deco mesh, but you’ll need to enter the new Wi-Fi password on all the devices in your network.

Dual band Deco Wi-Fi network

It is also recommended to have a wired backhaul for the Decos in your network. Or decos should be in a good range with each other to establish a good backend network between them. Wired backhaul ensures minimum bandwidth drop for the internet speed.

Deco Mesh

I already had network cables running through different rooms, which was convenient for backhauling the Deco network over a wired connection.

Now, with Mesh network my complete home is covered with full range of Wi-Fi strong signals.

Mesh network range

With the transition to a Mesh network, I gained following benefits:

  • Increased device handling capacity for my Wi-Fi hardware.
  • Strong Wi-Fi signal coverage throughout my entire house.
  • Improved internet speed for all devices in every corner of the house.
  • Seamless network switching for devices when moving between rooms.
  • A single SSID broadcast that supports both 2.4G and 5G bands.

In summary, multi-story homes or houses with many rooms (which introduces wall interference) should opt for mesh systems over traditional single router and wired setups. Mesh systems offer a cleaner, maintenance-free solution without cable clutter throughout the house.

I hope this post will be helpful to our fellow readers in setting up their own mesh with Airtel Xtreme fiber internet.

AWS CloudFormation IaC Generator!

AWS has recently introduced a Console-to-Code functionality, allowing users to automatically generate Infrastructure as Code (IaC) templates based on actions performed in the EC2 console. Additionally, AWS offers the CloudFormation IaC Generator, a compact tool embedded in the AWS CloudFormation console. This tool facilitates the creation of CloudFormation templates for pre-existing resources within your account. In the following post, we will walk through this tool and step-by-step instructions on how to use it.

Exploring AWS CloudFormation IaC Generator

What is the IaC generator?

The AWS CloudFormation IaC generator lets you generate a template for AWS resources that are already provisioned in your account and not being managed by CloudFormation. It does makes sense to exclude resources managed by CloudFormation since you already have a template for them!

Firstly, initiate a scan of your account under the IaC generator console to provide the tool with a comprehensive list of resources not governed by CloudFormation. There are a few quota limits on these scans which can be referred here.

Upon completion of the scan, the tool displays a list of resources that are not under CloudFormation management. Begin creating the template by selecting these resources, and the tool will then generate the template in either YAML or JSON format.

The powerful IaC generator capabilities of CloudFormation can also be accessed via the AWS CLI, making it a compelling choice for streamlined and efficient automation.

How to use the IaC generator?

IaC generator console
  • If you are using it for the first time, you might want to hit the Start a new scan button for running the first resources scan of this tool. This scan will identify all the AWS resources in your account that are not managed by CloudFormation.
  • Click on Create template button.
  • On a create wizard, provide the template details.
Template details
  • We are choosing to create a template from scratch. If you want to add a resource in exsiting CloudFormation stack then choose ‘Upadte the template for an existing stack‘. Make an appropriate choice for deletion and update replace policies.
  • On a next screen, choose resources to be included in the IaC template.
Adding scanned resources
  • If the resource you are looking for is not in the list, probably you need to initiate the new scan since your scan inventory might be the old one.
  • Click on Next button and choose related resources if any.
Related resources
  • The tool gathers the list of dependent or related resources from the resource you chose in the last step. Since we selected S3 bucket with no external dependency like KMS key, etc. we are not having any related resource.
  • Click on Next button for the final Review screen of the wizard.
Review
  • Review the selections and click Create template button.
IaC template is ready!
  • The teamplate will be genrated. You will have option to choose YAML or JSON format. You can copy or download it as well. Or you can import it into a CloudFormation Stack by clicking Import to stack button.
  • There is also AWS CDK application command in last tab AWS CDK

Importing the AWS resources in to the CloudFormation stack

It is always advisable to manage AWS resources through IaC templates, as this approach enhance resource management and minimizes the cloud clutter. One common challenge in the IaC journey is incorporating manually created existing resources into IaC. The IaC generator proves valuable in this scenario by assisting in the creation of IaC templates for your resources, facilitating a seamless transition.

Using IaC generator, you can generate the IaC template of existing resources that are not managed by Cloudformation. Once the template is generated, it also offers an option to import it in to the stack. Select that option (the last screesnhot in above section) and it will kickstart Cloudfomation import stack wizard.

Review all the information on the console, and then proceed to initiate the creation of a new stack that will import the chosen resources. I won’t go into a detailed, step-by-step procedure here, as it follows the standard CloudFormation stack process.

The CloudFormation stack will be created and you can see the selected resource is now imported and managed by CloudFormation.

Import resource completed.

This is a convenient method to scan for resources not governed by CloudFormation and subsequently import them into a CloudFormation stack, thereby fostering the adoption of Infrastructure as Code practices within your account and organization.

Conclusion

The IaC generator from AWS is a commendable initiative aimed at assisting customers in achieving 100% compliance with Infrastructure as Code for their infrastructure. It provides a seamless experience, effortlessly identifying non-IaC resources and smoothly importing them into CloudFormation stacks. Furthermore, it expedites the adoption of IaC by automatically generating code templates for you.

Exploring CloudFormation Git Sync!

In late Nov 2023, amazon announced the new CloudFormation Git sync feature. Let’s explore this new feature; how it works, how it impacts CD patterns of Infrastructure as Code (IaC), etc.

CloudFromation Git Sync Feature!

What is the CloudFormation Git sync?

Recently announced CloudFormation Git sync feature lets customers deploy and sync the CloudFormation IaC code directly from remote Git repositories. This will be a game changer in the future as this feature might empower customers to omit the Continuous Deployment tools like Jenkins, GitHub Actions, etc. altogether and hence their maintenance.

In summary, the customer is required to establish a GitHub Connection with AWS and subsequently generate a CloudFormation stack using the relevant IaC template repository information. Once the stack is set up, CloudFormation continually monitors the template files in the remote Git repository. Any new commits in the remote repo, trigger the automatic deployment of the corresponding changes to AWS.

Pre-requisite for CloudFormation Git sync

  • A Git repository with a valid CloudFormation IaC template
  • A GitHub Connector configured for the target AWS account
  • IAM role for Git Sync operations. It should have –
    • Access IAM policy
    • Trust policy

IAM policy

For tighter security control, one can scope down the IAM policy for certain CloudFormation Stacks using a resource block in the SyncToCloudFormation statement.

{
    "Version": "2012-10-17",
    "Statement": [
        {
            "Sid": "SyncToCloudFormation",
            "Effect": "Allow",
            "Action": [
                "cloudformation:CreateChangeSet",
                "cloudformation:DeleteChangeSet",
                "cloudformation:DescribeChangeSet",
                "cloudformation:DescribeStackEvents",
                "cloudformation:DescribeStacks",
                "cloudformation:ExecuteChangeSet",
                "cloudformation:GetTemplate",
                "cloudformation:ListChangeSets",
                "cloudformation:ListStacks",
                "cloudformation:ValidateTemplate"
            ]
        },
        {
            "Sid": "PolicyForManagedRules",
            "Effect": "Allow",
            "Action": [
                "events:PutRule",
                "events:PutTargets"
            ],
            "Resource": "*",
            "Condition": {
                "StringEquals": {
                    "events:ManagedBy": [
                        "cloudformation.sync.codeconnections.amazonaws.com"
                    ]
                }
            }
        },
        {
            "Sid": "PolicyForDescribingRule",
            "Effect": "Allow",
            "Action": "events:DescribeRule",
            "Resource": "*"
        }
    ]
}

Trust policy

{
    "Version": "2012-10-17",
    "Statement": [
        {
            "Sid": "TrustPolicy",
            "Effect": "Allow",
            "Principal": {
                "Service": "cloudformation.sync.codeconnections.amazonaws.com"
            },
            "Action": "sts:AssumeRole"
        }
    ]
}

How to create a stack using CloudFormation Git Sync?

Let’s look at the step-by-step procedure to deploy a new CloudFormation stack using Git Sync.

Environment setup considered here –

  • An AWS account configured with GitHub Connection in the Developer Tools Console.
  • A Private GitHub repository cfn-git-sync-poc that hosts a valid CloudFormation template at cloudformation/s3-stack.yaml
  • An IAM role was cfn-github-role created on the target AWS account with above stated policies.

Now, it’s time to get our hands dirty!

  • Log in to the AWS CloudFormation console. Click on the Create stack dropdown button and choose With new resources (standard)
  • On a Create stack page, select Template is ready and Sync from Git
Create stack using Git
  • Start providing the stack details like the stack name of your choice and select automatic Deployment file creation. If you wish to create a deployment file, please refer to this file format details.
Stack details
  • Then, specify the Git repository information. Ensure that you have a configured and active GitHub connection to fill in the fields in this segment. Choose the repository containing the Infrastructure as Code (IaC), specify the deployment branch, and designate a Deployment file path where AWS will store the newly committed deployment file. Lastly, furnish the IAM role details that will be utilized for executing Git Sync operations.
Repository details
  • Lastly, enter the file path for the CloudFormation IaC template inside the remote Git repo and define the parameters that are declared in the template. These details will be used to build the Deployment file.
Template and parameter details
  • Click the Next button and you will enter the Stack options page.
  • Stack options are the same as any other CloudFormation stack hence we will not discuss them here.
  • After verifying/modifying Stack options click Next button on the page.
  • Now, you will enter the review page where you can see the Deployment file constructed using the details provided and it will be committed to the remote Git repo on defined location
Deployment file!
  • Review the rest of the configurations and click the Submit button.
  • Now, CloudFormation will commit and push the Deployment file to the remote Git repo by raising a Pull Request (PR). The message will be flagged on the page. Meanwhile, since the Deployment file is not found in the remote repo, the Provisioning status will be marked as Failed. Once PR is approved, Deployment file will be available in the remote repo.
The First deploy using CloudFormation Git Sync
  • Head over to GitHub and you should see a PR raised by Amazon to commit the deployment file into the remote repo.
PR raised by AWS Connector
Deployment file creation by AWS Connector in PR
  • Review, approve, and merge the PR.
  • Once PR is merged the code modification is detected by CloudFormation and it starts provisioning the stack.
Stack provisioning started
  • Once all defined resources are created, stack creation will complete and CloudFormation keep monitoring the Git repository for any new changes.
The Stack is deployed successfully!

In multiple environments such as development, testing, staging, and production, it’s possible to utilize distinct Stack Deployment files while leveraging a single CloudFormation IaC template file. These varied Deployment files can be organized into separate folders within the same repository for better segregation. By selecting the appropriate deployment file based on the environment where the CloudFormation stack is being established, the process becomes more streamlined. Something like –

cloudformation
├── dev
│   └── deployment.yaml
├── test
│   └── deployment.yaml
├── staging
│   └── deployment.yaml
├── production
│   └── deployment.yaml
└── template.yaml

By selecting the appropriate deployment file based on the environment where the CloudFormation stack is being established, the process becomes more streamlined. I anticipate that the Git Sync feature will evolve with additional capabilities in the future, potentially prompting customers to reconsider the necessity of separate Continuous Deployment (CD) software.

What do you think about this feature?

What are your thoughts on the CloudFormation Git Sync feature? Could it potentially revolutionize the game? Will it make several Continuous Deployment tools obsolete? It feels like an ArgoCD for Kubernetes, operating in a remarkably similar manner. For sure, it may not yet offer extensive control over commit-wide deployments, but the potential for future enhancements is exciting. This feature appears to transform the Infrastructure as Code (IaC) landscape for AWS customers, possibly luring some back from alternative IaC platforms. Witnessing its development and utilization in enterprise productions is going to be exciting!

How to add a GitHub connection from an AWS account?

In this blog post, we will guide you through a step-by-step process to establish a GitHub connection in an AWS account.

Creating GitHub Connection for AWS

What is a connection?

Firstly, let’s understand the concept of a connection in the AWS world. In AWS, a connection refers to a resource that is used for linking third-party source repositories to various AWS services. AWS provides a range of Developer tools, and when integration is required with third-party source repositories such as GitHub, GitLab, etc., the connection serves as a means to achieve this.

Adding a connection to connect GitHub with AWS

Let’s dive into the step-by-step procedure to add a connection that helps your AWS account to talk with your personal GitHub repositories.

AWS Developer Tools Connection console
  • On a wizard screen, select Github and name your connection.
  • Click on Connect to GitHub button
Create Connection wizard
  • Now, AWS will try to connect to GitHub and access your account. Ensure you are already logged into GitHub and you should see below authorization screen. If not, you will need to login to GitHub first.
Authorize AWS connector for GitHub
  • You can review the permissions being allowed to AWS on your account by clicking Learn more link on this screen.
  • Click on Authorize AWS Connector for GitHub
  • After authorizing the AWS connector, you should be back to the GitHub connection settings page.
  • At this point, AWS requires a GitHub Apps detail that will allow Amazon to access your GitHub repositories and make modifications to them.
  • AWS also offers to create a GitHub app on your behalf if it’s not created already. You can use the Install a new app button here to let AWS create the GitHub app in your account.
  • In that case, you need to verify the configuration (repo selection) and then click the Install button.
Installing AWS Connector GitHub App
  • Once the App is created, the GitHub Apps ID will be populated in the wizard or manually enter the ID if the App is already created.
GitHub Apps details for creating a connection
  • Click on Connect button
  • You should be greeted with a success message with the new connection created!
GitHub Connection is created!

Your GitHub connection is now ready. You can use this connection in compatible AWS services and let those services access your Github repositories.

Exploring the Latest AWS Console-to-Code Feature

On November 2023 AWS announced the Preview going live for the new feature AWS Console-to-Code. Two months later, in this blog, we will explore this feature, learn about how to use it, what are the limitations, etc.

AWS Console-to-Code

What is the AWS Console-to-Code feature?

It’s the latest feature from AWS made available in the EC2 console that leverages Generative AI to convert the actions performed on the AWS EC2 console into the IaC (infrastructure as Code) code! It’s a stepping stone towards IaC creation methods in the world of AWS cloud.

The actions carried out on the AWS console during the current session are monitored by the feature in the background. These recorded actions are then made available to the user to select up to 5 of these actions, along with their preferred language. AWS then utilizes its Generative AI capabilities to automatically generate code that replicates the objectives achieved through manual actions on the console.

It also generates the AWS CLI command alongside the IaC code.

The usefulness of the AWS Console-to-Code feature

With the current list of limitations and the preview stage, this feature might not be a game changer but it does have potential in the future. The AWS Console-to-Code feature will surely help developers and administrators to get the IaC skeleton quickly to start from and speed up the IaC coding with less effort.

This feature simplifies the process of generating AWS CLI commands, eliminating the need to constantly consult documentation and manually construct commands with the correct arguments. As a result, it accelerates automation deliveries with reduced effort.

By the way, there is no additional cost to use Console-to-Code so it doesn’t hurt to employ it for initial IaC drafting!

Limitation of AWS Console-to-Code feature

  • Currently, it’s in the ‘Preview’ phase.
  • Only available in North Virginia (us-east-1) region as of today.
  • It can generate IaC code in the listed types and languages only –
    • CDK: Java
    • CDK: Python
    • CDK: TypeScript
    • CloudFoprmation: JSON
    • CloudFoprmation: YAML
  • It does not retain data across sessions. The actions that are performed in the current session are made available for Code Generation. Meaning if you refresh the browser page, it resets the action list and starts recording afresh.
  • Up to 5 actions can be selected to generate code.
  • Actions from the EC2 console only are recorded. However, I observed even a few actions like Security Group creation or Volume listing, etc. are not being recorded.

How to use the AWS Console-to-Code feature

  • Login to the EC2 console and select region N. Virginia (us-east-1)
  • On the left-hand side menu, ensure you have a Console-to-Code link.
  • Perform some actions in the EC2 console like launching an instance, etc.
  • Navigate to Console-to-Code by clicking on the link in the left-hand side menu.
  • It will present you with a list of recorded actions. Select one or a maximum of 5 actions for which you want to generate code. You can even filter the recorded actions as per their Type:
    • Show read-only: Read-only events like Describe*
    • Show mutating: Events that modified/created/deleted or altered the AWS resources.
  • Click on the drop-down menu and select the type and language for the code.
AWS console-to-code recorded actions
  • It should start generating code.
  • After code generation, you have an option to copy or download it. You can also copy the AWS CLI command on the same page.
Python code generated by AWS Console-to-Code
  • It also provides the generated code’s explanation at the bottom of the code.