
Beginners guide to learn dd command along with a list of examples. The article includes outputs for command examples too.
Beginners guide to learn dd command! In this article, we will learn about dd (Disk Duplication) command and various usage of it along with examples.
dd command mainly used to convert and copy files in Linux and Unix systems. dd command syntax is
dd <options>
It has a very large list of options which can be used as per your requirement. Most of the commonly used options are :
- bs=xxx Read and write xxx bytes at a time
- count=n Copy only n blocks.
- if=FILE Read from FILE
- of=FILE Output to FILE
Let me walk you through examples to understand dd command usage.
Backup complete disk using dd
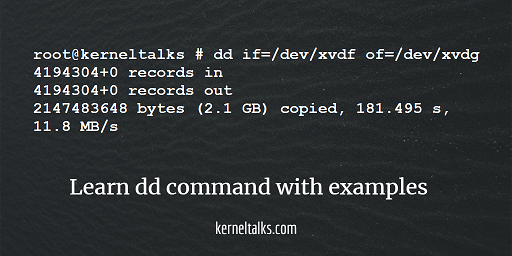
For copying the whole disk to another disk, dd is very helpful. You just need to give it disk to read from and disk to write. Check below example –
root@kerneltalks # dd if=/dev/xvdf of=/dev/xvdg
4194304+0 records in
4194304+0 records out
2147483648 bytes (2.1 GB) copied, 181.495 s, 11.8 MB/s
In the above output, you can see disk /dev/xvdf is copied to /dev/xvdg. Command will show you how much data and what speed it copied.
Identify disk physically using dd
When there are a bunch of disks attached to the server and if you want to trace a particular disk physically, then dd command might be helpful. You have to run dd command to read from disk and write into the void. This will keep the hard disk activity light solid (physical on disk).
root@kerneltalks # dd if=/dev/xvdf of=/dev/null
Normally all other disk blinking activity LED whereas this one will be having its LED solid. Easy to spot the disk then! Be careful with IF and OF. IF you switch their arguments, you will end up wiping out your hard disk clean.
Create image of hard disk using dd
You can create an image of hard disk using dd. It’s the same as what we saw in the first example backup of the disk. Here we will use output file OF as a data file on mount point and not another disk.
root@kerneltalks # dd if=/dev/xvdf of=/xvdf_disk.img
4194304+0 records in
4194304+0 records out
2147483648 bytes (2.1 GB) copied, 32.9723 s, 65.1 MB/s

root@kerneltalks # ls -lh /xvdf_disk.img
-rw-r--r--. 1 root root 2.0G Jan 15 14:36 /xvdf_disk.img
In the above output, we created an image of disk /dev/xvdf into a file located in / named xvdf_disk.img
Compressed image can be created as well using gzip along with dd
root@kerneltalks # dd if=/dev/xvdf |gzip -c >/xvdf_disk.img.gz
4194304+0 records in
4194304+0 records out
2147483648 bytes (2.1 GB) copied, 32.6262 s, 65.8 MB/s
root@kerneltalks # ls -lh /xvdf_disk.img.gz
-rw-r--r--. 1 root root 2.0M Jan 15 14:31 /xvdf_disk.img.gz
You can observe output zipped image is very much less in size.
Restore image of hard disk using dd
Yup, the next question will be how to restore this hard disk image on another disk? The answer is simply to use it as a source and destination as another disk.
root@kerneltalks # dd if=/xvdf_disk.img of=/dev/xvdg
4194304+0 records in
4194304+0 records out
2147483648 bytes (2.1 GB) copied, 175.748 s, 12.2 MB/s
Make sure your disk image and target disk has same size.
Restore compressed hard disk image using dd along with gzip command as below –
root@kerneltalks # gzip -dc /xvdf_disk.img.gz | dd of=/dev/xvdg
4194304+0 records in
4194304+0 records out
2147483648 bytes (2.1 GB) copied, 177.272 s, 12.1 MB/s
Create ISO from CD or DVD using dd
Another popular use of dd command is creating an optical disk image file i.e. ISO file from CD or DVD. You need to first mount CD or DVD on your server then use it as a source device and file on mount point as a destination.
root@kerneltalks # dd if=/dev/dvd of=/dvd_disc.iso bs=4096
Here, we specified the 4096 block size using bs option. Make sure no other application or user is accessing a CD or DVD when running this command. You can use fuser command to check if someone is accessing it.
The next question will be how to mount ISO file in Linux? Well we have already article on it here 🙂
Creating file of definite size with zero data using dd
Many times sysadmins or developers need files with junk data or zero data for testing. Using dd you can create such files with definite size.
Let’s say you want to create a file of 1GB then you define block size of 1M and count of 1024. So 1M x 1024 = 1024M = 1G.
root@kerneltalks # dd if=/dev/zero of=/testfile bs=1M count=1024
1024+0 records in
1024+0 records out
1073741824 bytes (1.1 GB) copied, 13.0623 s, 82.2 MB/s

root@kerneltalks # ls -lh /testfile
-rw-r--r--. 1 root root 1.0G Jan 15 14:29 /testfile
In the above output, you can see our math worked perfectly. 1G file is created out of our command.
Changing file uppercase to lowercase using dd
All the above examples we have seen so far are of data copy using dd command. Now, this example is of data convert using dd command. Using dd, you can change file data from all uppercase to lowercase and vice versa.
# cat /root/testdata
This is test data file on kerneltalks.com test server.

# dd if=/root/testdata of=/root/testdata_upper conv=ucase
0+1 records in
0+1 records out
55 bytes (55 B) copied, 0.000138394 s, 397 kB/s

# cat /root/testdata_upper
THIS IS TEST DATA FILE ON KERNELTALKS.COM TEST SERVER.
You can see all data in file is converted to uppercase. For changing data from uppercase to lowercase use option conv=lcase
If you another interesting use of dd command, let us know in the comments down below.