
A quick article on AWS VPC creation along with screenshots.

In this article, we will be creating a custom VPC in the AWS account and check all available options along with screenshots. You must be aware that every AWS account comes with a default VPC already created for you. Few of the AWS services require the existence of this default VPC while it’s recommended to have custom VPC for some. So without further delay, let’s start with some VPC introduction.
What is VPC?
VPC stands for Virtual Private Cloud. It’s your own isolated network section in the AWS cloud. It’s safe to say it’s your own small cloud within the AWS cloud! VPC can be visualized as the outer boundary of your account in AWS within which you deploy all your cloud resources.
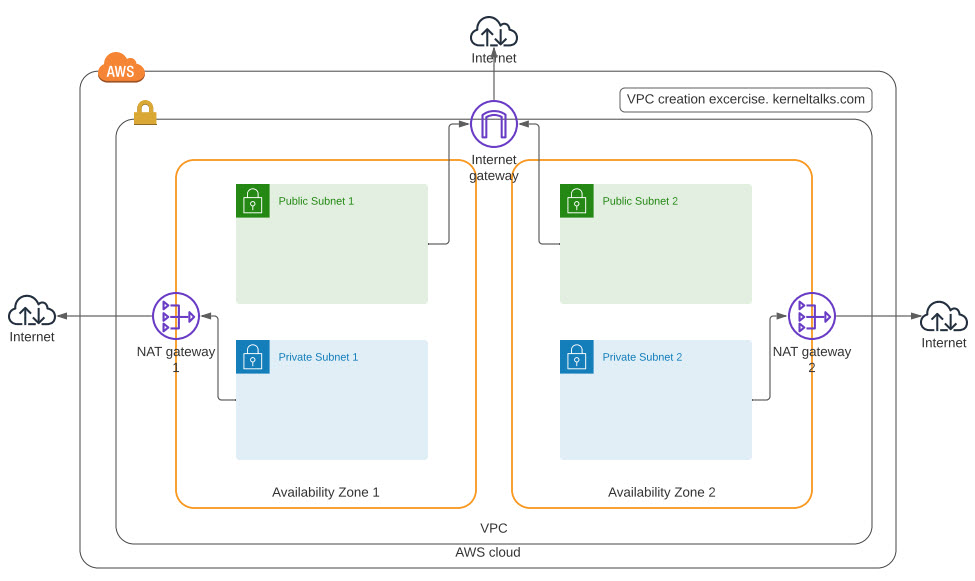
For this exercise we will try to implement below design in AWS.

VPC Creation using AWS Management Console
- Log in to the AWS VPC console.
- On the left navigation plane, click on Your VPCs
- Now on the VPC page, click on the Create VPC button
- You will be presented with the below screen :

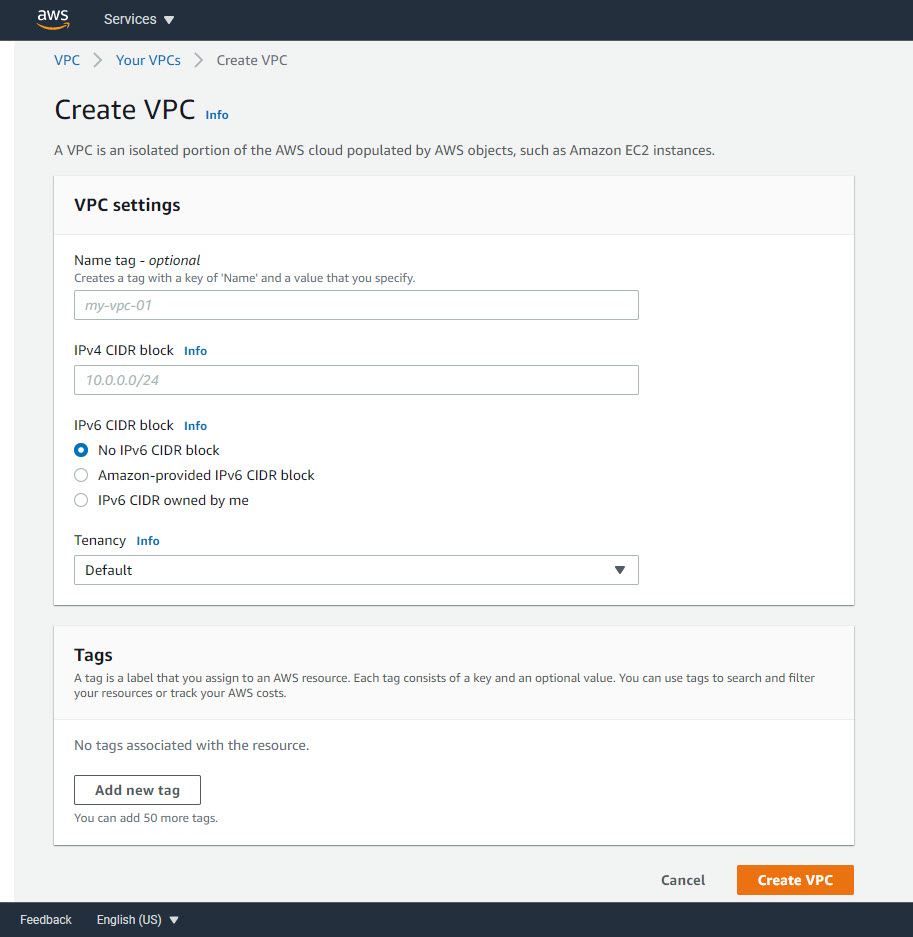
Here you can fill in below details-
- Name tag (optional): For identifying your VPC within your account.
- IPv4 CIDR block: This CIDR block will be available throughout your VPC. Make sure you choose wisely to support your IP appetite. You can later add 4 more secondary CIDR blocks to VPC. Plan accordingly.
- IPv6 CIDR block: Depending on your requirement. You can specify your own block or use Amazon assigned one.
- Tenancy: Choose how your instances will be launched.
- Default: Follow the tenancy attribute defined at instance launch
- Dedicated: Regardless of tenancy type selected at instance launch, always launch an instance on dedicated hardware.
- Tags: Add tags to manage billing, identification, etc. If you choose the Name tag in the first field then it will appear here automatically.
Once you fill everything, click Create VPC and your VPC will be created. You should be seeing a confirmation screen-

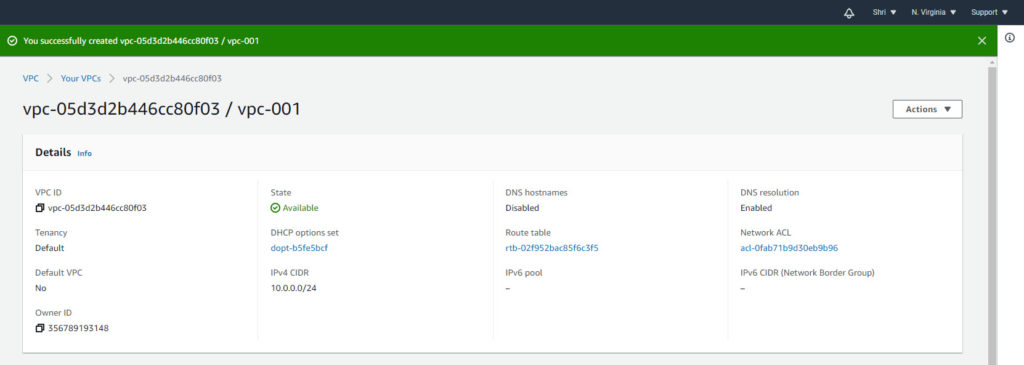
Now, your VPC is created. You need to remember below points when you create custom VPC with this method :
- Along with this VPC below resources are created automatically –
- 1 NACL
- All traffic is allowed in and out with ALLOW rule with rule number 100
- Also has the * DENY rule which means if the packet does not match any of the specified rules it will be denied.
- 1 DHCP options set
- With Internal domain name
- No NTP servers defined
- Name servers pointing to Amazon-provided DNS
- You can not edit it. You can delete this one and create a new one.
- 1 route table
- All traffic destined to remain within VPC i.e. Target defined as local
- 1 security group
- All Traffic allowed in inbound and outbound rules.
- 1 NACL
- You need to create below manually –
- Subnets
- Internet gateway (If Public subnet is created)
- NAT gateways (For internet access to Private subnet)
- So to launch an instance in this VPC you have to create a subnet first.
How to create subnets in custom VPC?
Lets go ahead and create subnets in our custom VPC.
Subnet creation needs proper planning. You need to decide on how you want to use your available IP pool. For example, since we have used the 10.0.0.0/24 CIDR block while creating VPC, we have 256 IPv4 addresses available in our VPC. I plan for –
- Use of 2 availability zones for HA
- Each zone should have 1 public and 1 private subnet.
- IPs to be spread across all subnets equally.
So in a nutshell I have to spread 256 IPs in 4 subnets. Also, you should be aware that in each subnet 5 IPs are not available for use –
- First IP: Network address
- Second IP: AWS VPC router
- Third IP: AWS DNS
- Fourth IP: Reserved by AWS for future use
- Last IP: Broadcast and since the broadcast is blocked in AWS this IP can not be used.
Now, 4 subnets that mean 20 IPs are reserved and not available to us. So in total, we have 246 IPs available to use when we create below 4 subnet –
- 10.0.0.0/26
- 10.0.0.64/26
- 10.0.0.128/26
- 10.0.0.192/26
Calculation is done! Its time to create subnets in AWS console.
Note: For CIDR notation understanding use https://cidr.xyz/ and for subnetting use online subnet calculators.
On the same VPC AWS console, in the left navigation pane click on Subnets. Then click on the Create subnet button. You should see below screen –

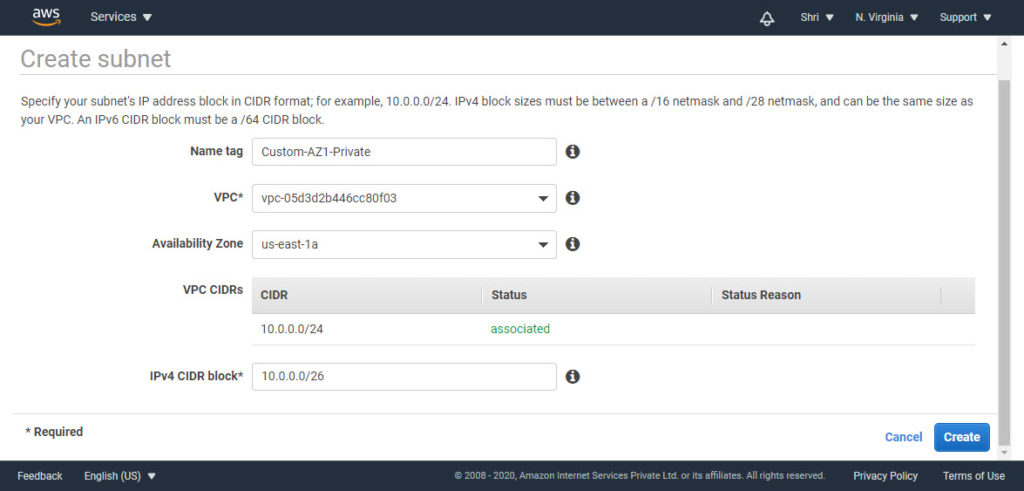
Here we need to fill in –
- Name tag: For identification purpose
- VPC: Select your custom VPC from the dropdown.
- Availability Zone: Select desired AZ from drop-down
- IPv4 CIDR block: Choose from your calculation (which we did earlier)
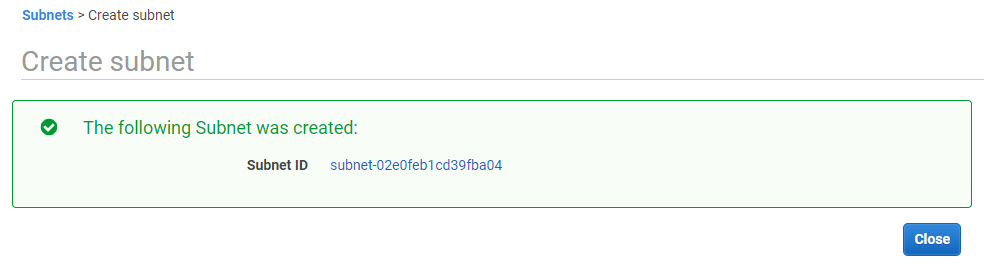
Once done, click Create button. Your subnet should be created and you will see confirmation like this –

Repeat the same process to create the rest of the subnets. Once all subnets are created you should see them in the subnet dashboard.


If you observe here, all subnets will be associated with the same route table which was created during VPC creation. This needs to be changed.
For public subnet, we need to create an internet gateway, create a custom route table who has a route to this IG, and then associate public subnets to that route table. This way we will enable internet connectivity for public subnets.
Optional: You can enable Auto-assign IPv4 setting in Public subnet settings which will enable auto-assign public IPv4 addresses to instances launched in this subnet.
How to create Internet Gateway and associate them with subnet?
- Log in to the AWS VPC console.
- On the left navigation plane, click on Internet Gateways
- Now on the IG page, click on the Create internet gateway button
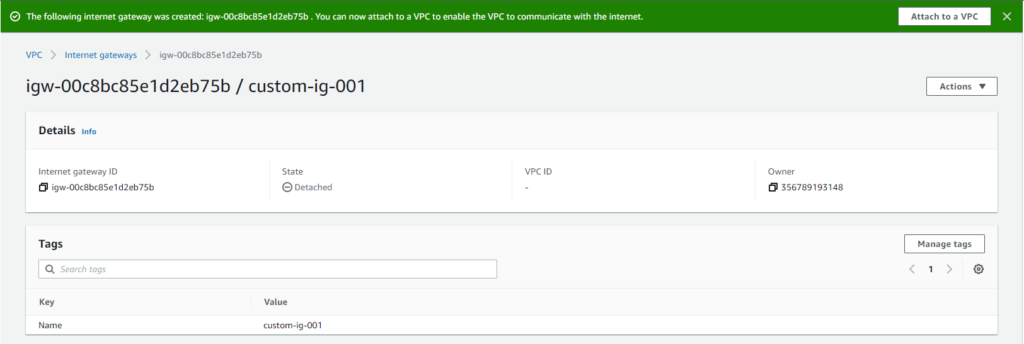
- Where you just need to add a Name tag for it and click the Create internet gateway button
- Your IG will be created and you will be asked to attach it to a VPC.

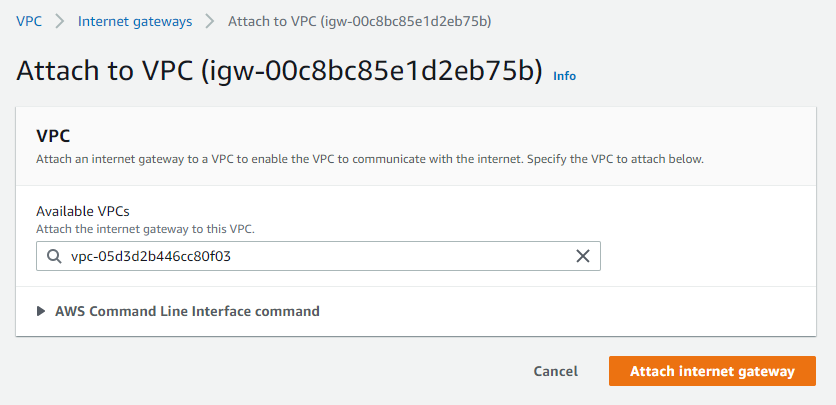
Click on Attach to a VPC button. Choose your custom VPC on the next screen and click on the Attach internet gateway button

Now, the internet gateway attached to the custom VPC. next step is to create a routing table.
- Log in to the AWS VPC console.
- On the left navigation plane, click on Route Tables
- Now on the route tables page, click on the Create route table button
- Where you just need to add a Name tag for it, select custom VPC from the drop-down and click the Create button
- Your route table will be created.
- Now go back to Route Tables screen and select the recently created route. And click on Routes tab

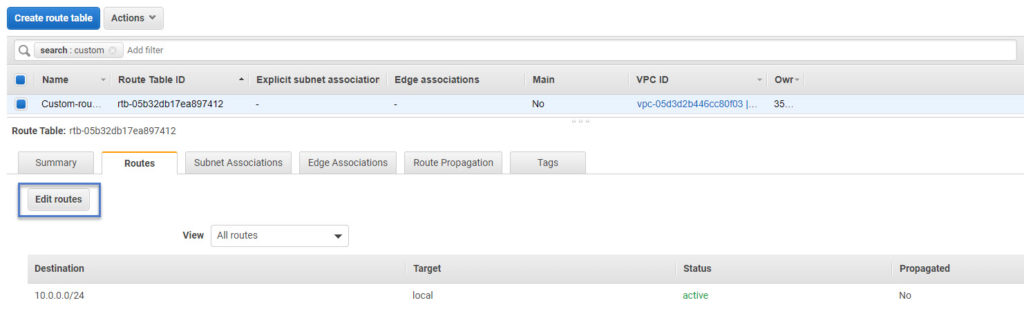
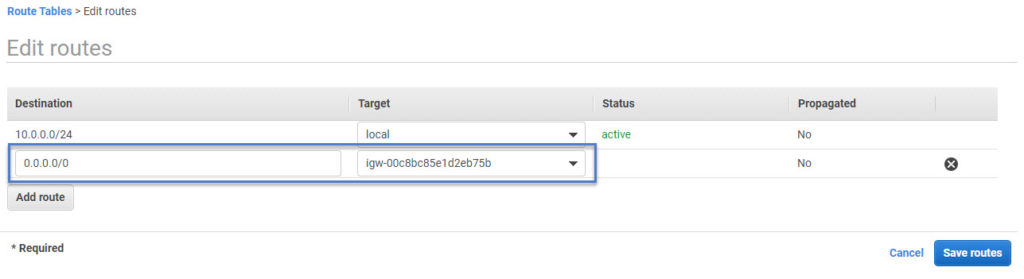
In the edit route screen, you need to add a route for destination 0.0.0.0/0 with a target to a recently created internet gateway. And then click Save routes. Make sure you keep the existing local route since it’s needed within VPC communication.

Now the internet route table is ready. We need to associate it with the public subnets created in earlier steps.
Select Subnet Associations tab under same route table and click on Edit subnet associations button

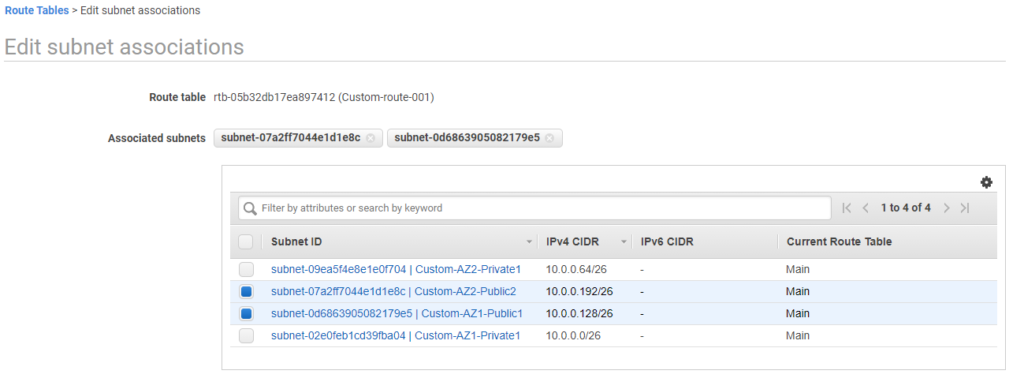
Select public subnets and click Save
At this stage, our subnets are properly segregated as public and private. Public subnets are associated with route table having a route to the internet and private subnet associated with route table having route for only within VPC communication.
The last piece of the puzzle is to create a NAT gateway for instances in the private subnet. Using NAT gateway, those instances can access the internet for downloading updates, etc. and yet they won’t be accessible from the internet i.e. not exposed on the open internet.
If you want absolute isolation from the internet for a private subnet then you can skip the NAT gateway topics.
Elastic IP availability is the pre-requisite for creating a NAT gateway. If you don’t have an Elastic IP allocated in your account, please get it allocated first.
How to allocate Elastic IP address in VPC?
- Log in to the AWS VPC console.
- On the left navigation plane, click on Elastic IPs
- Now on the Elastic IPs page, click on the Allocate Elastic Ip address button
- Where you just need to add a Network Broder Group for it and click the Allocate button.
- Network broder group is a collection of AZs where allocated Elastic IPs will be available for use. In a nutshell, you will be choosing a region here since Elastic IPs are regional resources.
How to create NAT gateway in custom VPC?
- Log in to the AWS VPC console.
- On the left navigation plane, click on NAT Gateways
- Now on the NAT Gateway page, click on the Create NAT gateway button
- Where you need to add a Name tag for it, Subnet, Elastic IP and click the Create internet gateway button
- make sure you select public subnet here and Elastic Ip which we got allocated in the previous step.


NAT Gateway is now created. We need to create a custom route table which has a target to this NAT gateway. Follow the same procedure we seen above for IG and associate private subnet to this new custom route table.

Repeat the same [procedure to create NAT gateway in another Availability zone as well so that it can be tagged to private subnet in that AZ. Remember NAT gateway is not a regional resource. You need to create it per availability zone.
At this stage, both subnets are all set for instance deployments.
- A public subnet is associated with a routing table having a route to the Internet gateway
- A private subnet is associated with route table having a route to NAT gateway
This completes our custom VPC creation and we achieved the targeted design !