A how-to guide for Virtual Private Cloud in AWS. Learn what is vpc, how to create, configure, and delete VPC in AWS with screenshots.

What is VPC?
VPC is a Virtual Private Cloud. It’s your own private cloud in the public cloud. You control every aspect of VPC and its communication with the outer world. It’s like having your own datacenter which is isolated from other datacenters. When you are using cloud services, you are working inside your VPC. Servers, storage, load balancer, databases everything you create, configure is executed under your VPC. VPC gives you great flexibility to control your data privacy and security even its on cloud.
How to create VPC in AWS?
We will walk through the process of creating VPC in AWS (Amazon Web Services) cloud. By default, one VPC is created for you when you create a new account with AWS. This VPC is marked as default VPC. Whenever you are using services within AWS, this VPC will be used by default if multiple VPC exists in your account.
Check out our AWS CSA associate certificate preparation guide
Lets follow these series of screenshots to create VPC.
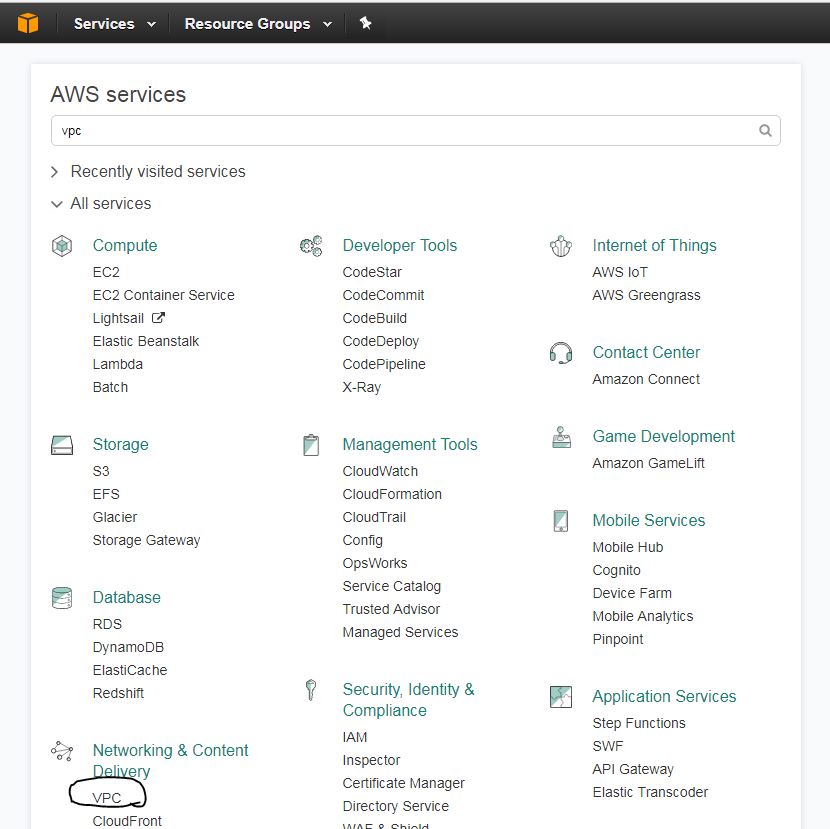
First login to your AWS management console and navigate to ‘VPC‘ under the category ‘Networking and Content delivery‘. See the below image. Or you can type VPC in the AWS services search bar you will be presented with VPC link.

Now you will be presented with VPC dashboard which shows you a summary of your VPC resources like below :

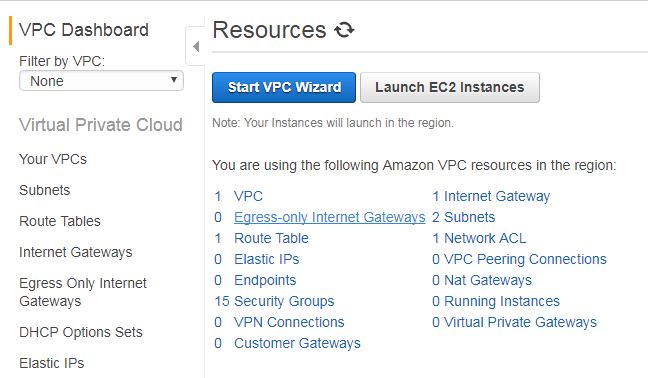
Here click on ‘Start VPC Wizard‘. This will kick off the VPC wizard to create your VPC step by step.
Step 1 :
Choose which kind of VPC you need. You have these choices –
- VPC with a single public subnet
- VPC with public and private subnets
- VPC with public and private subnets with hardware VPN access
- VPC with private subnet only with hardware VPN access
Each choice has its own features to offer. You can see what it offers by clicking on it. We will be creating the first type of VPC in this tutorial.

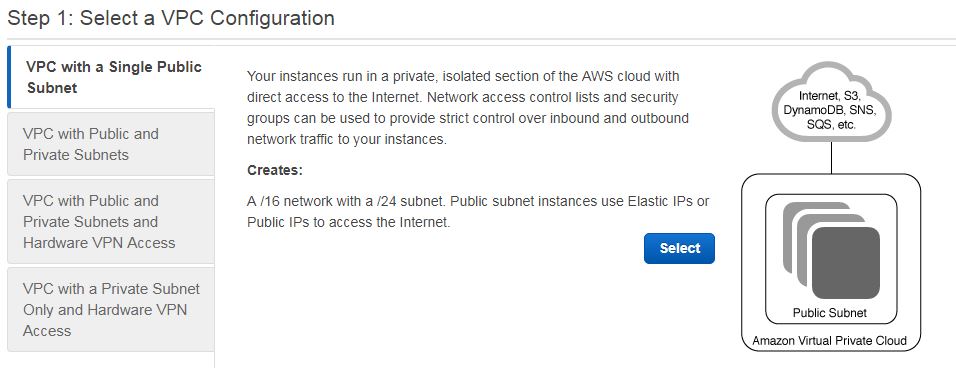
Select your type of VPC on the left column and then click on Select blue button on right.
Step 2:
Here you need to configure your subnet IP ranges, hardware related stuff, etc. See below screenshot and we will understand each field one by one.

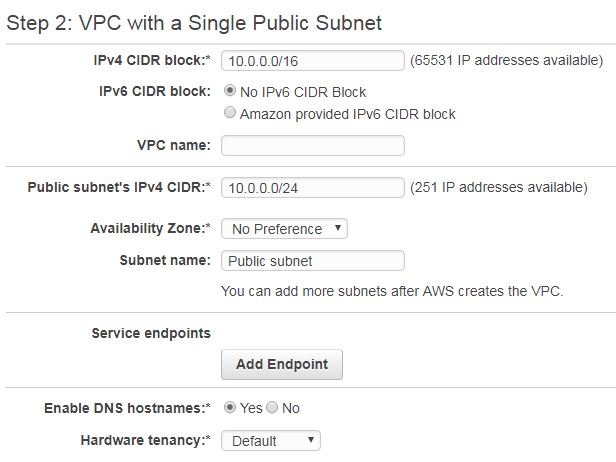
- IPv4 CIDR block: CIDR is Class-less Inter Domain Routing. It is your subnet range to be used by VPC. The IP addresses from this range will be assigned to components or services you will be using in this VPC. This is a mandatory field. You have to specify your range with subnet notation. Note that this range is configured and reachable only within your VPC.
- IPv6 CIDR block: Optional field. You can have IPv6 support in your VPC with this. Here IP range will be automatically generated and assigned by Amazon. You do not have the privilege to choose your own.
- VPC Name: Name of your choice. It helps you to identify this VPC in other parts of AWS within your account for configuration purposes. You can leave this blank since AWS identifies its every component by ARN (Amazon resource name). This ARN is an alphanumeric system-generated name that is not user friendly hence this field is optionally provided so that you can name your components with an easily recognizable name.
- Public subnet’s IPv4 CIDR: This range is meant for outside world communication. Your resources will be assigned IP from this block when you want them to communicate outside VPC.
- Availability zone: These zones are logical grouping of AWS hardware within one specified region (geographical grouping). At a one time you can select one region to work within and availability zones from that region will be listed here as a dropdown. If no zone selected, AWS will create VPC in any of the zones which has max free resources at that instant of time.
- Subnet name: Again this one is to name your public subnet with an easily recognizable name.
- Service endpoints: These are virtual devices in AWS. If you want any of them to add with this VPC then you can browse and select them here.
- Enable DNS hostnames: It enables DNS names to be generated for components when they created in this VPC. These names are system generated.
- Hardware Tenancy: Choose if you want your VPC components to be on single dedicated hardware (dedicated, physically as close as possible) or anywhere (physically may be near or long) within the zone you specified above. Dedicated tenancy assigns hardware which is the same rack or nearby racks so that you have very minimum network latency and highest performance.
Step 3 :
Click ‘Create VPC ‘ button. Your VPC will be created within seconds and you will be greeted with a screen saying “Your VPC has been successfully created. You can launch instances into the subnets of your VPC. For more information, see Launching an Instance into Your Subnet.” (link altered here with my blog post link). Click ok and you will be presented with VPC list screen as below :


Here you can see out newly created VPC named kerneltalks_vpc! All details of this VPC can be seen here. You VPC is ready to
How to modify VPC in AWS?
After creation you can modify VPC parameters. From the VPC list shown above, select any VPC you want to edit and then click the Actions button in the header. Dropdown menu will appear to edit below parameters :
- Delete VPC
- Edit CIDRs
- Edit DHCP options set
- Edit DNS resolution
- Edit DNS hostnames
- Create flow log
Flow logs are created fro any resources in VPC to trace and see IP traffic flow information. The rest of the options are self-explanatory. Here you can modify VPc and delete VPC too.
Here is small GIF I created which shows all above process of creating VPC.