

Learn how to create an S3 bucket in AWS step by step. Understand permissions and properties of the bucket which are to be set while creating.

S3 which stands for Simple Storage Service is a storage web service provided by Amazon web service. S3 is the replacement of storage boxes in traditional data centers. Its highly scale-able, cheap, reliable alternative. In S3 data is stored in a bucket. The bucket is the root folder in S3. You can have more than one bucket in a single AWS account. Files stored in buckets are called objects. You can control access to data by defining permissions at the bucket level and object level.
In this article we will see how to create S3 bucket with screenshots.
Step 1 –
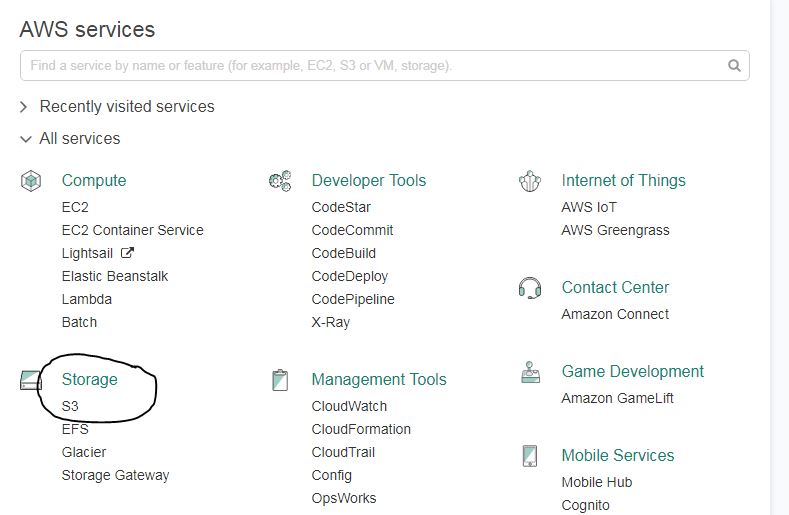
Login to AWS console and select S3 under Storage. You can even search it under the search bar of the console.

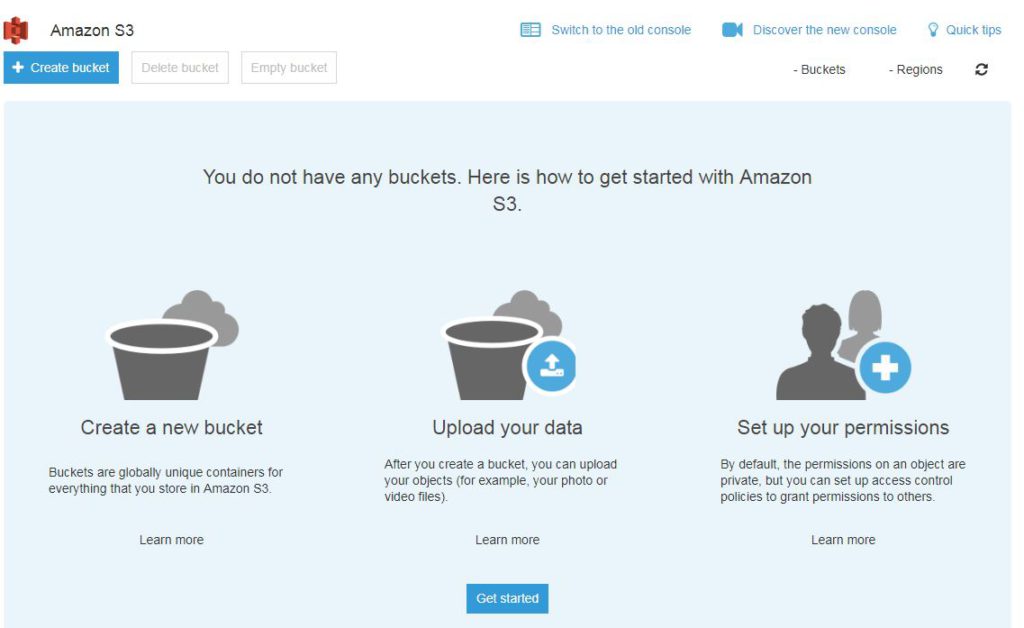
It will take you to Amazon S3 console where you can see ‘create bucket‘ button along with Delete bucket and Empty bucket button in header.

Step 2 –
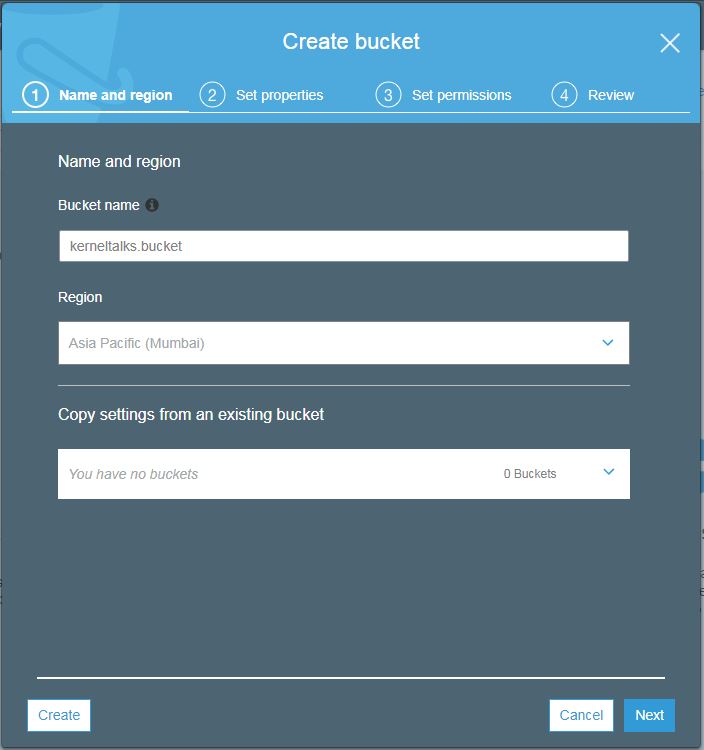
Click create a bucket and you will be presented with bucket wizard. Enter the bucket name of your choice. Remember it should be unique across all AWS infrastructure. Select region (geographically nearest to source/destination from where read/write of data will happen to/from this bucket to avoid latency). If you want to create a new bucket with the setting of the existing bucket, you can specify the existing bucket name in the last option.

Hit next after filling the required details. You will enter the bucket properties screen as below.

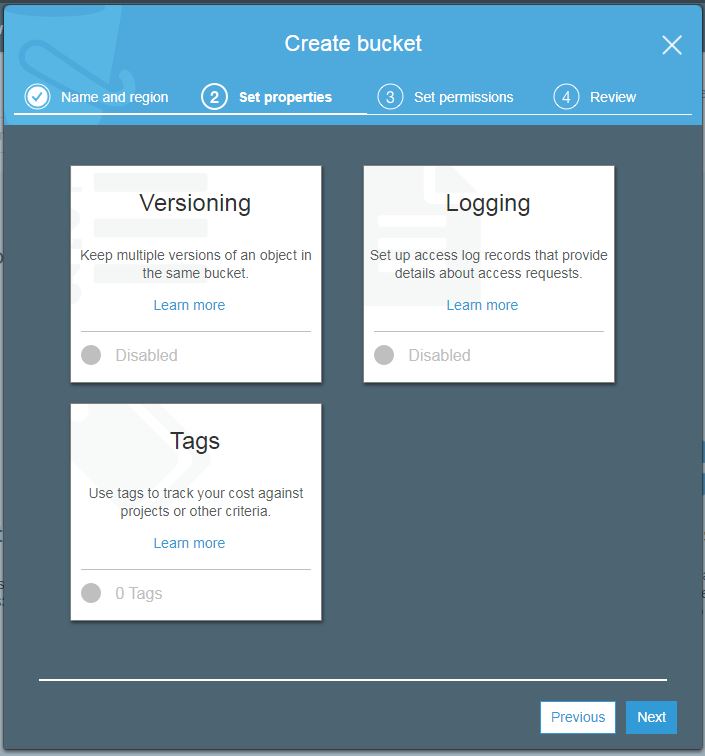
Here you can set these properties to your bucket.
- Versioning. Enable to keep all versions of objects when altered. Once enabled it can not be disabled. It can only be suspended then.
- Logging. It will track all access requests made to this bucket.
- Tags. Add tags of your choice to identify bucket easily in other AWS services and billing.
All are disabled by default. Once you enable features of your choice hit next. You will enter the permission settings screen.

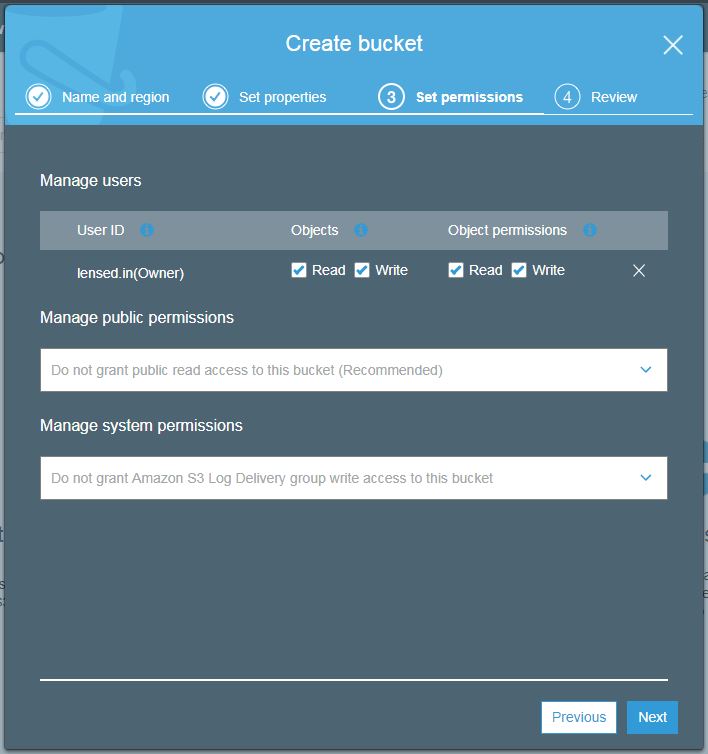
Here you can manage permissions at the user, public, and system level. Public and system permissions can be enabled or disabled. User-level permission can be set read, write and user id wise.
Once you are done, hit next and the review screen will show you all the options you have selected as a final confirmation before creating a bucket.

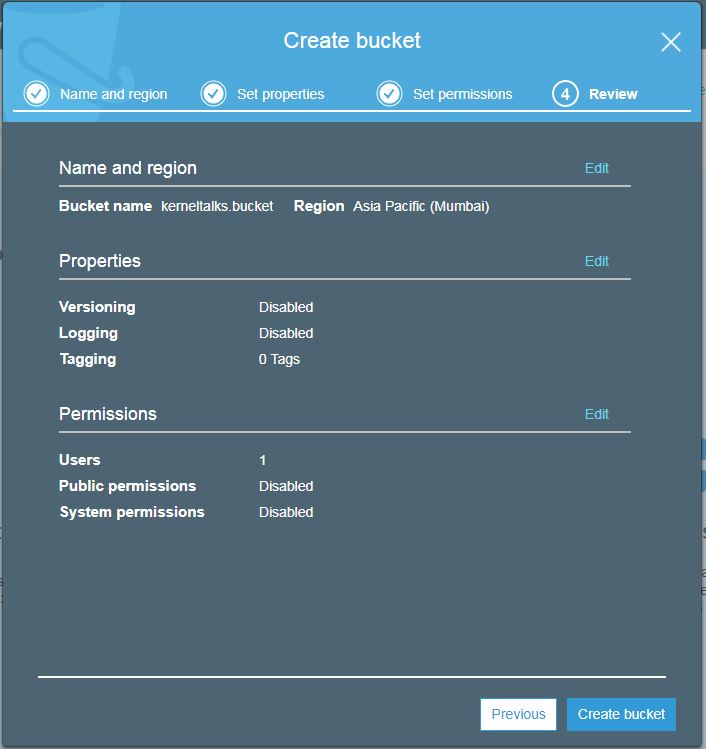
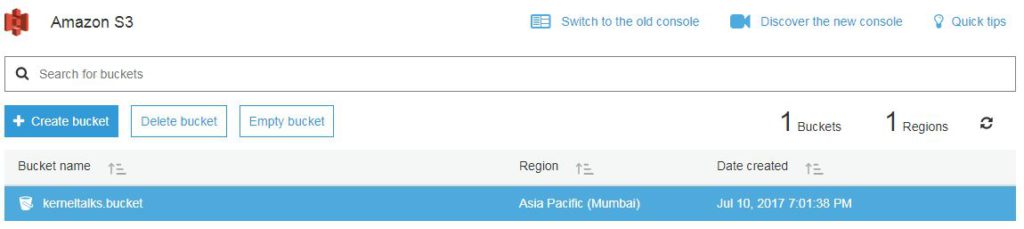
Hit create bucket now. Your bucket will be created and you will be redirected back to bucket list screen where you can see your newly created bucket!

Step 3 –
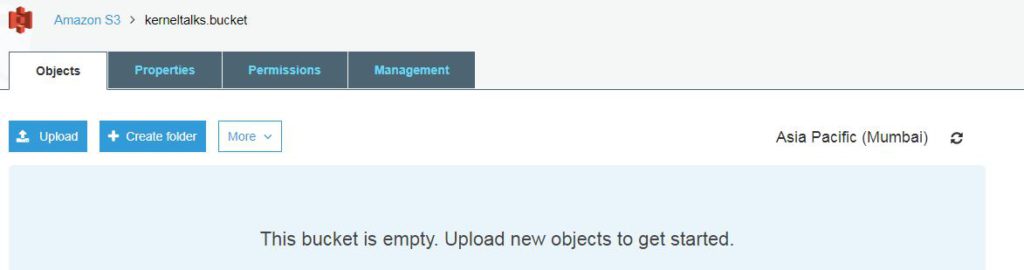
If you click on bucket name you will be able to get into bucket itself where you can upload objects.

Even tabs like properties, permissions, management are visible in the menu bar which can be used to administer this bucket. We will see them in another post.