Monthly Archives: November 2019

How to add product channels in SUSE Manager

A short article explaining product channels in SUSE Manager along with screenshots.

Product sync in SUSE Manager

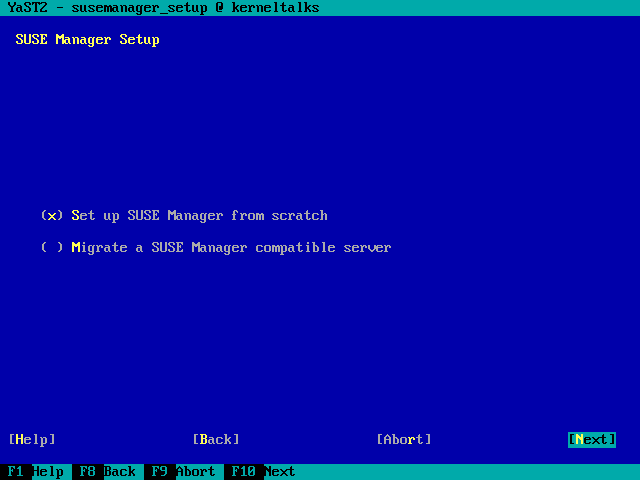
In our previous article, we saw how to configure SUSE Manager 4.0 with screenshots. In this article, we will discuss channel management in SUSE Manager.

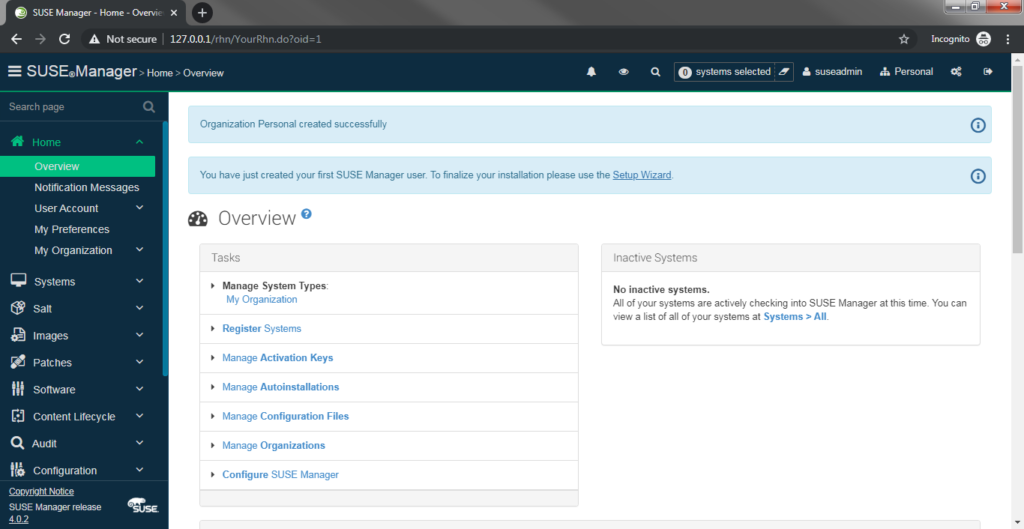
To start with you should have base product channels synced to SUSE Manager from Suse. For that goto to Admin > Setup Wizard in SUSE Manager web console. It’s a 3 step process which you need to complete for your first base channel syncs.

How to install SUSE Manager 4.0?

Read here

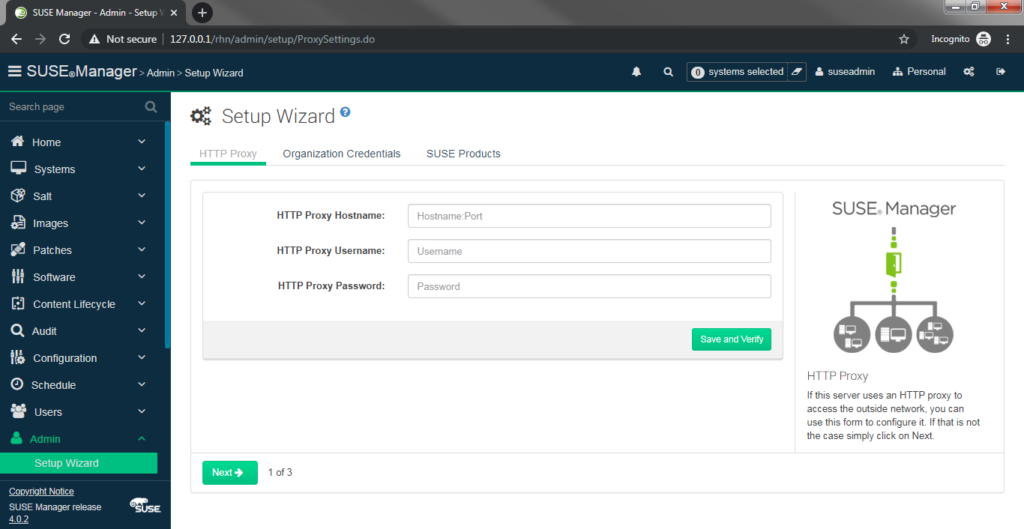
In the first step, you need to configure for internet access if applicable

Proxy configuration in SUSE Manager

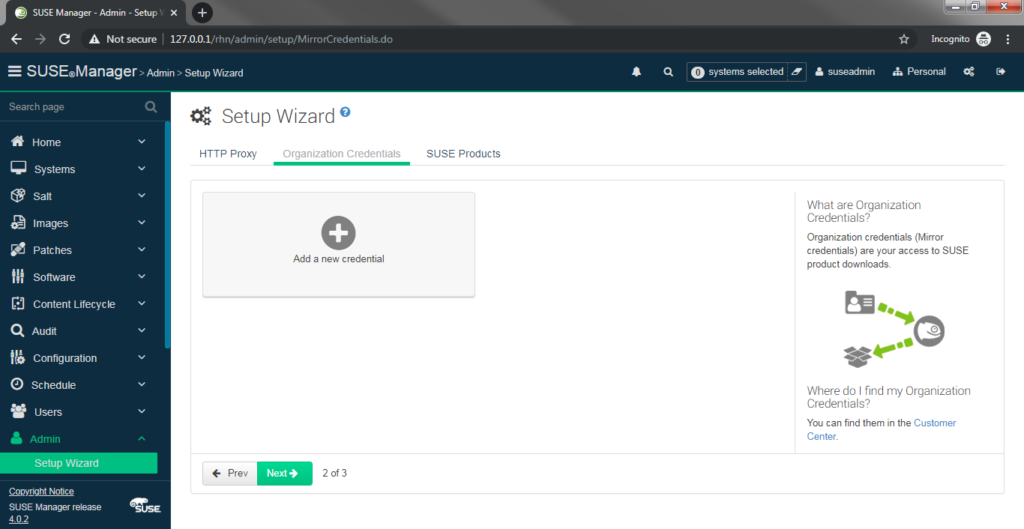
In the second step, you need to add your organizational credentials which will be used to verify your subscriptions and accordingly products will be made available to you for sync in SUSE Manager.

Organizational credentials in SUSE manager

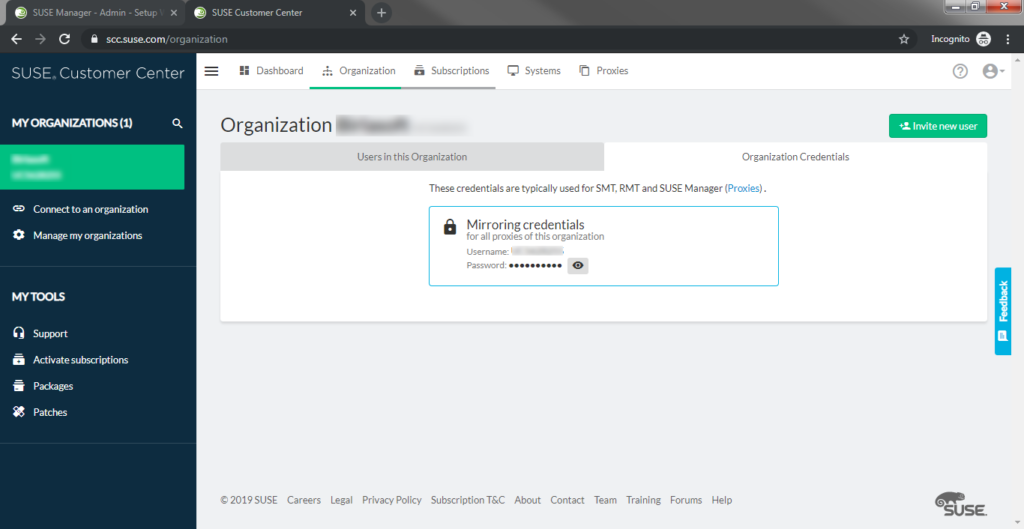
You will find your organization credentials at https://scc.suse.com/organization . There you will find the username (same as organization id) and password which you need to fill up in SUSE Manager.

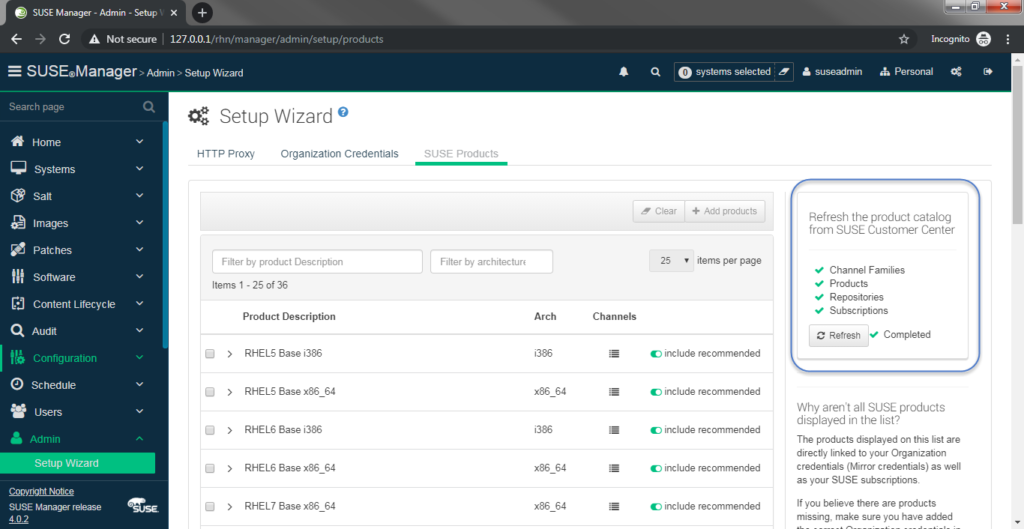
Enter it to the SUSE manager page above and move to the third step i.e. SUSE products. You will have to wait for a few minutes when you visit this page for the first time. It will download all products catalog from SUSE Customer Center depending on your organization’s credentials. Once the refresh is done, you will see a list of products available for you like below –

SUSE product catalog

Product channel sync

Now select product of your choice to sync its channels. It depends on what variety of OS flavors you have in your infra and which all you have subscribed to. I selected only SUSE 15 for now.

SUSE Manager product channel sync

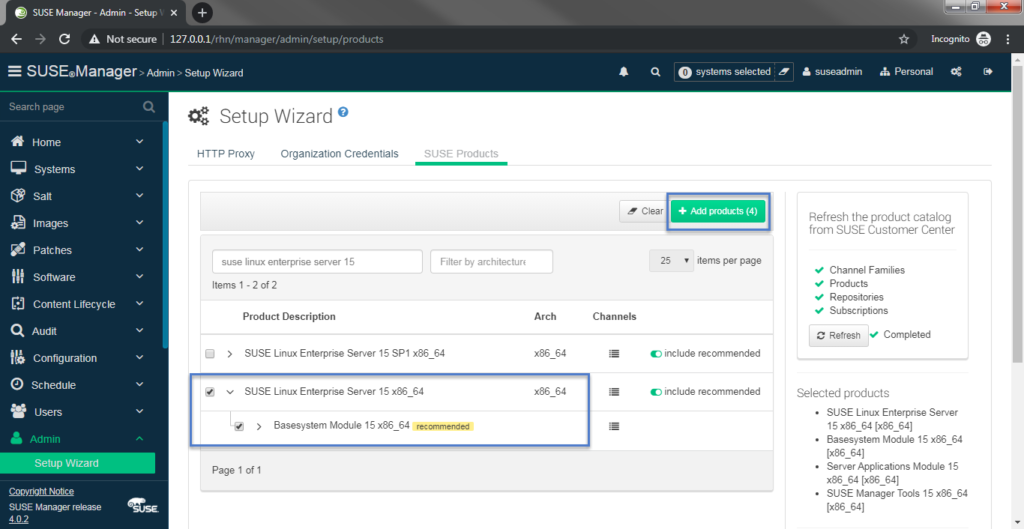
And click on Add product button highlighted in the screenshot. They will start syncing. It takes time to sync channels depending on the number of products you selected to sync and the internet bandwidth of the server.

You can track progress in log files on the SUSE Manager server located at /var/log/rhn/reposync . You will see log file for each channel and it contains sync status progress for that channel.

kerneltalks:/var/log/rhn/reposync # ls -lrt
total 540
-rw-rw---- 1 wwwrun www   1474 Dec  3 12:02 sle-product-sles15-pool-x86_64.log
-rw-rw---- 1 wwwrun www   1731 Dec  3 12:02 sle-product-sles15-updates-x86_64.log
-rw-rw---- 1 wwwrun www 245815 Dec  3 12:16 sle-module-basesystem15-pool-x86_64.log
-rw-rw---- 1 wwwrun www 293137 Dec  3 13:05 sle-module-basesystem15-updates-x86_64.log

Once the sync is complete it will show as below –

Sync complete!

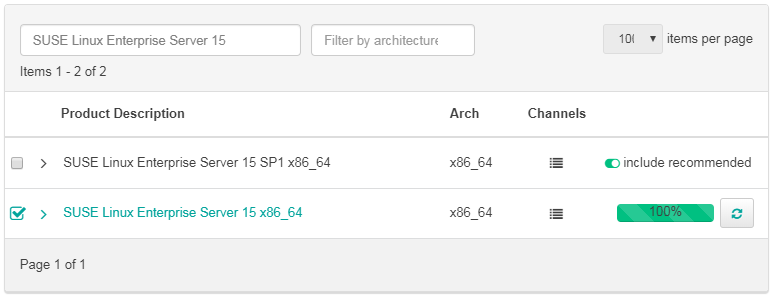
That’s it! You have added a product and associated channels to SUSE Manager.


How to remove product channels from SUSE Manager

If by mistake, you have added some products which you don’t want then it’s not easy to remove it from SUSE Manager. The webpage does not allow you to just de-select it. You have to follow another method to remove them. I explained all steps to remove product and channels from SUSE manager here

SUSE Manager 4 Setup Configuration

Step by step setup of SUSE Manager Server 4.0 configuration

SUSE Manager server 4 setup

In our previous post of SUSE Manager server installation, we walked you through how to install SUSE Manager step by step including screenshots. In this article, we will walk you through the SUSE Manager 4.0 configuration setup.

Considering you have the system installed with SUSE Manager package you can proceed to start SUSE Manager setup by running below command –

kerneltalks:~ # yast2 susemanager_setup

If you see an error saying No such client module susemanger_setup then you must not have susemanger package installed. Install it using zyapper in susemanager command and you will be able to run above setup command.

Once run, you will be presented with a text-based GUI setup and we will go through it step by step along with screenshots.

Obviously keep in mind you completed the disk space requirements before you start setup. Those are explained in the pre-requisite on the SUSE documentation.

SUSE Manager Setup

The first screen to choose the type of setup which is a pretty obvious choice.

The first screen of the setup

On the second screen, you will be asked to enter the SUSE Manager Administrator email address.

Admin email address

On the next screen, you need to provide details to create an SSL certificate of SUSE Manager.

Certificate setup

Now it will ask you for database details to be set. You can choose the database user of your choice.

Database settings

At this stage, all inputs have been collected and setup is ready to complete configurations. It still gives you another chance to modify your responses in answer file and run setup manually later in below window.

The setup is ready!

We made the obvious choice and hit the Yes button. Now, it will setup the SUSE manager and show you output as it goes. Finally, the SUSE Manager setup will be completed as below.

Setup is completed!

Hit Next and you will be shown web URL which can be used to administrator your SUSE Manager along with the instruction to create an account first.

SUSE Manager is configured!

SUSE Manager web console

As given in the last screen of setup, open your browser and head to the URL mentioned. Since I installed in VirtualBox, I used port forwards and opened it on loopback IP –

SUSE Manager console first page!

You need to fill in all the details to create your SUSE Administrator user and hit ‘Create Organization‘ button at the end of the page. And you are done! You will see below home page of the SUSE Manager console.

SUSE Manager console home page

Now your SUSE Manager setup is completed and you have web page console from where you can manage your SUSE Manager.

As very next step after this setup completion is to add subscription details to it and sync product channels so that it can be used in your organization for patching. We have covered it here in how to add product channels in SUSE Manager

How to configure JBOSS EAP 7 as a service in SUSE Linux

Step by step procedure to configure JBOSS EAP as service in SUSE Linux

JBOSS EAP as service

One of the major requirements for Jboss’s basic installations is to configure Jboss as a service in Linux. It’s pretty easy to configure it in RedHat and related families but when it comes to SUSE it pretty difficult since few functions of RedHat family don’t work in Suse. And with default ZIP installation we do not get the SUSE startup file as well which is readily available for RedHat.

We are considering Jboss EAP 7.2 on Suse 12 for this article.

RedHat has a pretty simple tutorial here which is not going to work on SUSE. So I will walk you through steps to get your Jboss eap working as service in SUSE Linux.


Pre-requisite

  • Make sure you have java installed on the server
  • Make sure JBoss user exists on the server which is defined in jboss-eap.conf file by parameter JBOSS_USER. Default user is jboss-eap
  • For default standalone configurations, INSTALL_PATH/standalone/ should be owned by JBOSS_USER
  • Make changes in init script template to match it with SUSE system as defined in below paragraph

Modification in script

You need to edit default init script INSTALL_PATH/bin/init.d/jboss-eap-rhel.sh to make it compatible with Suse.

  • Replace /etc/init.d/functions with /etc/rc.status
  • Replace success with rc_status -v

With JBoss zip install, you will have init script jboss-eap-rhel.sh located under INSTALL_PATH/bin/init.d This is init script which won’t be useful in latest Suse versions since they follow LSB format. So we need to make it work with LSB and here is how to do it.

Copy service configuration file and service init script from the installation directory to respective system directories –

root@kerneltalks # cp INSTALL_PATH/bin/init.d/jboss-eap.conf /etc/default
root@kerneltalks # cp INSTALL_PATH/bin/init.d/jboss-eap-rhel.sh /etc/init.d/jboss-eap
root@kerneltalks # chmod +x /etc/init.d/jboss-eap

Please note that while coping over file we trimmed rhel from its name since it does not make sense to keep that name on the SUSE system! It will also alter the next command as well.


Adding it as a service

root@kerneltalks # chkconfig --add jboss-eap

Till this point, its the same process as RedHat mentioned in its tutorial. Now, if you try to start service it won’t. It will throw below error :

root@kerneltalks # service jboss-eap start
jboss-eap.sh is neither service nor target!?

Import service in sytemd

Now we need to get this service into systemd. To do that, You need to add below block on top of /etc/init.d/jboss-eap.sh . Make sure you edit it exactly since its an LSB compliant format read by the system. This needs to go below the shell opening line of script !/bin/sh and before the rest of the script.

### BEGIN INIT INFO
# Provides:          jboss-eap
# Required-Start:
# Required-Stop:
# Default-Start:     2 3 4 5
# Default-Stop:      0 1 6
# Short-Description: jboss eap service
# Description:       jboss eap server for suse linux
### END INIT INFO

You are almost there! Import the service into systemd using below command –

root@kerneltalks # systemctl enable jboss-eap
jboss-eap.service is not a native service, redirecting to systemd-sysv-install
Executing /usr/lib/systemd/systemd-sysv-install enable jboss-eap

Now your service is available in systemctl to control. You can control service using commands like systemctl start jboss-eap, systemctl stop jboss-eap, systemctl status jboss-eap

root@kerneltalks # systemctl start jboss-eap
● jboss-eap-rhel.service - LSB: jboss eap service
   Loaded: loaded (/etc/init.d/jboss-eap-rhel.sh; bad; vendor preset: disabled)
   Active: active (running) since Thu 2019-06-20 1:23:23 IST; 10s ago
     Docs: man:systemd-sysv-generator(8)
  Process: 10625 ExecStart=/etc/init.d/jboss-eap-rhel.sh start (code=exited, status=0/SUCCESS)
 Main PID: 12346 (java)
......

You have configured Jboss eap to run as service in Suse Linux.

How to start, stop and reload postfix

This is a quick post that lists commands to start, stop postfix service.

postfix service in Linux

Postfix is a free and open-source mailing service. It was developed by IBM and is a common alternative to Sendmail service.

How to start, stop and reload postfix mail service

You can use postfix command directly or you can use OS service management commands.

[root@kerneltalks ~]# postfix start
postfix/postfix-script: starting the Postfix mail system
[root@kerneltalks ~]# postfix stop
postfix/postfix-script: stopping the Postfix mail system
[root@kerneltalks ~]# postfix reload

Using systemctl or service command to control postfix service.

[root@kerneltalks ~]# service postfix start
Redirecting to /bin/systemctl start postfix.service
[root@kerneltalks ~]# service postfix stop
Redirecting to /bin/systemctl stop postfix.service
[root@kerneltalks ~]# systemctl start postfix
[root@kerneltalks ~]# systemctl stop postfix

IPv6 error in postfix

Sometimes you see below error while dealing with postfix service.

[root@kerneltalks ~]# postfix start
postfix: fatal: parameter inet_interfaces: no local interface found for ::1

This is due to your system is using IPv6 as well along with IPv4. If you don’t need IPv6 then you can safely disable IPv6 and then restart postfix service to resolve the above error.

Another way is to disable postfix IPv6 support and get rid of this error. To do that you need to edit /etc/postfix/main.cf configuration file and change inet_protocols to ipv4.

[root@kerneltalks ~]# vi /etc/postfix/main.cf
#inet_protocols = all 
inet_protocols = ipv4 

Save changes and restart postfix service.