Category Archives: Cloud Services

How to create S3 bucket in AWS

Learn how to create an S3 bucket in AWS step by step. Understand permissions and properties of the bucket which are to be set while creating.

S3 bucket creation in AWS

S3 which stands for Simple Storage Service is a storage web service provided by Amazon web service. S3 is the replacement of storage boxes in traditional data centers. Its highly scale-able, cheap, reliable alternative. In S3 data is stored in a bucket. The bucket is the root folder in S3. You can have more than one bucket in a single AWS account. Files stored in buckets are called objects. You can control access to data by defining permissions at the bucket level and object level.

In this article we will see how to create S3 bucket with screenshots.

Step 1 –

Login to AWS console and select S3 under Storage. You can even search it under the search bar of the console.

S3 in AWS console

It will take you to Amazon S3 console where you can see ‘create bucket‘ button along with Delete bucket and Empty bucket button in header.

S3 console

Step 2 –

Click create a bucket and you will be presented with bucket wizard. Enter the bucket name of your choice. Remember it should be unique across all AWS infrastructure. Select region (geographically nearest to source/destination from where read/write of data will happen to/from this bucket to avoid latency). If you want to create a new bucket with the setting of the existing bucket, you can specify the existing bucket name in the last option.

Create bucket wizard

Hit next after filling the required details. You will enter the bucket properties screen as below.

S3 Bucket properties

Here you can set these properties to your bucket.

  1. Versioning. Enable to keep all versions of objects when altered. Once enabled it can not be disabled. It can only be suspended then.
  2. Logging. It will track all access requests made to this bucket.
  3. Tags. Add tags of your choice to identify bucket easily in other AWS services and billing.

All are disabled by default. Once you enable features of your choice hit next. You will enter the permission settings screen.

S3 bucket permissions

Here you can manage permissions at the user, public, and system level. Public and system permissions can be enabled or disabled. User-level permission can be set read, write and user id wise.

Once you are done, hit next and the review screen will show you all the options you have selected as a final confirmation before creating a bucket.

Bucket review screen before creation

Hit create bucket now. Your bucket will be created and you will be redirected back to bucket list screen where you can see your newly created bucket!
Bucket list

Step 3 –

If you click on bucket name you will be able to get into bucket itself where you can upload objects.

Inside S3 bucket

Even tabs like properties, permissions, management are visible in the menu bar which can be used to administer this bucket. We will see them in another post.

How to: Virtual Private Cloud in AWS

A how-to guide for Virtual Private Cloud in AWS. Learn what is vpc, how to create, configure, and delete VPC in AWS with screenshots.

How to guide : VPC in AWS

What is VPC?

VPC is a Virtual Private Cloud. It’s your own private cloud in the public cloud. You control every aspect of VPC and its communication with the outer world. It’s like having your own datacenter which is isolated from other datacenters. When you are using cloud services, you are working inside your VPC. Servers, storage, load balancer, databases everything you create, configure is executed under your VPC. VPC gives you great flexibility to control your data privacy and security even its on cloud.

How to create VPC in AWS?

We will walk through the process of creating VPC in AWS (Amazon Web Services) cloud. By default, one VPC is created for you when you create a new account with AWS. This VPC is marked as default VPC. Whenever you are using services within AWS, this VPC will be used by default if multiple VPC exists in your account.

Check out our AWS CSA associate certificate preparation guide

Lets follow these series of screenshots to create VPC.

First login to your AWS management console and navigate to VPC under the category ‘Networking and Content delivery‘. See the below image. Or you can type VPC in the AWS services search bar you will be presented with VPC link.

VPC in AWS management console

Now you will be presented with VPC dashboard which shows you a summary of your VPC resources like below :

VPC dashboard showing resources details

Here click on ‘Start VPC Wizard‘. This will kick off the VPC wizard to create your VPC step by step.

Step 1 :

Choose which kind of VPC you need. You have these choices –

  1. VPC with a single public subnet
  2. VPC with public and private subnets
  3. VPC with public and private subnets with hardware VPN access
  4. VPC with private subnet only with hardware VPN access

Each choice has its own features to offer. You can see what it offers by clicking on it. We will be creating the first type of VPC in this tutorial.

Select type of VPC

Select your type of VPC on the left column and then click on Select blue button on right.

Step 2:

Here you need to configure your subnet IP ranges, hardware related stuff, etc. See below screenshot and we will understand each field one by one.

VPC configuration
  • IPv4 CIDR block: CIDR is Class-less Inter Domain Routing. It is your subnet range to be used by VPC. The IP addresses from this range will be assigned to components or services you will be using in this VPC. This is a mandatory field. You have to specify your range with subnet notation. Note that this range is configured and reachable only within your VPC.
  • IPv6 CIDR block: Optional field. You can have IPv6 support in your VPC with this. Here IP range will be automatically generated and assigned by Amazon. You do not have the privilege to choose your own.
  • VPC Name: Name of your choice. It helps you to identify this VPC in other parts of AWS within your account for configuration purposes. You can leave this blank since AWS identifies its every component by ARN (Amazon resource name). This ARN is an alphanumeric system-generated name that is not user friendly hence this field is optionally provided so that you can name your components with an easily recognizable name.
  • Public subnet’s IPv4 CIDR: This range is meant for outside world communication. Your resources will be assigned IP from this block when you want them to communicate outside VPC.
  • Availability zone: These zones are logical grouping of AWS hardware within one specified region (geographical grouping). At a one time you can select one region to work within and availability zones from that region will be listed here as a dropdown. If no zone selected, AWS will create VPC in any of the zones which has max free resources at that instant of time.
  • Subnet name: Again this one is to name your public subnet with an easily recognizable name.
  • Service endpoints: These are virtual devices in AWS. If you want any of them to add with this VPC then you can browse and select them here.
  • Enable DNS hostnames: It enables DNS names to be generated for components when they created in this VPC. These names are system generated.
  • Hardware Tenancy: Choose if you want your VPC components to be on single dedicated hardware (dedicated, physically as close as possible) or anywhere (physically may be near or long) within the zone you specified above. Dedicated tenancy assigns hardware which is the same rack or nearby racks so that you have very minimum network latency and highest performance.

Step 3 :

Click ‘Create VPC ‘ button. Your VPC will be created within seconds and you will be greeted with a screen saying “Your VPC has been successfully created. You can launch instances into the subnets of your VPC. For more information, see Launching an Instance into Your Subnet.” (link altered here with my blog post link). Click ok and you will be presented with VPC list screen as below :

VPC list

Here you can see out newly created VPC named kerneltalks_vpc! All details of this VPC can be seen here. You VPC is ready to

How to modify VPC in AWS?

After creation you can modify VPC parameters. From the VPC list shown above, select any VPC you want to edit and then click the Actions button in the header. Dropdown menu will appear to edit below parameters :

  • Delete VPC
  • Edit CIDRs
  • Edit DHCP options set
  • Edit DNS resolution
  • Edit DNS hostnames
  • Create flow log

Flow logs are created fro any resources in VPC to trace and see IP traffic flow information. The rest of the options are self-explanatory. Here you can modify VPc and delete VPC too.

Here is small GIF I created which shows all above process of creating VPC.

GIF: Create VPC in AWS

Complete AWS CSA Associate exam preparation guide!

Small AWS CSA Associate exam preparation guide to help you get ready for the certification exam. Get confident with the list of test quizzes listed here.

AWS CSA Associate exam preparation guide

Note: SAA-C01 is retiring now and being replaced with SAA-C02.

Recently I cleared the Amazon Web Services Certified Solutions Architect Associate-level exam and I was bombarded with many questions like How to prepare for the AWS CSA exam? Which book to refer to preparing AWS CSA certification? How to study for AWS CSA? Which online resources available for the certified solutions architect exam? So I thought of summing all this up in a small post which can be useful for AWS CSA aspirants.

Remember this post is compiled from my own experience and should not be taken as the final benchmark for taking the certification exams. This post is mainly aimed to help you gaining confidence in taking examination once you are through your syllabus and hands-on experience.

AWS has three streams where you can pursue your cloud career.

  • AWS Certified Solutions Architect (Architecture context)
  • AWS Certified Developer (Developer context)
  • AWS Certified SysOps Administrator (Operations context)

All these three streams have an associate-level (primary or base) level certification. Later professional (higher level) certification is available for solution architect only. Developer and SysOps get merged into single AWS certified DevOps Engineer professional certification.

So, we are talking here about the Amazon Web Services Certified Solutions Architect Associate level exam! Obviously you should be well versed with AWS and requirements stated by Amazon on exam link. Let’s have some examination details :

AWS CSA Exam details :

  • Total number of questions: 60-65
  • Duration: 130 minutes
  • Cost : $150
  • Type: Multiple choice questions
  • Can be retaken after 7 days of cooldown period if failed in the first attempt
  • Syllabus: Download here.
  • Pass criteria: 720/1000.

AWS CSA Study material :

Quick recap before exam :

I have compiled a series of quick reviews before taking the exam. Feel free to refer and suggest your addition/feedback.

Below is a list of AWS quiz which I gathered from the web which can help you to put your cloud knowledge to test and gain the confidence to get ready for the exam.

Free Quiz

Premium (paid) Quiz

  • Cloud academy: 241 Questions. Signup needed (first 7 days free access then paid account)
  • Linux Academy: 117 Questions. Signup needed (first 7 days free access then paid account)
  • A Cloud Guru: 294 Questions. Signup needed.
  • AWS Training practice tests $20. It’s free if you are AWS certified. You can get a voucher from your certification benefits section on the AWS certification portal.
  • Practice exam by tutorialsdojo

All the best !

Our other certification preparation articles

  1. Preparing for 1Z0-1085-20 Oracle Cloud Infrastructure Foundations 2020 Associate Exam
  2. Journey to AWS Certified Solutions Architect – Professional Certification SAP-C01
  3. Preparing for CLF-C01 AWS Certified Cloud Practitioner Exam
  4. Preparing for SOA-C01 AWS Certified SysOps Administrator Associate Exam

AWS SWF, Beanstalk, EMR, Cloudfomation revision before the CSA exam

Quick revision on topics AWS SWF, Beanstalk, EMR, Cloudfomation before appearing AWS Certified Solutions Architect – Associate exam.

This article notes down a few important points about AWS (Amazon Web Services) SWF, Beanstalk, EMR, Cloudfomation. This can be helpful in last-minute revision before appearing for the AWS Certified Solutions Architect – Associate level certification exam.

This is forth part of AWS CSA revision series. Rest of the series listed below :

In this article we are checking out key points about SWF (Simple Work Flow), Beanstalk (App deployment Service), EMR (Elastic MAp Reduce), Cloudfomation (Infrastructure as code).

Recommended read : AWS CSA exam preparation guide

Lets get started :

SWF

  • Max simultaneous workflows executions 1,00,000
  • C++ is not supported in SWF
  • There are three actors :
    • activity workers
    • workflow starters
    • deciders
  • Each workflow runs in the domain which is a collection of tasks.
  • Workflows in different domains can not interact

Beanstalk

  • Scala, WebSphere is not available in Beanstalk
  • Its free service. You will be charged for resources it provisions for your application
  • Supported platforms :
    • Java
    • Ruby
    • Python
    • PHP
    • Node.js
    • .net
    • Go
    • Docker

Cloudfront

  • One AWS account can have 100 CF origin access identities at max.
  • Key pairs are only used for EC2 and CloudFront.
  • All CloudFront URL ends with cloudfront.net
  • Cloudfront origins can be S3 bucket, EC2, webserver in an on-premise datacenter
  • It can serve private content by S3 origin access identifiers, signed URLs, and signed cookies.
  • Limits :
    • Req per sec per distribution : 1,00,000
    • Transfer rate per distribution : 40 Gbps
    • Origins per distribution : 25
    • web distributions per account : 200

AWS Infra

  • Total availability zones currently are 42.
  • The total regions are 16.
  • First 3 services launched by AWS are SQS (2004), S3 (2006), EC2 (later in 2006)

AWS CloudFront, SNS, SQS revision before the CSA exam

Quick revision on topics AWS CloudFront, SNS, SQS before appearing AWS Certified Solutions Architect – Associate exam.

CloudFront, SNS, SQS revision!

This article notes down a few important points about AWS (Amazon Web Services) CloudFront, SNS, and SQS. This can be helpful in last-minute revision before appearing for the AWS Certified Solutions Architect – Associate level certification exam.

This is third part of AWS CSA revision series. Rest of the series listed below :

In this article, we are checking out key points about CloudFront(CDN Content Delivery Network), SNS (Simple Notification Service), and SQS (Simple Queue Service).

Recommended read : AWS CSA exam preparation guide

Lets get started :

AWS Cloudfront

  • Origin can be S3 bucket or CNAME of Elastic Load Balancer ELB
  • S3 bucket as the origin. URL will be bucket_name.s3-reagion.cloudfront.net
  • Private content sharing with signed URL with an expiration time limit
  • To serve a new object version, create a new distribution, or create invalidation of the old objects. Since invalidation costs, creating new distribution always helps.
  • Limits :
    • 1,00,000 Requests per second per distribution
    • 200 distributions per account
    • 40Gbps speed per distribution
    • 25 origins per distribution
    • 20 GB max file size to serve
  • By default, object expiration is 24 hours. The minimum TTL is 0.

Amazon SNS

  • The latest addition to SNS is Lambda
  • SNS has two clients: Publishers and subscribers
  • Publishers communicate with subscribers by sending messages to the topic.
  • Protocol supported :
    • HTTP
    • HTTPS
    • SMS
    • email
    • email-JSON
    • Amazon SQS
    • AWS Lambda
  • SNS Topic of the same name can be created after 30-60 seconds the previous topic deleted.

Amazon SQS

  • The default visibility timeout is 30 secs. The maximum is 12 hours.
  • Mainly used to decouple your application
  • The default period message stays in queue is 4 days. Min-Max periods are 1 min to 2 weeks.
  • The maximum SQS message size is 256KB.
  • Supports an unlimited number of queues and unlimited messages per queue.
  • Long polling can be done from 1 to 20 secs.

AWS VPC, Route53, IAM revision before the CSA exam

Quick revision on topics AWS VPC, Route53, IAM before appearing AWS Certified Solutions Architect – Associate exam.

VPC, Route53, IAM revision!

This article notes down a few important points about AWS (Amazon Web Services) VPC, Route53, and IAM. This can be helpful in last-minute revision before appearing for the AWS Certified Solutions Architect – Associate level certification exam.

This is the second part of the AWS CSA revision series. Rest of the series listed below :

In this article, we are checking out key points about VPC (Virtual Private Cloud), Route53 (DNS Service) and IAM (Identity and Access Management).

Recommended read : AWS CSA exam preparation guide

Lets get started :

VPC (Virtual Private Cloud)

  • NACL (Network Access Control List) controls traffic security at the subnet level
  • Security groups control traffic security at the instance level
  • NACL is stateless (i.e. all traffic need to exclusively allow) while Security groups are stateful (i.e. response traffic is automatically allowed)
  • Only 1 Internet gateway per VPC is allowed.
  • VPC peering can be done between two AWS accounts or other VPS within the same region.
  • VPC peering is a direct network route between two VPC enabling sharing resources in different subnets.
  • Limits :
    • 5 VPC per region
    • 50 customer gateways per region
    • 200 route table per region
    • 50 entries per route table
    • 5 elastic IP
    • 5 security group per network interface
    • 500 security groups per VPC
    • 50 rules per security group
  • First 4 and last 1 IP of each subnet is reserved by AWS as below :
    • x.x.x.0: Network IP
    • x.x.x.1 : VPC router IP
    • x.x.x.2: For VPC DNS
    • x.x.x.3: For future use
    • x.x.x.255: Broadcast IP

Route 53

  • Can register domain, act as DNS, Check health of resources.
  • Port 53 used to serve request by DNS hence the name route 53!
  • Primarily TCP used to serve DNS request but if the response is more than 512 bytes it will use TCP.
  • Currently supported records :
    • A (address record)
    • AAAA (IPv6 address record)
    • CNAME (canonical name record)
    • MX (mail exchange record)
    • NAPTR (name authority pointer record)
    • NS (name server record)
    • PTR (pointer record)
    • SOA (start of authority record)
    • SPF (sender policy framework)
    • SRV (service locator)
    • TXT (text record)
  • Routing policies :
    • Simple routing: Single resource serving traffic
    • Weighted routing: Divert proportion wise traffic to multiple resources
    • Latency routing: Returns result with the lowest latency to requestor origin
    • Failover routing: Active-passive. One resource takes traffic when the other one is failed
    • Geolocation routing: Returns DNS queries based on the geolocation of the user
  • Limits :
    • 500 hosted zones per AWS account
    • 50 domains per AWS account
  • Ideal TTL values for CNAME to the existing domain are 24 hours and CNAM to S3 or ELB is 1 hour.
  • There is no default TTL for any record type in Route 53. You have to specify TTL for your records.
  • Weights can be assigned as integer 0 to 255. 0 means no weight i.e. don’t route to that record. The probability of routing to be done to a particular record equals to the weight of that record/Sum of all record weights.

IAM (Identity and Access Management)

  • Never use the root account for login. Create an admin user and use it for administrative tasks
  • Created users, groups and roles are global and available across all regions in the same AWS account
  • Prebuilt policy for :
    • Administrator – All access
    • Power-user – Everything administrator has except IAM management access
    • Read-only – Only view access (accounting purpose)
  • By default, the newly created user has normal deny on all AWS resources. Explicit allow will override normal deny.
  • Cross account roles can be defined. It assumes access of other users granted to another user.
  • The public key can be viewed in the account settings anytime. The private key visible only at the time of creation.  If lost can not be retrieved and need to create fresh key pair to use.

AWS EC2, S3, RDS revision before the CSA exam

Quick revision on topics AWS EC2, S3, RDS before appearing AWS Certified Solutions Architect – Associate exam.

EC2, S3, RDS revision!

This article notes down a few important points about AWS (Amazon Web Services) EC2, S3, and RDS. This can be helpful in last-minute revision before appearing for the AWS Certified Solutions Architect – Associate level certification exam.

This is first part of AWS CSA revision series. Rest of the series listed below :

In this article, we are checking out key points about EC2 (Elastic Compute Cloud), S3 (Simple Storage Service) and RDS (Relational Database Service).

Recommended read : AWS CSA exam preparation guide

Lets get started :

EC2 (Elastic Compute Cloud)

  • Its an AWS service that provides scalable virtual servers in cloud.
  • Pricing models are Reserved instances, On-demand instances, and spot instances.
  • Reserved are less costly since you reserve in advance by paying partial or full.
  • On-demand ones are costliest. But their launching depends on current available capacity in that zone
  • Spot instances are bidding unused instances in the Amazon marketplace (cheapest of all). They are allocated and withdrawn according to your bid price.
  • Max 20 running and 20 shut-down instances can exist per account.
  • AMI is Amazon Machine Image used to deploy/install the pre-configured OS on EC2 instances.
  • Instance store backed volumes are ephemeral storage and lost their data once the instance is off
  • EBS (Elastic Block Store) volumes hold data permanently regardless of instance state.
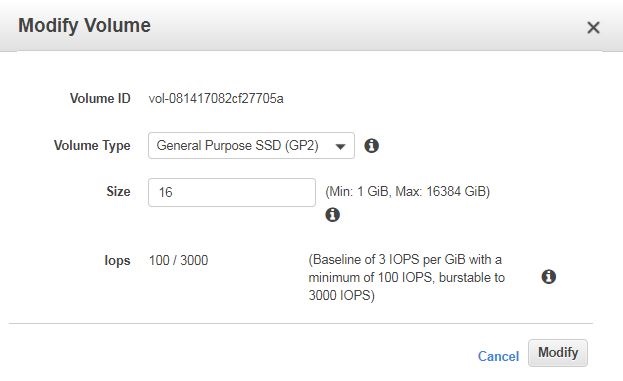
  • EBS volume size: Min 1 GiB, Max 16384 GiB (16 Tib)
  • EBS volume can be attached to 1 instance at a time. It cannot be attached to an instance in a different availability zone.
  • EBS : 3 IOPS per GiB with a minimum of 100 IOPS, burstable to 3000 IOPS
  • EBS Provisioned IOPS. 50:1 ratio to be maintained.
  • RAID 5 and RAID 6 are not recommended for EBS by AWS.
  • IOPS are measures in chucks of 256KB or smaller.
  • EC2-Classic is a deprecated service. Exist in accounts before 24 Dec 2013.
  • The default session timeout for ELB is 60 sec.
  • 5 Elastic IPs per region only.
  • Key pairs are used by EC2 and CloudFront only.
  • SAML URL https://signin.aws.amazon.com/saml
  • Maximum 2 key pairs can be kept per user.
  • Elastic Load Balancer ELB modes :
    • Idle connection timeout
    • Cross zone load balancing
    • Connection draining
    • Proxy protocol
    • Sticky session
    • Health checks
  • Auto Scaling plans :
    • Current instant levels
    • Manual scaling
    • Dynamic scaling
    • Scheduled scaling
  • ELB session timeout is 60 sec.
  • Timeout for connection draining in ELB is 1 sec to 3600 sec. The default is 300 sec.

S3 (Simple Storage Service)

  • objects (files) are stored in buckets. All root folders are buckets and must have a unique name across all AWS infra
  • Unlimited storage and high availability by default
  • 99.999999999% (Eleven 9’s) durability and 99.99% availability for data stored on S3
  • User can enable AES-256 encryption for data at rest
  • Versioning can be enabled but can not be disabled. It can only be suspended then.
  • Life cycle policies can be defined for deletion or archival.
  • The glacier is a low-cost storage option for archiving data. Data in and out of Glacier takes hours or days.
  • Glacier costs 1 cent / 1 GB for a year.
  • Object size : min 0 bytes, max 5 TB
  • Object more than 100MB must use the multipart upload function
  • All regions support read after write consistency for PUTS (new object) and eventual consistency for PUTS (overwrite) & DELETE.
  • The object always stays within the region and synced across all availability zones.
  • The S3 infrequent access (S3-IA) storage class has object durability of 99.999999999% and availability of 99.90%
  • Max object size in a single put is 5GB.

RDS (Relation Database Service)

  • Its fully managed database service in the cloud.
  • Supported databases: Oracle, MySQL, PostgreSQL, MS SQL, Aurora (Amazon homegrown SQL DB)
  • Scale underlying hardware automatically
  • Support read replicas of SQL based DB
  • Disk space : min 5GB, max 3TB
  • Default database port: 3306
  • RDS backup retention policy : 0 days min (no backup) to 35 days max.

DynamoDB

  • Dynamodb supports in-place atomic updates
  • Dynamodb defaults in the US west Oregon region.
  • Max 1MB of data can be retrieved in the single query operation.
  •  

AWS cloud terminology

Understand AWS cloud terminology of 71 services! Get acquainted with terms used in the AWS world to start with your AWS cloud career!

AWS Cloud terminology

AWS i.e. Amazon Web Services cloud platform providing list of web services on pay per use basis. It’s one of the famous cloud platforms to date. Due to flexibility, availability, elasticity, scalability, and no-maintenance, many corporations are moving to the cloud.  Since many companies using these services, it becomes necessary that sysadmin or DevOps should be aware of AWS.

This article aims at listing services provided by AWS and explaining the terminology used in the AWS world.

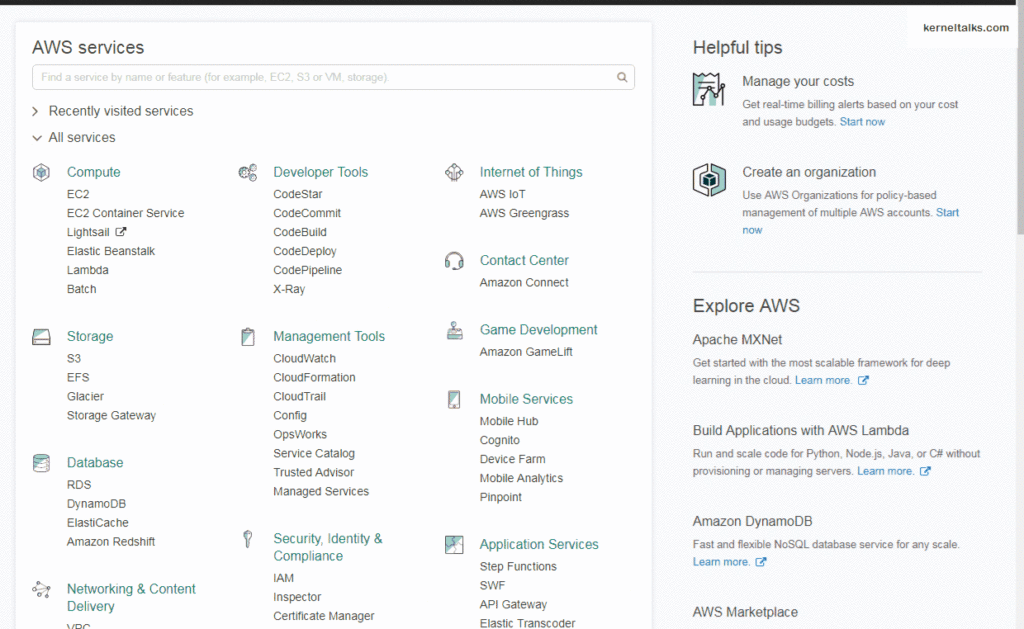
As of today, AWS offers a total of 71 services which are grouped together in 17 groups as below :

Compute

It’s a cloud computing means virtual server provisioning. This group provides the below services.

  1. EC2: EC2 stands for Elastic Compute Cloud. This service provides you scalable virtual machines per your requirement.
  2. EC2 container service: Its high performance, highly scalable which allows running services on EC2 clustered environment
  3. Lightsail: This service enables the user to launch and manage virtual servers (EC2) very easily.
  4. Elastic Beanstalk: This service manages capacity provisioning, load balancing, scaling, health monitoring of your application automatically thus reducing your management load.
  5. Lambda: It allows you to run your code only when needed without managing servers for it.
  6. Batch: It enables users to run computing workloads (batches) in a customized managed way.

Storage

It’s cloud storage i.e. cloud storage facility provided by Amazon. This group includes :

  1. S3: S3 stands for Simple Storage Service (3 times S). This provides you online storage to store/retrieve any data at any time, from anywhere.
  2. EFS: EFS stands for Elastic File System. It’s online storage that can be used with EC2 servers.
  3. Glacier: Its a low cost/slow performance data storage solution mainly aimed at archives or long term backups.
  4. Storage Gateway: Its interface which connects your on-premise applications (hosted outside AWS) with AWS storage.

Database

AWS also offers to host databases on their Infra so that clients can benefit from cutting edge tech Amazon have for faster/efficient/secured data processing. This group includes :

  1. RDS: RDS stands for Relational Database Service. Helps to set up, operate, manage a relational database on cloud.
  2. DynamoDB: Its NoSQL database providing fast processing and high scalability.
  3. ElastiCache: It’s a way to manage in-memory cache for your web application to run them faster!
  4. Redshift: It’s a huge (petabyte-size) fully scalable, data warehouse service in the cloud.

Networking & Content Delivery

As AWS provides a cloud EC2 server, its corollary that networking will be in the picture too. Content delivery is used to serve files to users from their geographically nearest location. This is pretty much famous for speeding up websites nowadays.

  1. VPC: VPC stands for Virtual Private Cloud. It’s your very own virtual network dedicated to your AWS account.
  2. CloudFront: Its content delivery network by AWS.
  3. Direct Connect: Its a network way of connecting your datacenter/premises with AWS to increase throughput, reduce network cost, and avoid connectivity issues that may arise due to internet-based connectivity.
  4. Route 53: Its a cloud domain name system DNS web service.

Migration

Its a set of services to help you migrate from on-premises services to AWS. It includes :

  1. Application Discovery Service: A service dedicated to analyzing your servers, network, application to help/speed up the migration.
  2. DMS: DMS stands for Database Migration Service. It is used to migrate your data from on-premises DB to RDS or DB hosted on EC2.
  3. Server Migration: Also called SMS (Server Migration Service) is an agentless service that moves your workloads from on-premises to AWS.
  4. Snowball:  Intended to use when you want to transfer huge amount of data in/out of AWS using physical storage appliances (rather than internet/network based transfers)

Developer Tools

As the name suggests, its a group of services helping developers to code easy/better way on the cloud.

  1. CodeCommit: Its a secure, scalable, managed source control service to host code repositories.
  2. CodeBuild: Code builder on the cloud. Executes tests codes and build software packages for deployments.
  3. CodeDeploy: Deployment service to automate application deployments on AWS servers or on-premises.
  4. CodePipeline: This deployment service enables coders to visualize their application before release.
  5. X-Ray: Analyse applications with event calls.

Management Tools

Group of services which helps you manage your web services in AWS cloud.

  1. CloudWatch: Monitoring service to monitor your AWS resources or applications.
  2. CloudFormation: Infrastructure as a code! It’s a way of managing AWS relative infra in a collective and orderly manner.
  3. CloudTrail: Audit & compliance tool for AWS account.
  4. Config: AWS resource inventory, configuration history, and configuration change notifications to enable security and governance.
  5. OpsWorks: Automation to configure, deploy EC2 or on-premises compute
  6. Service Catalog: Create and manage IT service catalogs which are approved to use in your/company account
  7. Trusted Advisor: Its AWS AI helping you to have better, money-saving AWS infra by inspecting your AWS Infra.
  8. Managed Service: Provides ongoing infra management

Security, Identity & compliance

Important group of AWS services helping you secure your AWS space.

  1. IAM: IAM stands for Identity and Access Management. Controls user access to your AWS resources and services.
  2. Inspector: Automated security assessment helping you to secure and compliance your apps on AWS.
  3. Certificate Manager: Provision, manage, and deploy SSL/TLS certificates for AWS applications.
  4. Directory Service: Its Microsoft Active Directory for AWS.
  5. WAF & Shield: WAF stands for Web Application Firewall. Monitors and controls access to your content on CloudFront or Load balancer.
  6. Compliance Reports: Compliance reporting of your AWS infra space to make sure your apps and the infra are compliant with your policies.

Analytics

Data analytics of your AWS space to help you see, plan, act on happenings in your account.

  1. Athena: Its a SQL based query service to analyze S3 stored data.
  2. EMR: EMR stands for Elastic Map Reduce. Service for big data processing and analysis.
  3. CloudSearch: Search capability of AWS within application and services.
  4. Elasticsearch Service: To create a domain and deploy, operate, and scale Elasticsearch clusters in the AWS Cloud
  5. Kinesis: Stream’s large amounts of data in real-time.
  6. Data Pipeline: Helps to move data between different AWS services.
  7. QuickSight: Collect, analyze, and present insight into business data on AWS.

Artificial Intelligence

AI in AWS!

  1. Lex: Helps to build conversational interfaces in an application using voice and text.
  2. Polly: Its a text to speech service.
  3. Rekognition: Gives you the ability to add image analysis to applications
  4. Machine Learning: It has algorithms to learn patterns in your data.

Internet of Things

This service enables AWS highly available on different devices.

  1. AWS IoT: It lets connected hardware devices to interact with AWS applications.

Game Development

As name suggest this services aims at Game Development.

  1. Amazon GameLift: This service aims for deploying, managing dedicated gaming servers for session-based multiplayer games.

Mobile Services

Group of services mainly aimed at handheld devices

  1. Mobile Hub: Helps you to create mobile app backend features and integrate them into mobile apps.
  2. Cognito: Controls mobile user’s authentication and access to AWS on internet-connected devices.
  3. Device Farm: Mobile app testing service enables you to test apps across android, iOS on real phones hosted by AWS.
  4. Mobile Analytics: Measure, track, and analyze mobile app data on AWS.
  5. Pinpoint: Targeted push notification and mobile engagements.

Application Services

Its a group of services which can be used with your applications in AWS.

  1. Step Functions: Define and use various functions in your applications
  2. SWF: SWF stands for Simple Workflow Service. Its cloud workflow management helps developers to co-ordinate and contribute at different stages of the application life cycle.
  3. API Gateway: Helps developers to create, manage, host APIs
  4. Elastic Transcoder: Helps developers to converts media files to play of various devices.

Messaging

Notification and messaging services in AWS

  1. SQS: SQS stands for Simple Queue Service. Fully managed messaging queue service to communicate between services and apps in AWS.
  2. SNS: SNS stands for Simple Notification Service. Push notification service for AWS users to alert them about their services in AWS space.
  3. SES: SES stands for Simple Email Service. Its cost-effective email service from AWS for its own customers.

Business Productivity

Group of services to help boost your business productivity.

  1. WorkDocs: Collaborative file sharing, storing, and editing service.
  2. WorkMail: Secured business mail, calendar service
  3. Amazon Chime: Online business meetings!

Desktop & App Streaming

Its desktop app streaming over cloud.

  1. WorkSpaces: Fully managed, secure desktop computing service on the cloud
  2. AppStream 2.0: Stream desktop applications from the cloud.

How to open port on AWS EC2 Linux server

Small tutorial with screenshots that show how to open port on the AWS EC2 Linux server. This will help you to manage port-specific services on the EC2 server.

Open port on AWS EC2 Linux

AWS i.e. Amazon Web Services is no new term for the IT world. It’s a cloud services platform offered by Amazon. Under its Free tier account, it offers you limited services free of cost for one year. This is one of the best places to try out new technologies without spending much on the financial front.

AWS offers server computing as one of their services and they call them EC (Elastic Computing). Under this, we can build our Linux servers. We have already seen how to set up a Linux server on AWS free of cost.

By default, all Linux servers build under EC2 has post 22 i.e. SSH service port (inbound from all IP) is open only. So, if you are hosting any port-specific service then the relative port needs to be open on the AWS firewall for your server.

Also, it has port 1 to 65535 are open too (outbound for all traffic). If you want to change this you can use the same below process for editing outbound rules too.

Setting up a firewall rule on AWS for your server is an easy job. You will be able to open ports in seconds for your server. I will walk you through the procedure with screenshots to open a port for the EC2 server.

Step 1

Log in to the AWS account and navigate to the EC2 management console. Go to Security Groups under Network & Security menu as highlighted below :

AWS EC2 management console

Step 2

On Security, Groups screen select your EC2 server and under Actions menu select Edit inbound rules

AWS inbound rules menu

Step 3

Now you will be presented with an inbound rule window. You can add/edit/delete inbound rules here. There are several protocols like HTTP, nfs, etc listed in the drop-down menu which auto-populate ports for you. If you have customer service and port you can define it too.

AWS add inbound rule

For example, if you want to open port 80 then you have to select :

  • Type: HTTP
  • Protocol: TCP
  • Port range: 80
  • Source: Anywhere (Open port 80 for all incoming req from any IP (0.0.0.0/0),  My IP: then it will auto-populate your current public internet IP

Step 4

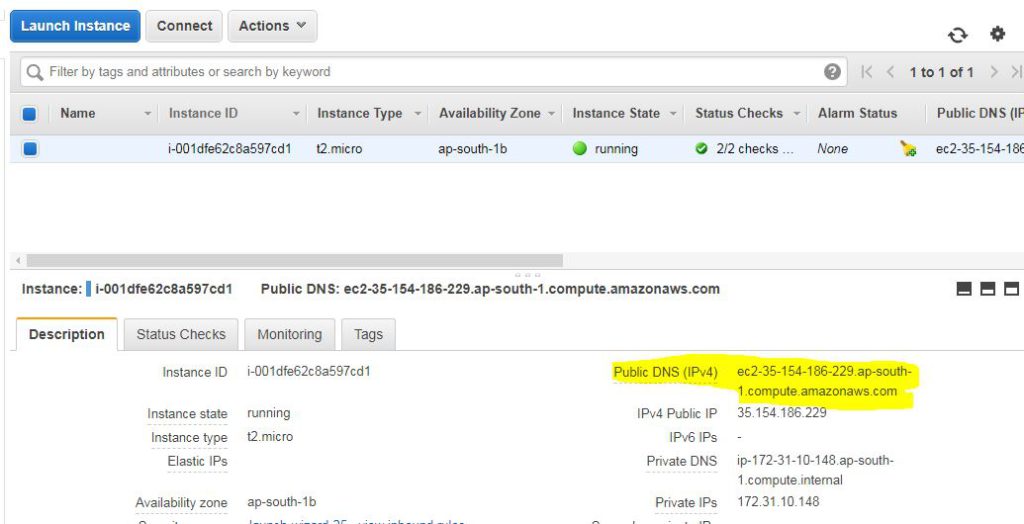
That’s it. Once you save these settings your server inbound port 80 is open! you can check by telneting to port 80 for your EC2 server public DNS (can be found it EC2 server details)

You can also check it on websites like ping.eu.

The same way outbound rules can be edited too! These changes are active on the fly and don’t need any downtime.

How to install EC2 Linux server in AWS with screenshots

Learn how to install the EC2 Linux server of your favorite distro on the Amazon Web Services cloud platform. Free Linux server for learning and practicing. 

Amazon Web Services AWS is one of the cloud platforms which offers various computing facilities online. For a free tier account, there are enough services offered for a normal user who aims for testing or learning new technologies without spending much. You can sign up for a free account (12 months free) here which will require your valid mobile number and credit card information for validation.

In this post, we will be using AWS to install the Linux server which we can use for practice/ hand-on experience at home. One of the other alternatives is to install Vmware on your desktop/laptop and then install Linux in its virtual machine. But this way requires a good hardware configuration of your laptop/desktop. Hosting your Linux on cloud is much easy and it’s not costing you anything for low usage!

AWS offers below a list of distros to install on its EC2 (server computing module) platform.

  • Redhat
  • Cent OS
  • Debian
  • Fedora
  • Gentoo
  • OpenSuse
  • Suse Linux
  • Ubuntu
  • Amazon Linux

You can have a hand on to all these distros within minutes after signing up for your account!  Of course, you will be having root administrator access on these systems! Let’s walk through steps to get your Linux server ready in minutes on AWS.

Step 1.

Login to AWS account and from landing page select “Launch a virtual machine” under ‘Build a solution’ screen.

Step 2.

You will be presented with the ‘Quick Launch EC2 Instance’ screen. Here you will be able to launch a wizard to get your task done fast or you can go through Advanced selections to decide your final virtual server config. We will be going with a normal wizard. Click the “Get Started” button here.

Step 3.

Now we will walk through wizard for creating our Linux virtual server.

Name your EC2 instance :

Your EC2 linux virtual server name of your choice.

Select your operating system. We are selecting RedHat here.

Select an instance type.

This is the type of hardware config you will be needing. For free account, you will be able to select those instances only which is tagged with “Free tier eligible”. Here we are selecting default t2.micro instance which has Single core CPU, 1 GB RAM, and 8GB of HDD.

Create a key pair.

This is an important screen. Here you will be given one Private key to download. You will require this key to authenticate yourself while logging into this EC2 Linux server when ready. Give the name of your choice and download the key file and keep it safe.

Create this instance.

Finally hit create button and your server will be ready in 2 minutes. You will see installing screen.

Once complete, click EC2 console link and you will be presented with list of servers under your account.

Step 4.

You can see below the EC2 screen with your server details like instance state, zone, DNS, etc.

Now to connect to this server from your laptop/desktop, you need to use key pair as authentication. Download putty.exe and puttygen.exe from here.

Open puttygen.exe and load your private key which you have downloaded from AWS console in step 2.

Once, successfully loaded you need to click the “Save public key” button and save the key on your desktop/laptop.

Now open putty.exe. Set your saved key file from puttygen (in the above task) as an SSH authentication. In left-hand side pane, expand SSH then select Auth and on the right-hand side, you will be able to browse your file.

Now your putty.exe is ready to connect with your AWS Linux server. Now head back to EC2 console and copy your server’s public DNS.

Use this it, in putty to connect. And you will be able to connect to the server. Once prompted for username use username from the below table as per your distro (official AMI). You won’t be prompted for a password. Your authentication will be done via key pair you configured in putty settings.

Default ssh usernames for famous Linux in EC2

Linux Distro
Username
Ubuntuubuntu
Debianadmin
Fedorafedora
CentOScentos
RHEL 6.4 & Laterec2-user
RHEL 6.3 & previousroot
SUSEroot
login as: ec2-user
Authenticating with public key "imported-openssh-key"
[ec2-user@ip-172-31-23-115 ~] $ sudo su -
[root@ip-172-31-23-115 ~] # id 
uid=0(root) gid=0(root) groups=0(root) context=unconfined_u:unconfined_r:unconfined_t:s0-s0:c0.c1023  

Once logged in, use sudo su - command and you will be in root account! That’s it, you have an EC2 Linux server with root account in few minutes!

You can install any distro listed above in these instances. Make sure you are not expiring your free usage according to AWS free tier policy otherwise you will be billed on your card. Practice, learn, improve! Have a happy shell!!