

How to create custom channels using Content Lifecycle Management in SUSE Manager


In this article, we will discuss Content Lifecycle Management in SUSE Manager for controlling patching in your infrastructure.
What is Content Lifecycle Management in SUSE Manager
Content Lifecycle management is managing how patches flow through your infra in a staged manner. In ideal infra, the latest patches will always be applied on development servers. If everything is good there then those patches will be applied to QA servers and lastly to production servers. This enables sysadmins to catch issues if any and hence preventing patching of the prod system which may create downtime of live environments.
SUSE Manager gives you this control via the content lifecycle. In this, you create custom channels in SUSE Manager for example dev, QA and prod. Then you register your systems to those channels according to their criticality. Now whenever channels get the new patches it will be available to respective systems (registered to those channels) to install. So if you control channels you control the patch availability to systems.
In content lifecycle management, SUSE manager enables you to push patches to channels manually. Like on first deploy all latest patches will be available to dev channels and hence dev systems. At this stage, if you run update commands (zypper up, yum update) they will show the latest patches only on dev servers. QA and prod servers won’t show any new patches.
Once dev is found to be ok after updates, you can go and manually promote patches to QA so now QA channels will have new latest patches and hence QA servers. Finally the same for prod. This is how you control and hence manage the patch lifecycle using SUSE Manager.
If it found confusing to you then go through the below process and screenshots, it will be more clear for you.
How to create custom channels in SUSE Manager
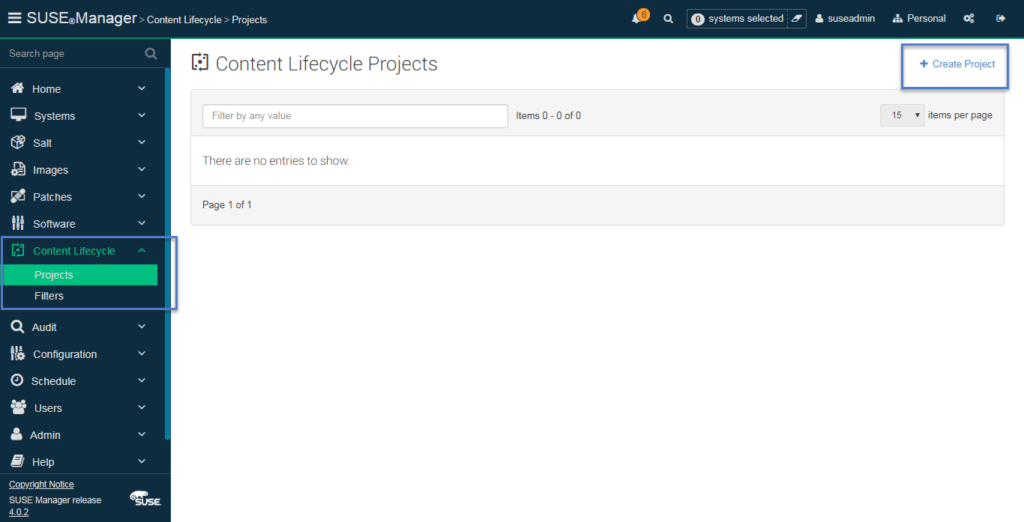
Now we will start with Content Lifecycle Management in SUSE Manager we setup. Log in to SUSE Manager and navigate to Content Lifecycle > Projects and click Create Project button.

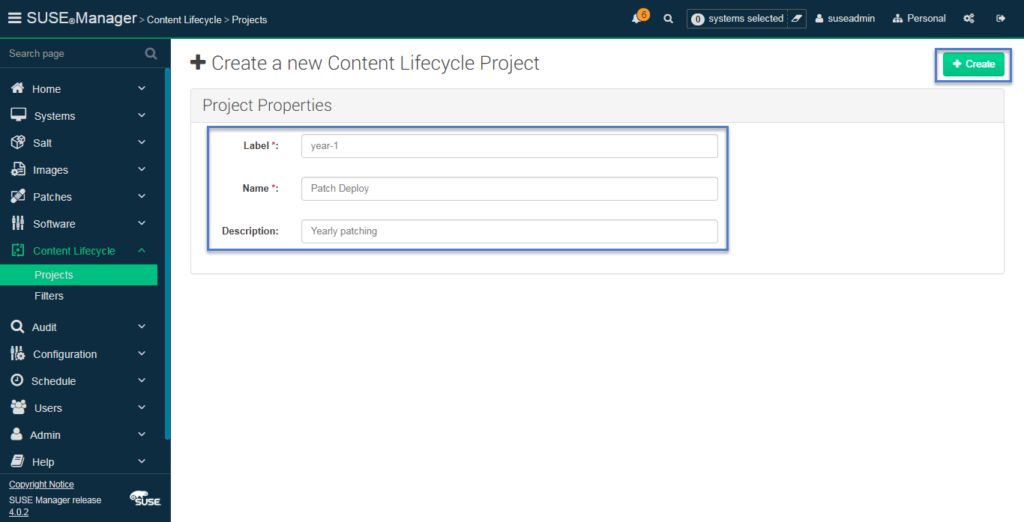
You will be presented with the below page: Fill in all relevant details and hit Create button. You can create a project for each flavor of Linux you have in your infra. For example, you can create projects for Suse Linux 11, Suse Linux 12, Suse Linux 12 sp 3, etc. So that you can select respective source channels in each of these projects and keep your SUSE Manager organized.
In our SUSE Manager, I synced only one product channels i.e. of Suse Linux 15 so I simply keyed in patch deploy as a name.
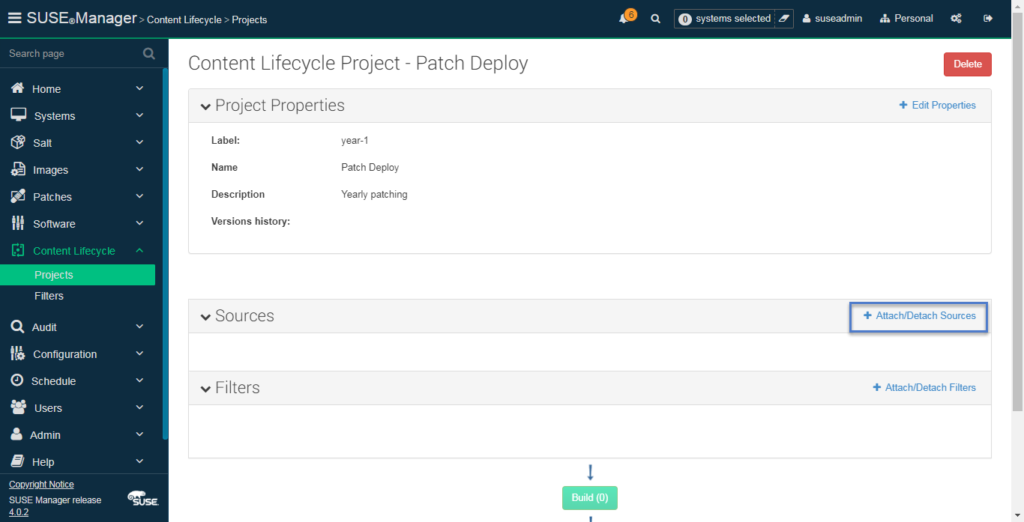
Once the project is created, you will be prompted to add source channels to it. Means from those channels packages, updates will be sourced (from SUSE) and distributed to your project channels.
These source channels are the ones you synced during initial setup of SUSE Manager. Read how to sync SUSE product channels in SUSE Manager for more details. So you need to select channels from these ones according to project requirement. Like for project Suse Linux 11 select only source channels of Suse Linux 11 and so on.
Click Attach/Detach sources to do that.
Now you can see in the below screenshot that only Suse Linux 15 channels are available for me to select since I synced only the Suse Linux product channel in the initial setup. You will see here all the products which you have synced.
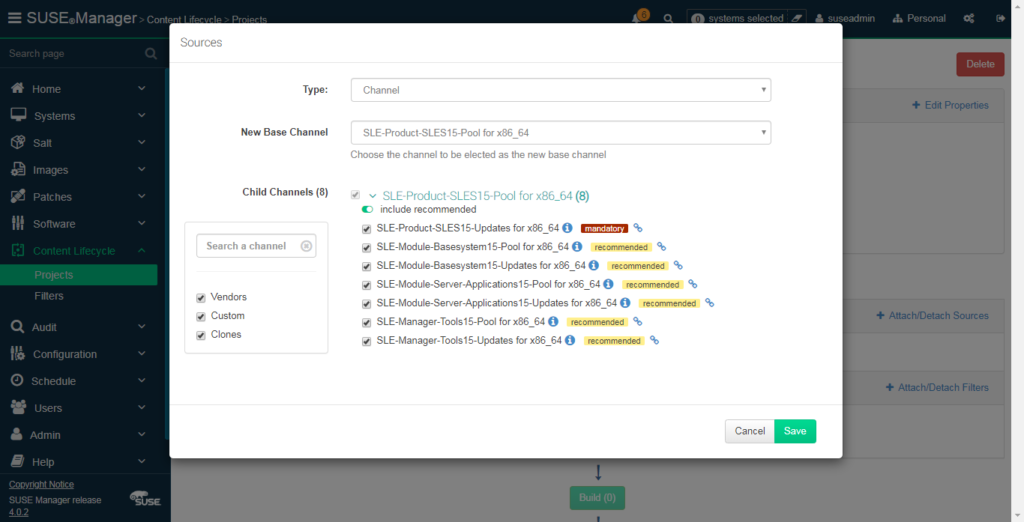
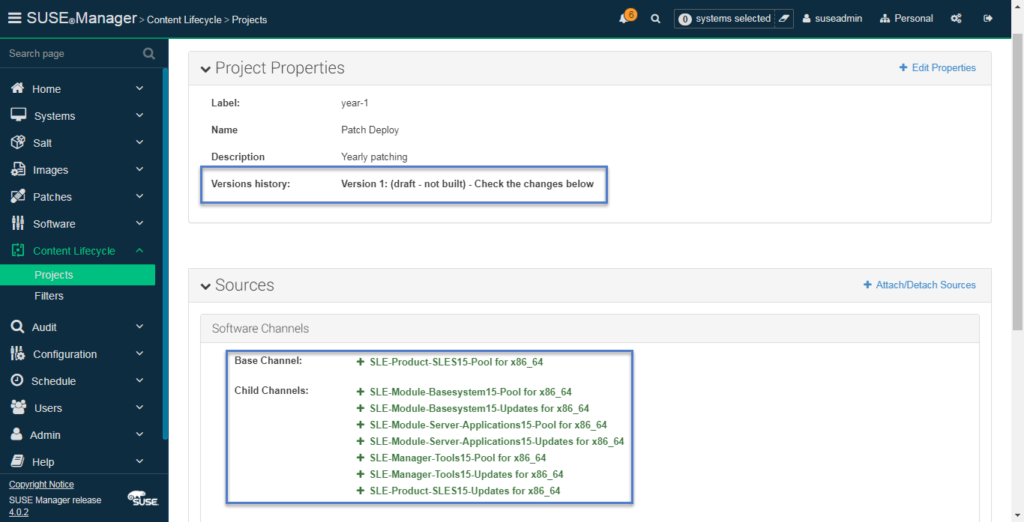
Once selected and clicked save you will see sources are updated with your selected channel list. Also, notice that version history details under Project properties are set to version 1 (draft - Not built)
Now its time to add your destination! This means to create environments. As I explained earlier here we will flow patches from dev to QA to prod. So here it is where you define this hierarchy. In the interest of time, we will follow from dev to prod only.
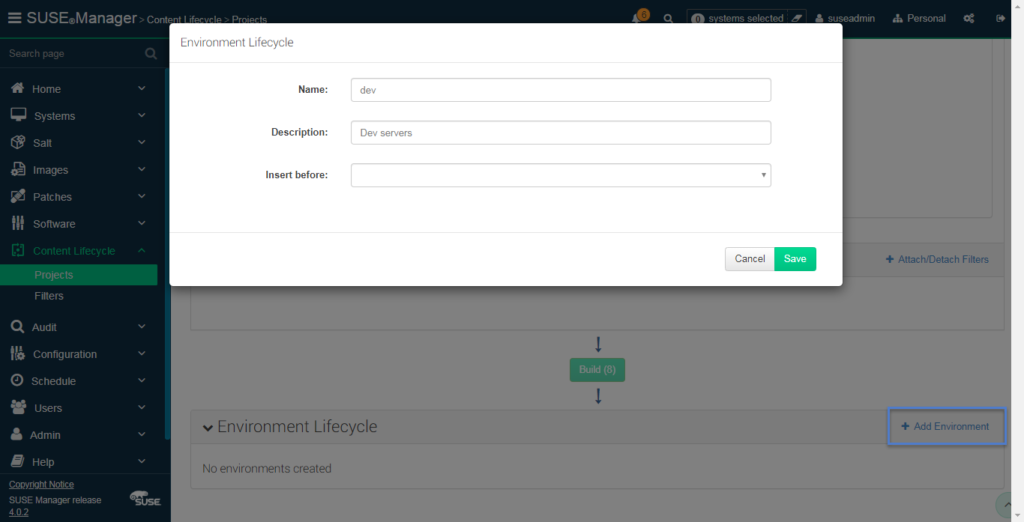
So we will create the environment as dev and prod as below by clicking Add Environment button –
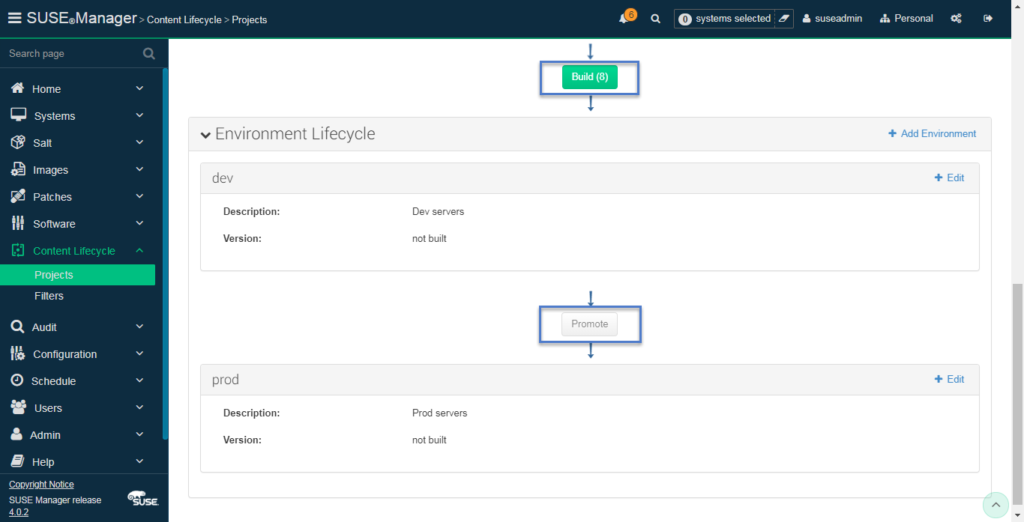
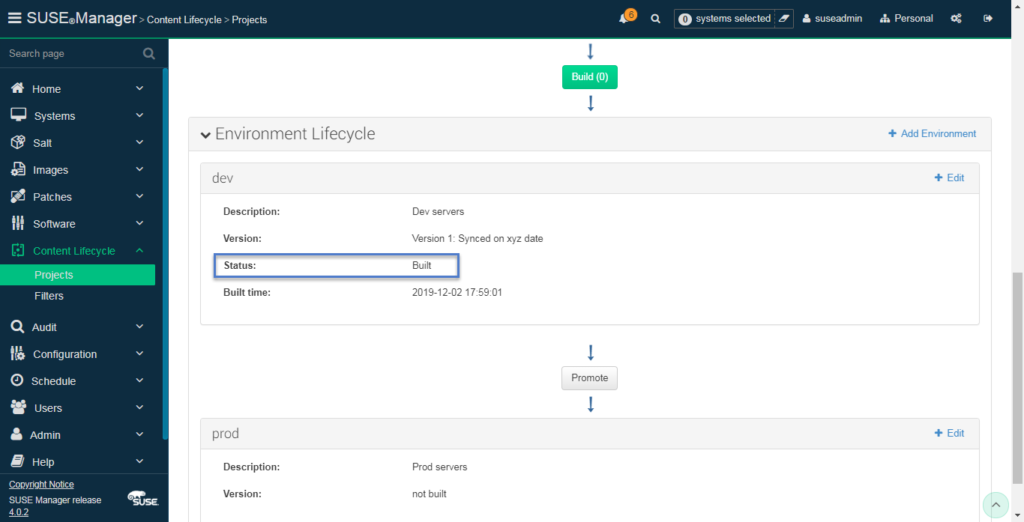
Once done you can see as below, dev and prod environments and buttons Build and Promote. Whereas version is marked as not built for all of them.
So you have to start patch flow now. As of now, all the latest patches are in source channels. Once you click Build button below they will be made available to the dev environment. Basically it will create child channels for dev where all these patches will be made available from source channel.
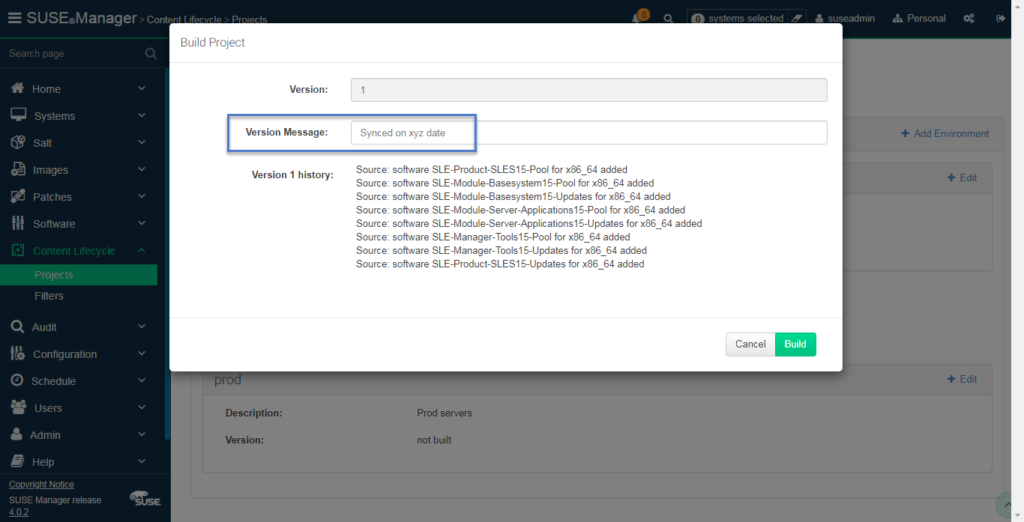
Once you click Build button you will see below version keeper window where you can add a version message note so that it will be easy to remember the purpose of this channel syncs or date/time of sync etc.
It will take time depending on the number of channels, number of patches within, size of them and of course your internet bandwidth! As Don Vosburg from SUSE commented below – ” This process is database intensive – so having the Postgres database on SSD helps speed it up a bit! “
Patches will be built in new custom channels and only then you will be able to Promote them to the next stage.
What do you mean by promoting patches?
So once build is completed, the latest patches are now available to dev environment from source channels via custom channels. But still, the next environment i.e. prod still don’t have them. At this stage, you can install/test them on dev servers and isolate prod servers from them in case of any issues. If everything is working fine after installing/testing then you can promote them to the next environment (here its prod) and then all latest patches will be made available to the prod environment via custom channels.
You can then click Promote button and the same way they will be synced to the next environment.
View custom channels in SUSE Manager
Now we built and promoted; dev and prod environments. I said they will have now custom channels through which the latest patches will be made available to respective environments. So its time to check these new custom channels created by content lifecycle management.
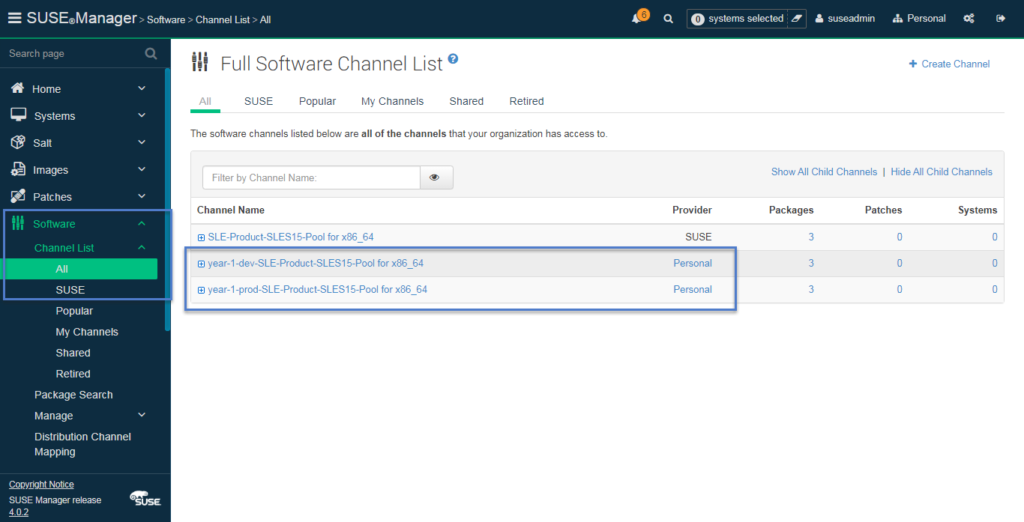
Navigate to Software > Channel List > All
You can see below dev and prod channel of project year-1 listed there. Where the provider is Personal. Remember, we added our organization name as Personal in our initial SUSE Manager setup.
That’s all for this article! We created new custom channels in SUSE Manager via Content Lifecycle Management feature. Using this feature we able to control the latest patches availability to different environments.
The next step is to create Activation Keys for these custom channels which can be used to register client systems to these channels in your infra.