

Step by step setup of SUSE Manager Server 4.0 configuration

In our previous post of SUSE Manager server installation, we walked you through how to install SUSE Manager step by step including screenshots. In this article, we will walk you through the SUSE Manager 4.0 configuration setup.
Considering you have the system installed with SUSE Manager package you can proceed to start SUSE Manager setup by running below command –
kerneltalks:~ # yast2 susemanager_setup
If you see an error saying No such client module susemanger_setup then you must not have susemanger package installed. Install it using zyapper in susemanager command and you will be able to run above setup command.
Once run, you will be presented with a text-based GUI setup and we will go through it step by step along with screenshots.
Obviously keep in mind you completed the disk space requirements before you start setup. Those are explained in the pre-requisite on the SUSE documentation.
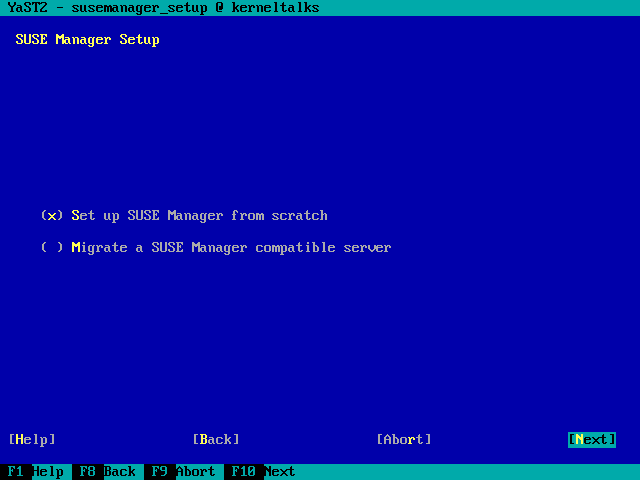
SUSE Manager Setup
The first screen to choose the type of setup which is a pretty obvious choice.

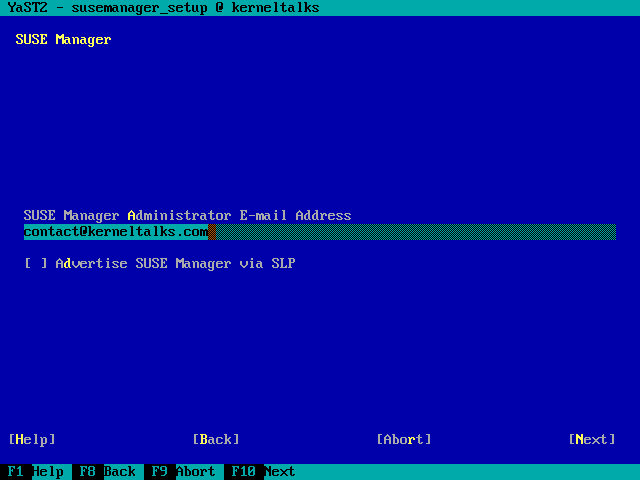
On the second screen, you will be asked to enter the SUSE Manager Administrator email address.
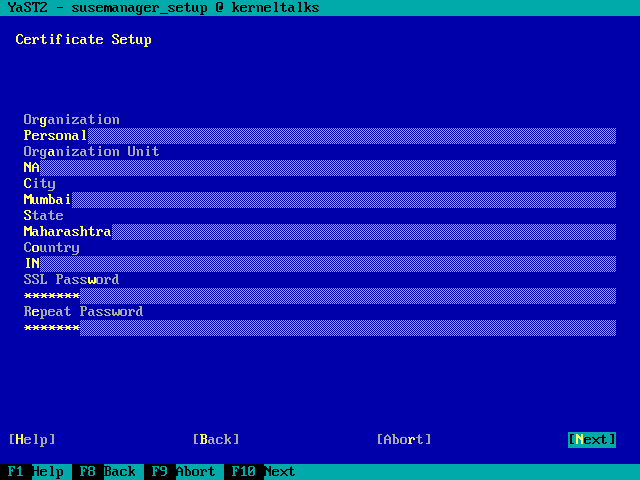
On the next screen, you need to provide details to create an SSL certificate of SUSE Manager.
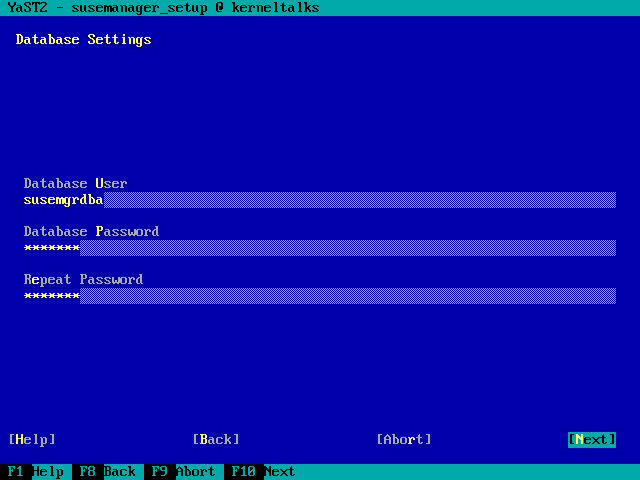
Now it will ask you for database details to be set. You can choose the database user of your choice.
At this stage, all inputs have been collected and setup is ready to complete configurations. It still gives you another chance to modify your responses in answer file and run setup manually later in below window.

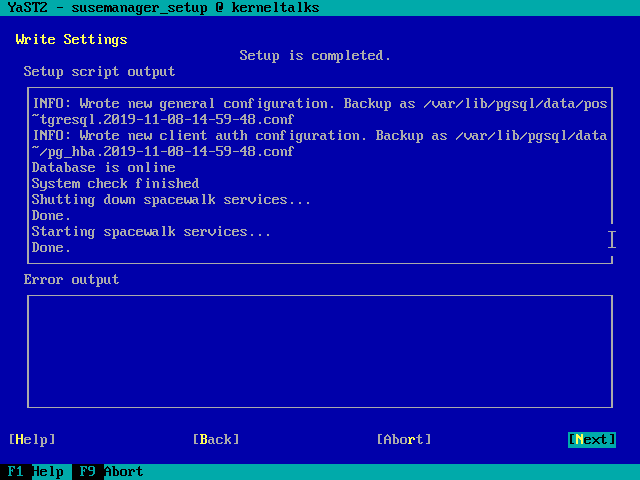
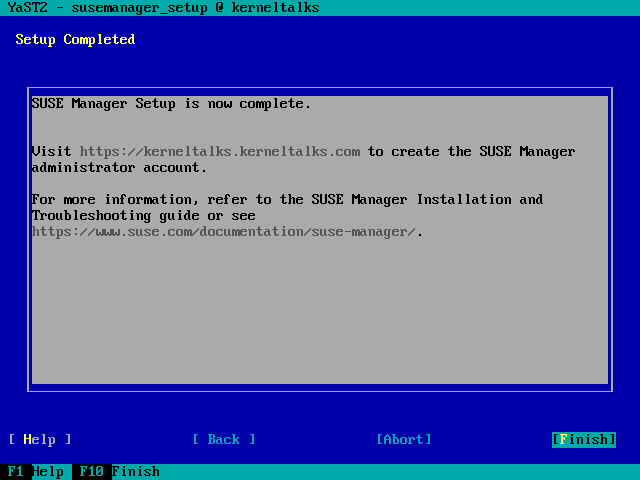
We made the obvious choice and hit the Yes button. Now, it will setup the SUSE manager and show you output as it goes. Finally, the SUSE Manager setup will be completed as below.
Hit Next and you will be shown web URL which can be used to administrator your SUSE Manager along with the instruction to create an account first.
SUSE Manager web console
As given in the last screen of setup, open your browser and head to the URL mentioned. Since I installed in VirtualBox, I used port forwards and opened it on loopback IP –

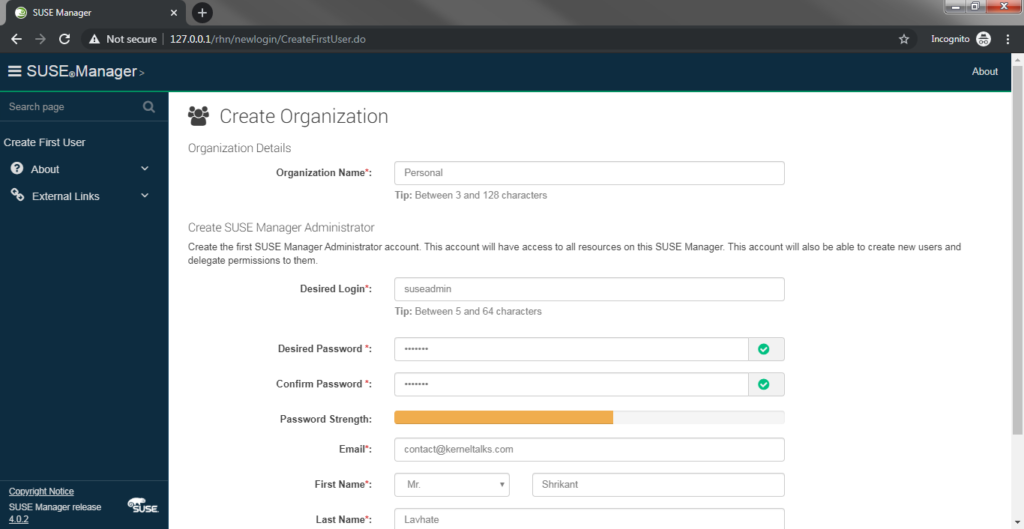
You need to fill in all the details to create your SUSE Administrator user and hit ‘Create Organization‘ button at the end of the page. And you are done! You will see below home page of the SUSE Manager console.
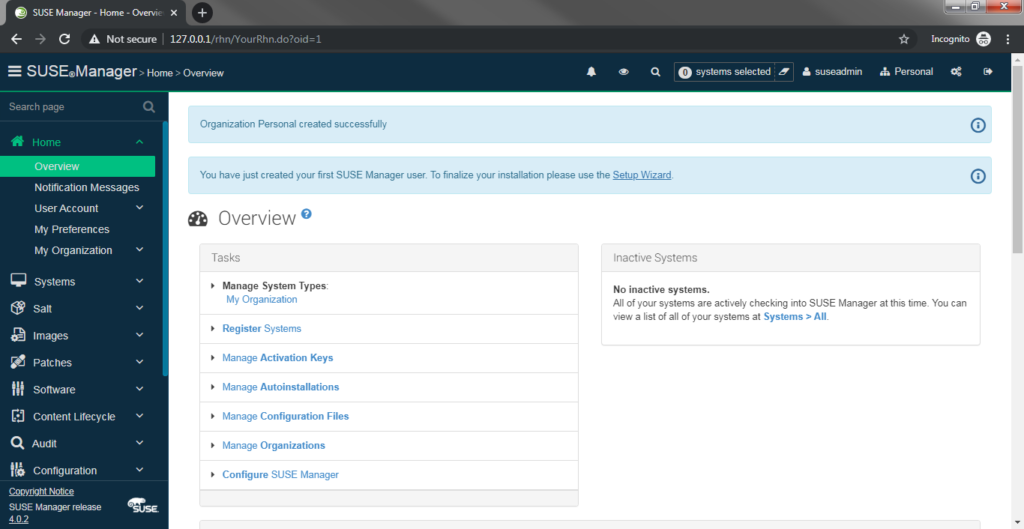
Now your SUSE Manager setup is completed and you have web page console from where you can manage your SUSE Manager.
As very next step after this setup completion is to add subscription details to it and sync product channels so that it can be used in your organization for patching. We have covered it here in how to add product channels in SUSE Manager