Monthly Archives: March 2017

AWS cloud terminology

Understand AWS cloud terminology of 71 services! Get acquainted with terms used in the AWS world to start with your AWS cloud career!

AWS Cloud terminology

AWS i.e. Amazon Web Services cloud platform providing list of web services on pay per use basis. It’s one of the famous cloud platforms to date. Due to flexibility, availability, elasticity, scalability, and no-maintenance, many corporations are moving to the cloud.  Since many companies using these services, it becomes necessary that sysadmin or DevOps should be aware of AWS.

This article aims at listing services provided by AWS and explaining the terminology used in the AWS world.

As of today, AWS offers a total of 71 services which are grouped together in 17 groups as below :

Compute

It’s a cloud computing means virtual server provisioning. This group provides the below services.

  1. EC2: EC2 stands for Elastic Compute Cloud. This service provides you scalable virtual machines per your requirement.
  2. EC2 container service: Its high performance, highly scalable which allows running services on EC2 clustered environment
  3. Lightsail: This service enables the user to launch and manage virtual servers (EC2) very easily.
  4. Elastic Beanstalk: This service manages capacity provisioning, load balancing, scaling, health monitoring of your application automatically thus reducing your management load.
  5. Lambda: It allows you to run your code only when needed without managing servers for it.
  6. Batch: It enables users to run computing workloads (batches) in a customized managed way.

Storage

It’s cloud storage i.e. cloud storage facility provided by Amazon. This group includes :

  1. S3: S3 stands for Simple Storage Service (3 times S). This provides you online storage to store/retrieve any data at any time, from anywhere.
  2. EFS: EFS stands for Elastic File System. It’s online storage that can be used with EC2 servers.
  3. Glacier: Its a low cost/slow performance data storage solution mainly aimed at archives or long term backups.
  4. Storage Gateway: Its interface which connects your on-premise applications (hosted outside AWS) with AWS storage.

Database

AWS also offers to host databases on their Infra so that clients can benefit from cutting edge tech Amazon have for faster/efficient/secured data processing. This group includes :

  1. RDS: RDS stands for Relational Database Service. Helps to set up, operate, manage a relational database on cloud.
  2. DynamoDB: Its NoSQL database providing fast processing and high scalability.
  3. ElastiCache: It’s a way to manage in-memory cache for your web application to run them faster!
  4. Redshift: It’s a huge (petabyte-size) fully scalable, data warehouse service in the cloud.

Networking & Content Delivery

As AWS provides a cloud EC2 server, its corollary that networking will be in the picture too. Content delivery is used to serve files to users from their geographically nearest location. This is pretty much famous for speeding up websites nowadays.

  1. VPC: VPC stands for Virtual Private Cloud. It’s your very own virtual network dedicated to your AWS account.
  2. CloudFront: Its content delivery network by AWS.
  3. Direct Connect: Its a network way of connecting your datacenter/premises with AWS to increase throughput, reduce network cost, and avoid connectivity issues that may arise due to internet-based connectivity.
  4. Route 53: Its a cloud domain name system DNS web service.

Migration

Its a set of services to help you migrate from on-premises services to AWS. It includes :

  1. Application Discovery Service: A service dedicated to analyzing your servers, network, application to help/speed up the migration.
  2. DMS: DMS stands for Database Migration Service. It is used to migrate your data from on-premises DB to RDS or DB hosted on EC2.
  3. Server Migration: Also called SMS (Server Migration Service) is an agentless service that moves your workloads from on-premises to AWS.
  4. Snowball:  Intended to use when you want to transfer huge amount of data in/out of AWS using physical storage appliances (rather than internet/network based transfers)

Developer Tools

As the name suggests, its a group of services helping developers to code easy/better way on the cloud.

  1. CodeCommit: Its a secure, scalable, managed source control service to host code repositories.
  2. CodeBuild: Code builder on the cloud. Executes tests codes and build software packages for deployments.
  3. CodeDeploy: Deployment service to automate application deployments on AWS servers or on-premises.
  4. CodePipeline: This deployment service enables coders to visualize their application before release.
  5. X-Ray: Analyse applications with event calls.

Management Tools

Group of services which helps you manage your web services in AWS cloud.

  1. CloudWatch: Monitoring service to monitor your AWS resources or applications.
  2. CloudFormation: Infrastructure as a code! It’s a way of managing AWS relative infra in a collective and orderly manner.
  3. CloudTrail: Audit & compliance tool for AWS account.
  4. Config: AWS resource inventory, configuration history, and configuration change notifications to enable security and governance.
  5. OpsWorks: Automation to configure, deploy EC2 or on-premises compute
  6. Service Catalog: Create and manage IT service catalogs which are approved to use in your/company account
  7. Trusted Advisor: Its AWS AI helping you to have better, money-saving AWS infra by inspecting your AWS Infra.
  8. Managed Service: Provides ongoing infra management

Security, Identity & compliance

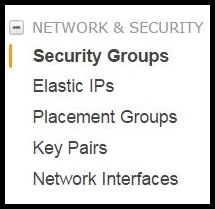
Important group of AWS services helping you secure your AWS space.

  1. IAM: IAM stands for Identity and Access Management. Controls user access to your AWS resources and services.
  2. Inspector: Automated security assessment helping you to secure and compliance your apps on AWS.
  3. Certificate Manager: Provision, manage, and deploy SSL/TLS certificates for AWS applications.
  4. Directory Service: Its Microsoft Active Directory for AWS.
  5. WAF & Shield: WAF stands for Web Application Firewall. Monitors and controls access to your content on CloudFront or Load balancer.
  6. Compliance Reports: Compliance reporting of your AWS infra space to make sure your apps and the infra are compliant with your policies.

Analytics

Data analytics of your AWS space to help you see, plan, act on happenings in your account.

  1. Athena: Its a SQL based query service to analyze S3 stored data.
  2. EMR: EMR stands for Elastic Map Reduce. Service for big data processing and analysis.
  3. CloudSearch: Search capability of AWS within application and services.
  4. Elasticsearch Service: To create a domain and deploy, operate, and scale Elasticsearch clusters in the AWS Cloud
  5. Kinesis: Stream’s large amounts of data in real-time.
  6. Data Pipeline: Helps to move data between different AWS services.
  7. QuickSight: Collect, analyze, and present insight into business data on AWS.

Artificial Intelligence

AI in AWS!

  1. Lex: Helps to build conversational interfaces in an application using voice and text.
  2. Polly: Its a text to speech service.
  3. Rekognition: Gives you the ability to add image analysis to applications
  4. Machine Learning: It has algorithms to learn patterns in your data.

Internet of Things

This service enables AWS highly available on different devices.

  1. AWS IoT: It lets connected hardware devices to interact with AWS applications.

Game Development

As name suggest this services aims at Game Development.

  1. Amazon GameLift: This service aims for deploying, managing dedicated gaming servers for session-based multiplayer games.

Mobile Services

Group of services mainly aimed at handheld devices

  1. Mobile Hub: Helps you to create mobile app backend features and integrate them into mobile apps.
  2. Cognito: Controls mobile user’s authentication and access to AWS on internet-connected devices.
  3. Device Farm: Mobile app testing service enables you to test apps across android, iOS on real phones hosted by AWS.
  4. Mobile Analytics: Measure, track, and analyze mobile app data on AWS.
  5. Pinpoint: Targeted push notification and mobile engagements.

Application Services

Its a group of services which can be used with your applications in AWS.

  1. Step Functions: Define and use various functions in your applications
  2. SWF: SWF stands for Simple Workflow Service. Its cloud workflow management helps developers to co-ordinate and contribute at different stages of the application life cycle.
  3. API Gateway: Helps developers to create, manage, host APIs
  4. Elastic Transcoder: Helps developers to converts media files to play of various devices.

Messaging

Notification and messaging services in AWS

  1. SQS: SQS stands for Simple Queue Service. Fully managed messaging queue service to communicate between services and apps in AWS.
  2. SNS: SNS stands for Simple Notification Service. Push notification service for AWS users to alert them about their services in AWS space.
  3. SES: SES stands for Simple Email Service. Its cost-effective email service from AWS for its own customers.

Business Productivity

Group of services to help boost your business productivity.

  1. WorkDocs: Collaborative file sharing, storing, and editing service.
  2. WorkMail: Secured business mail, calendar service
  3. Amazon Chime: Online business meetings!

Desktop & App Streaming

Its desktop app streaming over cloud.

  1. WorkSpaces: Fully managed, secure desktop computing service on the cloud
  2. AppStream 2.0: Stream desktop applications from the cloud.

How to resolve the fatal error: curses.h: No such file or directory

Learn how to get rid of the fatal error: curses.h: No such file or directory during utility or third-party package installations in Linux.

Solution for curses.h: No such file or directory

Many times during package/utility installations you must have come across an error like one below :

fatal error: curses.h: No such file or directory

Recently I faced it while installing cmatrix from source code. I saw an error like one below :

# make
gcc -DHAVE_CONFIG_H -I. -I. -I.     -g -O2 -Wall -Wno-comment -c cmatrix.c
cmatrix.c:37:20: fatal error: curses.h: No such file or directory
 #include <curses.h>
                    ^
compilation terminated.
make: *** [cmatrix.o] Error 1

After troubleshooting I came up with a solution and able to pass through make stage. I am sharing it here which might be useful for you.

curses.h header file belongs to ncurses module! You need to install packages ncurses-devel, ncurses (YUM) or libncurses5-dev (APT) and you will be through this error.

Use yum install ncurses-devel ncurses for YUM based systems (like Red Hat, CentOS, etc.) or apt-get install libncurses5-dev for APT based systems (like Debian, Ubuntu, etc.) Verify once that package is installed and proceed with your next course of action.

Follow category ‘Troubleshooting errors‘ for more such error based solutions.

How to check if the package is installed on Linux

Learn to check if the package is installed on the Linux server or not. Verify if the package available on the server along with its installed date.

Check if package in installed on Linux

Package installation on Linux sometimes fails with error package is already installed; nothing to do. To avoid this you need to first check if the package is installed on system or not and then attempt its installation. In this article, we will be seeing different ways we can check if the package is installed on the server and also check its installation date.

Package management related reads :

Different ways to check if package is installed or not :

On RPM based system

RPM-based systems like Red Hat, CentOS, etc, we can use rpm query command like below :

# rpm -qa |grep telnet
telnet-0.17-60.el7.x86_64
OR
# rpm -q telnet
telnet-0.17-60.el7.x86_64

We are using -qa i.e. query all options which will list all installed packages on the system. We are grepping out our desired (telnet in this example) package name. If the output is blank then the package is not installed. If it’s installed then the respective name will be shown (like above). To understand what these numbers in package name mean read package naming conventions.

Or even directly querying the package name will yield you the same result as the second example above.

If the system is configured with YUM then it can list all installed packages for you and you can grep out your desired package from it.

# yum list installed telnet
Loaded plugins: amazon-id, rhui-lb, search-disabled-repos
Installed Packages
telnet.x86_64                                                            1:0.17-60.el7                                                            @rhui-REGION-rhel-server-releases
OR
# yum list installed |grep telnet                                                                                                                        
telnet.x86_64                    1:0.17-60.el7              @rhui-REGION-rhel-server-releases

On APT based systems

APT based systems like Debian, Ubuntu, etc, dpkg command can be used to verify if the package is installed –

# dpkg -l |grep telnet
ii  telnet                           0.17-40                            amd64        basic telnet client

Column wise fields in output are Name, Version, Architecture, Description.

If you have an apt repository configured then you can try to install emulation of the desired package. If it’s installed then the respective message will be shown in output (highlighted line below). If it’s not installed then output just emulates installation process and exits without actually installing.  –

# apt-get install -s telnet
Reading package lists... Done
Building dependency tree
Reading state information... Done
telnet is already the newest version (0.17-40).
0 upgraded, 0 newly installed, 0 to remove and 0 not upgraded.

Package installation date

One of the Linux interview questions is how to find the package installation date? or how to check when the package was installed in Linux? Answer is –

On YUM based systems

rpm command has a direct option of sorting packages with their installed date --last. Grep your desired package and you will get its installed date.

# rpm -qa --last |grep telnet
telnet-0.17-60.el7.x86_64                     Fri 10 Mar 2017 01:58:17 PM EST
On APT based systems

Here there is no direct command which shows installation date. You have to grep ‘install’ word through installer log files /var/log/dpkg.log to get the installation date. If logrotate is configured on the system then use wild card * to search through all rotated and current log files.

If you observe this file does not exist on your server then install operation wasn’t performed on that system after its setup. On the very first install operation (using apt-get or dpkg) this file will get created and start logging installation details.

# grep install /var/log/dpkg.log* |grep telnet
2017-03-10 19:26:30 status installed telnet:amd64 0.17-40
2017-03-10 19:26:30 status half-installed telnet:amd64 0.17-40
2017-03-10 19:26:40 install telnet:amd64 0.17-40 0.17-40
2017-03-10 19:26:40 status half-installed telnet:amd64 0.17-40
2017-03-10 19:26:40 status installed telnet:amd64 0.17-40


How to restart service in Linux

Article explaining service management in Linux. Learn how to restart service in Linux distro like Red Hat, Debian, Ubuntu, CentOS, etc.

Service management in Linux

Managing services in Linux is one of the frequent task sysadmins need to take care of. In this post, we will be discussing several operations like –

  • How to stop service in Linux
  • How to start service in Linux
  • How to restart service in Linux
  • How to check the status of service in Linux

Different distributions have different ways of service management. Even within the same distro, different versions may have different service management aspects. Like RHEL 6 and RHEL7 has different commands to manage services.

Let’s see service related tasks in various flavors of Linux –

How to stop service in Linux

Service can be stopped with below commands (respective distro specified)

# service <name> stop (RHEL6 & lower, Ubuntu, CentOS, Debian, Fedora)

# systemctl stop <name>.service  (RHEL7)

# stop <name> (Ubuntu with upstart)

here <name> is service name like telnet, NTP, NFS, etc. Note that upstart is pre-installed with Ubuntu 6.10 later, if not you can install using the APT package.

Newer versions are implementing systemctl now in place of service command. Even if you use service command in RHEL7 then it will call systemctl in turns.

# service sshd-keygen status
Redirecting to /bin/systemctl status  sshd-keygen.service
● sshd-keygen.service - OpenSSH Server Key Generation
   Loaded: loaded (/usr/lib/systemd/system/sshd-keygen.service; static; vendor preset: disabled)
   Active: inactive (dead)
-----output clipped-----

In the above output, you can see it shows you which systemctl command its executing in place of service command.  Also, note that it appends .service to service_name supplied to service command.

Old service commands like RHEL6 & lower, prints status of operation as OK (success) or FAILED (failure) for start, stop, restart operations. systemctl the command doesn’t print any output on the console.

How to start service in Linux

Starting service follows same above syntax.

# service <name> start (RHEL6 & lower, Ubuntu, CentOS, Debian, Fedora)

# systemctl start <name>.service  (RHEL7)

# start <name> (Ubuntu with upstart)

How to restart service in Linux

# service <name> restart (RHEL6 & lower, Ubuntu, CentOS, Debian, Fedora)

# systemctl restart <name>.service  (RHEL7)

# restart <name> (Ubuntu with upstart)

It stops service and then immediately starts it. So basically its a combined command of above two.

Mostly to reload edited new configuration we seek restart of service. But this can be done without restarting it provided service supports reload config. This can be done by using reload option instead of restart.

How to check the status of service in Linux

Checking the status of service makes you aware of if service is currently running or not. Different distros give different details about service in the output of status. Below are a few examples for your reference.

Service status information in Ubuntu :

# service cron status                                                                                                                                         
● cron.service - Regular background program processing daemon
   Loaded: loaded (/lib/systemd/system/cron.service; enabled; vendor preset: enabled)
   Active: active (running) since Fri 2017-03-10 17:53:23 UTC; 2s ago
     Docs: man:cron(8)
 Main PID: 3506 (cron)
    Tasks: 1
   Memory: 280.0K
      CPU: 1ms
   CGroup: /system.slice/cron.service
           └─3506 /usr/sbin/cron -f

Mar 10 17:53:23 ip-172-31-19-90 systemd[1]: Started Regular background program processing daemon.
Mar 10 17:53:23 ip-172-31-19-90 cron[3506]: (CRON) INFO (pidfile fd = 3)
Mar 10 17:53:23 ip-172-31-19-90 cron[3506]: (CRON) INFO (Skipping @reboot jobs -- not system startup)

It has details about the service state, its man page, PID, CPU & MEM utilization, and recent happenings from the log.

Service status information in RHEL6:

# service crond status
crond (pid  1474) is running...

It only shows you PID and state of service.

Service status information in RHEL7:

# systemctl status crond.service
● crond.service - Command Scheduler
   Loaded: loaded (/usr/lib/systemd/system/crond.service; enabled; vendor preset: enabled)
   Active: active (running) since Fri 2017-03-10 13:04:58 EST; 1min 2s ago
 Main PID: 499 (crond)
   CGroup: /system.slice/crond.service
           └─499 /usr/sbin/crond -n

Mar 10 13:04:58 ip-172-31-24-59.ap-south-1.compute.internal systemd[1]: Started Command Scheduler.
Mar 10 13:04:58 ip-172-31-24-59.ap-south-1.compute.internal systemd[1]: Starting Command Scheduler...
Mar 10 13:04:58 ip-172-31-24-59.ap-south-1.compute.internal crond[499]: (CRON) INFO (RANDOM_DELAY will be scaled with factor 85% if used.)
Mar 10 13:04:59 ip-172-31-24-59.ap-south-1.compute.internal crond[499]: (CRON) INFO (running with inotify support)

It prints all details as Ubuntu but doesn’t show CPU and memory utilization, manpage.

List all services on the system

If you want to see all services running on the system and their statuses then you can use below command :

# service --status-all (RHEL6 & lower, Ubuntu, CentOS, Debian, Fedora)

# systemctl list-units --type service --all (RHEL7)

It will present you list of all services and their status with few other details.

Hollywood movie MATRIX like desktop in Linux terminal

cmatrix: One of the command to have fun in a Linux terminal. It will turn your terminal into the Hollywood movie “MATRIX” like a cool desktop. 

Hollywood movie MATRIX falling code in Linux terminal

About cmatrix program:

It’s written by Chris Allegretta. The Cmatrix page can be found here. This program is distributed via the GNU GPL and its Sourceforge page is here. To download the latest release visit Sourceforge page.

Have you seen the Hollywood movie “Matrix”? You must have liked those monitors with falling green code. It looks like a cool hacker/coder desktop! After the movie went to the box office, many matrix screensavers were out for windows. Do you want one for Linux? Like the one below?

Matrix falling code in terminal

Yes, that’s possible. You can have such a matrix-like desktop in Linux terminal too. In very simple two steps.

Step 1

Install cmatrix package using YUM or APT depending on your Linux distro.

If you don’t have a YUM repository configured then you can download a standalone file (check Sourceforge page if this link is broken). Then follow below commands to set it up from source code.

  • Install packages: gcc, make, autoconf, automake ncurses-devel
  • Download above mentioned file, un-zip, un-tar it and goto unpacked directory cmatrix-1.2a
  • Within cmatrix directory execute below commands.
# aclocal
aclocal: warning: autoconf input should be named 'configure.ac', not 'configure.in'
# autoconf
# automake -a
automake: warning: autoconf input should be named 'configure.ac', not 'configure.in'
configure.in:3: warning: AM_INIT_AUTOMAKE: two- and three-arguments forms are deprecated.  For more info, see:
configure.in:3: http://www.gnu.org/software/automake/manual/automake.html#Modernize-AM_005fINIT_005fAUTOMAKE-invocation
Makefile.am: installing './depcomp'
automake: warning: autoconf input should be named 'configure.ac', not 'configure.in'

Then configure and make ready to install.

# ./configure
checking for a BSD-compatible install... /bin/install -c
checking whether build environment is sane... yes
/root/cmatrix-1.2a/missing: Unknown `--is-lightweight' option
Try `/root/cmatrix-1.2a/missing --help' for more information
configure: WARNING: 'missing' script is too old or missing
checking for a thread-safe mkdir -p... /bin/mkdir -p
checking for gawk... gawk
checking whether make sets $(MAKE)... yes
checking whether make supports nested variables... yes
checking for gcc... gcc
checking whether the C compiler works... yes
checking for C compiler default output file name... a.out
checking for suffix of executables...
checking whether we are cross compiling... no
checking for suffix of object files... o
checking whether we are using the GNU C compiler... yes
checking whether gcc accepts -g... yes
checking for gcc option to accept ISO C89... none needed
checking for style of include used by make... GNU
checking dependency style of gcc... gcc3
checking whether make sets $(MAKE)... (cached) yes
checking for main in -lncurses... yes
checking how to run the C preprocessor... gcc -E
checking for grep that handles long lines and -e... /bin/grep
checking for egrep... /bin/grep -E
checking for ANSI C header files... yes
checking for sys/types.h... yes
checking for sys/stat.h... yes
checking for stdlib.h... yes
checking for string.h... yes
checking for memory.h... yes
checking for strings.h... yes
checking for inttypes.h... yes
checking for stdint.h... yes
checking for unistd.h... yes
checking fcntl.h usability... yes
checking fcntl.h presence... yes
checking for fcntl.h... yes
checking sys/ioctl.h usability... yes
checking sys/ioctl.h presence... yes
checking for sys/ioctl.h... yes
checking for unistd.h... (cached) yes
checking termios.h usability... yes
checking termios.h presence... yes
checking for termios.h... yes
checking termio.h usability... yes
checking termio.h presence... yes
checking for termio.h... yes
checking return type of signal handlers... void
checking for putenv... yes
checking curses.h usability... yes
checking curses.h presence... yes
checking for curses.h... yes
checking ncurses.h usability... yes
checking ncurses.h presence... yes
checking for ncurses.h... yes
checking for tgetent in -lncurses... yes
"Using ncurses as the termcap library"
checking for use_default_colors in -lncurses... yes
checking for resizeterm in -lncurses... yes
checking for wresize in -lncurses... yes
checking for consolechars... no
checking for setfont... /bin/setfont
checking for /usr/lib/kbd/consolefonts... yes
checking for /usr/share/consolefonts... no
checking for mkfontdir... no
checking for /usr/lib/X11/fonts/misc... no
checking for /usr/X11R6/lib/X11/fonts/misc... no
configure: WARNING:

*** You do not appear to have an X window fonts directory in the standard
*** locations (/usr/lib/X11/fonts/misc or /usr/X11R6/lib/X11/fonts/misc). The
*** mtx.pcf font will not be installed.  This means you will probably not
*** be able to use the mtx fonts in your x terminals, and hence be unable
*** to use the -x command line switch.  Sorry about that...

checking that generated files are newer than configure... done
configure: creating ./config.status
config.status: creating Makefile
config.status: creating cmatrix.spec
config.status: creating config.h
config.status: executing depfiles commands
# make
(CDPATH="${ZSH_VERSION+.}:" && cd . && autoheader)
autoheader: WARNING: Using auxiliary files such as `acconfig.h', `config.h.bot'
autoheader: WARNING: and `config.h.top', to define templates for `config.h.in'
autoheader: WARNING: is deprecated and discouraged.
autoheader:
autoheader: WARNING: Using the third argument of `AC_DEFINE' and
autoheader: WARNING: `AC_DEFINE_UNQUOTED' allows one to define a template without
autoheader: WARNING: `acconfig.h':
autoheader:
autoheader: WARNING:   AC_DEFINE([NEED_FUNC_MAIN], 1,
autoheader:             [Define if a function `main' is needed.])
autoheader:
autoheader: WARNING: More sophisticated templates can also be produced, see the
autoheader: WARNING: documentation.
rm -f stamp-h1
touch config.h.in
cd . && /bin/sh ./config.status config.h
config.status: creating config.h
make  all-am
make[1]: Entering directory `/root/cmatrix-1.2a'
gcc  -g -O2   -o cmatrix cmatrix.o  -lncurses  -lncurses
make[1]: Leaving directory `/root/cmatrix-1.2a'

Finally install it. and thats it.

# make install
make[1]: Entering directory `/root/cmatrix-1.2a'
 /bin/mkdir -p '/usr/local/bin'
  /bin/install -c cmatrix '/usr/local/bin'
 Installing matrix fonts in /usr/lib/kbd/consolefonts...
 /bin/mkdir -p '/usr/local/share/man/man1'
 /bin/install -c -m 644 cmatrix.1 '/usr/local/share/man/man1'
make[1]: Leaving directory `/root/cmatrix-1.2a'

Step 2

Type cmatrix command and experience matrix! You can exit out the matrix screen anytime by hitting ctlr+c on the terminal. Check cmatrix command in action in the GIF above!

Reader’s tip :

One of our readers, @Pranit Raje  sent us this one-liner which did the trick. Its not as exact matrix code as we saw above but yeah it’s promising. Try and have fun in the terminal.

LC_ALL=C tr -c "[:digit:]" " " < /dev/urandom | dd cbs=$COLUMNS conv=unblock | GREP_COLOR="1;32" grep --color "[^ ]"


Understanding package naming convention (rpm & deb)

This article will help you understand the package naming convention followed while naming RPM or DEB packages. It helps while you work on package management.

Package naming convention

Linux world is moved by packages since you need a flavor punch on plain vanilla OS! Although there are quite a few package managers available in the market largely two package managers are popular: RPM (Red Hat package manager) & DEB (Debian package manager).

Red Hat package managers release their packages with extension .rpm while Debian package managers have .deb extension. The extension really doesn’t matter in Linux world but still, it’s there for identification purposes for humans!

Recommended read:

Apart from extensions they also have a package naming convention which makes it easy to identify package name, version, release & what architecture it supports. Lets quickly walk through these conventions.

Red Hat package naming convention

Red Hat package name follows below format –

packagename-version-release.architecture.rpm

Field involved here are

  1. It starts with the package name
  2. Then its version (separated by hyphen – from the last field)
  3. Then its release (separated by hyphen – from the last field)
  4. Sometimes OS details are padded here (separated by a dot .  from the last field)
  5. Then architecture for which package built (separated by a dot .  from the last field)
  6. Ends with rpm extension (separated by a dot . from the last field)

For example, look at this telnet package file name “telnet-0.17-60.el7.x86_64.rpm

Here,

  • telnet is a package name
  • 0.17 is version
  • 60 is release
  • el7 is enterprise Linux 7 (package built for rhel7)
  • x86_64 is architecture

Extra OS details mentioned in names can be :

  1. elX or rhlX – RHEL X
  2. suseXXY – Suse Linux XX.Y
  3. fcX – Fedora Core X
  4. mdv or mdk – Mandriva Linux

Debian package naming convention

Debian package name follows below format –

packagename_version-release_architecture.deb

Field involved here are

  1. It starts with the package name
  2. Then its version (separated by underscore – from the last field)
  3. Then its release (separated by a hyphen – from the last field)
  4. Sometimes Debian codename details are padded here (separated by hyphen –  from the last field)
  5. Then architecture for which package built (separated by a dot .  from the last field)
  6. Ends with deb extension (separated by a dot . from the last field)

Debian codename can be squeeze or wheezy.

For example look at this telnet package file name “telnet_0.17-40_amd64.deb

Here,

  • telnet is a package name
  • 0.17 is version
  • 40 is release
  • amd64 is architecture

Different types of architectures which can be seen in names are :

  1. x86_64 or amd64 – 64 bit on x86 microprocessor
  2. i386  – The Intel x86 family of microprocessors, starting with the 80386.
  3. ppc – The Power PC microprocessor family.
  4. alpha – The Digital Alpha microprocessor family.
  5. sparc – Sun Microsystem SPARC processor family.
  6. noarch – No particular architecture. The package may work on all types of architecture.

Package removal in Linux (YUM & APT)

Different types of package removal in Linux explained with examples. Learn package removal or uninstall on a yum or apt-based system.

Package removal in Linux

This article is part of the YUM series. Other articles in this series can be found at below links :

We will be seeing how to uninstall packages from YUM and APT based Linux systems. Package removal also knows as an erasing package from the system.

Package removal on YUM based system

Removing package using yum

On YUM based system like Red Hat or CentOS, the package can be removed by supplying erase or remove argument to yum command along with package name. For example to remove telnet, we will use yum remove telnet

# yum remove telnet
Loaded plugins: amazon-id, rhui-lb, search-disabled-repos
Resolving Dependencies
--> Running transaction check
---> Package telnet.x86_64 1:0.17-60.el7 will be erased
--> Finished Dependency Resolution

Dependencies Resolved

=============================================================================================================================================================
 Package                      Arch                         Version                             Repository                                               Size
=============================================================================================================================================================
Removing:
 telnet                       x86_64                       1:0.17-60.el7                       @rhui-REGION-rhel-server-releases                       113 k

Transaction Summary
=============================================================================================================================================================
Remove  1 Package

Installed size: 113 k
Is this ok [y/N]: y
Downloading packages:
Running transaction check
Running transaction test
Transaction test succeeded
Running transaction
  Erasing    : 1:telnet-0.17-60.el7.x86_64                                                                                                               1/1
  Verifying  : 1:telnet-0.17-60.el7.x86_64                                                                                                               1/1

Removed:
  telnet.x86_64 1:0.17-60.el7

Complete!

The above output will be the same even if you use yum erase telnet command. Before removing it will print package details to be removed on screen and ask for confirmation to avoid unwanted removals.

Removing package using rpm command

Same task can be achieved by using rpm command with erase -e option.

# rpm -evh telnet
Preparing...                          ################################# [100%]
Cleaning up / removing...
   1:telnet-1:0.17-60.el7             ################################# [100%]

In above example we used -e (erase), -v (verbose) and -h (print hash marks) along with name of package.

Package removal on APT based system

Removing package using apt-get

On APT based systems like Ubuntu or Debian, the package can be removed with apt-get remove <package_name> command. Note that like YUM this command doesn’t support erase option.

# apt-get remove telnet                                                                                                                                      
Reading package lists... Done
Building dependency tree       
Reading state information... Done
The following packages will be REMOVED:
  telnet
0 upgraded, 0 newly installed, 1 to remove and 60 not upgraded.
After this operation, 182 kB disk space will be freed.
Do you want to continue? [Y/n] y
(Reading database ... 81678 files and directories currently installed.)
Removing telnet (0.17-40) ...
Processing triggers for man-db (2.7.5-1) ...

apt-get to asks for confirmation before removing package from system.

Removing package using dpkg

With Debian package manager command i.e. dpkg, this can be done using --remove argument.

# dpkg --remove telnet
(Reading database ... 81678 files and directories currently installed.)
Removing telnet (0.17-40) ...
Processing triggers for man-db (2.7.5-1) ...

See above output as it removes telnet.

Observe that dpkg or rpm commands don’t ask for user confirmation before removing the package.

How to open port on AWS EC2 Linux server

Small tutorial with screenshots that show how to open port on the AWS EC2 Linux server. This will help you to manage port-specific services on the EC2 server.

Open port on AWS EC2 Linux

AWS i.e. Amazon Web Services is no new term for the IT world. It’s a cloud services platform offered by Amazon. Under its Free tier account, it offers you limited services free of cost for one year. This is one of the best places to try out new technologies without spending much on the financial front.

AWS offers server computing as one of their services and they call them EC (Elastic Computing). Under this, we can build our Linux servers. We have already seen how to set up a Linux server on AWS free of cost.

By default, all Linux servers build under EC2 has post 22 i.e. SSH service port (inbound from all IP) is open only. So, if you are hosting any port-specific service then the relative port needs to be open on the AWS firewall for your server.

Also, it has port 1 to 65535 are open too (outbound for all traffic). If you want to change this you can use the same below process for editing outbound rules too.

Setting up a firewall rule on AWS for your server is an easy job. You will be able to open ports in seconds for your server. I will walk you through the procedure with screenshots to open a port for the EC2 server.

Step 1

Log in to the AWS account and navigate to the EC2 management console. Go to Security Groups under Network & Security menu as highlighted below :

AWS EC2 management console

Step 2

On Security, Groups screen select your EC2 server and under Actions menu select Edit inbound rules

AWS inbound rules menu

Step 3

Now you will be presented with an inbound rule window. You can add/edit/delete inbound rules here. There are several protocols like HTTP, nfs, etc listed in the drop-down menu which auto-populate ports for you. If you have customer service and port you can define it too.

AWS add inbound rule

For example, if you want to open port 80 then you have to select :

  • Type: HTTP
  • Protocol: TCP
  • Port range: 80
  • Source: Anywhere (Open port 80 for all incoming req from any IP (0.0.0.0/0),  My IP: then it will auto-populate your current public internet IP

Step 4

That’s it. Once you save these settings your server inbound port 80 is open! you can check by telneting to port 80 for your EC2 server public DNS (can be found it EC2 server details)

You can also check it on websites like ping.eu.

The same way outbound rules can be edited too! These changes are active on the fly and don’t need any downtime.

How to download the package using YUM or APT

Learn how to download packages from YUM or APT repository. The standalone package can be used to install on another server that has no YUM or APT configured.

Process to download package using YUM or APT

Many production environments don’t prefer to configure YUM or APT repositories on all servers. This is to avoid accidental installation of packages or up-gradating packages, which may cause issues on operations. Most of them use a centralized patch server to push updates to all servers.

If you want to install a single package on a server in such a setup, you need to have a standalone package file .rpm or .deb with you—directly downloading packages from the internet is not allowed in production areas. So you have to get packages from the server with registered YUM or APT repository configured.

The good news is you can download the package using YUM or APT! Later this package can be transferred to the intended server and can be installed. See below steps to download packages :

Download package on YUM configured server

Using downloadonly switch with yum command is a way to download packages on yum supported servers (Red Hat, CentOS). You need to fire yum install command and instruct it to download only without installing a package.

# yum install telnet --downloadonly
Loaded plugins: amazon-id, rhui-lb, search-disabled-repos
Resolving Dependencies
--> Running transaction check
---> Package telnet.x86_64 1:0.17-60.el7 will be installed
--> Finished Dependency Resolution

Dependencies Resolved

=============================================================================================================================================================
 Package                      Arch                         Version                              Repository                                              Size
=============================================================================================================================================================
Installing:
 telnet                       x86_64                       1:0.17-60.el7                        rhui-REGION-rhel-server-releases                        63 k

Transaction Summary
=============================================================================================================================================================
Install  1 Package

Total download size: 63 k
Installed size: 113 k
Background downloading packages, then exiting:
telnet-0.17-60.el7.x86_64.rpm                                                                                                         |  63 kB  00:00:00
exiting because "Download Only" specified

In the above output, the install process exists since we specified download the only option (see the highlighted line).

This downloaded package (.rpm) will be saved under /var/cache/yum/<architecture>/<OS>/<repository>/packages directory. A repository name can be seen in the above install command output under package details. We downloaded packages on the RHEL7 server running on x86_64 architecture. See where our package (.rpm) got downloaded :

# pwd
/var/cache/yum/x86_64/7Server/rhui-REGION-rhel-server-releases/packages
# ll
total 68
-rw-r--r--. 1 root root 64872 Nov  6 11:09 telnet-0.17-60.el7.x86_64.rpm

Alternatively, you can install yum-utils and then use the yumdownloader program to download the RPM from a repo in your PWD.

# yum install yum-utils -y
# yumdownloader telnet
Loaded plugins: extras_suggestions, langpacks, priorities, update-motd
telnet-0.17-65.amzn2.x86_64.rpm                                                                                                                  |  64 kB  00:00:00
# ll
total 68
-rw-r--r-- 1 root root 65496 May  5  2020 telnet-0.17-65.amzn2.x86_64.rpm

Download package on APT configured server

On APT supported servers like Debian, ubuntu you need to use -d option in apt-get install command.

# apt-get install -d telnet
Reading package lists... Done
Building dependency tree       
Reading state information... Done
The following NEW packages will be installed:
  telnet
0 upgraded, 1 newly installed, 0 to remove and 0 not upgraded.
Need to get 0 B/63.5 kB of archives.
After this operation, 182 kB of additional disk space will be used.
Download complete and in download only mode

This will download package in /var/cache/apt/archives.

# pwd
/var/cache/apt/archives

# ll
total 72
drwxr-xr-x 2 root root  4096 Mar  6 11:55 ./
drwx------ 4 root root  4096 Mar  6 12:02 ../
-rw-r--r-- 1 root root 63460 May  6  2015 telnet_0.17-40_amd64.deb
----output clipped ----

Check telnet package file .deb is downloaded in the current directory. If you want to download them in the current working directory, use download option instead of install. So no hassle of tracking down the package in a variable path like yum!

# pwd
/tmp/mypackages
# apt-get download  ssh
Get:1 http://ap-south-1.ec2.archive.ubuntu.com/ubuntu xenial-updates/main amd64 ssh all 1:7.2p2-4ubuntu2.1 [7,070 B]
Fetched 7,070 B in 0s (9,252 B/s)
# ll
total 16
drwxr-xr-x  2 root root 4096 May 17 10:17 ./
drwxr-xr-x 11 root root 4096 May 17 10:13 ../
-rw-r--r--  1 root root 7070 Aug 15  2016 ssh_1%3a7.2p2-4ubuntu2.1_all.deb

You can see the ssh package got downloaded within the same working directory. Now this package can be transferred to other servers (where repositories are not configured) for installation!