A quick rundown on how to create an Amazon ECR repository and push container image to it.

What is Amazon ECR?
Amazon ECR, i.e., Elastic Container Registry, is a fully managed container image registry service provided by AWS. It is integrated with Amazon ECS so that developers can have a fully managed container platform by AWS. You can visualize it as your own docker hub.
Browse through our Amazon ECS related articles here.
How to create ECR repository?
Amazon ECR has its own home under Amazon ECS dashboard.
- Login to Amazon ECR dashboard; click on Get started button
- Or login to the Amazon ECS dashboard
- Click on Repositories in the left navigation panel
- Click on the Create repository button on the repository page.
- You should be presented with the below screen –

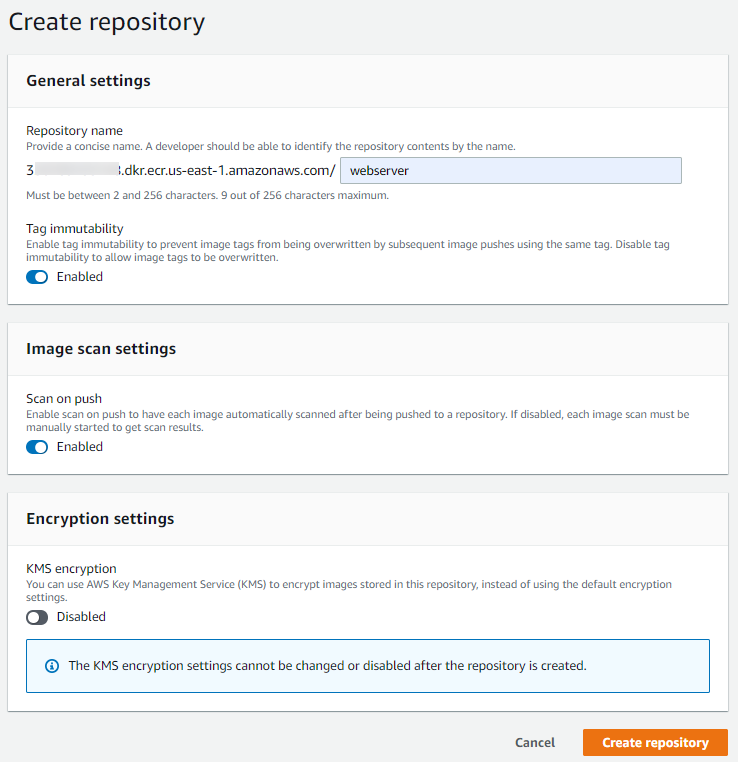
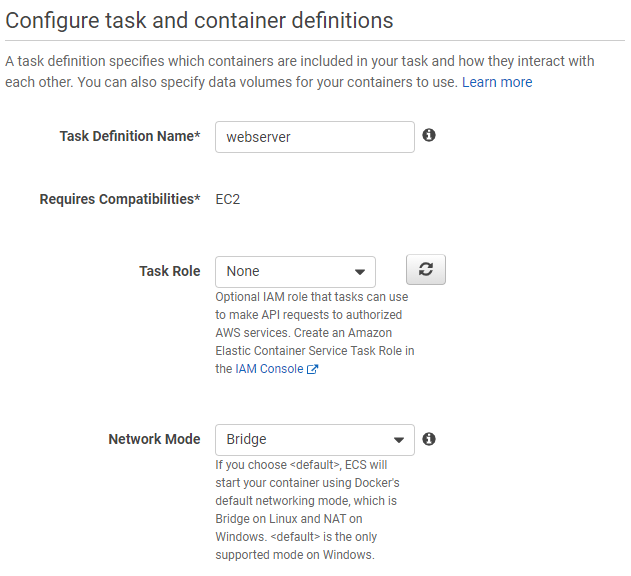
Different configurations are –
- Repository name: It will follow the below format
- account-id.dkr.ecr.region.amazonaws.com/name
- Tag immutability: Prevents overwriting images with the same tags in the subsequent push.
- Image scan settings: Enable it to scan images as soon as they are pushed to ECR for vulnerabilities.
- Encryption settings: Use KMS or let ECR use default encryption for images once pushed to ECR.
Click Create repository button.
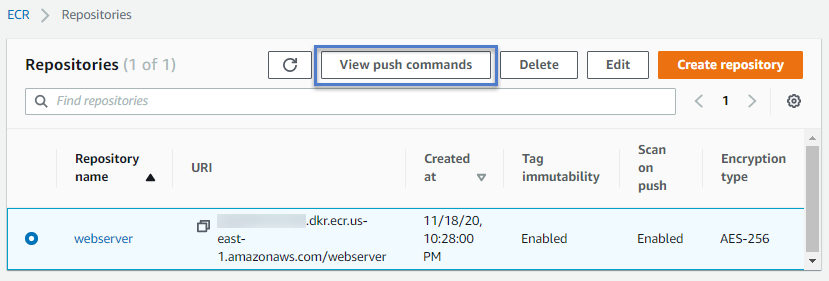
A repository should be created, and the ECR dashboard should enlist the newly created repository. Please select it and click on the View push commands button to get the authentication token, login, and push commands. These are ready-made commands for you to ease your tasks.

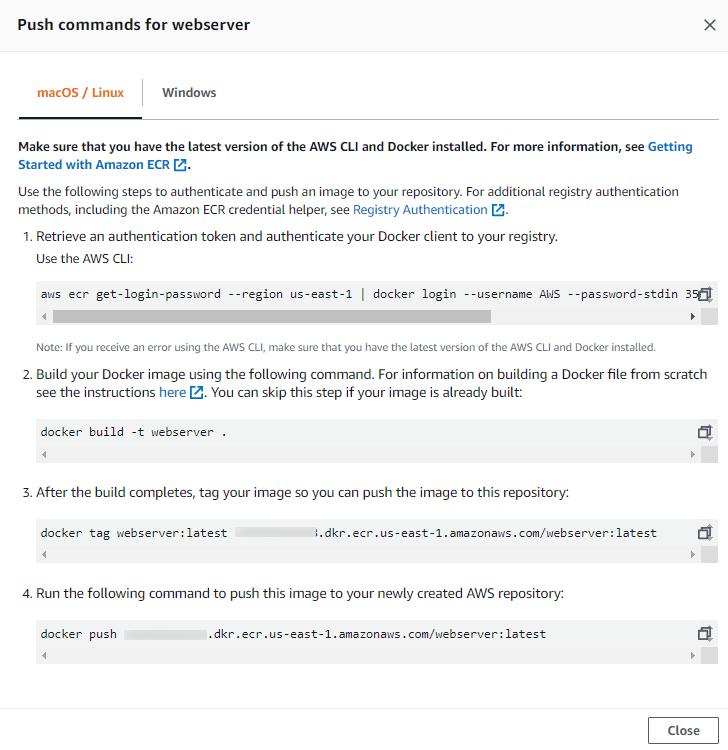
ECR will provide you with 4 commands pre-populated with the correct repository name. The explanation is given with each command is pretty self-explanatory.

How to push container image to Amazon ECR?
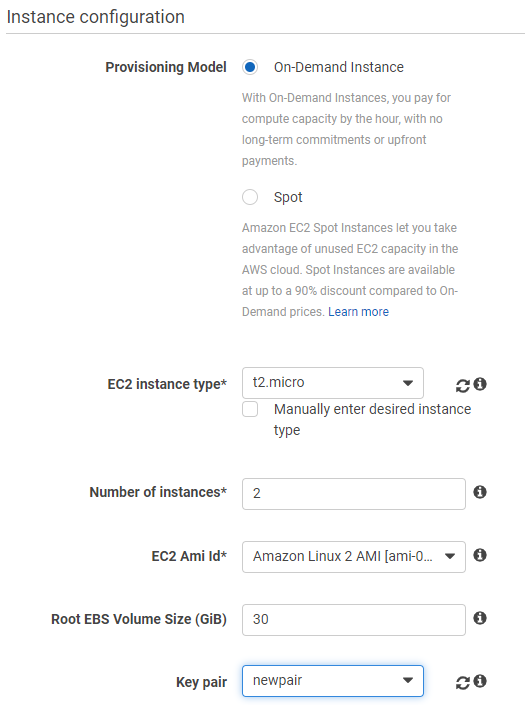
Now, we will use these commands to push the test container image to Amazon ECR. I will be using the Amazon Linux EC2 instance for this exercise. Make sure you have docker and aws-cli installed, configured, and running fine on the EC2 instance. Also, make sure EC2 is having at least an AmazonEC2ContainerRegistryPowerUser role attached so that ECR push works fine if you are using EC2 roles for authentication.
Step 1.
Get the authentication token and log in using the docker command. Its taken care of by the first command we saw in the previous screenshot. It has a two-part. First, aws command gets the authentication details and passes them to the second docker command for login.
[root@ip-10-0-0-226 ~]# aws ecr get-login-password --region us-east-1 | docker login --username AWS --password-stdin 3xxxxxxxxxxx.dkr.ecr.us-east-1.amazonaws.com
WARNING! Your password will be stored unencrypted in /root/.docker/config.json.
Configure a credential helper to remove this warning. See
https://docs.docker.com/engine/reference/commandline/login/#credentials-store

Login Succeeded
Step 2.
Tag container image. I am assuming you already have an image created using Dockerfile. For testing, I pulled the Nginx image from DockerHub and tagged it.
[root@ip-10-0-0-226 ~]# docker tag nginx:latest 3xxxxxxxxxxx.dkr.ecr.us-east-1.amazonaws.com/webserver:latest
Verify image tags.
[root@ip-10-0-0-226 ~]# docker images
REPOSITORY                                               TAG                 IMAGE ID            CREATED             SIZE
3xxxxxxxxxxx.dkr.ecr.us-east-1.amazonaws.com/webserver   latest              daee903b4e43        9 hours ago         133MB
nginx                                                    latest              daee903b4e43        9 hours ago         133MB
Step 3.
Push image to ECR using docker push command.
[root@ip-10-0-0-226 ~]# docker push 3xxxxxxxxxxx.dkr.ecr.us-east-1.amazonaws.com/webserver:latest
The push refers to repository [3xxxxxxxxxxx.dkr.ecr.us-east-1.amazonaws.com/webserver]
b9e73ac5343e: Pushed
5887d03dfc3d: Pushed
e3a971c30b12: Pushed
32048dd980c7: Pushed
f5600c6330da: Pushed
latest: digest: sha256:bb84ff0786cd1dbde780d84f6bf76bfdef36fe8ffa658f7f5c48e39363b4d500 size: 1362
If you come back to the AWS console and check under the repository, you should be seeing this latest pushed image there.

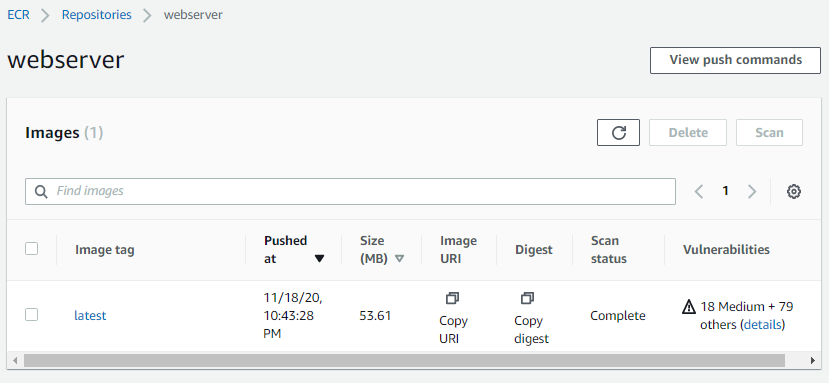
As you can see, since the Image scan was enabled, ECR scanned the image for vulnerabilities as soon as it was pushed. And added a report in the same view. Click on the image tag for checking image details.

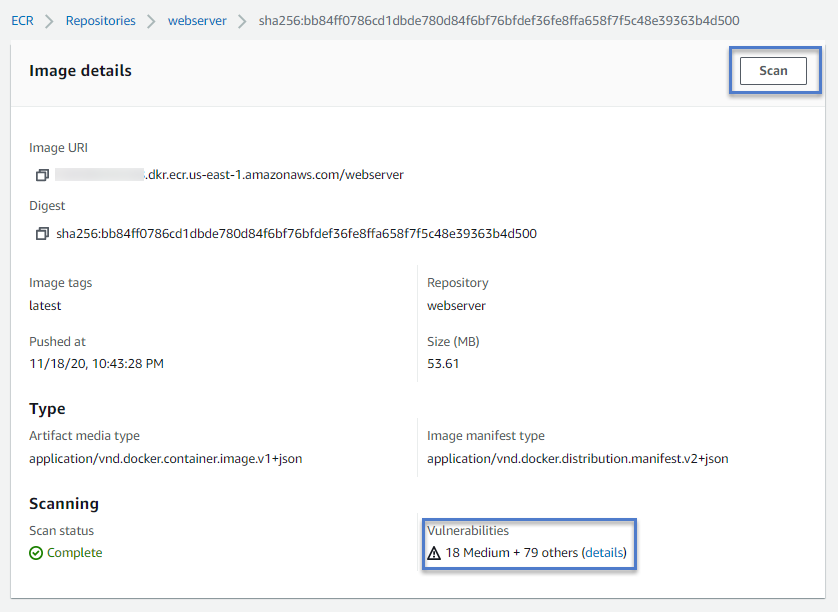
If you don’t enable the Image scan setting, then the manual scan can be done by clicking the Scan button on the Images details screen.
Another point to note here is ECR showing image size as 53.61MB, whereas it was reported as 133MB on EC2 command outputs. This is because docker compresses the image layers when pushing the image to the repository. Note about the same can be found here in AWS documentation.
How to pull container image from ECR?
It’s a simple docker pull command. Provided you have EC2 instance and docker daemon properly setup for authentication (as mentioned above).
[root@ip-10-0-0-226 ~]# docker images
REPOSITORY          TAG                 IMAGE ID            CREATED             SIZE
[root@ip-10-0-0-226 ~]# docker pull 3xxxxxxxxxxx.dkr.ecr.us-east-1.amazonaws.com/webserver
Using default tag: latest
latest: Pulling from webserver
852e50cd189d: Pull complete
a29b129f4109: Pull complete
b3ddf1fa5595: Pull complete
c5df295936d3: Pull complete
232bf38931fc: Pull complete
Digest: sha256:bb84ff0786cd1dbde780d84f6bf76bfdef36fe8ffa658f7f5c48e39363b4d500
Status: Downloaded newer image for 3xxxxxxxxxxx.dkr.ecr.us-east-1.amazonaws.com/webserver:latest
3xxxxxxxxxxx.dkr.ecr.us-east-1.amazonaws.com/webserver:latest
[root@ip-10-0-0-226 ~]# docker images
REPOSITORY                                               TAG                 IMAGE ID            CREATED             SIZE
3xxxxxxxxxxx.dkr.ecr.us-east-1.amazonaws.com/webserver   latest              daee903b4e43        10 hours ago        133MB