

Complete installation guide to install & configure checkmk server on Linux. Also steps to add Linux client to checkmk monitoring using checkmk monitoring instance console.


checkmk is a free, open-source IT infrastructure monitoring tool. It’s actually Nagios plugins that enhances their capabilities and performance. In this article, we will walk you through step by step procedure to setup checkmk monitoring server and add the client to its monitoring.
Check_mk is re-branded as checkmk
Also website is moved from mathias-kettner.com to checkmk.com. There are few pointers in article which needs to be treated with new URL although I made necessary changes.
1. Download and install package
Download the appropriate package from the download page. For this article, we are using check_mk RAW edition CRE 1.5.0.p7 (since its 100% free). You can use tools like wget to directly download packages on the server.
[root@kerneltalks ~]# wget https://mathias-kettner.de/support/1.5.0p7/check-mk-raw-1.5.0p7-el7-38.x86_64.rpm
--2018-11-14 04:34:47--  https://mathias-kettner.de/support/1.5.0p7/check-mk-raw-1.5.0p7-el7-38.x86_64.rpm
Resolving mathias-kettner.de (mathias-kettner.de)... 178.248.246.154
Connecting to mathias-kettner.de (mathias-kettner.de)|178.248.246.154|:443... connected.
HTTP request sent, awaiting response... 200 OK
Length: 123984316 (118M) [application/x-redhat-package-manager]
Saving to: ‘check-mk-raw-1.5.0p7-el7-38.x86_64.rpm’

100%[==============================================================================================================================>] 123,984,316 13.9MB/s   in 9.6s

2018-11-14 04:34:57 (12.3 MB/s) - ‘check-mk-raw-1.5.0p7-el7-38.x86_64.rpm’ saved [123984316/123984316]
Now, install the package along with all of its dependencies. Use your package manager like yum, zipper, or apt to install package so that it will resolve its dependencies automatically and install them too.
2. Allow http protocol and port in firewall
Since the checkmk portal runs on HTTP protocol with default port 80, you need to allow them in the firewall.
[root@kerneltalks1 ~]# setsebool -P httpd_can_network_connect 1
If your machine has SELinux activated, you need to allow it in SELinux. If you have a local firewall i.e. iptables enabled, you need to allow it in iptables as well.
If you are on the AWS server, you need to open the security group as well to allow HTTP protocol.
3. Create and start check_mk server
After RPM installation, check if omd command is running properly.
[root@kerneltalks1 ~]# omd version
OMD - Open Monitoring Distribution Version 1.5.0p7.cre
Now, proceed with creating a monitoring instance and then starting it. Create a monitoring instance with omd create command.
[root@kerneltalks1 ~]# omd create kerneltalks_test
Adding /opt/omd/sites/kerneltalks_test/tmp to /etc/fstab.
Creating temporary filesystem /omd/sites/kerneltalks_test/tmp...OK
Restarting Apache...OK
Created new site kerneltalks_test with version 1.5.0p7.cre.
The site can be started with omd start kerneltalks_test.
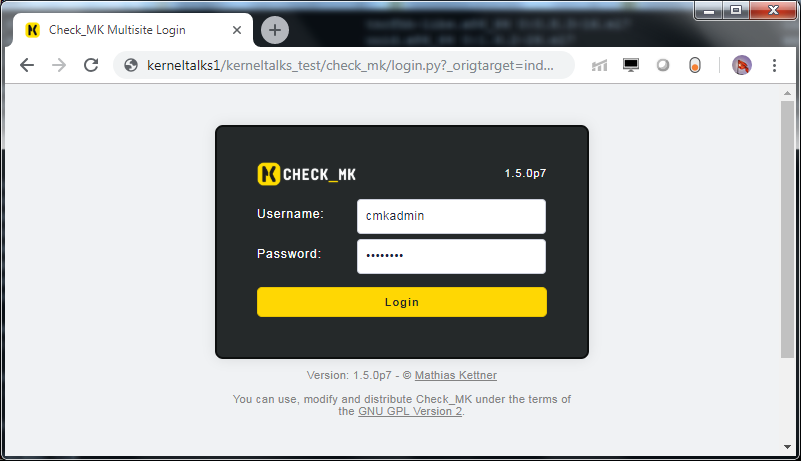
The default web UI is available at http://kerneltalks1/kerneltalks_test/
The admin user for the web applications is cmkadmin with password: Pz4IM7J7
(It can be changed with 'htpasswd -m ~/etc/htpasswd cmkadmin' as site user.
)
Please do a su - kerneltalks_test for administration of this site.
Our monitoring server instance is ready. You can gather details like URL, login credentials, the command to change password, etc from the command output.
Now if you try to login to the mentioned URL you will see OMD: Site Not Started error.

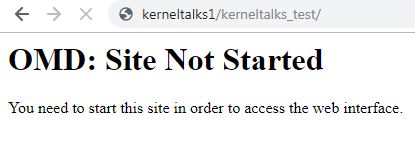
So, to use this server instance you need to start it using the command omd start
[root@kerneltalks1 ~]# omd start kerneltalks_test
OK
Starting mkeventd...OK
Starting rrdcached...OK
Starting npcd...OK
Starting nagios...2018-11-14 04:09:41 [6] updating log file index
2018-11-14 04:09:41 [6] updating log file index
OK
Starting apache...OK
Initializing Crontab...OK
Now you are good to go! You can go back to the URL and login to your monitoring server console!


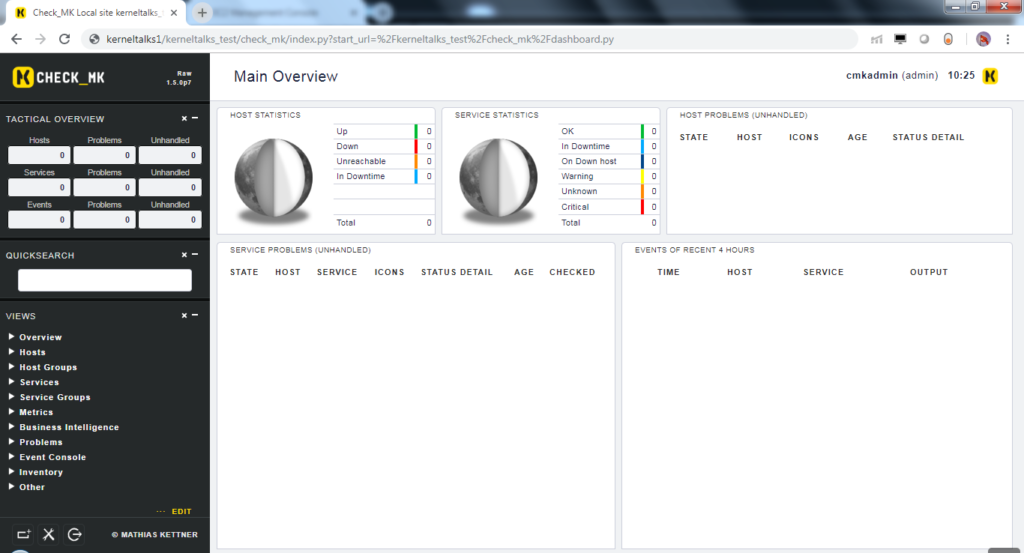
You can see everything is valued to zero since its being a fresh monitoring server instance we just created. Let’s add one Linux host into this monitoring instance to monitor.
How to install check_mk agent on Linux client
In this part, we will install check_mk agent on the Linux client and will add that client into monitoring. Below 2 pre-requisite should be completed before agent installation.
- check_mk client works with
xinetdservice on the machine. You should installxinetdservice and start it before you attempt to agent install. - Port 6556 TCP should be open between check_mk server and client for communication
check_mk client package is available on check_mk server at path http://<servername>/<instance_name>/check_mk/agents/. In our case it will be at http://kerneltalks1/kerneltalks_test/check_mk/agents/

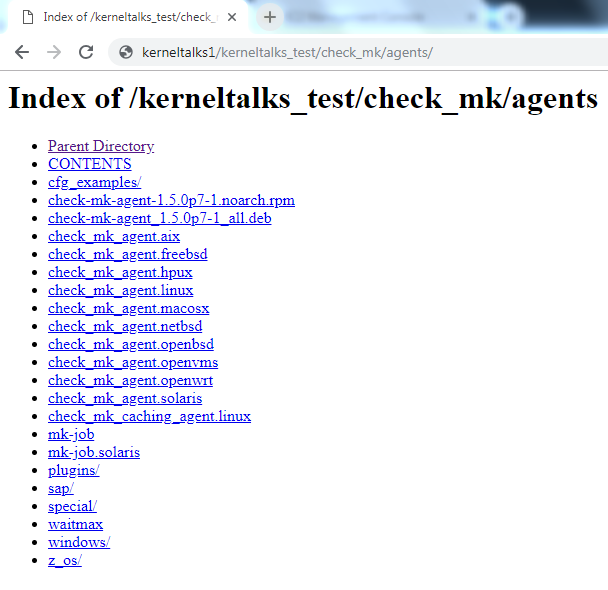
You can find almost all platform agents here. Let’s download the agent on our Linux client using the command line and install it.
[root@kerneltalks2 ~]# rpm -ivh check-mk-agent-1.5.0p7-1.noarch.rpm
Preparing...                          ################################# [100%]
Updating / installing...
   1:check-mk-agent-1.5.0p7-1         ################################# [100%]
Activating startscript of xinetd
Note: Forwarding request to 'systemctl enable xinetd.service'.
Reloading xinetd...
Redirecting to /bin/systemctl reload xinetd.service
After agent installation, you need to go back to check_mk console to add this new host into monitoring.
Add new client in check_mk monitoring
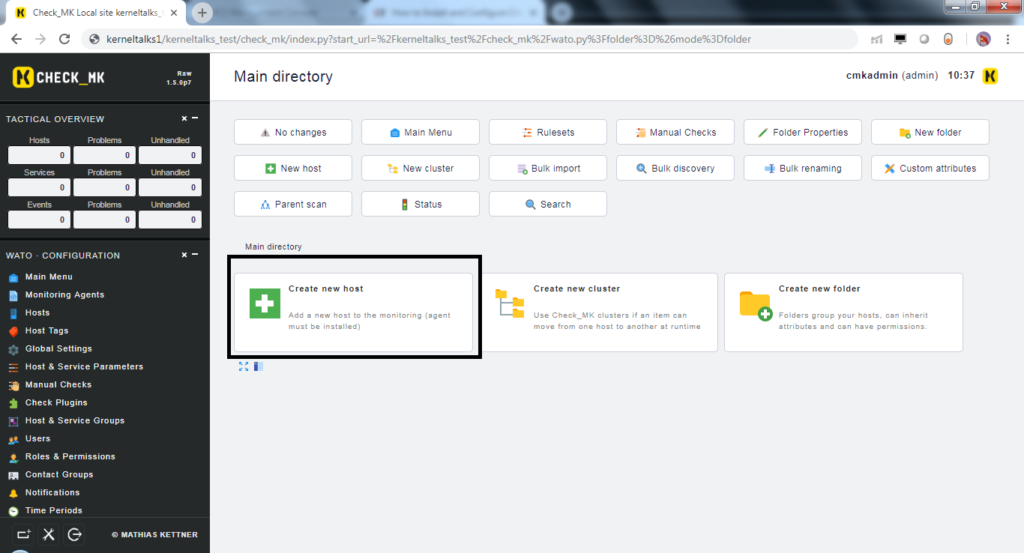
Login to console and navigate to WATO configurations > Hosts > Create new host
Fill in details like hostname, IP address, agent details in next screen, and hit ‘Save & Goto services‘. You will be presented with the below screen in which check_mk discovers services on the client.
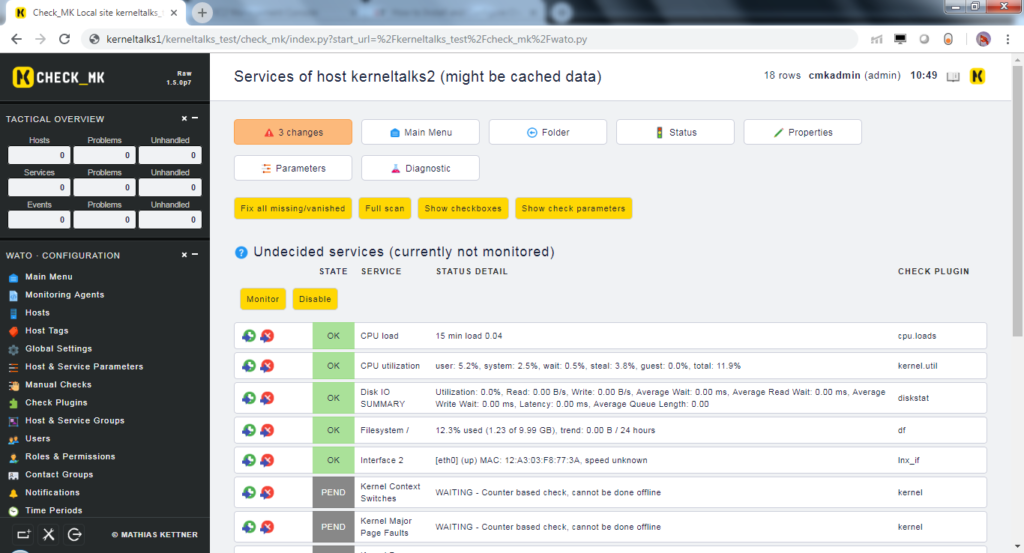
Click on the red button with a number of changes written on it. Activate changes and you are done!

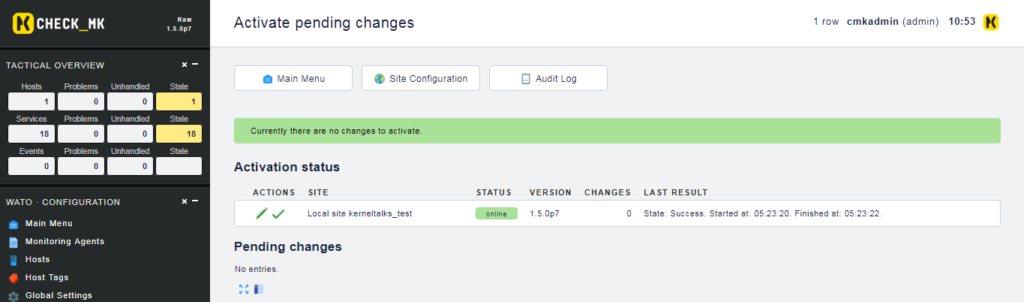
Once changes are completed activated you can see one host is added into monitoring. This completes end to end walkthrough tutorial to install the check_mk monitoring server and add Linux client to it.
You can gather details like ULR, login credentials
Typo in the above line I think it should be URL,login credentials.
Thanks Manmohan. Typo corrected. 🙂
Cool
Hi Shrikant,
I’m Jan and I’m working for tribe29.
I’m reaching out because I found this guide about Check_MK (a product originally developed by Mathias Kettner GmbH).
Recently, the company has rebranded itself (find out why at https://tribe29.com/brand#name), so Mathias Kettner GmbH became tribe29 GmbH – and the product naming switched from Check_MK to Checkmk. We also moved our website from mathias-kettner.com to checkmk.com.
We would be grateful if you could update the name and the backlink in your entry from https://mathias-kettner.com/download.php? to https://checkmk.com/download.php?edition=dcee&version=stable&dist=debian
Either way, thanks for the great resource. Enjoy your week.
Best regards,
Jan Leptien
Hey Jan,
Thanks for your comment. I made necessary changes along with quoted text informing this change in the beginning of article.
Have a good time ! Thanks for stopping by!