Monthly Archives: February 2019

How to forward port using iptables in Linux

Quick article to demonstrate how to configure port forwarding in Linux using iptables.
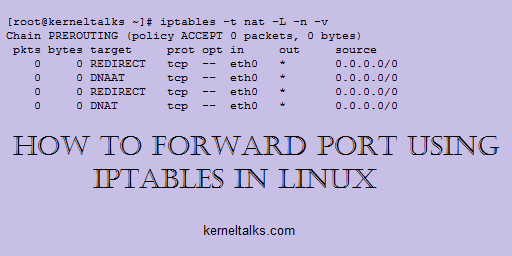
Port forwarding using iptables

In this article, we will walk you through port forwarding using iptables in Linux. First of all, you need to check if port forwarding is enabled or not on your server. For better understanding, we will be using eth0 as a reference interface and all our command executions will be related to eth0 in this article.

How to check if port forwarding is enabled in Linux

Either you can use sysctl to check if forwarding is enabled or not. Use below command to check –

[root@kerneltalks ~]#  sysctl -a |grep -i eth0.forwarding
net.ipv4.conf.eth0.forwarding = 0
net.ipv6.conf.eth0.forwarding = 0

Since both values are zero, port forwarding is disabled for ipv4 and ipv6 on interface eth0.

Or you can use the process filesystem to check if port forwarding is enabled or not.

[root@kerneltalks ~]# cat /proc/sys/net/ipv4/conf/eth0/forwarding
0
[root@kerneltalks ~]# cat /proc/sys/net/ipv6/conf/eth0/forwarding
0

Again here process FS with zero values confirms port forwarding is disabled on our system. Now we need to first enable port forwarding on our system then we will configure port forwarding rules in iptables.

How to enable port forwarding in Linux

As we checked above, using the same methods you can enable port forwarding in Linux. But its recommended using sysctl command rather than replacing 0 by 1 in proc files.

Enable port forwarding in Linux using sysctl command –

[root@kerneltalks ~]# sysctl net.ipv4.conf.eth0.forwarding=1
net.ipv4.conf.eth0.forwarding = 1
[root@kerneltalks ~]# sysctl net.ipv6.conf.eth0.forwarding=1
net.ipv6.conf.eth0.forwarding = 1

To make it persistent over reboots, add parameters in /etc/sysctl.conf

[root@kerneltalks ~]# echo "net.ipv4.conf.eth0.forwarding = 1">>/etc/sysctl.conf
[root@kerneltalks ~]# echo "net.ipv6.conf.eth0.forwarding = 1">>/etc/sysctl.conf
[root@kerneltalks ~]# sysctl -p
net.ipv4.conf.eth0.forwarding = 1
net.ipv6.conf.eth0.forwarding = 1

Now, we have port forwarding enabled on our server, we can go ahead with configuring port forwarding rules using iptables.

How to forward port in Linux

Here we will forward port 80 to port 8080 on 172.31.40.29. Do not get confused port forwarding with port redirection.

We need to insert an entry in PREROUTING chain of iptables with DNAT target. Command will be as follows –

# iptables -A PREROUTING -t nat -i eth0 -p tcp --dport 80 -j DNAT --to 172.31.40.29:8080
# iptables -A FORWARD -p tcp -d 172.31.40.29 --dport 8080 -j ACCEPT

Change interface, IP and ports as per your requirement. The first command tells us to redirect packets coming to port 80 to IP 172.31.40.29 on port 8080. Now packet also needs to go through FORWARD chain so we are allowing in in the second command.

Now rules have been applied. You need to verify them.

How to check port forwarding iptables rules

Command to verify port forwarding rules is –

[root@kerneltalks ~]# iptables -t nat -L -n -v
Chain PREROUTING (policy ACCEPT 0 packets, 0 bytes)
 pkts bytes target     prot opt in     out     source               destination
    0     0 DNAT       tcp  --  eth0   *       0.0.0.0/0            0.0.0.0/0            tcp dpt:80 to:172.31.40.29:8080

Here REDIRECT target means its a redirection rule. Since we have configured forwarding rule we see the target as DNAT

How to save iptables rules

To save iptables rules and make them persistent over reboots use below command –

[root@kerneltalks ~]# iptables-save

Script to create mount points in LVM

Here is a little script to create a mount point using CSV file which has a mount point name, size, and VG name.

Script to create mount points in LVM

Caution : Use script on your own risk!

Do not use it on production servers. Test it and use it on newly built/dev/testing servers.

Below is the script code. Save it under /tmp/lvm_script.sh and also save your CSV file under the same directory with the name list.csv

CSV file format is mount point name,size in GB,VG name. For example : /data,10,data_vg

Script code :

#Script to create mount point using CSV file
#Author : Shrikant Lavhate (kerneltalks.com)
#Save CSV file as list.csv in current working directory with format mount point name,size in GB,VG name

chckfail()
{
        if [ $? -ne 0 ];then
                echo "Check error above. Halting..."
                exit 1
        fi
}

for i in `cat list.csv`
do
        kt_mountname=`echo $i | cut -d, -f1`
        kt_lvname=`echo $i |cut -d, -f1|cut -c 2-|tr / _`
        kt_vgname=`echo $i | cut -d, -f3`
        kt_lvsize=`echo $i | cut -d, -f2`
        kt_lvsize="${kt_lvsize}G"
        lvcreate -n $kt_lvname -L $kt_lvsize $kt_vgname >/dev/null
        chckfail
        mkfs.ext4 /dev/$kt_vgname/$kt_lvname >/dev/null
        chckfail
        mkdir -p $kt_mountname >/dev/null
        chckfail
        mount /dev/$kt_vgname/$kt_lvname $kt_mountname>/dev/null
        chckfail
        echo "/dev/$kt_vgname/$kt_lvname $kt_mountname ext4 defaults 0 0">>/etc/fstab
        chckfail
done

Breaking the code :

Quick walk through above code.

  • Part one is chckfail function which used to check if the command ran is successful or not. If the command failed, it will stop the execution of the script and exits.
  • Variable part extracts mount point name, size, VG to be used details from CSV file. It also creates LV names out of mount point name in CSV
  • Standard LVM commands to create LV, format it with EXT4, create mount point directory, and mount LV on it.
  • Finally, it adds an entry to /etc/fstab for the persistent mount.

Modifying script for your requirement :

  1. If you are using size in MB then remove line kt_lvsize="${kt_lvsize}G"
  2. If you are using size in TB then replace G with T in above mentioned line.
  3. If you are using filesystem other than ext4 then change mkfs.ext4 & /etc/fstab command accordingly.

One liner scripts to ease your Linux tasks

An assorted collection of one-liner scripts that are helpful in Linux sysadmin’s day to day tasks.

One liner scripts!

In this article, I am consolidating many one-liner scripts that I used or came across which will help you to perform Linux day to day tasks. Great way to save your time in repetitive work ensuring zero human errors!

Setting up hostname in SUSE (older versions)

I always prefer hostnamectl to set hostname in systems running on newer kernels.

# echo myserver.mydomain.com > /etc/HOSTNAME
# sed --in-place 's/preserve_hostname: false/preserve_hostname: true/' /etc/cloud/cloud.cfg #For Cloud servers
# sed --in-place 's/DHCLIENT_SET_HOSTNAME="yes"/DHCLIENT_SET_HOSTNAME="no"/' /etc/sysconfig/network/dhcp
# hostname myserver

Add your hostname instead of myserver and your FQDN domain instead of mydomain.


Setting up nameservers in Linux

# echo "nameserver 10.8.14.33 #Lab nameserver1
nameserver 10.8.17.33 #Lab nameserver2
search lab.kerneltalks.com">>/etc/resolv.conf

Add your own nameserver IPs and search domain in above code.


Add FQDN in hostfile

This applies to server with single IP allocated only.

# echo "`hostname -I` `hostname`.labs.kerneltalks.com `hostname`">>/etc/hosts

Add your own domain instead of labs.kerneltalks.com


Configure sudo so that it asks user’s password when user tries to execute sudo

# sed --in-place 's/Defaults targetpw/#Defaults targetpw/' /etc/sudoers

Remove existing NTP servers and add new in /etc/ntp.conf

# sed -e '/^server/s/^/#/g' -i /etc/ntp.conf
# echo "server 10.8.14.8 #Lab NTP1
server 10.8.14.9 #Lab NTP2">>/etc/ntp.conf

Commands to enable root access in Linux server

Below is a list of the commands you can execute to enable root access on the Cloud server or AWS Linux server.

# sed --in-place 's/PermitRootLogin no/PermitRootLogin yes/' /etc/ssh/sshd_config

# sed --in-place 's/PasswordAuthentication no/PasswordAuthentication yes/' /etc/ssh/sshd_config
# service sshd restart
# passwd root

If you are doing it on a public cloud server make sure that you reset the root account password since cloud server spin up with key-based authentication and their root does not carry a password initially.


Test port connectivity using telnet and exit in single command

# echo 'exit' | telnet 10.10.0.1 7657
Trying 10.10.0.1...
Connected to 10.10.0.1.
Escape character is '^]'.
Connection closed by foreign host.

How to upgrade SUSE 12 SP1 to SP3 or SP4

Short article to demonstrate how to upgrade SUSE 12 SP1 to SP3 and SP4

Upgrade SUSE12 SP1 to SP4

First, you need to install zypper-migration-plugin . This plugin helps you in the migration from a lower service pack to the higher service pack.

kerneltalks:~ # zypper in zypper-migration-plugin
Refreshing service 'SMT-http_smt-ec2_susecloud_net'.
Refreshing service 'cloud_update'.
Loading repository data...
Reading installed packages...
Resolving package dependencies...

The following NEW package is going to be installed:
  zypper-migration-plugin

1 new package to install.
Overall download size: 10.5 KiB. Already cached: 0 B. After the operation, additional 16.7 KiB will be used.
Continue? [y/n/? shows all options] (y): y
Retrieving package zypper-migration-plugin-0.10-9.1.noarch                                                                         (1/1),  10.5 KiB ( 16.7 KiB unpacked)
Retrieving: zypper-migration-plugin-0.10-9.1.noarch.rpm ..........................................................................................................[done]
Checking for file conflicts: .....................................................................................................................................[done]
(1/1) Installing: zypper-migration-plugin-0.10-9.1.noarch ........................................................................................................[done]

Then make sure your system is patched to the current patch level. You can use the below command to install all the latest patches.

kerneltalks:~ #  zypper patch

Now, once you are ready with the backup of the current system, proceed to migrate from SP1 to SP2. Use command zypper migration and you can see a list of service pack upgrades for your system. Although, we see that we can skip SP and upgrade to higher service packs, its

kerneltalks:~ # zypper migration

Executing 'zypper  refresh'

Refreshing service 'cloud_update'.
........
All repositories have been refreshed.

Executing 'zypper  --no-refresh patch-check --updatestack-only'

Loading repository data...
Reading installed packages...
0 patches needed (0 security patches)

Unavailable migrations (product is not mirrored):

        SUSE Linux Enterprise High Performance Computing 12 SP3 x86_64 (not available)
        SUSE Linux Enterprise Software Development Kit 12 SP3 x86_64
        Advanced Systems Management Module 12 x86_64 (already installed)
        Containers Module 12 x86_64 (already installed)
        Public Cloud Module 12 x86_64 (already installed)
        Legacy Module 12 x86_64 (already installed)
        Web and Scripting Module 12 x86_64 (already installed)
        Toolchain Module 12 x86_64 (already installed)

        SUSE Linux Enterprise High Performance Computing 12 SP2 x86_64 (not available)
        SUSE Linux Enterprise Software Development Kit 12 SP2 x86_64
        Advanced Systems Management Module 12 x86_64 (already installed)
        Containers Module 12 x86_64 (already installed)
        Public Cloud Module 12 x86_64 (already installed)
        Legacy Module 12 x86_64 (already installed)
        Web and Scripting Module 12 x86_64 (already installed)
        Toolchain Module 12 x86_64 (already installed)


Available migrations:

    1 | SUSE Linux Enterprise Server 12 SP4 x86_64
        SUSE Linux Enterprise Software Development Kit 12 SP4 x86_64
        Advanced Systems Management Module 12 x86_64 (already installed)
        Containers Module 12 x86_64 (already installed)
        Public Cloud Module 12 x86_64 (already installed)
        Legacy Module 12 x86_64 (already installed)
        Web and Scripting Module 12 x86_64 (already installed)
        Toolchain Module 12 x86_64 (already installed)

    2 | SUSE Linux Enterprise Server 12 SP3 x86_64
        SUSE Linux Enterprise Software Development Kit 12 SP3 x86_64
        Advanced Systems Management Module 12 x86_64 (already installed)
        Containers Module 12 x86_64 (already installed)
        Public Cloud Module 12 x86_64 (already installed)
        Legacy Module 12 x86_64 (already installed)
        Web and Scripting Module 12 x86_64 (already installed)
        Toolchain Module 12 x86_64 (already installed)

    3 | SUSE Linux Enterprise Server 12 SP2 x86_64
        SUSE Linux Enterprise Software Development Kit 12 SP2 x86_64
        Advanced Systems Management Module 12 x86_64 (already installed)
        Containers Module 12 x86_64 (already installed)
        Public Cloud Module 12 x86_64 (already installed)
        Legacy Module 12 x86_64 (already installed)
        Web and Scripting Module 12 x86_64 (already installed)
        Toolchain Module 12 x86_64 (already installed)


[num/q]:

You can see the migration plugin gave us the choice to jump from SP1 to SP2 or SP3 or SP4. Enter numeric against your choice and then it will upgrade related packages on your system. Here we select to go from SP1 to SP2 by tying 3.

[num/q]: 3

Executing 'snapper create --type pre --cleanup-algorithm=number --print-number --userdata important=yes --description 'before online migration''

sh: snapper: command not found
Upgrading product SUSE Linux Enterprise Server 12 SP2 x86_64.
Upgrading product SUSE Linux Enterprise Software Development Kit 12 SP2 x86_64.
Upgrading product Advanced Systems Management Module 12 x86_64.
Upgrading product Containers Module 12 x86_64.
Upgrading product Public Cloud Module 12 x86_64.
Upgrading product Legacy Module 12 x86_64.
Upgrading product Web and Scripting Module 12 x86_64.
Upgrading product Toolchain Module 12 x86_64.

Executing 'zypper --releasever 12.2 ref -f'
...................................

Once completed reboot system. Check OS version and you can see we are upgraded from SP1 to SP2

kerneltalks:~ # cat /etc/os-release
NAME="SLES"
VERSION="12-SP2"
VERSION_ID="12.2"
PRETTY_NAME="SUSE Linux Enterprise Server 12 SP2"
ID="sles"
ANSI_COLOR="0;32"
CPE_NAME="cpe:/o:suse:sles:12:sp2"

Now, repeat process to upgrade OS from SP2 to SP3 and SP4.