Monthly Archives: January 2017

Why and how to disable SELinux in your Linux distro

Learn how to disable SELinux in most of the Linux distro. Understand what is SELinux; why and when you require to disable it. 

You may have come across many app/tools or utility configurations on Linux like FTP when its stated to disable SELinux. You do it and your config runs smoothly. Have you ever wondered what is this SELinux thing? We are going to discuss this in this post!

SELinux is a short form of Security-Enhanced Linux. It’s a set of modules that implement access control policies in the kernel. To disable all this policy enforcement, we disable SELinux. These access control policies might interfere and won’t let your app/utility etc work properly. This is why we see disabling SELinux steps in configurations. Vendors like Red Hat strongly recommends using ‘Permissive mode’ rather than completely disabling SELinux.

SELinux exists to secure your server! Do not disable it unless you have a good reason or you know what you are doing.

SELinux modes:

There are three modes defined in SELinux config files.

  1. Enforcing: Always enforce policies
  2. Permissive: Prints warning messages rather than actually enforcing policies
  3. Disabled: All SELinux policies disabled.

Its always to go with permissive mode if you are troubleshooting some system/app/utility behavior. So that it will give you a proper picture if SELinux really coming in your way and if you should permanently disable it or not.

Current SELinux mode can be checked using below command :

# getenforce
Permissive

Here SELinux is running in permissive mode.

How to disable SELinux temporarily :

Disabling SELinux permanently using the config file method (explained below) needs a reboot. If you want to avoid downtime then you can turn it into permissive mode temporarily using below method :

# echo 0 > /selinux/enforce
OR
# setenforce 0

Setting enforce file with value 0 makes it permissive. Turning it to 1 makes SELinux enforcing.

How to disable SELinux permanently:

SELinux has its own configuration file located at /etc/selinux/config. Here you can state SELINUX=disabled. But this file change needs a reboot to take effect. Here you can even choose permissive mode we talked about earlier.

# cat /etc/selinux/config

# This file controls the state of SELinux on the system.
# SELINUX= can take one of these three values:
#     enforcing - SELinux security policy is enforced.
#     permissive - SELinux prints warnings instead of enforcing.
#     disabled - No SELinux policy is loaded.
SELINUX=enforcing
# SELINUXTYPE= can take one of these two values:
#     targeted - Targeted processes are protected,
#     mls - Multi Level Security protection.
SELINUXTYPE=targeted

Save file changes and reboot the system. Once rebooted you can see SELinux status using getenforce command.

This method works on RHEL, CentOS, Fedora, Ubuntu.

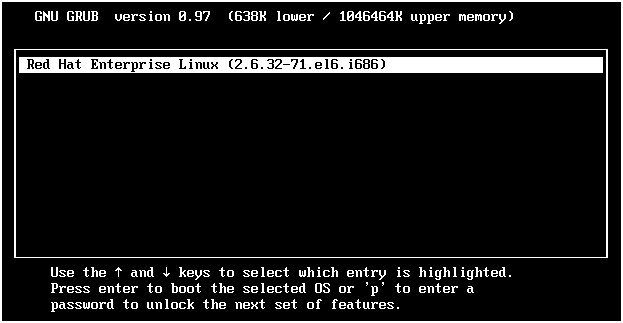
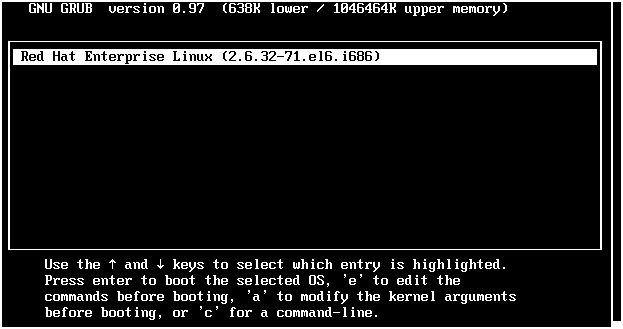
SELinux mode selection from GRUB:

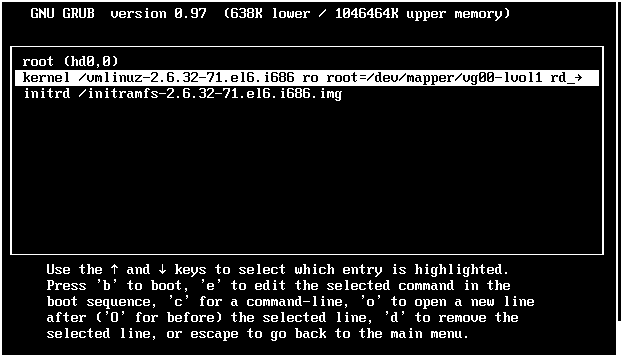
You can even decide which mode SELinux starts with system boot. Edit /boot/grub/grub.conf file and appending  entry selinux=0 or selinux=1 in kernel line like below:

# cat /boot/grub/grub.conf
---- output clipped -----
splashimage=(hd0)/boot/grub/splash.xpm.gz
hiddenmenu
title Red Hat Enterprise Linux (2.6.32-431.29.2.el6.x86_64)
        root (hd0)
        kernel /boot/vmlinuz-2.6.32-431.29.2.el6.x86_64 ro root=LABEL=/ rhgb quite selinux=0  
        initrd /boot/initramfs-2.6.32-431.29.2.el6.x86_64.img

Disabling SELinux for specific service:

Disabling SELinux for specific services also possible. So you can keep it in enforcing mode and only disable for your required services. You need to use setsebool command and feed it with service name nad required value like below.

# setsebool httpd_disable_trans 0

This sets its permissive mode for httpd services. Make a note that, you need to restart related service after disabling/enabling SELinux for it.

FTP server configuration steps in RHEL 6

Step by step configuration guide for setting up the FTP server in RHEL6. FTP server is useful for small scale file sharing between cross-OS platforms.

FTP (file transfer protocol) is one of the famous methods to get centralized file storage on a low scale. FTP server implementation mainly is done to enable users to upload files in a centralized location. Many vendors have their FTP servers running where sysadmins upload logs when any case investigation is in progress with the vendor. This is almost a common thing in the life of sysadmin working in Corporate infrastructure.

In this post, we are going to see step by step configuring the FTP server in the RHEL server. Setting up FTP server can be staged in below parts :

  1. Installing necessary packages
  2. Starting up services
  3. Setting up users
  4. Testing

1. Installing necessary packages :

We need to have a very secure ftp, rpcbind and xinetd services installed on the server. You can check them if they are installed using the below command :

# rpm -qa | grep -i vsftpd
vsftpd-2.2.2-21.el6.x86_64

# rpm -qa | grep -i xinetd
xinetd-2.3.14-40.el6.x86_64

# rpm -qa | grep -i rpcbind
rpcbind-0.2.0-12.el6.x86_64

If they are not installed, install them with below command (Make sure you have YUM configured on your server.):

#  yum install vsftpd rpcbind xinetd y
Loaded plugins: amazon-id, rhui-lb, security
Setting up Install Process
No package y available.
Resolving Dependencies
--> Running transaction check
---> Package rpcbind.x86_64 0:0.2.0-11.el6 will be updated
---> Package rpcbind.x86_64 0:0.2.0-12.el6 will be an update
---> Package vsftpd.x86_64 0:2.2.2-21.el6 will be installed
---> Package xinetd.x86_64 2:2.3.14-40.el6 will be installed
--> Finished Dependency Resolution

Dependencies Resolved

=================================================================================================================================================================================
 Package                           Arch                             Version                                     Repository                                                  Size
=================================================================================================================================================================================
Installing:
 vsftpd                            x86_64                           2.2.2-21.el6                                rhui-REGION-rhel-server-releases                           155 k
 xinetd                            x86_64                           2:2.3.14-40.el6                             rhui-REGION-rhel-server-releases                           122 k
Updating:
 rpcbind                           x86_64                           0.2.0-12.el6                                rhui-REGION-rhel-server-releases                            51 k

Transaction Summary
=================================================================================================================================================================================
Install       2 Package(s)
Upgrade       1 Package(s)

Total download size: 328 k
Is this ok [y/N]: y
Downloading Packages:
(1/3): rpcbind-0.2.0-12.el6.x86_64.rpm                                                                                                                    |  51 kB     00:00
(2/3): vsftpd-2.2.2-21.el6.x86_64.rpm                                                                                                                     | 155 kB     00:00
(3/3): xinetd-2.3.14-40.el6.x86_64.rpm                                                                                                                    | 122 kB     00:00
---------------------------------------------------------------------------------------------------------------------------------------------------------------------------------
Total                                                                                                                                            1.1 MB/s | 328 kB     00:00
Running rpm_check_debug
Running Transaction Test
Transaction Test Succeeded
Running Transaction
  Installing : 2:xinetd-2.3.14-40.el6.x86_64                                                                                                                                 1/4
  Installing : vsftpd-2.2.2-21.el6.x86_64                                                                                                                                    2/4
  Updating   : rpcbind-0.2.0-12.el6.x86_64                                                                                                                                   3/4
  Cleanup    : rpcbind-0.2.0-11.el6.x86_64                                                                                                                                   4/4
  Verifying  : rpcbind-0.2.0-12.el6.x86_64                                                                                                                                   1/4
  Verifying  : vsftpd-2.2.2-21.el6.x86_64                                                                                                                                    2/4
  Verifying  : 2:xinetd-2.3.14-40.el6.x86_64                                                                                                                                 3/4
  Verifying  : rpcbind-0.2.0-11.el6.x86_64                                                                                                                                   4/4

Installed:
  vsftpd.x86_64 0:2.2.2-21.el6                                                           xinetd.x86_64 2:2.3.14-40.el6

Updated:
  rpcbind.x86_64 0:0.2.0-12.el6

Complete!

Once installed, make them start at every boot with chkconfig configurations.

2. Starting up service :

After installation is over, stop iptables firewall and turn SELinux into permissive mode, to ensure FTP functions well.

# service  iptables  stop
ip6tables: Setting chains to policy ACCEPT: filter         [  OK  ]
ip6tables: Flushing firewall rules:                        [  OK  ]
ip6tables: Unloading modules:                              [  OK  ]
# setenforce 0

Now start services one by one and check if they are running.

# service vsftpd start
Starting vsftpd for vsftpd:    [ OK ]
# service xinetd start
Starting xinetd:               [ OK ]
# service rpcbind status
rpcbind (pid 4855) is running...

3. Setting up users:

Users which are listed in file /etc/vsftpd/ftpusers are not allowed to access FTP server. Hence if you want to disable FTP access of any user, you need to put that username in this file. For security reasons, the root account is by default exist in this file i.e. not allowed to FTP.

# cat  /etc/vsftpd/ftpusers
# Users that are not allowed to login via ftp
root
bin
daemon
adm
lp
sync
shutdown

For testing, create a new user on the system. Login to the server from a new terminal with this new user. Create some test files in its home directory.

Bonus tip: You can even edit the welcome banner message the user sees after logging into FTP server. Edit “ftpd_banner=Welcome to blah FTP service.” line under /etc/vsftpd/vsftpd.conf file.

4. Testing:

Now, access the FTP server from a windows machine using the command prompt. Once successfully logged in using the above-created test user, you will be able to see the file created in the above step and even you will be able to download it!

C:/> ftp 10.10.15.2
Connected to 10.10.15.2.
220 (vsFTPd 2.2.2)
User (10.10.15.2:(none)): testuser
Password:
230 Login successful.
ftp>
ftp>dir
200 PORT command successful. Consider using PASV.
-rw-rw-r--      1   501   502     42 Jan 18 12:08  file1
226 Directory send OK.
ftp: 63 bytes received in 0.00Seconds 63000.00Kbytes/sec.

You can run get, put FTP commands, and verify full functionality! You have successfully configured a secure FTP server on Linux!

Difference between LVM and LVM2: Linux interview question explained

Post stating point-wise differences between LVM and LVM2 explained. This is one of the frequently asked questions for the Linux interview.

One of the frequently asked Linux interview questions is ‘what is the difference between LVM and LVM2?’ to which most of the candidate’s flanks. In this article, we will be discussing this question.

First of all, what is LVM? LVM is a logical volume manager. It is a widely used volume manager in Linux and Unix like VxVM (Veritas volume manager). As a sysadmin, you must be knowing all tasks which can be done in LVM but not a theoretical question like the difference between LVM and LVM2.

LVM and LVM2 are two different versions of LVM. Obviously, LVM2 being the latest. Their differences can be identified in terms of their functions, services offered, availability, etc. Let’s see one by one :

Availability :

LVM is available in most of the famous distributions like HPUX, Redhat, Suse, etc. LVM2 is available only kernel version 2.6.9 and above like RHEL4 and later. You can even build LVM modules as per your kernel (if its not available in your distributions). Setup information can be found here.

Compatibility :

LVM2 has backward compatibility with LVM. It has the same command modules and infrastructure like LVM with enhanced features. LVM being the previous version don’t have compatibility with LVM2 features.

Size limits :

Different size limits are increased in the new LVM2. The maximum file system/device size was capped to 2TB in LVM whereas its 16TB(32-bit CPU) & 8EB (64 bit CPU) in LVM2.

Max LV and PV were 255 in LVM. In LVM2 it has no limit (snippet from vgcreate manpage below).

 -l, --maxlogicalvolumes MaxLogicalVolumes
              Sets the maximum number of logical volumes allowed in this  vol-
              ume  group.  The setting can be changed with vgchange.  For vol-
              ume groups with metadata in lvm1 format, the limit  and  default
              value  is  255.   If  the metadata uses lvm2 format, the default
              value is 0 which removes this  restriction:  there  is  then  no
              limit.

 -p, --maxphysicalvolumes MaxPhysicalVolumes
              Sets  the  maximum number of physical volumes that can belong to
              this volume group.  The setting can be  changed  with  vgchange.
              For  volume  groups  with metadata in lvm1 format, the limit and
              default value is 255.  If the metadata  uses  lvm2  format,  the
              value  0  removes  this restriction: there is then no limit.

Extra features :

LVM2 is bundled with below extra features over LVM :

  1. Volume mirroring support
  2. Shared volume support with GFS
  3. Transnational metadata for fast recovery
  4. Cluster suite failover supported
  5. Striped volume expansion

This sums up the difference between LVM and LVM2 versions. Write to us in comments if you have corrections/suggestions.

Recover forgotten root password in RHEL with screenshots

Learn how to recover forgotten root password in Linux RHEL. Step by step procedure to reset the root password by booting system in single-user mode.

There are many times when we set the root password too complex and later on forgot it. Many people used to work on consoles with no timeout values. In such cases, when they logged out of the console or reboot system, they most of the times forgot the root password to log in.

So it becomes extremely important to have one more account with root privileges on the system. Normally in corporate environments, they do keep such 2-3 accounts so that forgetting root password shouldn’t stop operations. But like in test environments or labs sometimes these practice is not followed and it becomes necessary to know how to recover forgotten root password.

A root password can not be recovered once forgotten! It can only be reset to new value! Now the question is if you don’t know the root password how will you reset it when you won’t able to login in the first place. The answer is the single-user mode!

Yes, to reset root password (when you forgot it) you need to boot the server into single-user mode. Why single user mode? Simple single user mode boots and present your root prompt without any requirement to log in! Simple eh? So resetting forgotten root password follows simple steps :

  1. Edit boot kernel path with single-user mode parameter (GRUB)
  2. Boot kernel into single user mode
  3. Reset root password
  4. Get into normal multi-user run-level

Lets see all these steps below with screenshots :

1. Edit boot kernel path

Restart server with the power button and halt the boot process by pressing any key when you see press any key to interrupt boot message on the console.

If you have installed more than one OS on your system, you will see more than one entries in the above screen. Use arrow keys to select (highlight) your kernel. If your bootloader is protected with password then press “p” you will be asked for a password if not then just press enter. After entering the password or pressing enter, you will be presented with the next screen:

Here, press the “e” key to edit the selected entry. You will be presented with a kernel line selection screen like below.

Select the kernel line and press “e” again to edit that entry. Now on new screen append letter S or single at end of the line so instruct the kernel to boot into single-user mode.

2. Boot kernel into single user mode

After typing above entry, press ‘enter’ key to save and you will back to the previous screen. Select kernel and press “b” to boot this edited kernel. That’s it! your server is booting in a single-user mode which will give you access to the system without the need of login.

Observe that, you haven’t asked for a password, and you are presented with root prompt!

3. Reset root password

Do I have to write anything for it? You have a root prompt already! go change your root password like you normally do.

# passwd root

Changing password for user root.
New password:
Retype new password:
passwd: all authentication tokens updated successfully.

You can also check here that you are in single-user mode by checking run level with who command.

4. Get into multi user mode

You can do it by rebooting the system. But you need to go through all the above steps again and remove the single user mode entry you made previously. Or else the server will boot into again single-user mode.

Or you can simply type “init 3” to change your run-level from single to multi-user mode!

You have successfully reset the forgotten root password to a new one. Keep a new password in a safe place and don’t forget again! Since forgetting takes your almost 10-20 mins of downtime.

How to extend the file system online in LVM

Learn how to extend the file system or logical volume in LVM under HPUX and Linux without any downtime. Grow your mount point capacity without impacting users.

“Extend file system” is of the common task every Linux Unix sysadmin face in his life. Insufficient capacity planning during deploying systems, un-foreseen grown data, improper data rotation techniques can lead to mount points reaching their capacity limits. A quick solution is to grow those mount point’s total size to get some breathing space till you finalize on final solution about data management.

Extending file system is actually extending related logical volume and then growing FS over it. There are few pre-requisite you should consider before attempting for file system extension.

Pre-requisite :

  1. You have free PE available in the respective Volume group. (check using vgdisplay)
  2. If not, you must have free disk/LUN which can be added to that VG
  3. In case of old HPUX versions, online JFS must be installed (check using swlist)

How to do it :

Let’s start with the case: We have /data (/dev/vg01/lvol01) mount point of 1024MB in vg01 volume group which needs to be extended by 500MB.

Now, as per the pre-requisite, we should have free PE available in vg01. You can verify it by checking the “free PE” field in vgdisplay output. If it’s a non-zero number then you have some PE available to use. You need to calculate how much free space exists in VG. For that check “PE size” in vgdisplay output, multiply it with the number of PEs, the resulting number is MBs you have free in VG. You can extend your file system by this many MB sizes.

Suppose, you don’t have free PE in vg01 then you need to add a new disk or LUN to system. Once detected, you need to add it vg01 using vgextend command. Once your vg01 is extended with new disk/LUN, you will see free PE in vgdisplay output.

For quick reference –

# vgextend <vg_name> <pv_name>

Now you verified and confirmed, you have 500MB free in VG. Proceed to extend the logical volume of /data mount point i.e. /dev/vg01/lvol01 using lvextend command.

# lvextend -L 1524 /dev/vg01/lvol1
Logical volume "/dev/vg01/lvol1" has been successfully extended.
Volume Group configuration for /dev/vg01 has been saved in /etc/lvmconf/vg01.conf

Existing 1024+500Mb hence 1524 in command.

Now your logical volume is extended to the desired size. Still, you won’t be able to see this space growth in mount point size. You need to extend the file system as well for that.

In HPUX, you can use fsadm command (size to be specified in KB) like below :

# fsadm -b 1560576 /data

In RHEL6 you can use resize2fs command like :

root@kerneltalks # resize2fs /dev/vg01/lvol01
resize2fs 1.43-WIP (20-Jun-2013)
Filesystem at /dev/vg01/lvol01 is mounted on /data; on-line resizing required
old_desc_blocks = 320, new_desc_blocks = 384
The filesystem on /dev/vg01/lvol01 is now 1610612736 blocks long.

Here, it will grow with maximum size of lvol hence size is not specified.

In RHEL7, for XFS filesystem :

# xfs_growfs /data -D size

where size is in system block (depends on your config). If you don’t specify size (-D) then it grows to the maximum available size of lvol. So in our case, we don’t need to specify size. Check all xfs commands here.

Final check :

You are done! Check mount point new size in bdf (HPUX) or df -h (Linux) output. Note that we haven’t stopped access to apps/users to the mount point in question. This means the entire operation was done online without any downtime or impacting users.

Logs under /var/stm/logs/os in HPUX

Your /var mount point is getting full? You need to check /var/stm/logs/os directory for old logs. Lots of space can be saved by zipping or purging them.

Ever wondered why /var/stm/logs/os is taking up huge space in /var mount point of HPUX? In this post, we will see details about logs under this directory and how to handle them.

Most of the time you get /var getting full alerts from your monitoring system or you observe /var is filling up. This is normal behavior since most of the logs reside in /var and if some logs are growing fast they cause /var filling up fast. As a first troubleshooting step, you need to check huge size files and directories in /var.

Many times you see one of the culprit is /var/stm/logs/os directory. If you see inside this directory you will see something like below :

# ls -lrt /var/stm/logs/os
total 6986016
-rw-r--r--   1 root       root        512656 Apr 10  2008 log1.raw
-rw-r--r--   1 root       root        512656 Apr 10  2008 log2.raw
-rw-r--r--   1 root       root        512656 Apr 10  2008 log3.raw
-rw-r--r--   1 root       root        512656 Apr 11  2008 log4.raw
-rw-r--r--   1 root       root        512656 Apr 11  2008 log5.raw
-rw-r--r--   1 root       root        512656 Apr 11  2008 log6.raw
-rw-r--r--   1 root       root        512656 Apr 11  2008 log7.raw
----- ouput clipped -----

There are lots of raw log files taking up huge space collectively.

What are these logs under /var/stm/logs/os :

Your next question will be what are these files? what is the purpose of these files on the server?

These are raw files that are being logged and used by STM i.e. support tool manager. Those are logs collected by STM which has information about your hardware issues. By the above output, you can see those are rotated when one log file crosses a certain file size. While rotating they are sequentially numbered. This numbering makes it easy when it comes to managing those logs.

How to read these logs :

You can read these logs using log viewer by STM. Goto CSTM console using command cstm

# /usr/sbin/cstm
Running Command File (https://z5.kerneltalks.com/usr/sbin/stm/ui/config/.stmrc).

-- Information --
Support Tools Manager

Version A.59.05

Product Number B4708AA

(C) Copyright Hewlett Packard Co. 1995-2007
All Rights Reserved

Use of this program is subject to the licensing restrictions described
in "Help-->On Version".  HP shall not be liable for any damages resulting
from misuse or unauthorized use of this program.

cstm>

Then run ru and select logtool utility.

cstm>ru
-- Run Utility --
Select Utility
    1 MOutil
    2 logtool
Enter selection or cancel to quit : 2

-- Logtool Utility --
To View a Summary of Events in a Raw Log

  1. Select a raw (unformatted) log file.  (File Menu -> "Select Raw")
     The current log file ends in ".cur", e.g. "log1.raw.cur".
     You do not have to switch logs.

  2. View the summary of the selected log file. (View Menu -> "Raw Summary")

To Format a Raw Log

  1. Set the format filter for the types of entries you want to see.
     (Filters Menu -> "Format").  To see all entries, skip this step.

  2. Format the raw log file. (File Menu -> "Format Raw")

  3. Display the formatted file. (View Menu -> "Formatted Log")

  4. To further narrow the entries displayed, set a display filter.
     (Filters Menu -> "Display" -> "Formatted")

For more information, use the on-line help (Help Menu -> "General help").

Logtool Utility>

With give information on console you can view, format raw log files.

Should I purge or zip /var/stm/logs/os logs ?

Now you know what are these files and you observe there are too many of them which are too old to keep. In such a scenario, you have got two options:

  • Zip them: For few months old files. Maybe 1-2 months old. How to zip files.
  • Purge them: For very old logs like 6 or more months old.

Make a note that those logs are read by STM as well so if you purge or zip them, STM won’t be able to use them.

So be sure you check logs using logtool utility explained above and decide to purge, zip, or keep it. Normally, if you are not facing any hardware issues with the server currently then you should zip/purge according to the time frame I suggested above.

# ls -lrt /var/stm/logs/os
total 2463008
-rw-r--r--   1 root       root         65910 Apr 10  2008 log1.raw.gz
-rw-r--r--   1 root       root         57168 Apr 10  2008 log2.raw.gz
-rw-r--r--   1 root       root         53727 Apr 10  2008 log3.raw.gz
-rw-r--r--   1 root       root         40526 Apr 11  2008 log4.raw.gz
-rw-r--r--   1 root       root         39541 Apr 11  2008 log5.raw.gz
-rw-r--r--   1 root       root         37050 Apr 11  2008 log6.raw.gz
-rw-r--r--   1 root       root         37624 Apr 11  2008 log7.raw.gz

Match above output with previous and see how file size decreased after zipping which in turns saved my /var space.

Zipping of purging these logs will greatly free up space under /var mount point. This is one of the directories which we normally miss or ignore while cleaning up the mount point.

Alternatively, you can even configure logrotate utility which will take care of this zipping and purging of files automatically without human intervention.

Blog enhancements for better speed and cleaner looks

KernelTalks implemented few blog enhancements for more speedy page loads and clean looks. Addition of CDN and Genesis premium themes to blog.

KernelTalks happy to share new technology enhancement implemented in the blog. Oct 2016 when KernelTalks was moved from Blogger to self-hosted WordPress. Also, it acquired custom domain name kerneltalks.com over previous one kerneltalks.blogspot.com In the past few months, blog traffic has grown to well extent which calls for good specifications.

To cater to growing traffic, KT implemented paid CDN (KeyCDN) for faster page delivery. Now, KT serves pages faster than before with the GTmetrix speed score as A (95%).

Apart from CDN, we also make a purchase of Genesis Framework which is a well famous product of Studiopress. This framework is a very neat and clean parent theme code for WordPress themes. This helps us avoiding code bloat which comes with free themes making then sluggish.

Currently, KernelTalks runs Magazine pro premium Genesis child theme giving it a much cleaner and well-organized look. It’s also a good theme for SEO which will help KT to rank higher in Google results!

That’s all technology updates running behind KernelTalks! Keep surfing and have a happy shell!

How to learn, practice HPUX online

HPUX is HP’s own Unix operating system which runs on HP hardware only. In this post, know if you can learn or practice HPUX online.

Many of our readers asked this question “How do learn HPUX online?”, “How to practice HPUX online?”, “Are there HPUX online test servers?”. So I thought of writing this post which discussed over if its possible to learn HPUX online by sitting at your home.

In today’s open source world, there is very small amount of space being owned by proprietary kernel’s like HPUX by HP, AIX by IBM, Solaris by Sun etc. Being  proprietary, these UNIX variants needs specific hardware to run on. Most of then dont even have emulator’s platform existing and dont run on vmware either. In such scenario, it becomes mandatory to have a licensed hardware to learn those technologies.

HPUX kernel supports only Itanium (IA) and PA-RISC architectures. This is the reason this OS cant run on VMware VM. IA and PA-RISC are very expensive hardware to own for a normal learner. PA-RISC being legacy hardware you might get it cheap in re-sell but again to find someone willing to sell this hardware is another treasure hunt quest!

Own HP Hardware:

One way to learn or practice HPUX is to buy HP hardware. You can purchase it directly from HP or its resellers. But since its expensive 99% of learners won’t opt for this option. Another way is to buy old hardware at a cheap price provided you found it up for sale!

Online HPUX servers:

HP used to run a program named “HP test drive”. Under this program, HP was offering free HPUX test machines (remote non-root access). But this program is shut down and no more available.

There are some institutes or learning centers which offer online HPUX server’s access for practice on a paid basis. You need to google around for such institutes locally in your area.

HP himself offers an HP performance center” program in which you can test hand on HP objects. Contact the local HP representative for more details.

Online courses :

Obviously this is always an open option. Learning centers offering HPUX courses locally in your area. HP also offers the HPUX learning module under its eLearning program.

Online study material :

There are many online course material for certification book materials available for HPUX. To start with, if you are a beginner, I will recommend book by Ashghar Ghori which is best to start with. It’s available to purchase from many websites like Amazon, Flipkart, etc. HP also provides study material which comes with their online courses.

Apart from this, HP official ITRC forum for HPUX is the best place to get your queries regarding HPUX resolved. Also, you can go through online blogs, videos, etc to learn HPUX. Obviously you can subscribe to this website which also publishes articles on HPUX frequently!

Conclusion :

If you are ready to spend a good amount of money on learning HPUX, go ahead with HP online courses and training materials. For a low budget, you need to search for local institutes offering HPUX courses.

Let us know in comments if you know any good online HPUX resources.

HPUX: Add persistent device names in VG

Know command to add persistent device names in the existing volume group in HPUX. Also, learn how to match legacy devices with persistent device names.

Newer HPUX like v3 introduced persistent device names (DSF disk special files). These are more convenient and user-friendly names than ctd format (Controller, target, device) names. CTD format are called legacy DSF and newer are persistent.

Persistent DSF takes care of native multipathing. In the case of multipathing, for the same disk, there are different ctd exists and hence different legacy names. But, there will be only one persistent device name per disk no matter how many ctd paths exist for that same disk. You can see this in the device file names mapping below.

For example, the legacy disk file name is /dev/dsk/c0t1d0 whereas persistent disk file name will be /dev/disk/disk1. A system with persistent device names does have legacy names in kernel too. Persistent to legacy names can be mapped using ioscan command like below :

# ioscan -m dsf
Persistent DSF             Legacy DSF(s) 
======================================== 
/dev/rdisk/disk1           /dev/rdsk/c1t0d0 
/dev/rdisk/disk2           /dev/rdsk/c4t0d0 
/dev/rdisk/disk3           /dev/rdsk/c2t0d1 
                           /dev/rdsk/c2t0d2 
/dev/rdisk/disk4           /dev/rdsk/c3t0d1 
                           /dev/rdsk/c3t0d2

In the above output, you can see the persistent device name on left and its related legacy name is on right. You can see multipathing is being taken care of by persistent device files. Since there is only one persistent name but many legacy device names for the same disk.

Adding persistent devices in VG :

For example, if you have created a volume group on a system with legacy device files. Now, you want to add persistent device files to VG. Then you can do it by using vgextend command with all persistent disk paths. But this method will be hectic since you need to search persistent names for all existing legacy devices in VG and accordingly add them in VG.

HPUX v3 has a special command vgdsf which will do this task for you. You just need to provide VG name and this command will add all persistent devices in VG and removes legacy devices out.

# vgdsf -c /dev/vg01

Converting legacy DSFs to persistent DSFs in VG /dev/vg01
Persistent DSF /dev/disk/disk3 added to VG /dev/vg01
Persistent DSF /dev/disk/disk4 added to VG /dev/vg01
Legacy DSF /dev/dsk/c2t0d1 removed from VG /dev/vg01
Legacy DSF /dev/dsk/c2t0d2 removed from VG /dev/vg01
Legacy DSF /dev/dsk/c3t0d1 removed from VG /dev/vg01
Legacy DSF /dev/dsk/c3t0d2 removed from VG /dev/vg01

In the above output you can see first it adds persistent dsf to VG and then removes legacy dsf from VG. You can verify if VG contains only persistent devices using vgdisplay command or examining /etc/lvmtab file.

How to check and test APA in HPUX

A how-to guide for checking and testing APA configurations in HPUX. Auto Port Aggregation is used for NIC redundancy which is similar to NIC teaming in Linux.

APA stands for Auto Port aggregation. It is software i.e. operating system level configuration which offers NIC (Network Interface Card also referred to as LAN card) redundancy. Under APA in HPUX, two NICs are configured together as a single virtual card at OS level. For OS, it’s a single NIC it’s talking to. But physically there are 2 NIC handling requests on this virtual card. On the occasion of hardware failure of anyone physical card, another physical card service OS (through virtual card) without hampering operations.

Complete guide : How to configure APA in HPUX

Normally, physical NICs are numbered as lan0, lan1, lan2, and so on. APA in HPUX terms new virtual cards as lan900, lan901, and so on. The current list of lan cards on the system can be obtained using the below command :

# ioscan -fnClan
Class     I  H/W Path    Driver S/W State   H/W Type     Description
=====================================================================
lan       0  2/0/0/1/0   igelan   CLAIMED     INTERFACE    HP PCI-X 1000Base-T Built-in
lan       1  2/0/4/1/0   iether   CLAIMED     INTERFACE    HP A7012-60601 PCI/PCI-X 1000Base-T Dual-port Adapter
lan       2  2/0/4/1/1   iether   CLAIMED     INTERFACE    HP A7012-60601 PCI/PCI-X 1000Base-T Dual-port Adapter
lan       3  2/0/6/1/0   iether   CLAIMED     INTERFACE    HP A7012-60601 PCI/PCI-X 1000Base-T Dual-port Adapter

In the above output, you can see, the second column which shows lan number. So we have 4 lan cards numbering lan0 to lan3 here. But in this output, you won’t be able to see APA interfaces i.e. virtual NIC.

For checking APA interfaces you need to use lanscan command.

# lanscan -q
2
3
900
901   0  1
902
903
904

Here you can see lan0 and lan 1 combined together forms lan901 interface which is APA card. Since those are used in APA, you don’t see them as separate entries like lan2 and lan3. This way you can trace physical NIC and their respective virtual or APA interfaces.

Testing APA:

To test APA means to check if your network connectivity via APA interface is uninterrupted in case of one of the physical NIC failure.

You can test this by removing one of the NIC physically from the system board. But this is not recommended since abruptly removing cards from the board also invites un-foreseen hardware issues. So, to test APA we have to emulate NIC failure or shuts NIC down without touching hardware.

This can be achieved by resetting NIC using lanadmin command. Resetting NIC makes card unavailable/un-operational for few seconds. This time is enough for us to test APA in HPUX.

Complete test can be carried out in below order:

  1. Identify IP defined on lan901 (our APA interface)
  2. Keep continuous ping on for this IP
  3. Reset lan0
  4. Observe ping
  5. Once lan0 comes back up reset lan1
  6. Observe ping
  7. Make sure both lan0 and lan1 are back online.

To reset lan you can use below command :

# lanadmin -r 0

To check if lan being reset is online or offline in APA

# lanscan -q
2
3
900
901   1   <<<< missing 0 means lan0 is offline

Repeat above command till lan901 shows 0 and 1 both interfaces.

During this test, you may observe one or two ping loss. This is due to APA shifting loads to the only available interface. This ping loss won’t hamper the operating environment because its far less than timeout values defined in software/tools used on OS. Hence redundancy is maintained in case of NIC failure.

Above test will fail i.e. you will completely lose ping to IP in the below scenarios :

  1. Your APA configuration is erroneous
  2. One or both lan interfaces are not configured properly at the network level (VLAN configurations)