

Different steps to troubleshoot check_mk agent in Linux

Before we start you may want to check our tutorial about setting up check_mk monitoring in Linux. You might experience issues when adding a server into check_mk monitoring. Below are a few steps, you can check to validate your configuration and communication between check_mk server and client works well.
Port 6556 communication
check_mk communicate over port 6556 by default. You need to check if port 6556 is open between client and server.
Also, you need to check if port 6556 is listening on your check_mk client so that server can fetch details by querying the client on port 6556.
root@kerneltalks#  netstat -lpn | grep 6556
tcp6       0      0 :::6556                 :::*                    LISTEN      24303/xinetd
You can even check using telnet on client and from server to client.
root@kerneltalks # telnet localhost 6556
Trying 127.0.0.1...
Connected to localhost.
Escape character is '^]'.
Connection closed by foreign host.
How to restart check_mk agent
check_mk agent runs on top of xinetd service in Linux. So if you make any changes to the config file then you need to reload configuration or restart the agent.
Reload check_mk configuration using below command –
root@kerneltalks # service xinetd reload
Redirecting to /bin/systemctl reload xinetd.service
Restart check_mk agent using below command –
root@kerneltalks # service xinetd stop
root@kerneltalks # service xinetd start
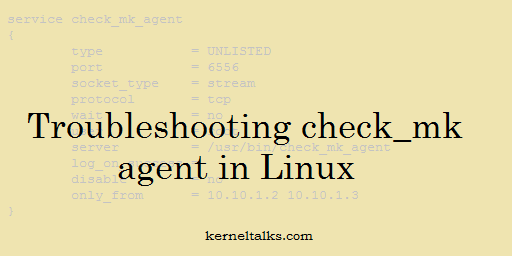
check_mk configuration file
Make sure you have a proper configuration file in place. check_mk configuration file is located at /etc/xinetd.d/check_mk_agent. The sample configuration file is as below –
# Created by Check_MK Agent Bakery.
# This file is managed via WATO, do not edit manually or you
# lose your changes next time when you update the agent.


service check_mk_agent
{
        type           = UNLISTED
        port           = 6556
        socket_type    = stream
        protocol       = tcp
        wait           = no
        user           = root
        server         = /usr/bin/check_mk_agent
        log_on_success =
        disable        = no
        only_from      = 10.10.1.2 10.10.1.3
}
only_from field denotes check_mk server IPs to which your agent will communicate. It will be populated by RPM you used to install. If it doesn’t reflect proper values you can edit it and reload check_mk configuration by using commands mentioned above.
check_mk agent updater
Check update for check_mk agent and download from the server using check_mk updater.
root@kerneltalks #  cmk-update-agent -v -v
+-------------------------------------------------------------------+
|                                                                   |
|  Check_MK Agent Updater - Update                                  |
|                                                                   |
+-------------------------------------------------------------------+
Read /etc/cmk-update-agent.state.
Getting target agent configuration from deployment server
Fetching URL: http://kerneltalks1/master/check_mk/deploy_agent.py?...
Response from deployment server:
AgentAvailable: False

Read /etc/cmk-update-agent.state.
Saved deployment status to /etc/cmk-update-agent.state.
No agent available for us.
Using this command you can even see to which server client is registered. If the client is not registered with check_mk server then you will see below error –
root@kerneltalks # cmk-update-agent -v -v
+-------------------------------------------------------------------+
|                                                                   |
|  Check_MK Agent Updater - Update                                  |
|                                                                   |
+-------------------------------------------------------------------+
Read /etc/cmk-update-agent.state.
Getting target agent configuration from deployment server
Fetching URL: http://kerneltalks1/master/check_mk/deploy_agent.py?...
ERROR This host is not registered for deployment
cmk-update-agent can not execute binary error
If you come across below error while executing cmk-update-agent command then it’s probably you are running binary of architecture it is not meant to run. e.g. you are running x86 binary on ARM server
/usr/bin/cmk-update-agent: line 8: /usr/lib/check_mk_agent/plugins/21600/cmk-update-agent: cannot execute binary file
Solution: Make sure you install the proper architecture package on your server which matches your server architecture. Generally x86 check_mk package is marked as noarch package but it will land you up in the above issue when you install it on the ARM arch server.
check_mk xinetd error
---------------------------------------------
WARNING
This package needs xinetd to be installed.
Currently you do not have installed xinetd.
Please install and start xinetd or install
and setup another inetd manually.
It's also possible to monitor via SSH without
an inetd.
---------------------------------------------
Solution: Install xinetd package. Start and enable xinetd service. If you are running a newer kernel/OS like Suse 15 SP1, xinetd is not available in it. Its sockets being served by systemd. You need to install a higher version of check_mk agent RPM which identifies systemd sockets and it won’t show you above error. e.g. version 1.4 packages were showing above error to me while when I used version 1.5 package, it got away and installation succeeded.
check_mk python error
---------------------------------------------
ERROR
Failed to install agent: Could not find a
'python' interpreter.
---------------------------------------------
Solution: It means you have a higher version of python like python3 and agent rpm is looking for python. Use the higher version of check_mk agent which understands the latest python binaries (which has nomenclature with like python3 and not python)