Yearly Archives: 2017

Why HPUX loosing market grip

Few observations on why HPUX is losing its grip in the market. How virtualization, cloud, costing effects HPUX existence in the market. 

hpux loosing market

Really? HPUX really losing market?  Kind of yes. But still it is one of the preferred OS for mission-critical environments like the defense industry because of its reliability and security. HPUX, one of the oldest OS (35 years old) released in 1982, no doubt is one of the best server OS we have seen in decades! Being a core HPUX certified engineer obviously I appreciate it moreover IBM’s AIX and Sun Micro system’s Solaris flavor.

But nowadays I am seeing fewer companies, corporate going for HPUX maybe because of its cost involved. Virtualization, cloud computing, and open-source Linux OS flavors made very cost-effective choices for corporate. High Availability offered by virtualization and cloud computing wins over the reliability of Unix when it comes to making cheap billing. HPUX being a hardware-dependent Os i.e. running only on HP hardware (inexpensive) and also involves costs in OS license itself including prime utilities like glance etc., choosing HPUX is a heavy pocket decision. In today’s world of cost-cutting, obviously this is one of the reasons, companies are not opting for HPUX.

Read also : How to learn, practice HPUX

The boom in cloud computing also has an effect on traditional in house data centers and hence on proprietary OS like HPUX.  Most of the cloud world is powered by Linux which adversely affects HPUX market share rather altogether AIX, Solaris too. People opting for cloud since they offer cheap services with no maintenance. Even I have seen companies are moving away from HPUX and shifting servers on Linux or cloud for billing numbers.

Another major leap back is HP backed off from new releases of HPUX. It’s like they opt to kill their own lion. The latest HPUX roadmap doesn’t even show HPUX v4 and v5 which was existing in old roadmaps. This clearly indicates they have stopped development for new versions and will be continuing current last HPUXv3 as the latest till 2025. This is a major setback since customers lookout for further development plans of service when opting for it.

I wish HP wake up to new versions and we see HPUX back alive and roaring on the IT world! Still it’s not the end of an era! There are many crucial companies and sectors still run by HPUX cause crucial data needs strong shoulders!

These are my observations and perceptions of HPUX’s current stand-in in the market. Let me know if you have any infographics, new data, matrices, graphs about the HPUX journey to date in comments.

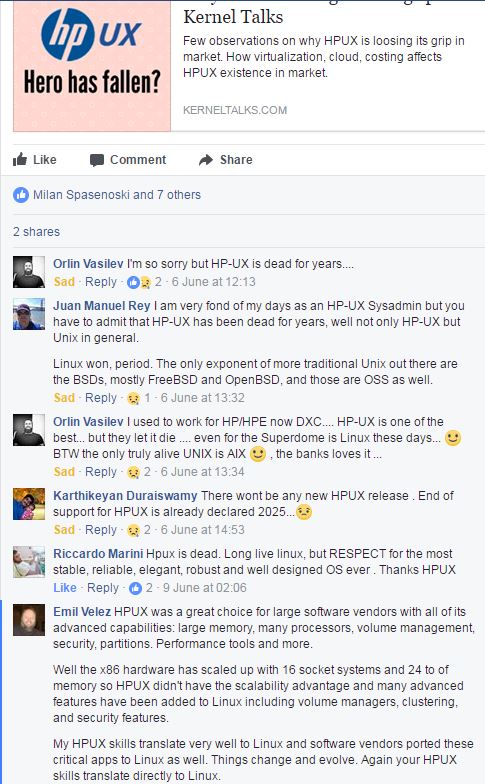
PS: Few comments rippled over this post on Facebook

Facebook comments

How to create RAM disk in Linux

Short tutorial explaining what is RAM disk and how to create a RAM disk in Linux. It also includes differences between ramfs and tmpfs.

RAM disk in Linux

Recently one of our readers asked “how to create a RAM disk in Linux?”. So I thought of writing this small tutorial which will help you to understand what is a RAM disk, what is the use of it and how to create a RAM disk in Linux.

What is RAM disk?

Roughly RAM disk can be termed as a portion of your RAM mounted as a directory. It uses tmpfs or ramfs. Refer below table for the difference between ramfs and tmpfs.

ramfs
tmpfs
Old type New type and replacing ramfs now
Can not be limited in size Size limit can be defined
Since can not be limited may lead to system crash Once limit reached, disk full error written. No system crash issue.
Entry is not visible in ‘df’ output. Need to calculate by using ‘Cached’ number in ‘free’ output. Can be seen in ‘df’ command output
Work mechanism as file system cache Work mechanism is as partition of physical disk

RAM disk is a very high speed, high performance and almost zero latency area to store application files. Due to its performance-oriented nature, its mostly used for temporary data like caching application files.

How to create RAM disk?

RAM disk can be created in simple two steps. One is to create a directory on which it should be mounted and the second step is to mount it on that directory using specific FS type. Make sure you have enough free RAM on the system so that portion of it can be used in RAM disk. You can check it using free command.

Lets create directory /mnt/ram_disk and mount RAM disk on it.

# mkdir /mnt/ram_disk
# mount -t tmpfs -o size=1024m new_ram_disk /mnt/ram_disk

In above mount command, -t should be followed by tmpfs or ramfs type. For ramfs, size is the starting size of RAM disk since ramfs have limitless size. Size followed by the name of the disk (of your choice ex. new_ram_disk). You can verify if it mounted properly using df command.

# df -h
Filesystem      Size  Used Avail Use% Mounted on
/dev/xvda1      5.8G  2.9G  2.7G  53% /
tmpfs           498M     0  498M   0% /dev/shm
new_ram_disk          1.0G     0  1.0G   0% /mnt/ram_disk

You can see newly created tmpfs of 1GB size is mounted on /mnt/ram_disk (highlighted above).

You can add below entry in /etc/fstab as well to persist it over reboots as well. But keep in mind that data within RAM disk flushes for each reboot since its backed memory is volatile.

new_ram_disk    /mnt/ram_disk   tmpfs    nodev,nosuid,noexec,nodiratime,size=1024M   0 


Network routes in Linux

Learn networking basics in the Linux server. What is the network route, how to check routes, how to define static and default routes in the Linux system?

Network routes in Linux

Network routes on Linux servers are the paths or gateways packets should follow to reach their destinations. Routes can be configured on interface level and system level. The default route is also known as default gateway is the IP where the packet should discover their path if the current network or interface (from which packet originated on the server) does not know the path for destination IP. This article is about discussing network routes in Linux. It will cover how to define the network route for the network interface, where and how to define the default route or default gateway in Linux etc.

How to check current routes on system?

Current routes on system can be viewed using below commands.

# ip route
default via 172.31.0.1 dev eth0
172.31.0.0/20 dev eth0  proto kernel  scope link  src 172.31.4.137
# netstat -r
Kernel IP routing table
Destination     Gateway         Genmask         Flags   MSS Window  irtt Iface
default         ip-172-31-0-1.a 0.0.0.0         UG        0 0          0 eth0
172.31.0.0      *               255.255.240.0   U         0 0          0 eth0
# routel
         target            gateway          source    proto    scope    dev tbl
        default         172.31.0.1                                     eth0
    172.31.0.0/ 20                    172.31.4.137   kernel     link   eth0
      127.0.0.0          broadcast       127.0.0.1   kernel     link     lo local
     127.0.0.0/ 8            local       127.0.0.1   kernel     host     lo local
----- output clipped -----

You can observe 172.31.0.1 is defined as default gateway on above system.

How to configure static route in Linux?

In RHEL: You need to edit below parameters in the config file /etc/sysconfig/network-scripts/route-ethX.

GATEWAY=10.10.0.1
NETMASK=255.0.0.0
IPADDR=10.10.0.22

where –

  • gateway is the default gateway for this interface
  • the netmask is a subnet mask value
  • ipaddr is the IP address of this interface

Caution : Do not change gateways on live production system.

In Debian: You can put your route in the file /etc/network/interfaces under the intended interface.

auto eth0
iface eth0 inet static
      address 10.10.0.22
      netmask 255.0.0.0
      up route add -net 10.10.0.0 netmask 255.0.0.0 gw 10.10.0.1

In all Linux systems you can use ip route command to define the static route. Command syntax is :

# ip route ip-address via dest-address

where, ip-address is IP of host or interface and dest-address is next HOP address i.e. route IP

How to configure default gateway in Linux?

In RHEL: Define default gateway IP against GATEWAY parameter in /etc/sysconfig/network file and then restart network service.

In Debian: Define default gateway IP against gateway parameter in /etc/network/interfaces file and then restart network service.

Or you can try these commands on any Linux (ex gateway as 10.10.0.1).

# ip route add default via 10.10.0.1
# route add default gw 10.10.0.1

Once set verify the default gateway with commands shown at the beginning of this article.

All you need to know about hostname in Linux

Learn what is hostname, how to set hostname and how to change hostname in Debian and RedHat based Linux systems.

Learn about hostname in Linux

The hostname is a prime identity of Linux servers in the human world! Obviously, the IP address is the main component to identify the system in the environment. In this article, we are going to see anything and everything about the hostname. We will walk through what is the hostname, how to set hostname, how to change hostname etc. Let’s start with the basics of the hostname.

What is hostname

The hostname is the humanly readable identity of the server. Any server is identified by IP address in the network but to identify easily hostname is also given. Normally FQDN (Fully Qualified Domain Name) is expected for the system but even Domain name (the name before the dot) is also fine for systems under private networks. The hostname can be alpha-numeric

Generally hostname standards to the maximum of 255 bytes long. But normally people prefer to keep it 10-12 characters long so that it’s easy to remember. Kernel variables _POSIX_HOST_NAME_MAX or HOST_NAME_MAX defines your current max limit of hostname. You can get their values using getconf a command like below :

# getconf HOST_NAME_MAX
64

How to set hostname in Linux

A quick command in all-new Linux distros is hostnamectl. Use set-hostname switch and your new hostname as an argument.

# hostnamectl set-hostname kerneltalks

For more details read on …

Hostname is defined in files

  • /etc/hosts for networking
  • /etc/hostname : This will be read by boot scripts on boot time and set its value.
  • /proc/sys/kernel/hostname : Current hostname.
  • /etc/sysconfig/network : Networking (HOSTNAME=”server1″ parameter)

In above files, you can only view current hostname (being used by the live kernel) under proc file only. Rest all files are used to lookup or set hostname at boot time. So if you change hostname using hostname command then it won’t reflect in rest files. It will only reflect in the proc file.

You can set the hostname of your choice in /etc/hostname or /etc/sysconfig/network and restart network service to notify kernel about it.

How to change hostname in Linux

The current hostname can be checked by typing hostname command without any argument. The hostname can be changed by simply using hostname command followed by the name of your choice.

Cautions : Do not change hostname on live production systems!

# hostname
server5
# hostname kerneltalks.com
# hostname
kerneltalks.com

Please make a note that change is dynamic and not permanent. After the system reboot, the hostname will be returned to what it was earlier.

Change hostname permanently in Linux

On RedHat systems : You can edit file /etc/sysconfig/network (define in HOSTNAME=”xyz”)  & reboot system

# cat /etc/sysconfig/network
HOSTNAME=kerneltalks.com

On Debian systems : You can edit file /etc/hostname & call /etc/init.d/hostname.sh script (/etc/init.d/hostname.sh start)

You can even change the hostname using the system control command. Use parameter kernel.hostname and define its value like below :

# sysctl kernel.hostname=kerneltalks
kernel.hostname = kerneltalks

On Suse systems: Edit file /etc/HOSTNAME and add hostname in it. There will be no parameter and value format. Only you have to enter hostname like below :

# cat /etc/HOSTNAME
kerneltalks.com

Change hostname permanently in clone, template VM & cloud clones

If you have a system which is prepared using clone, template from VMware or cloud clone deploy then you should do the following :

Edit file /etc/cloud/cloud.cfg and change parameter 'preserve_hostname' to true. You can do it using one-line sed script as below :

root@kerneltalks # sed --in-place 's/preserve_hostname: false/preserve_hostname: true/' /etc/cloud/cloud.cfg

Also, change DHCP related parameter DHCLIENT_SET_HOSTNAME in file /etc/sysconfig/network/dhcp to no. So that hostname wont be changed by DHCP in the next reboot. Again, you can use one line sed to do that as below :

root@kerneltalks # sed --in-place 's/DHCLIENT_SET_HOSTNAME="yes"/DHCLIENT_SET_HOSTNAME="no"/' /etc/sysconfig/network/dhcp

That’s it. These are two extra steps you need to take on cloud or VM servers.

How to configure FQDN in Linux

Another thing around the hostname is to set FQDN for Linux server i.e. Fully Qualified Domain Name. Generally you should be doing in via DNS in your environment but /etc/hosts always get checked first. So its good practise to define FQDN at /etc/hosts file

Use <IP> <FQDN> <Hostname> format to add/edit entry in /etc/hosts and you are good to go. Sample entry below –

root@testsrv1 # echo "10.1.1.5 testsrv1.kerneltalks.com testsrv1">>/etc/hosts

You can verify Linux server’s FQDN by using command hostname -f

root@testsrv1 # hostname -f
testsrv1.kerneltalks.com

How to tune kernel parameters in Linux

An article explaining how to tune kernel parameters in the Linux system using command or using a configuration file.

Tune kernel parameters in Linux

In this article we will be discussing how to set or tune the kernel parameter in any Linux system. There are many ways you can do it like setting them in their configuration files or using a system control command sysctl.

sysctl command is used to configure kernel parameters at runtime. Your current kernel parameters values can be viewed with -a switch.

# sysctl -a
abi.vsyscall32 = 1
crypto.fips_enabled = 0
debug.exception-trace = 1
debug.kprobes-optimization = 1
dev.hpet.max-user-freq = 64
dev.mac_hid.mouse_button2_keycode = 97
dev.mac_hid.mouse_button3_keycode = 100
dev.mac_hid.mouse_button_emulation = 0
dev.parport.default.spintime = 500

----- output clipped -----

In the above output you can see parameters on left and their current value on the right. Parameters are sorted with alphabetical order and both columns in output are delimited with = sign so that you can sort this output easily using this delimiter.

There are a few parameters you can even view using the proc file system. You can cat their respective files and view values.

# cat /proc/sys/kernel/shmmni
2048

In above example we can see shmmni value is set to 2048.

How to tune kernel parameter

To change the kernel parameter you can define it under configuration file /etc/sysctl.conf and it will be applied at the next reboot. You need to define parameter=value format in this file (ex. kernel.shmmni=4096).

Each new line represents a new parameter and value pair. Values in this file will be loaded at the next reboot. If you want to load this file immediately then you can can do it by using sysctl -p command. It will load /etc/sysctl.conf file in kernel. You can even define values with -w switch explained below.

To change the kernel parameter using sysctl, you should use a write switch -w along with parameter and value. In the below example we are changing kernel.shmmni value to 2048.

# sysctl kernel.shmmni
kernel.shmmni = 4096
# sysctl -w kernel.shmmni=2048
kernel.shmmni = 2048

You can observe previously kernel.shmmni value was 4096, using -w we changed it to 2048. This change is immediate and does not need a reboot to comes in effect.

syslog configuration in Linux

Learn everything about Syslog in Linux. Its configuration file format, how to restart Syslog, rotation, and how to log Syslog entry manually.

Linux Syslog configuration

One of the most important daemons on Unix or Linux based system is syslogd! It logs many crucial system events by default. Logs written by syslogd are commonly referred to as Syslog. Syslogs are first logs when you want to trace issues with your system. They are the lifeline of sysadmins 🙂

In this article, we will see configuration files for syslogd, different configs and how to apply them. Before we begin to go through the below files which we will be using throughout this article frequently.

  1. /etc/syslog.conf : syslogd configuration file
  2. /var/log/messages : Syslog file

There are three projects on Syslog daemon spawned one after another to enhance the previous project’s functionality. They are: syslog (year 1980), syslog-ng (year 1998) and rsyslog (year 2004). So depending on which project’s fruit is running on your server, your daemon name changes. The rest of the configuration remains pretty close similar.

Syslog uses port TCP 514 for communication.

syslogd daemon

This daemon starts with systems and runs in the background all the time, capturing system events and logging them in Syslog. It can be started, stop, restart like other services operations in Linux. You need to check which Syslog version (three projects as stated above) is running (ps -ef |grep syslog) and accordingly, use the daemon name.

# service rsyslog status
rsyslogd (pid  999) is running...

# service rsyslog restart
Shutting down system logger:                               [  OK  ]
Starting system logger:                                    [  OK  ]

After making any changes in the configuration file you need to restart syslogd in order to take these new changes in effect.

syslog configuration file

As stated above /etc/syslog.conf is a configuration file where you can define when, where, which event to be logged by Syslog daemon. There name changes as per your Syslog version

  • /etc/syslog.conf for syslog
  • /etc/syslog-ng.conf for syslog-ng
  • /etc/rsyslog.conf for rsyslog

The typical config file looks like below :

*.info;mail.none;authpriv.none;cron.none                /var/log/messages
authpriv.*                                              /var/log/secure
mail.*                                                  -/var/log/maillog
cron.*                                                  /var/log/cron
*.emerg                                                 *
uucp,news.crit                                          /var/log/spooler
local7.*                                                /var/log/boot.log

Here, on the left side column shows services for which you want logs to be logged along with their priority (succeeded by . after service name) and on the right side are actions normally destinations where logs should be written by the daemon.

Services values and priorities :

  • local7: boot messages
  • kern: Kernel messages
  • auth: Security events
  • authpriv : Access control related messages
  • mail, cron: mail and cron related events

Service priorities :

  • debug
  • info
  • notice
  • warning
  • err
  • crit
  • alert
  • emerg
  • * means all level of messages to be logged
  • none means no messages to be logged

All the above priorities are given in ascending level of urgency.

Actions/destination :

Those mostly log files or remote Syslog server to which logs get sent. The remote server can be specified by IP or hostname preceded by @ sign.

Syslog

All logs by syslogd are written its Syslog file /var/log/messages. Typical Syslog file looks like :

May 22 02:00:29 server1 rsyslogd: [origin software="rsyslogd" swVersion="5.8.10" x-pid="999" x-info="http://www.rsyslog.com"] exiting on signal 15.
May 22 02:00:29 server1 kernel: imklog 5.8.10, log source = /proc/kmsg started.
May 22 02:00:29 server1 rsyslogd: [origin software="rsyslogd" swVersion="5.8.10" x-pid="1698" x-info="http://www.rsyslog.com"] start
May 22 02:17:43 server1 dhclient[916]: DHCPREQUEST on eth0 to 172.31.0.1 port 67 (xid=0x445faedb)

Here file can be read in below parts from left to right :

  1. Date
  2. Time
  3. Hostname (This is important to identify which server’s log is this on centralized Syslog server)
  4. The service name for which logs were written by the daemon
  5. Separator colon
  6. Actual message or log

The first 5 fields can be used for sorting, filtering logs in various tools, scripts, etc. Since Syslog logs, all events on system, it’s obvious it grows in size pretty quickly. You can manually rotate Syslog over a specific period or you can even use logrotate utility to do it automatically in the background.

Testing Syslog logging

To test if the daemon is logging messages in Syslog or not, you can use logger command. With this command, you can specify numerous options like a priority, service, etc. But even without any argument, you can supply a string to write in Syslog and it will do the job for you.

# logger Writing KERNELTALKS in syslog using logger. Testing...

# cat /var/log/messages |grep -i kerneltalks
May 22 02:31:05 server1 root: Writing KERNELTALKS in syslog using logger. Testing...

In the above example, you can see all entries after logger command are printed in the Syslog file. Since we used logger command and didn’t specify any service, it logged message with userid root in-service field!

8 Wannacry ransomware memes take over the Internet

Gallery of wannacry ransomware memes that take over Internet after major cyber attack broke over the weekend.

Wannacry ransomware memes

As everyone is aware the Internet world has been hit by ransomware called WannaCry last weekend. It was a nightmare for Wintel admins as their whole weekend was burned into patching windows servers in their environments. Obviously Linux world was pretty quiet since WannaCry targeted Windows operating systems only.

No wonder, the Internet got filled with lots of memes about this cyber attack. I collected a few of them here:

Read & share !

Note: Image credits are links from where I collected that image. The origin/creator of the image might be different.

If you have any meme about wannacry let us know in comments!

Want to have some some fun in Linux? Read on these articles !


How to configure the local APT repository

Learn how to configure the local APT repository in Debian based Linux systems. Useful article for package management on Linux.

APT repository configuration

APT is package manager that handles Debian packages (.deb). Linux distributions like Ubuntu, Debian uses APT whereas Red Hat, CentOS uses YUM. The package repository is an index of packages that can be used to search, view, install & update packages for Linux In this article, we will be walking through steps to configure the local APT repository.

APT has two types of repositories: complex and simple. We will see a simple repository configuration in this article. For example, we will be keeping two packages in our repository and configure APT to use it. If you know, you can even download packages in .deb format from existing APT repositories! We are keeping our test packages under /usr/mypackages directory. You can choose your own path.

Rest of the process consist of only 3 steps :

  1. Store packages in the designated directory
  2. Scan that directory to create an index
  3. Add index file path to /etc/apt/sources.list

Step 1 :

Store packages in directory (/usr/mypackages in our case here). I kept below two packages :

# ll /usr/mypackages
total 156
-rw-r--r--  1 root root 136892 May 17 10:19 python_2.7.11-1_amd64.deb
-rw-r--r--  1 root root  11064 May 17 10:20 python-tdb_1.3.8-2_amd64.deb

Step 2:

Scan packages directory with  command dpkg-scanpackagesThis command takes two arguments: first is a directory to scan and the second is override file. For simple repositories, we don’t need an override file so we can use /dev/null as the second argument.

If you get The program 'dpkg-scanpackages' is currently not installed. error then you need to install package dpkg-dev on your server.

# dpkg-scanpackages . /dev/null
Package: python
Source: python-defaults
Version: 2.7.11-1
Architecture: amd64
Maintainer: Ubuntu Developers <ubuntu-devel-discuss@lists.ubuntu.com>
Installed-Size: 635
Pre-Depends: python-minimal (= 2.7.11-1)
Depends: python2.7 (>= 2.7.11-1~), libpython-stdlib (= 2.7.11-1)
Suggests: python-doc (= 2.7.11-1), python-tk (>= 2.7.11-1~)
Conflicts: python-central (<< 0.5.5)
Breaks: update-manager-core (<< 0.200.5-2)
Replaces: python-dev (<< 2.6.5-2)
Provides: python-ctypes, python-email, python-importlib, python-profiler, python-wsgiref
Filename: ./python_2.7.11-1_amd64.deb
Size: 136892
MD5sum: af686bd03f39be3f3cd865d38b44f5bf
SHA1: eb433da2ec863602e32bbf5569ea4065bbc11e5c
SHA256: 5173de04244553455a287145e84535f377e20f0e28b3cec5a24c109e3fa3f088
Section: python
Priority: standard
Multi-Arch: allowed
Homepage: http://www.python.org/
Description: interactive high-level object-oriented language (default version)
 Python, the high-level, interactive object oriented language,
 includes an extensive class library with lots of goodies for
 network programming, system administration, sounds and graphics.
 .
 This package is a dependency package, which depends on Debian's default
 Python version (currently v2.7).
Original-Maintainer: Matthias Klose <doko@debian.org>

Package: python-tdb
Source: tdb
Version: 1.3.8-2
Architecture: amd64
Maintainer: Ubuntu Developers <ubuntu-devel-discuss@lists.ubuntu.com>
Installed-Size: 50
Depends: libtdb1 (= 1.3.8-2), python (<< 2.8), python (>= 2.7~), python:any (>= 2.7.5-5~), libc6 (>= 2.2.5), libpython2.7 (>= 2.7)
Provides: python2.7-tdb
Filename: ./python-tdb_1.3.8-2_amd64.deb
Size: 11064
MD5sum: 05035155e6baf5700a19fb8308beeca1
SHA1: bd9ec7d2a902e6997651efeaa0842bfb4a782862
SHA256: c53fd7dae63a846cc9583c174e1def248f9def2c4208923704f964068f0a5ea5
Section: python
Priority: optional
Homepage: http://tdb.samba.org/
Description: Python bindings for TDB
 This is a simple database API. It is modelled after the structure
 of GDBM. TDB features, unlike GDBM, multiple writers support with
 appropriate locking and transactions.
 .
 This package contains the Python bindings.
Original-Maintainer: Debian Samba Maintainers <pkg-samba-maint@lists.alioth.debian.org>

dpkg-scanpackages: warning: Packages in archive but missing from override file:
dpkg-scanpackages: warning:   python python-tdb
dpkg-scanpackages: info: Wrote 2 entries to output Packages file.

You can see in above output, dpkg-scanpackages checks all packages list their details on terminal. Since command sends output to stdout we will pipe this output with gunzip to create gz index file.

# dpkg-scanpackages . /dev/null | gzip -9c > Packages.gz
dpkg-scanpackages: warning: Packages in archive but missing from override file:
dpkg-scanpackages: warning:   python python-tdb
dpkg-scanpackages: info: Wrote 2 entries to output Packages file.

# ll
-rw-r--r--  1 root root   1130 May 17 10:27 Packages.gz

Now your index file is ready to be used by APT. You need to let APT know that a new index is created and can be used as a new location to scan packages.

Recommended reads :
YUM configuration in Linux
EPEL repo config in Linux

Step 3:

Update the APT configuration file /etc/apt/sources.list with path of the newly created index file. Add below line :

deb file:/usr/mypackages ./

Thats it! Its done. Run apt update to pickup this new repo.

# apt update
Get:1 file:/usr/mypackages ./ InRelease
Ign:1 file:/usr/mypackages ./ InRelease
Get:2 file:/usr/mypackages ./ Release
Err:2 file:/usr/mypackages ./ Release
  File not found - /usr/mypackages/./Release (2: No such file or directory)
Hit:3 http://ap-south-1.ec2.archive.ubuntu.com/ubuntu xenial InRelease
Hit:4 http://ap-south-1.ec2.archive.ubuntu.com/ubuntu xenial-updates InRelease
Hit:5 http://ap-south-1.ec2.archive.ubuntu.com/ubuntu xenial-backports InRelease
Get:6 http://security.ubuntu.com/ubuntu xenial-security InRelease [102 kB]
Get:7 http://security.ubuntu.com/ubuntu xenial-security/main amd64 Packages [265 kB]
Reading package lists... Done
E: The repository 'file:/usr/mypackages ./ Release' does not have a Release file.
N: Updating from such a repository can't be done securely, and is therefore disabled by default.
N: See apt-secure(8) manpage for repository creation and user configuration details.

You can see in the above output there are security warnings since e haven’t added release files in our directory. We had configured only simple repo hence we just stick with .deb packages and rest files not included.

Difference between hard link and soft link

Learn the difference between hard links and soft links. Also discover what are they, how to create them, and how to identify them on the system.

Differences between hard link and soft link

One of the frequently asked Linux or Unix interview questions is what is the difference between hard links and soft links? In this post, we will touch base: what is the hard link & soft link,  main differences between hard and soft link, how to create a soft link and hard link, a table showing the difference between a hard and soft link, and how to identify the hard link and soft link.

Without much of distraction, lets get started :

What is hard link?

A hard link is a mirror copy of a file in the Linux or Unix system. Having said that, the original file and link file both have the same inodes. Since both share the same inode, hard links can not cross file system boundaries i.e. you can not create a hard link of a file residing in another mount point. Whenever you delete hard links, the original file and its other hard links still exist since they are all mirror copies. It just reduces the link count! Hard links have actual file content.

What is soft link?

A soft link is just a link to a file in Linux or Unix system. For understanding, you can visualize soft link as a “desktop shortcuts” in windows. Since its a link, its inode is different from the file it’s linking to. Soft links can cross file systems. You can create soft links across file systems. If you delete the original file all linked soft links fail. Since it will point to a non-existent file.

Differences between hard link and soft link :

Hard link
Soft link
Its mirror copy of original file Its link to original file
Link and original file have same inode Links has different inode than original file
Can not cross file systems Can be created across file systems
Show data even if original file deleted Fails if original file deleted
Has full content of original file Its just points to source file hence contains no data of source
It can not link directories It can link to directory
Saves your inodes in kernel since it shared same inode as source One inode is occupied hence decreasing available inodes
Takes up storage space since its a mirror copy Takes almost no storage since it contains only path of source

How to create hard link?

To create a hard link you need to use command ln followed by source (original filename) and then link name. In the below example, we are creating two hard links link1 and link2 to file testdata.

# cat testdata
This is test file with test data!
# ln testdata link1
# ln testdata link2
# ls -li
total 12
3921 -rw-r--r--. 3 root root 50 May 16 01:16 link1
3921 -rw-r--r--. 3 root root 50 May 16 01:16 link2
3921 -rw-r--r--. 3 root root 50 May 16 01:16 testdata

You can see above we used ln command to create hard links. Following which we listed their inodes with -i option of command ls. You can see, both links are having the same inode (3921) as the original file (see the first column). Also, the size of hard links is the same as the original file since they contain the same data as the source file.

Now we will delete the original file and see if we can still have data of it from link files.

# rm testdata
rm: remove regular file `testdata'? y

# ls -li
total 8
3921 -rw-r--r--. 2 root root 50 May 16 01:16 link1
3921 -rw-r--r--. 2 root root 50 May 16 01:16 link2

# cat link1
This is test file with test data!

Yes. Data still can be fetched from hard links even after deleting the original file since those are mirror copies!

How to create soft link?

For creating soft links, the same ln command can be used but need to specify -s option (soft link). The rest of the command format remains the same.

# ln -s testdata link1
# ln -s testdata link2
# ls -li
total 4
3921 lrwxrwxrwx. 1 root root  8 May 16 01:26 link1 -> testdata
3925 lrwxrwxrwx. 1 root root  8 May 16 01:26 link2 -> testdata
3923 -rw-r--r--. 1 root root 34 May 16 01:25 testdata

In the above example, after creating soft links if you observe inode numbers of soft links are different from the original file. Also, link size is pretty small since they have only path details of the source, not data. Another observation is soft links shows which file they are pointing to in ls output at last column which was not the case in hard links.

Now, we will delete original file and try to access links.

# cat link2
This is test file with test data!
# rm -f testdata
# cat link2
cat: link2: No such file or directory

You can see in the above output, previously we can use link2 properly. After deleting the original file, links are broken and throwing errors when we try to access them!

How to identify hard link and soft link?

From the above examples, you can figure out soft links are easy to identify. Soft links are marked as link files lxxxxxxxxx in special file bit (first column of ll output). They are even displaying pointers and source file names in the last column of ll output (link1 -> testdata).

Hard links are not that pretty straight forward to identify. You need to use inode option -i in ls command and then you need to check for duplicate inodes. This is a manual method. You can even use find command with -same file option. It will then scan inodes and list files with the same inodes (i.e. hard links!)

# find /path -xdev -samefile testdata

The above command will scan /path directory and will list all files having the same inode as testdata file. Which means it will list all hard links to testdata file!

Complete AWS CSA Associate exam preparation guide!

Small AWS CSA Associate exam preparation guide to help you get ready for the certification exam. Get confident with the list of test quizzes listed here.

AWS CSA Associate exam preparation guide

Note: SAA-C01 is retiring now and being replaced with SAA-C02.

Recently I cleared the Amazon Web Services Certified Solutions Architect Associate-level exam and I was bombarded with many questions like How to prepare for the AWS CSA exam? Which book to refer to preparing AWS CSA certification? How to study for AWS CSA? Which online resources available for the certified solutions architect exam? So I thought of summing all this up in a small post which can be useful for AWS CSA aspirants.

Remember this post is compiled from my own experience and should not be taken as the final benchmark for taking the certification exams. This post is mainly aimed to help you gaining confidence in taking examination once you are through your syllabus and hands-on experience.

AWS has three streams where you can pursue your cloud career.

  • AWS Certified Solutions Architect (Architecture context)
  • AWS Certified Developer (Developer context)
  • AWS Certified SysOps Administrator (Operations context)

All these three streams have an associate-level (primary or base) level certification. Later professional (higher level) certification is available for solution architect only. Developer and SysOps get merged into single AWS certified DevOps Engineer professional certification.

So, we are talking here about the Amazon Web Services Certified Solutions Architect Associate level exam! Obviously you should be well versed with AWS and requirements stated by Amazon on exam link. Let’s have some examination details :

AWS CSA Exam details :

  • Total number of questions: 60-65
  • Duration: 130 minutes
  • Cost : $150
  • Type: Multiple choice questions
  • Can be retaken after 7 days of cooldown period if failed in the first attempt
  • Syllabus: Download here.
  • Pass criteria: 720/1000.

AWS CSA Study material :

Quick recap before exam :

I have compiled a series of quick reviews before taking the exam. Feel free to refer and suggest your addition/feedback.

Below is a list of AWS quiz which I gathered from the web which can help you to put your cloud knowledge to test and gain the confidence to get ready for the exam.

Free Quiz

Premium (paid) Quiz

  • Cloud academy: 241 Questions. Signup needed (first 7 days free access then paid account)
  • Linux Academy: 117 Questions. Signup needed (first 7 days free access then paid account)
  • A Cloud Guru: 294 Questions. Signup needed.
  • AWS Training practice tests $20. It’s free if you are AWS certified. You can get a voucher from your certification benefits section on the AWS certification portal.
  • Practice exam by tutorialsdojo

All the best !

Our other certification preparation articles

  1. Preparing for 1Z0-1085-20 Oracle Cloud Infrastructure Foundations 2020 Associate Exam
  2. Journey to AWS Certified Solutions Architect – Professional Certification SAP-C01
  3. Preparing for CLF-C01 AWS Certified Cloud Practitioner Exam
  4. Preparing for SOA-C01 AWS Certified SysOps Administrator Associate Exam