Category Archives: Software & Tools

How to start, stop & restart MariaDB server in Linux

Learn how to start, stop & restart the MariaDB server in Linux. Also, know how to check the MariaDB server status.
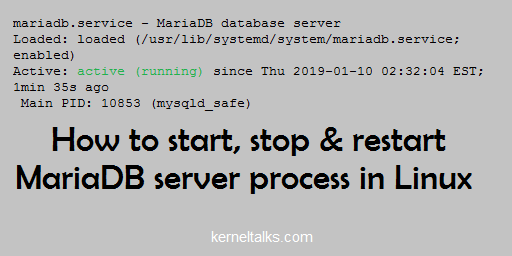
Managing MariaDB server process

MariaDB is a MySQL database management system and popular nowadays.
It is one of the pillars of the LAMP stack popular among developers. In this article, we will walk you through steps to manage the MariaDB server process from the command line shell prompt.

In newer systems like RHEL 7, Debian 8, Ubuntu 15.04, Suse 12 and later system V init daemon is replaced by systemd. We will see both systemd and system V init commands to manage the MariaDB server process. Be noted that we are dealing with the MariaDB server process only. You have to take care of the databases you build within for their graceful shutdown and startup.

How to start MariaDB server

On newer systems with systemd

# systemctl start mariadb

On older systems with system V init

# service mysql start
Starting MariaDB.190110 07:15:32 mysqld_safe Logging to 'https://z5.kerneltalks.com/var/lib/mysql/kerneltalks.test.err'.
190110 07:15:32 mysqld_safe Starting mysqld daemon with databases from /var/lib/mysql
.                                                          [  OK  ]

How to start MariaDB server at boot

On newer systems with systemd

# systemctl enable mariadb
ln -s 'https://z5.kerneltalks.com/usr/lib/systemd/system/mariadb.service' 'https://z5.kerneltalks.com/etc/systemd/system/multi-user.target.wants/mariadb.service'

On older systems with system V init

Systems like RHEL, CentOS, SUSE uses chkconfig to manage processes at boot.

# chkconfig --add mysql
# chkconfig --level 345 mysql on

Systems like Debian, ubuntu uses update-rc.d

# update-rc.d mysql defaults

How to stop MariaDB server

On newer systems with systemd

# systemctl stop mariadb

On older systems with system V init

# service mysql stop
Shutting down MariaDB.                                     [  OK  ]

How to check MariaDB server status

On newer systems with systemd

# systemctl status mariadb
mariadb.service - MariaDB database server
   Loaded: loaded (/usr/lib/systemd/system/mariadb.service; enabled)
   Active: active (running) since Thu 2019-01-10 02:32:04 EST; 1min 35s ago
 Main PID: 10853 (mysqld_safe)
   CGroup: /system.slice/mariadb.service
           ├─10853 /bin/sh /usr/bin/mysqld_safe --basedir=/usr
           └─11015 /usr/libexec/mysqld --basedir=/usr --datadir=/var/lib/mysql --plugin-dir=/usr/lib64/mysql/plugin --log-error=/var/log/mariadb/mariadb.log --pid-fi...

Jan 10 02:32:00 ip-172-31-89-93.ec2.internal mariadb-prepare-db-dir[10775]: MySQL manual for more instructions.
Jan 10 02:32:00 ip-172-31-89-93.ec2.internal mariadb-prepare-db-dir[10775]: Please report any problems at http://mariadb.org/jira
Jan 10 02:32:00 ip-172-31-89-93.ec2.internal mariadb-prepare-db-dir[10775]: The latest information about MariaDB is available at http://mariadb.org/.
Jan 10 02:32:00 ip-172-31-89-93.ec2.internal mariadb-prepare-db-dir[10775]: You can find additional information about the MySQL part at:
Jan 10 02:32:00 ip-172-31-89-93.ec2.internal mariadb-prepare-db-dir[10775]: http://dev.mysql.com
Jan 10 02:32:00 ip-172-31-89-93.ec2.internal mariadb-prepare-db-dir[10775]: Consider joining MariaDB's strong and vibrant community:
Jan 10 02:32:00 ip-172-31-89-93.ec2.internal mariadb-prepare-db-dir[10775]: https://mariadb.org/get-involved/
Jan 10 02:32:01 ip-172-31-89-93.ec2.internal mysqld_safe[10853]: 190110 02:32:01 mysqld_safe Logging to 'https://z5.kerneltalks.com/var/log/mariadb/mariadb.log'.
Jan 10 02:32:01 ip-172-31-89-93.ec2.internal mysqld_safe[10853]: 190110 02:32:01 mysqld_safe Starting mysqld daemon with databases from /var/lib/mysql
Jan 10 02:32:04 ip-172-31-89-93.ec2.internal systemd[1]: Started MariaDB database server.

On older systems with system V init

# service mysql status
MariaDB running (2122)                                     [  OK  ]

How to restart MariaDB server process

On newer systems with systemd

root@kerneltalks # systemctl restart mariadb

On older systems with system V init

root@kerneltalks # service mysql restart
Shutting down MariaDB....                                  [  OK  ]
Starting MariaDB.190110 07:35:01 mysqld_safe Logging to 'https://z5.kerneltalks.com/var/lib/mysql/ip-172-31-90-145.ec2.internal.err'.
190110 07:35:01 mysqld_safe Starting mysqld daemon with databases from /var/lib/mysql
.                                                          [  OK  ]

Install LAMP in RHEL

Learn to install LAMP in RHEL. Linux, Apache, Mysql/MariaDB, Php/PHPmyadmin i.e. LAMP is a complete application stack used for development, testing & hosting dynamic websites.

LAMP installation

LAMP is an application stack which helps you to develop, test, and host dynamic website. You can test dynamic applications as well with this stack. Basically LAMP stands for Linux Apache Mysql/MariaDB and PHP/PHPMyadmin.

Linux gives a kernel platform on which the rest of the stack runs. Apache provides your web-server which is front-end for your application or website. Mysql/MariaDB is a database you could use for data on your site or app. PHP is as you know server-side strong scripting language just fit for web application development.

Without any further delay, let’s run through commands to setup and configure your LAMP stack. For the demonstration, I will be using RHEL 7 on AWS here to setup LAMP.

Setting Linux in LAMP

Nothing to tell you here! Having a Linux server already pass you through this. Here are a few installations articles from our factory.

Setting up Apache in LAMP

Installing Apache is not a big deal now. Follow the below list of commands to install, enable, and start Apache webserver.

root@kerneltalks # yum install httpd
root@kerneltalks # systemctl enable httpd
root@kerneltalks # systemctl start httpd

Check and make sure you get Apache welcome page in the browser after entering the IP address of the server. Open port 80 in Linux firewall, network firewall, or AWS security group if necessary.

We have a detailed tutorial to install Apache in Linux & install Tomcat Apache 9 if you want to refer.

Apache test page

Setting up Mysql in LAMP

MariaDB is a MySQL database we will be installing here. Use the below commands to install and start MariaDB.

root@kerneltalks # yum install mariadb-server mariadb
root@kerneltalks # systemctl start mariadb

Secure your MariaDB setup by running below command –

root@kerneltalks # /usr/bin/mysql_secure_installation

NOTE: RUNNING ALL PARTS OF THIS SCRIPT IS RECOMMENDED FOR ALL MariaDB
      SERVERS IN PRODUCTION USE!  PLEASE READ EACH STEP CAREFULLY!

In order to log into MariaDB to secure it, we'll need the current
password for the root user.  If you've just installed MariaDB, and
you haven't set the root password yet, the password will be blank,
so you should just press enter here.

Enter current password for root (enter for none):
OK, successfully used password, moving on...

Setting the root password ensures that nobody can log into the MariaDB
root user without the proper authorisation.

Set root password? [Y/n] Y
New password:
Re-enter new password:
Password updated successfully!
Reloading privilege tables..
 ... Success!

By default, a MariaDB installation has an anonymous user, allowing anyone
to log into MariaDB without having to have a user account created for
them.  This is intended only for testing, and to make the installation
go a bit smoother.  You should remove them before moving into a
production environment.

Remove anonymous users? [Y/n] Y
 ... Success!

Normally, root should only be allowed to connect from 'localhost'.  This
ensures that someone cannot guess at the root password from the network.

Disallow root login remotely? [Y/n] n
 ... skipping.

By default, MariaDB comes with a database named 'test' that anyone can
access.  This is also intended only for testing, and should be removed
before moving into a production environment.

Remove test database and access to it? [Y/n] Y
 - Dropping test database...
 ... Success!
 - Removing privileges on test database...
 ... Success!

Reloading the privilege tables will ensure that all changes made so far
will take effect immediately.

Reload privilege tables now? [Y/n] Y
 ... Success!

Cleaning up...

All done!  If you've completed all of the above steps, your MariaDB
installation should now be secure.

Thanks for using MariaDB!

Now you are running the MySQL database i.e. MariaDB and secured it too. You can test by connecting to database and running simple command –

root@kerneltalks # mysql -u root -p
Enter password:
Welcome to the MariaDB monitor.  Commands end with ; or \g.
Your MariaDB connection id is 18
Server version: 5.5.60-MariaDB MariaDB Server

Copyright (c) 2000, 2018, Oracle, MariaDB Corporation Ab and others.

Type 'help;' or '\h' for help. Type '\c' to clear the current input statement.

MariaDB [(none)]> SELECT VERSION();
+----------------+
| VERSION()      |
+----------------+
| 5.5.60-MariaDB |
+----------------+
1 row in set (0.00 sec)

Setting up PHP in LAMP

Install PHP to complete this step. Install PHPMyAdmin if you are planning to host a dynamic website using CMS like WordPress.

root@kerneltalks # yum install php

You can test sample PHP code like one below by placing it in /var/www/html (default webserver directory)

# cat /var/www/html/php_info.php
<?php phpinfo(); ?>

It will shows PHP information in web browser when you hit http://ip-address/php_info.php

PHP version test page

How to list PHP extensions in Linux

You can check active PHP modules using the below command. If an extension is missing you need to install its corresponding package on the system. Generally, it follows naming convention like PHP-extension i.e. for curl extension you need to search and install php-curl or phpX-curl where X is PHP version

# php -m
[PHP Modules]
Core
ctype
date
dom
filter
hash
iconv
json
libxml
mbstring
mysqli
mysqlnd
pcre
PDO
pdo_mysql
pdo_sqlite
Reflection
session
SimpleXML
SPL
sqlite3
standard
tokenizer
xml
xmlreader
xmlwriter
zlib

[Zend Modules]

That’s it. You have a working web server (Apache), Database (MariaDB), and web development scripting language (PHP) running on Linux! Complete LAMP stack is at your service!

How to install Apache Tomcat 9 in Linux

Learn how to install Apache 9 in Linux like RedHat, CentOs, Suse, OEL etc.

Apache Tomcat 9 installation

This is a quick post to a list of steps for Apache Tomcat 9 installation on Linux. Let’s start with download the software. Get your Apache Tomcat 9 from the official download page.

Apache being a webserver is part of LAMP stack. Red more about LAMP here.

First download core binary file from the official download page. Use tools like wget to download a file right on your server itself.

root@kerneltalks # wget http://mirrors.estointernet.in/apache/tomcat/tomcat-9/v9.0.14/bin/apache-tomcat-9.0.14.tar.gz

Now extract the tarball. You will have apache-tomcat-9.0.14 directory after unzipping.

root@kerneltalks # tar -xvf apache-tomcat-9.0.14.tar.gz

Now move the directory or its content to your required directory where you want your Apache Tomcat binaries should stay & you are done. For demonstration, I moved them in /opt

root@kerneltalks #  mv apache-tomcat-9.0.14 /opt

You have startup.sh and shutdown.sh scripts in the bin directory. Test them and you are all set. If you do not have java installed on your server, you will see below error while you try to start Apache.

root@kerneltalks #  cd /opt/apache-tomcat-9.0.14/bin
root@kerneltalks # sh startup.sh
Neither the JAVA_HOME nor the JRE_HOME environment variable is defined
At least one of these environment variable is needed to run this program

Install java package using your package manager according to Linux you use. The package installation will set the above variables automatically. Then you can try starting Apache again.

root@kerneltalks # ]# sh startup.sh
Using CATALINA_BASE:   /opt/apache-tomcat-9.0.14
Using CATALINA_HOME:   /opt/apache-tomcat-9.0.14
Using CATALINA_TMPDIR: /opt/apache-tomcat-9.0.14/temp
Using JRE_HOME:        /
Using CLASSPATH:       /opt/apache-tomcat-9.0.14/bin/bootstrap.jar:/opt/apache-tomcat-9.0.14/bin/tomcat-juli.jar
Tomcat started.

And here you go. Your Apache instance is started with the default configuration. It listens on port 8080 by default. You can open your server IP in a browser and make sure you get default Apache page like below –

Apache welcome page

If not then check if port 8080 is listening or not. If you have a server in AWS, then make sure you open port in the related security group of your instance.

root@kerneltalks # netstat -an |grep 8080
tcp6       0      0 :::8080                 :::*                    LISTEN

Try restarting instance and you should be pass through!

How to configure Cockpit in RHEL 8

Learn how to install, configure and use cockpit web console in RHEL 8.

Install, configure and use Cockpit in RHEL 8

What is cockpit web console?

The cockpit is an open-source project aims at Red Hat Enterprise Linux web console using which system can be administered. Introduced in RHEL 7, Cockpit provides a user and device friendly web console to manage your systems. Being a web console, it can be accessed over mobile devices as well. Obviously CLI (Command Line Interface) is the wizard wand in sysadmin’s hand but sometimes small and quick changes can be done through this console. Cockpit is integrated systemd. Let’s see how to install the cockpit on RHEL.

How to install Cockpit web console in RHEL 8?

The cockpit is offered with a package of the same name. Install package cockpit, using yum to install the Cockpit web console in RHEL 8. If YUM configuration is not in place on your system, you can always mount RHEL 8 BETA ISO and configure yum with this ISO as a repo. Below are commands for it –

[root@kerneltalks ~]# cat /etc/yum.repos.d/dvdiso.repo
[dvdiso]
name=RedHat DVD ISO
baseurl=file:///mnt/dvd/BaseOS/
enabled=1
gpgcheck=1
gpgkey=file:///mnt/dvd/BaseOS/RPM-GPG-KEY-redhat-release
[root@kerneltalks BaseOS]# yum repolist
RedHat DVD ISO                                                                                                                          1.0 MB/s | 2.2 MB     00:02
Last metadata expiration check: 0:00:01 ago on Wed 28 Nov 2018 12:30:43 PM EST.
repo id                                                                      repo name                                                                            status
dvdiso                                                                       RedHat DVD ISO                                                                       1,688

Now install package cockpit using yum –

[root@kerneltalks ~]# yum --nogpg install cockpit
Last metadata expiration check: 0:01:21 ago on Wed 28 Nov 2018 12:30:43 PM EST.
Dependencies resolved.
========================================================================================================================================================================
 Package                                               Arch                            Version                                    Repository                       Size
========================================================================================================================================================================
Installing:
 cockpit                                               x86_64                          180-1.el8                                  dvdiso                           66 k
Installing dependencies:
 cockpit-bridge                                        x86_64                          180-1.el8                                  dvdiso                          553 k
 cockpit-system                                        noarch                          180-1.el8                                  dvdiso                          1.6 M
 cockpit-ws                                            x86_64                          180-1.el8                                  dvdiso                          820 k
 glib-networking                                       x86_64                          2.56.1-1.el8                               dvdiso                          155 k
 gsettings-desktop-schemas                             x86_64                          3.28.1-1.el8                               dvdiso                          619 k
 libmodman                                             x86_64                          2.0.1-17.el8                               dvdiso                           36 k
 libproxy                                              x86_64                          0.4.15-5.2.el8                             dvdiso                           74 k
Installing weak dependencies:
 redhat-logos                                          x86_64                          80.5-1.el8                                 dvdiso                          975 k
 subscription-manager-cockpit                          noarch                          1.23.8-1.el8                               dvdiso                          952 k

Transaction Summary
========================================================================================================================================================================
Install  10 Packages

Total size: 5.7 M
Installed size: 13 M
Is this ok [y/N]: y
Downloading Packages:
Running transaction check
Transaction check succeeded.
Running transaction test
Transaction test succeeded.
Running transaction
  Preparing        :                                                                                                                                                1/1
Installed: redhat-logos-80.5-1.el8.x86_64
  Installing       : redhat-logos-80.5-1.el8.x86_64                                                                                                                1/10
  Running scriptlet: redhat-logos-80.5-1.el8.x86_64                                                                                                                1/10
Installed: redhat-logos-80.5-1.el8.x86_64
Installed: libmodman-2.0.1-17.el8.x86_64
  Installing       : libmodman-2.0.1-17.el8.x86_64                                                                                                                 2/10
  Running scriptlet: libmodman-2.0.1-17.el8.x86_64                                                                                                                 2/10
Installed: libmodman-2.0.1-17.el8.x86_64
Installed: libproxy-0.4.15-5.2.el8.x86_64
  Installing       : libproxy-0.4.15-5.2.el8.x86_64                                                                                                                3/10
  Running scriptlet: libproxy-0.4.15-5.2.el8.x86_64                                                                                                                3/10
Installed: libproxy-0.4.15-5.2.el8.x86_64
Installed: gsettings-desktop-schemas-3.28.1-1.el8.x86_64
  Installing       : gsettings-desktop-schemas-3.28.1-1.el8.x86_64                                                                                                 4/10
Installed: gsettings-desktop-schemas-3.28.1-1.el8.x86_64
Installed: glib-networking-2.56.1-1.el8.x86_64
  Installing       : glib-networking-2.56.1-1.el8.x86_64                                                                                                           5/10
Installed: glib-networking-2.56.1-1.el8.x86_64
Installed: cockpit-bridge-180-1.el8.x86_64
  Installing       : cockpit-bridge-180-1.el8.x86_64                                                                                                               6/10
Installed: cockpit-bridge-180-1.el8.x86_64
Installed: cockpit-system-180-1.el8.noarch
  Installing       : cockpit-system-180-1.el8.noarch                                                                                                               7/10
Installed: cockpit-system-180-1.el8.noarch
Installed: subscription-manager-cockpit-1.23.8-1.el8.noarch
  Installing       : subscription-manager-cockpit-1.23.8-1.el8.noarch                                                                                              8/10
Installed: subscription-manager-cockpit-1.23.8-1.el8.noarch
Installed: cockpit-ws-180-1.el8.x86_64
  Running scriptlet: cockpit-ws-180-1.el8.x86_64                                                                                                                   9/10
  Installing       : cockpit-ws-180-1.el8.x86_64                                                                                                                   9/10
  Running scriptlet: cockpit-ws-180-1.el8.x86_64                                                                                                                   9/10
Installed: cockpit-ws-180-1.el8.x86_64
Installed: cockpit-180-1.el8.x86_64
  Installing       : cockpit-180-1.el8.x86_64                                                                                                                     10/10
Installed: cockpit-180-1.el8.x86_64
  Running scriptlet: redhat-logos-80.5-1.el8.x86_64                                                                                                               10/10
  Running scriptlet: cockpit-180-1.el8.x86_64                                                                                                                     10/10
  Verifying        : cockpit-180-1.el8.x86_64                                                                                                                      1/10
  Verifying        : cockpit-bridge-180-1.el8.x86_64                                                                                                               2/10
  Verifying        : cockpit-system-180-1.el8.noarch                                                                                                               3/10
  Verifying        : cockpit-ws-180-1.el8.x86_64                                                                                                                   4/10
  Verifying        : glib-networking-2.56.1-1.el8.x86_64                                                                                                           5/10
  Verifying        : gsettings-desktop-schemas-3.28.1-1.el8.x86_64                                                                                                 6/10
  Verifying        : libmodman-2.0.1-17.el8.x86_64                                                                                                                 7/10
  Verifying        : libproxy-0.4.15-5.2.el8.x86_64                                                                                                                8/10
  Verifying        : redhat-logos-80.5-1.el8.x86_64                                                                                                                9/10
  Verifying        : subscription-manager-cockpit-1.23.8-1.el8.noarch                                                                                             10/10

Installed:
  cockpit-180-1.el8.x86_64          redhat-logos-80.5-1.el8.x86_64   subscription-manager-cockpit-1.23.8-1.el8.noarch   cockpit-bridge-180-1.el8.x86_64
  cockpit-system-180-1.el8.noarch   cockpit-ws-180-1.el8.x86_64      glib-networking-2.56.1-1.el8.x86_64                gsettings-desktop-schemas-3.28.1-1.el8.x86_64
  libmodman-2.0.1-17.el8.x86_64     libproxy-0.4.15-5.2.el8.x86_64

Complete!

Now, make sure you have open firewall ports for Cockpit. Mostly it’s enabled by default during installation but its always good to verify.

[root@kerneltalks ~]# firewall-cmd --add-service=cockpit --permanent
Warning: ALREADY_ENABLED: cockpit
success

Next step is to enable and start Cockpit using sysctl command so it will load on every boot.

[root@kerneltalks ~]# systemctl enable cockpit.socket
Created symlink /etc/systemd/system/sockets.target.wants/cockpit.socket → /usr/lib/systemd/system/cockpit.socket.

[root@kerneltalks ~]# systemctl start cockpit.socket
[root@kerneltalks ~]# systemctl status cockpit.socket
● cockpit.socket - Cockpit Web Service Socket
   Loaded: loaded (/usr/lib/systemd/system/cockpit.socket; enabled; vendor preset: disabled)
   Active: active (listening) since Wed 2018-11-28 12:38:52 EST; 1s ago
     Docs: man:cockpit-ws(8)
   Listen: [::]:9090 (Stream)
  Process: 9823 ExecStartPost=/bin/ln -snf active.motd /run/cockpit/motd (code=exited, status=0/SUCCESS)
  Process: 9816 ExecStartPost=/usr/share/cockpit/motd/update-motd  localhost (code=exited, status=0/SUCCESS)
    Tasks: 0 (limit: 11516)
   Memory: 392.0K
   CGroup: /system.slice/cockpit.socket

Nov 28 12:38:52 kerneltalks.com systemd[1]: Starting Cockpit Web Service Socket.
Nov 28 12:38:52 kerneltalks.com systemd[1]: Listening on Cockpit Web Service Socket.

This will enable and activate the Cockpit service on RHEL. Since service is running now, Cockpit will listen to port 9090 by default. Check if the Cockpit service is listening on a port and open up your browser to access the web console.

How to connect Cockpit web console on RHEL 8

As we already mentioned, by default Cockpit listens on port 9090. All you have to do is open up a browser and go to https://ip_or_hostname:9090 URL and you will be connected to the Cockpit web console. So, in our case the Cockpit URL is https://192.168.56.101:9090. You will be greeted with the login screen as below –

Cockpit web console in RHEL 8

Use root account to login and you will be presented with the home screen of Cockpit web administration console like below –

System administration using Cockpit web console

That’s it. You have web console in front of you. You can see utilization metrics in real time on home screen. Left hand side menu gives you ways to manage your system. Explore!

Install and configure checkmk server on Linux

Complete installation guide to install & configure checkmk server on Linux. Also steps to add Linux client to checkmk monitoring using checkmk monitoring instance console.

Complete installation guide for check_mk on Linux

checkmk is a free, open-source IT infrastructure monitoring tool. It’s actually Nagios plugins that enhances their capabilities and performance. In this article, we will walk you through step by step procedure to setup checkmk monitoring server and add the client to its monitoring.

Check_mk is re-branded as checkmk

Also website is moved from mathias-kettner.com to checkmk.com. There are few pointers in article which needs to be treated with new URL although I made necessary changes.

1.  Download and install package

Download the appropriate package from the download page. For this article, we are using check_mk RAW edition CRE 1.5.0.p7 (since its 100% free). You can use tools like wget to directly download packages on the server.

[root@kerneltalks ~]# wget https://mathias-kettner.de/support/1.5.0p7/check-mk-raw-1.5.0p7-el7-38.x86_64.rpm
--2018-11-14 04:34:47--  https://mathias-kettner.de/support/1.5.0p7/check-mk-raw-1.5.0p7-el7-38.x86_64.rpm
Resolving mathias-kettner.de (mathias-kettner.de)... 178.248.246.154
Connecting to mathias-kettner.de (mathias-kettner.de)|178.248.246.154|:443... connected.
HTTP request sent, awaiting response... 200 OK
Length: 123984316 (118M) [application/x-redhat-package-manager]
Saving to: ‘check-mk-raw-1.5.0p7-el7-38.x86_64.rpm’

100%[==============================================================================================================================>] 123,984,316 13.9MB/s   in 9.6s

2018-11-14 04:34:57 (12.3 MB/s) - ‘check-mk-raw-1.5.0p7-el7-38.x86_64.rpm’ saved [123984316/123984316]

Now, install the package along with all of its dependencies. Use your package manager like yum, zipper, or apt to install package so that it will resolve its dependencies automatically and install them too.

2. Allow http protocol and port in firewall

Since the checkmk portal runs on HTTP protocol with default port 80, you need to allow them in the firewall.

[root@kerneltalks1 ~]# setsebool -P httpd_can_network_connect 1

If your machine has SELinux activated, you need to allow it in SELinux. If you have a local firewall i.e. iptables enabled, you need to allow it in iptables as well.

If you are on the AWS server, you need to open the security group as well to allow HTTP protocol.

3. Create and start check_mk server

After RPM installation, check if omd command is running properly.

[root@kerneltalks1 ~]# omd version
OMD - Open Monitoring Distribution Version 1.5.0p7.cre

Now, proceed with creating a monitoring instance and then starting it. Create a monitoring instance with omd create command.

[root@kerneltalks1 ~]# omd create kerneltalks_test
Adding /opt/omd/sites/kerneltalks_test/tmp to /etc/fstab.
Creating temporary filesystem /omd/sites/kerneltalks_test/tmp...OK
Restarting Apache...OK
Created new site kerneltalks_test with version 1.5.0p7.cre.

  The site can be started with omd start kerneltalks_test.
  The default web UI is available at http://kerneltalks1/kerneltalks_test/

  The admin user for the web applications is cmkadmin with password: Pz4IM7J7
  (It can be changed with 'htpasswd -m ~/etc/htpasswd cmkadmin' as site user.
)
  Please do a su - kerneltalks_test for administration of this site.

Our monitoring server instance is ready. You can gather details like URL, login credentials, the command to change password, etc from the command output.

Now if you try to login to the mentioned URL you will see OMD: Site Not Started error.

OMD site not started error

So, to use this server instance you need to start it using the command omd start

[root@kerneltalks1 ~]# omd start kerneltalks_test
OK
Starting mkeventd...OK
Starting rrdcached...OK
Starting npcd...OK
Starting nagios...2018-11-14 04:09:41 [6] updating log file index
2018-11-14 04:09:41 [6] updating log file index
OK
Starting apache...OK
Initializing Crontab...OK

Now you are good to go! You can go back to the URL and login to your monitoring server console!

check_mk console login
check_mk console

You can see everything is valued to zero since its being a fresh monitoring server instance we just created. Let’s add one Linux host into this monitoring instance to monitor.

How to install check_mk agent on Linux client

In this part, we will install check_mk agent on the Linux client and will add that client into monitoring. Below 2 pre-requisite should be completed before agent installation.

  1. check_mk client works with xinetd service on the machine. You should install xinetd service and start it before you attempt to agent install.
  2. Port 6556 TCP should be open between check_mk server and client for communication

check_mk client package is available on check_mk server at path http://<servername>/<instance_name>/check_mk/agents/. In our case it will be at http://kerneltalks1/kerneltalks_test/check_mk/agents/

check_mk agents location on check_mk server.

You can find almost all platform agents here. Let’s download the agent on our Linux client using the command line and install it.

[root@kerneltalks2 ~]# rpm -ivh check-mk-agent-1.5.0p7-1.noarch.rpm
Preparing...                          ################################# [100%]
Updating / installing...
   1:check-mk-agent-1.5.0p7-1         ################################# [100%]
Activating startscript of xinetd
Note: Forwarding request to 'systemctl enable xinetd.service'.
Reloading xinetd...
Redirecting to /bin/systemctl reload xinetd.service

After agent installation, you need to go back to check_mk console to add this new host into monitoring.

Add new client in check_mk monitoring

Login to console and navigate to WATO configurations > Hosts > Create new host

Add new host in check_mk monitoring

Fill in details like hostname, IP address, agent details in next screen, and hit ‘Save & Goto services‘. You will be presented with the below screen in which check_mk discovers services on the client.

check_mk add host

Click on the red button with a number of changes written on it. Activate changes and you are done!

activate changes check_mk

Once changes are completed activated you can see one host is added into monitoring. This completes end to end walkthrough tutorial to install the check_mk monitoring server and add Linux client to it.

How to install and uninstall Sophos Antivirus in Linux

Short post to learn how to install and uninstall Sophos Antivirus in Linux.

Sophos is a well-known antivirus for Windows, Linux, Mac platforms. Sophos also offers different security solutions along with antivirus. In this post we walk through the install, check and remove Sophos antivirus on Linux systems. You can download Sophos antivirus for Linux for free here.

How to install Sophos Antivirus in Linux

You can transfer the installer downloaded on a laptop or desktop on your Linux server. Or you can use tools like wget to download the installer directly on your Linux server. You can get a Linux installer link from your account on a website.

You will be having Sophos Antivirus with install.sh script within. For non-interactive setup executive script with below switches and you are good to go –

root@kerneltalks # ./install.sh --automatic --acceptlicence /opt/sophos-av
Installing Sophos Anti-Virus....
Selecting appropriate kernel support...

Installation completed.
Your computer is now protected by Sophos Anti-Virus.

Antivirus is successfully installed on your server.

Check current status of Sophos Antivirus

Antivirus runs with service named sav-protect. So you can use normal Linux service status command to check the status of AV service.

root@kerneltalks # service sav-protect status
sav-protect.service - "Sophos Anti-Virus daemon"
   Loaded: loaded (/usr/lib/systemd/system/sav-protect.service; enabled)
   Active: active (running)[0m since Thu 2018-07-19 13:30:50 IST; 3 months 4 days ago
     Docs: man:sav-protect
  Process: 5619 ExecStop=/opt/sophos-av/engine/.sav-protect.systemd.stop.sh (code=exited, status=0/SUCCESS)
  Process: 6287 ExecStartPost=/opt/sophos-av/engine/.sav-protect.systemd.poststart.(code=exited, status=1/FAILURE)
  Process: 5646 ExecStartPre=/opt/sophos-av/engine/.sav-protect.systemd.prestart.sh (code=exited, status=0/SUCCESS)
 Main PID: 6286 (savd)
   CGroup: /system.slice/sav-protect.service
           ├─5842 savscand --incident=unix://tmp/incident --namedscan=unix://root@tmp/namedscansprocessor.397 --ondemandcontrol=socketpair://46/47
           └─6286 savd etc/savd.cfg

Oct 21 17:50:56 kerneltalks savd[6286]: scheduled.scan.log: Scheduled scan "SEC:Weekly scan" completed: master boot records scanned: 0, boot records scanned: 0, files scanned: 968342, scan errors: 0, threats detected: 0, infected files detected: 0
Oct 21 21:38:46 kerneltalks savd[6286]: update.check: Successfully updated Sophos Anti-Virus from \\avserver.kerneltalks.com\SophosUpdate\CIDs\S038\savlinux

You can see the recent two activities as a successful scheduled scan run and virus definition update in the last log lines.

How to uninstall Sophos Antivirus in Linux

Run uninstall.sh script located at /opt/sophos-av to uninstall Sophos Antivirus.

root@kerneltalks # /opt/sophos-av/uninstall.sh
Uninstalling Sophos Anti-Virus.
WARNING: Sophos Anti-Virus still running.
Do you want to stop Sophos Anti-Virus? Yes(Y)/No(N) [N]
> Y

Stopping Sophos Anti-Virus.
Sophos Anti-Virus has been uninstalled.

And AV is un-installed. You can confirm by checking status again which will result in an error.

root@kerneltalks # service sav-protect status
service: no such service sav-protect

Install Ansible in Linux

Small tutorial about how to install Ansible in Linux and run ansible command on the remote clients from the control server.

Ansible installation in Linux

What is Ansible ?

Ansible is an open-source configuration management tool developed by Red Hat. You can have enterprise support for it from Red Hat subscriptions. Ansible is written in Python, Ruby, and Power shell. It uses SSH in the background to communicate with clients and execute tasks. The best feature of Ansible is being agent-less hence no load on clients and configurations can be pushed from the server at any time.

Ansible installation

The first pre-requisite of Ansible is: Primary or control server should have password-less SSH connection configured for Ansible user for all its client servers. You can configure passwordless SSH in two commands steps using ssh-keygen and ssh-copy-id.

For our understanding, we have 1 control server kerneltalks1 and 1 client kerneltalks2 and we have configured passwordless SSH for user shrikant (which we treat as Ansible user here)

Lets install Ansible on control server i.e. kerneltalks1

Ansible can be installed using the normal package installation procedure. Below are quick commands for your reference.

  • RHELsubscription-manager repos --enable rhel-7-server-ansible-2.6-rpms; yum install ansible
  • CentOS, Fedora : yum install ansible
  • Ubuntuapt-add-repository --yes --update ppa:ansible/ansibleapt-get install ansible
  • Git clone : git clone https://github.com/ansible/ansible.git
    • cd ./ansiblemake rpm
    • rpm -Uvh ./rpm-build/ansible-*.noarch.rpm

I installed Ansible on my CentOS machine using above command.

[root@kerneltalks1 ~]# ansible --version
ansible 2.7.0
  config file = /etc/ansible/ansible.cfg
  configured module search path = [u'/root/.ansible/plugins/modules', u'/usr/share/ansible/plugins/modules']
  ansible python module location = /usr/lib/python2.7/site-packages/ansible
  executable location = /bin/ansible
  python version = 2.7.5 (default, Aug  4 2017, 00:39:18) [GCC 4.8.5 20150623 (Red Hat 4.8.5-16)]

Ansible default config structure

After installation, Ansible creates/etc/ansible directory with default configuration in it.  You can find ansible.cfg and hosts files in it.

[root@kerneltalks1 ~]# ll /etc/ansible
total 24
-rw-r--r--. 1 root root 20269 Oct  9 01:34 ansible.cfg
-rw-r--r--. 1 root root  1016 Oct  9 01:34 hosts
drwxr-xr-x. 2 root root     6 Oct  9 01:34 roles

ansible.cfg is default configuration file for ansible executable

hosts is a list of clients on which control server executes commands remotely via password-less SSH.

Running first command via Ansible

Let’s configure kerneltalks2 and run our first Ansible command on it remotely from kerneltalks1 control server.

You need to configure the password less ssh as we discussed earlier. Then add this server name in /etc/ansible/hosts file.

root@kerneltalks1 # cat /etc/ansible/hosts
[testservers]
 172.31.81.83 

Here IP mentioned is of kerneltalks2 and you can specify the grouping of servers in square braces. And you are good to go. Run ansible command with ping module (-m switch). There are many modules comes in-built with ansible which you can use rather than using equivalent shell commands.

[shrikant@kerneltalks1 ~]$ ansible -m ping all
172.31.81.83 | SUCCESS => {
    "changed": false,
    "ping": "pong"
}

You can see the output is a success on the mentioned IP. So we installed and ran the first successful command using ansible!

Common errors

1. If you try to run ansible command on a group of the server which does not exist in the host file. You will see below error –

[shrikant@kerneltalks1 ~]$ ansible -m ping testserver
 [WARNING]: Could not match supplied host pattern, ignoring: testserver

 [WARNING]: No hosts matched, nothing to do

You need to check /etc/ansible/hosts file (or hosts files being referred by your ansible installation) and make sure the server group mentioned on command exists in it.

2. If you do not configure passwordless SSH from the control server to the client or If the client is not reachable over the network you will see below error.

[root@kerneltalks1 ansible]# ansible -m ping all
kerneltalks2 | UNREACHABLE! => {
    "changed": false,
    "msg": "Failed to connect to the host via ssh: Warning: Permanently added 'kerneltalks2,172.31.81.83' (ECDSA) to the list of known hosts.\r\nPermission denied (publickey,gssapi-keyex,gssapi-with-mic,password).\r\n",
    "unreachable": true
}

You need to check the connectivity and passwordless ssh access from the control server.

xsos: a tool to read sosreport in RHEL/CentOS

Learn how to use xsos tool to read sosreport in RHEL/CentOS. xsos is a very helpful tool for Linux sysadmins. Different options and their examples included in the article.

xsos tool to read sosreport

an xsos tool is a tool coded to read a sosreport on Linux systems. sosreport is a tool from RedHat which collects system information which helps vendors to troubleshoot issues. sosreport creates the tarball which contains all the system information but you can not read it directly. For simplicity, Ryan Sawhill created a tool named xsos which will help you to read sosreport in a much easier way in your terminal itself. In this article, we will walk you through how to read sosreport on the Linux terminal.

xsos installation

xsos rpm is available on Ryan’s page on redhat.com. One can simply use the URL as below to install his yum repo and then install the xsos package.

yum install http://people.redhat.com/rsawhill/rpms/latest-rsawaroha-release.rpm &

yum install xsos

Refer below outputs for your reference.

root@kerneltalks # yum install http://people.redhat.com/rsawhill/rpms/latest-rsawaroha-release.rpm
Loaded plugins: amazon-id, rhui-lb, search-disabled-repos
latest-rsawaroha-release.rpm                             |  24 kB     00:00
Examining /var/tmp/yum-root-b0cGf5/latest-rsawaroha-release.rpm: rsawaroha-release-1-1.noarch
Marking /var/tmp/yum-root-b0cGf5/latest-rsawaroha-release.rpm to be installed
Resolving Dependencies
--> Running transaction check
---> Package rsawaroha-release.noarch 0:1-1 will be installed
--> Finished Dependency Resolution

Dependencies Resolved

================================================================================
 Package               Arch       Version   Repository                     Size
================================================================================
Installing:
 rsawaroha-release     noarch     1-1       /latest-rsawaroha-release      27 k

Transaction Summary
================================================================================
Install  1 Package

Total size: 27 k
Installed size: 27 k
Is this ok [y/d/N]: y
Downloading packages:
Running transaction check
Running transaction test
Transaction test succeeded
Running transaction
  Installing : rsawaroha-release-1-1.noarch                                 1/1
  Verifying  : rsawaroha-release-1-1.noarch                                 1/1

Installed:
  rsawaroha-release.noarch 0:1-1

Complete!


root@kerneltalks # yum install xsos
Loaded plugins: amazon-id, rhui-lb, search-disabled-repos
rsawaroha                                                | 2.9 kB     00:00
rsawaroha/primary_db                                       |  11 kB   00:00
Resolving Dependencies
--> Running transaction check
---> Package xsos.noarch 0:0.7.13-1 will be installed
--> Finished Dependency Resolution

Dependencies Resolved

================================================================================
 Package        Arch             Version              Repository           Size
================================================================================
Installing:
 xsos           noarch           0.7.13-1             rsawaroha            54 k

Transaction Summary
================================================================================
Install  1 Package

Total download size: 54 k
Installed size: 137 k
Is this ok [y/d/N]: y
Downloading packages:
warning: /var/cache/yum/x86_64/7Server/rsawaroha/packages/latest-xsos.rpm: Header V4 RSA/SHA256 Signature, key ID 4c4ffd02: NOKEY
Public key for latest-xsos.rpm is not installed
latest-xsos.rpm                                            |  54 kB   00:00
Retrieving key from file:///etc/pki/rpm-gpg/RPM-GPG-KEY-rsaw.aroha
Importing GPG key 0x4C4FFD02:
 Userid     : "Ryan Sawhill Aroha <rsaw@redhat.com>"
 Fingerprint: bac2 74b8 9f6b 5907 b3d0 e467 fba4 72a7 4c4f fd02
 Package    : rsawaroha-release-1-1.noarch (installed)
 From       : /etc/pki/rpm-gpg/RPM-GPG-KEY-rsaw.aroha
Is this ok [y/N]: y
Running transaction check
Running transaction test
Transaction test succeeded
Running transaction
  Installing : xsos-0.7.13-1.noarch                                         1/1
  Verifying  : xsos-0.7.13-1.noarch                                         1/1

Installed:
  xsos.noarch 0:0.7.13-1

Complete!

Now xsos utility is installed on your system. Lets check it out.

Using xsos

Without any argument, running xsos command will give you current system information in a summarized format.

root@kerneltalks # xsos
OS
  Hostname: kerneltalks
  Distro:   [redhat-release] Red Hat Enterprise Linux Server release 7.4 (Maipo)
            [os-release] Red Hat Enterprise Linux Server 7.4 (Maipo) 7.4 (Maipo)
  RHN:      serverURL = https://enter.your.server.url.here/XMLRPC
            enableProxy = 0
  RHSM:     hostname = subscription.rhsm.redhat.com
            proxy_hostname =
  YUM:      4 enabled plugins: amazon-id, langpacks, rhui-lb, search-disabled-repos
  Runlevel: N 3  (default multi-user)
  SELinux:  enforcing  (default enforcing)
  Arch:     mach=x86_64  cpu=x86_64  platform=x86_64
  Kernel:
    Booted kernel:  3.10.0-693.11.6.el7.x86_64
    GRUB default:   3.10.0-693.11.6.el7.x86_64
    Build version:
      Linux version 3.10.0-693.11.6.el7.x86_64 (mockbuild@x86-041.build.eng.bos.redhat.com) (gcc version 4.8.5 20150623 (Red Hat 4.8.5-16) (GCC) ) #1 SMP Thu Dec 28
      14:23:39 EST 2017
    Booted kernel cmdline:
      root=UUID=3e11801e-5277-4d87-be4c-0a9a61fbc3da ro console=ttyS0,115200n8 console=tty0 net.ifnames=0 crashkernel=auto LANG=en_US.UTF-8
    GRUB default kernel cmdline:
      ro root=UUID=3e11801e-5277-4d87-be4c-0a9a61fbc3da console=hvc0 LANG=en_US.UTF-8
    Taint-check: 0  (kernel untainted)
    - - - - - - - - - - - - - - - - - - -
  Sys time:  Mon Jan  8 18:13:30 UTC 2018
  Boot time: Mon Jan  8 18:05:57 UTC 2018  (epoch: 1515434757)
  Uptime:    7 min,  1 user
  LoadAvg:   [1 CPU] 0.00 (0%), 0.01 (1%), 0.01 (1%)
  /proc/stat:
    procs_running: 2   procs_blocked: 0    processes [Since boot]: 1132
    cpu [Utilization since boot]:
      us 1%, ni 0%, sys 2%, idle 94%, iowait 0%, irq 0%, sftirq 0%, steal 3%

It shows system info like hostname, distro details, kernel details, arch details, yum config, date & time, and load information.

Now there are different switches you can use with xsos command and get the required details. Frequently used switches given below –

 -a     show everything
 -b     show info from dmidecode
 -o     show hostname, distro, SELinux, kernel info, uptime, etc
 -k     inspect kdump configuration
 -c     show info from /proc/cpuinfo
 -m     show info from /proc/meminfo
 -d     show info from /proc/partitions
 -t     show info from dm-multipath
 -i     show info from ip addr

Above is a snippet from help. Full list of switches can be obtained by running help using xsos -h

Reading sosreport using xsos

To read sosreport using xsos tool, you need to first extract sosreport tarball and use the extracted directory path as a source for the xsos tool. The command format is –

xsos –<switch> <sosreport_dir_path>

For example, lets see CPU information read from sosreport.

root@kerneltalks # xsos -c /var/tmp/sosreport-kerneltalks-20180108180100
CPU
  1 logical processors
  1 Intel Xeon CPU E5-2676 v3 @ 2.40GHz (flags: aes,constant_tsc,ht,lm,nx,pae,rdrand)

Here, -c instructs xsos command to read CPU information from sosreport which is saved in /var/tmp/sosreport-kerneltalks-20180108180100 directory.

Another example below which reads IP information from sosreport.

root@kerneltalks # xsos -i /var/tmp/sosreport-kerneltalks-20180108180100
IP4
  Interface  Master IF  MAC Address        MTU     State  IPv4 Address
  =========  =========  =================  ======  =====  ==================
  lo         -          -                  65536   up     127.0.0.1/8
  eth0       -          02:e5:4c:f8:86:0e  9001    up     172.31.29.189/20

IP6
  Interface  Master IF  MAC Address        MTU     State  IPv6 Address                                 Scope
  =========  =========  =================  ======  =====  ===========================================  =====
  lo         -          -                  65536   up     ::1/128                                      host
  eth0       -          02:e5:4c:f8:86:0e  9001    up     fe80::e5:4cff:fef8:860e/64                   link

you can see IP information fetched from stored sosreport and displayed for your understanding.

You can use different switches to fetch different information as per your requirement from the sosreport. This way you need not go through each and every logfile or log directory extracted in the sosreport directory to get the information. Just use a relevant switch with xsos utility and it will scan the sosreport directory and present your data!

All you need to know about sosreport tool

Understand sosreport in detail. Learn how to generate sosreport and how to read sosreport in this article.

sosreport

sosreport is not a new term for RedHat lovers! Its a tool on RedHat Linux which helps you grab system information in a single tarball which can be shared with the vendor for troubleshooting issues.

Whenever you log a case with RedHat for RHEL, the first thing first they ask is for sosreport. In this article, we will see how to generate a sosreport and how to read sosreport.

If sosreport package is not installed on your system you will see below error –

root@kerneltalks # sosreport
-bash: sosreport: command not found

Install sos package using yum. You can follow the installation steps explained here. Below are the installation logs for your reference.

root@kerneltalks # yum install sos
Loaded plugins: amazon-id, rhui-lb, search-disabled-repos
Resolving Dependencies
--> Running transaction check
---> Package sos.noarch 0:3.4-6.el7 will be installed
--> Processing Dependency: bzip2 for package: sos-3.4-6.el7.noarch
--> Running transaction check
---> Package bzip2.x86_64 0:1.0.6-13.el7 will be installed
--> Finished Dependency Resolution

Dependencies Resolved

========================================================================================================================================================================
 Package                        Arch                            Version                                 Repository                                                 Size
========================================================================================================================================================================
Installing:
 sos                            noarch                          3.4-6.el7                               rhui-REGION-rhel-server-releases                          381 k
Installing for dependencies:
 bzip2                          x86_64                          1.0.6-13.el7                            rhui-REGION-rhel-server-releases                           52 k

Transaction Summary
========================================================================================================================================================================
Install  1 Package (+1 Dependent package)

Total download size: 433 k
Installed size: 1.4 M
Is this ok [y/d/N]: y
Downloading packages:
(1/2): sos-3.4-6.el7.noarch.rpm                                                                                                                  | 381 kB  00:00:00
(2/2): bzip2-1.0.6-13.el7.x86_64.rpm                                                                                                             |  52 kB  00:00:00
------------------------------------------------------------------------------------------------------------------------------------------------------------------------
Total                                                                                                                                   610 kB/s | 433 kB  00:00:00
Running transaction check
Running transaction test
Transaction test succeeded
Running transaction
  Installing : bzip2-1.0.6-13.el7.x86_64                                                                                                                            1/2
  Installing : sos-3.4-6.el7.noarch                                                                                                                                 2/2
  Verifying  : sos-3.4-6.el7.noarch                                                                                                                                 1/2
  Verifying  : bzip2-1.0.6-13.el7.x86_64                                                                                                                            2/2

Installed:
  sos.noarch 0:3.4-6.el7

Dependency Installed:
  bzip2.x86_64 0:1.0.6-13.el7

Complete!

How to generate sosreport

To generate a sosreport you just need to run sosreport command. It saves the report in /var/tmp by default so make sure you have enough breathing space in /var mount point.

Output file follows naming conventions as sosreport-name.caseID-yyyymmddhhmmss.tar.xz where –

  1. name is Name you provide or hostname by default
  2. caseID if you provide or blank
  3. Date in yyyymmdd format
  4. Time in hhmmss

Its a tarball with compression. After running the command it will ask you name and case ID and then start executing its modules which collects all system information and save it into a tarball.

root@kerneltalks # sosreport

sosreport (version 3.4)

This command will collect diagnostic and configuration information from
this Red Hat Enterprise Linux system and installed applications.

An archive containing the collected information will be generated in
/var/tmp/sos.iNadXY and may be provided to a Red Hat support
representative.

Any information provided to Red Hat will be treated in accordance with
the published support policies at:

  https://access.redhat.com/support/

The generated archive may contain data considered sensitive and its
content should be reviewed by the originating organization before being
passed to any third party.

No changes will be made to system configuration.

Press ENTER to continue, or CTRL-C to quit.

Please enter your first initial and last name [kerneltalks]: Shrikant Lavhate
Please enter the case id that you are generating this report for []: 12345678

 Setting up archive ...
 Setting up plugins ...
 Running plugins. Please wait ...

  Running 74/74: yum...            er...
Creating compressed archive...

Your sosreport has been generated and saved in:
  /var/tmp/sosreport-ShrikantLavhate.12345678-20171105171210.tar.xz

The checksum is: 502b698f6052964ca1c2d348ea7e67a4

Please send this file to your support representative.

Command also shows you checksum of the output file. This will be helpful in checking the integrity of the file when it reaches destination party like vendor etc.

root@kerneltalks # ll /var/tmp/sosreport-ShrikantLavhate.12345678-20171105171210.tar.xz
-rw-------. 1 root root 8519732 Nov  5 17:12 /var/tmp/sosreport-ShrikantLavhate.12345678-20171105171210.tar.xz

How to read sosreport

The output report generated above is the tarball file. You can un-tar it and read it on your own as well.

root@kerneltalks # tar xvf /var/tmp/sosreport-ShrikantLavhate.12345678-20171105171210.tar.xz

After extracting tarball you can see directory created with tarball name. Under which you can file many files and directories.

root@kerneltalks # ls -lrt sosreport-ShrikantLavhate.12345678-20171105171210
total 16
drwxr-xr-x.  5 root root   42 Jul 11 15:57 usr
dr-xr-xr-x.  3 root root   19 Jul 11 16:07 boot
dr-xr-xr-x. 10 root root 4096 Nov  5 12:19 proc
dr-xr-xr-x. 10 root root  112 Nov  5 12:19 sys
drwxr-xr-x.  4 root root   28 Nov  5 12:19 var
drwxr-xr-x.  2 root root   18 Nov  5 12:19 dev
dr-xr-xr-x.  7 root root   78 Nov  5 12:24 lib
dr-xr-x---.  2 root root   29 Nov  5 16:23 root
drwxr-xr-x. 34 root root 4096 Nov  5 17:08 etc
lrwxrwxrwx.  1 root root   29 Nov  5 17:12 mount -> sos_commands/filesys/mount_-l
lrwxrwxrwx.  1 root root   27 Nov  5 17:12 df -> sos_commands/filesys/df_-al
lrwxrwxrwx.  1 root root   27 Nov  5 17:12 uptime -> sos_commands/general/uptime
lrwxrwxrwx.  1 root root   28 Nov  5 17:12 uname -> sos_commands/kernel/uname_-a
drwx------.  3 root root   18 Nov  5 17:12 sos_strings
lrwxrwxrwx.  1 root root   25 Nov  5 17:12 lsmod -> sos_commands/kernel/lsmod
lrwxrwxrwx.  1 root root   45 Nov  5 17:12 java -> sos_commands/java/alternatives_--display_java
lrwxrwxrwx.  1 root root   29 Nov  5 17:12 hostname -> sos_commands/general/hostname
lrwxrwxrwx.  1 root root   31 Nov  5 17:12 dmidecode -> sos_commands/hardware/dmidecode
lrwxrwxrwx.  1 root root   25 Nov  5 17:12 date -> sos_commands/general/date
lrwxrwxrwx.  1 root root   32 Nov  5 17:12 route -> sos_commands/networking/route_-n
lrwxrwxrwx.  1 root root   30 Nov  5 17:12 ps -> sos_commands/process/ps_auxwww
lrwxrwxrwx.  1 root root   41 Nov  5 17:12 netstat -> sos_commands/networking/netstat_-W_-neopa
lrwxrwxrwx.  1 root root   22 Nov  5 17:12 last -> sos_commands/last/last
lrwxrwxrwx.  1 root root   34 Nov  5 17:12 ip_addr -> sos_commands/networking/ip_-o_addr
lrwxrwxrwx.  1 root root   24 Nov  5 17:12 free -> sos_commands/memory/free
lrwxrwxrwx.  1 root root  130 Nov  5 17:12 installed-rpms -> sos_commands/rpm/sh_-c_rpm_--nodigest_-qa_--qf_NAME_-_VERSION_-_RELEASE_._ARCH_INSTALLTIME_date_awk_-F_printf_-59s_s_n_1_2_sort_-f
lrwxrwxrwx.  1 root root   38 Nov  5 17:12 chkconfig -> sos_commands/services/chkconfig_--list
-rw-r--r--.  1 root root 1481 Nov  5 17:12 version.txt
drwx------.  2 root root   37 Nov  5 17:12 sos_reports
drwx------.  2 root root   35 Nov  5 17:12 sos_logs
drwx------. 43 root root 4096 Nov  5 17:12 sos_commands
drwxr-xr-x.  3 root root   19 Nov  5 17:12 run

Navigate to sos_reports directory within which you will find sos.txtsos.html file.

In sos.txt file you can see all the plugins loaded, the command executed, files copied by sosreport. In sos.html file, all these things are hyperlinked to their original content within the directory. So you can directly view command output or files which are copied by script.

If there are any alerts detected by sosreport it will highlight those at the very beginning of these files.

This information is for sosreport version 3.4. If you are running different version there might be small differences in information.

Googler : Search google right from your Linux terminal

Learn the search power tool Googler to search keywords on Google from the Linux terminal. The text-based search tool works on all Linux distros.

Googler! Logo @github.com/jarun/googler

One of the most visited sites by IT people is Google! Sample code, syntax, errors, solutions, tutorials, howtos we search all these things on Google every day. No one knows everything! No one can deny that he/she never used Google! So it’s an inseparable part of digital life.

What if you could Google right from your Linux terminal! Sounds crazy! Obviously Googling in text mode won’t be that easy-to-use experience but yes for Linux lovers its fascinating and must-do experience.

In this article, we will walk you through how to Google in Linux terminal.

Googler is a tool that provides the capability to search on Google from the Linux terminal. We will see how to install Googler and how to use Googler to search from the Linux terminal.

About Googler

Googler is a command-line utility originally started by Henri Hakkinen and now taken forward by Arun Jana. Its GIT repo is maintained here. When searched, it shows results with title, link, and excerpt in terminal window.

Take a look of Googler in action :

Googler searching kerneltalks on Google

How to install Googler

The Googler uses Python and the latest release needs Python 3 or later to run. Install Python 3 on your system if you don’t have it.

Now download ready packages for deployment according to your package manager. Get your packages from here: Package managers or OS releases
Install Googler package and you are ready to go.

After a successful package installation, you will be able to run googler command. If you want to compile it on your system using source code then source code is available here.

How to use Googler

Googler has many options to search and interact with results. For simple search you just supply keyword and it will show you the first 10 search results the same as Google website do when you search keyword from browser.

Output is color coded for easy reading and identification where –

  • Green for titles
  • Yellow for links
  • cyan for indices and link metadata like published date etc.
  • Normal for link description

See above screenshot where you can see simple keyword search in googler and the color scheme.

If you run googler command without any argument it asks for a keyword or offers help via ?

root@kerneltalks # googler
Please initiate a query.
googler (? for help) ?

omniprompt keys:
  n, p                  fetch the next or previous set of search results
  index                 open the result corresponding to index in browser
  f                     jump to the first page
  o [index|range|a ...] open space-separated result indices, numeric ranges
                        (sitelinks unsupported in ranges), or all, in browser
                        open the current search in browser, if no arguments
  O [index|range|a ...] like key 'o', but try to open in a GUI browser
  g keywords            new Google search for 'keywords' with original options
                        should be used to search omniprompt keys and indices
  q, ^D, double Enter   exit googler
  ?                     show omniprompt help
  *                     other inputs issue a new search with original options

Here are few searches you can try with Googler :

Search within news for keyword

# googler -N Linux

Search on specific website

# googler -w kerneltalks.com nfs

Search specific filetype

# googler linux tutorial filetype:pdf

Many options to explore and use. Check googler manpage using man googler or help using googler -h !!

Enjoy! Happy Googling from Terminal!