Quick post to troubleshoot issue with networker service startup
Networker process startup issue
If you come across issue where you installed new networker agent on Linux server and service is not coming up. You will see below message –
root@kerneltalks ~# /etc/init.d/networker start
root@kerneltalks ~# /etc/init.d/networker status
There are currently no running NetWorker processes.
Troubleshooting
You can dig through logs or run a debug using below command :
root@kerneltalks ~# nsrexecd -D5
It will print lots of messages. You have go through them for possible cause of issue. I found below offending entries –
RAP critical 162 Attributes '%s' and/or '%s' of the %s resource do not resolve to the machine's hostname '%s'. To correct the error, it may be necessary to delete the %s database.
Solution
First check your /etc/hosts file is correct and having valid loopback entry.
A quick post on a couple of errors and their solutions while working on ELK stack.
ELK stack issues and solutions
ELK stack i.e. ElasticSearch Logstash and Kibana. We will walk you through a couple of errors you may see while working on ELK stack and their solutions.
Error: missing authentication token for REST request
First, thing first how to run cluster curl commands which are spared everywhere on the Elastic documentation portal. They have a copy as a curl command which if you run on your terminal will end up in below error –
You need to use authentication within curl command and you are good to go. It’s good practice to use the only username in command with -u switch so that you won’t reveal your password in command history! Make sure you use the Kibana UI user here.
root@kerneltalks # curl -u kibanaadm -X GET "localhost:9200/_cat/health?v&pretty"
Enter host password for user 'kibanaadm':
epoch      timestamp cluster        status node.total node.data shards  pri relo init unassign pending_tasks max_task_wait_time active_shards_percent
1578644464 08:21:04  test-elk green           1         1   522 522    0    0        0             0                  -                100.0%
Issue: How to remove x-pack after 6.2 upgrades
If you are running ELK stack 6.2 and you are performing upgrade then you need to take care of the x-pack module first. Since x-pack is included within 6.3 and later distributions you don’t need it as a separate module. But due to some reason, while upgrade mew stack won’t be able to remove the existing x-pack module. This will lead to having 2 x-pack modules on system and Kibana restarting continuously because of that with below error –
Error: Multiple plugins found with the id \"xpack_main\":\n - xpack_main at /usr/share/kibana/node_modules/x-pack\n - xpack_main at /usr/share/kibana/plugins/x-pack
Solution:
So, before the upgrade, you need to remove the x-pack plugin from ElasticSearch and Kibana as well. Using below commands –
root@kerneltalks # /usr/share/elasticsearch/bin/elasticsearch-plugin remove x-pack
-> removing [x-pack]...
-> preserving plugin config files [/etc/elasticsearch/x-pack] in case of upgrade; use --purge if not needed

root@kerneltalks # /usr/share/kibana/bin/kibana-plugin remove x-pack
Removing x-pack...
This will make your upgrade go smooth. If you have already upgraded (with RPM) and faced the issue, you may try to downgrade packages rpm -Uvh --oldpackage <package_name> and then try to remove x-pack modules.
Issue: How to set Index replicas to 0 on single node ElasticSearch cluster
On single node ElasticSearch cluster if you are running default configuration then you will run into un-assigned replicas issue. In Kibana UI you can see those Index health as Yellow. Also, your cluster health will be yellow too with a message – Elasticsearch cluster status is yellow. Allocate missing replica shards.
Solution:
You need to mark all indices with a replica count to zero. You can do this in one go using below command –
root@kerneltalks # curl -u kibanaadm -X PUT "localhost:9200/_all/_settings?pretty" -H 'Content-Type: application/json' -d'
{
    "index" : {
        "number_of_replicas" : 0
    }
}
'
Enter host password for user 'kibanaadm':
{
  "acknowledged" : true
}
Where _all can be replaced with a specific index name if you want to do it for a specific index. Use the Kibana UI user in command and you will be asked for the password. Once entered it alters all indices setting and will show you output as above.
You can now check-in Kibana UI and your cluster health along with index health will be Green.
I am consolidating errors I came across and their solution in quick words for easy reference to me and you as well!
Troubleshooting Linux errors!
Error saw while starting the MariaDB server process on RHEL 6
# service mysql start
mysql: unrecognized service
Solution: You do not have MariaDB installed on your server. Install MariaDB
Error while starting MariaDB server process n RHEL 7
# systemctl start mariadb
Failed to issue method call: Unit mariadb.service failed to load: No such file or directory.
Solution: You do not have MariaDB installed. Install mariadb-server package
Error while installing Symantec Antivirus
which: no uudecode in (/usr/sbin:/usr/bin:/bin)
ERROR: Required utility missing: uudecode. Please install this
utility before using this Intelligent Updater package.
Solution : uudecode is provided by sharutils package. Install sharutils package.
Error while exporting a filesystem
# exportfs -ra
exportfs: 34.89.123.45:/data: Function not implemented
Solution: Check and start the nfs-server process.
Error while listing directory files
# ls -lrt
ls: cannot open directory '.': Permission denied
Solution: Your directory does not have read permission to the owner. Sometimes due to windows to Linux file copy etc. Set permission and you are good to go. Use the command in the same directory # chmod -R +r .
Error while querying NTP
# ntpq -p
localhost: timed out, nothing received
***Request timed out
Solution : Edit /etc/ntp.conf and replace restrict 127.0.0.1 to restrict localhost then restart ntpd service with systemctl restart ntpd
Error during mounting of the file system
# mount /dev/vg01/lvol0 /dump
mount: unknown filesystem type '(null)'
Solution: You are trying to mount a file system which is not formatted yet. Format filesystem and then try mounting.
Error while mounting other system’s disk
I was trying to mount a disk from another server in AWS and it was not mounting. I checked dmesg and got below error :
[ 792.138218] XFS (xvdh2): Filesystem has duplicate UUID d295b18a-2a70-4260-9f59-60e51432ea92 - can't mount
Solution: Since I was doing some research I temporarily mounted it without UUID. using below command –
root@kerneltalks # mount -t xfs -o nouuid /dev/xvdh2 /disk1
But ideally, you should have unique UUID to all disks on the system and you can generate UUID in such a case using XFS utility.
keytool command not found
keytool is used to generate key or CSR for SSL certificate.
# keytool -genkey -alias server -keyalg RSA -keystore kerneltalks.jks                                                             -keysize 2048
If 'keytool' is not a typo you can use command-not-found to lookup the package that contains it, like this:
    cnf keytool
Solution: Make sure you have JRE installed (Java Runtime Environment). Goto JRE binary directory and then run this command.
java version typo
# /usr/bin/java version
Error: Could not find or load main class version
Its java trying to load the program named version. You missed hyphen there!
Solution: Try below command
# java -version
java version "1.7.0_211"
OpenJDK Runtime Environment (rhel-2.6.17.1.0.1.el7_6-x86_64 u211-b02)
OpenJDK 64-Bit Server VM (build 24.211-b02, mixed mode)
Bad magic number in super-block
Error below seen while trying to resize filesystem in RHEL7
# resize2fs /dev/mapper/vg01-data
 resize2fs 1.42.9 (28-Dec-2013)
 resize2fs: Bad magic number in super-block while trying to open /dev/mapper/vg01-data
 Couldn't find valid filesystem superblock.
Solution: This is because RHEL7 has the XFS filesystem by default so you need to use xfs_growfs command to resize the filesystem.
How to change DocumentRoot in Apache2 to different directory than /srv/www/htdocs
Apache2 has by default DocumentRoot set to /srv/www/html. If you want to change it to some different directory you need to change it in a couple of configuration files.
Easy way to search all those files is searched in the directory –
Here are few files and the lines within them you need to edit.
# vi /etc/apache2/default-server.conf
ScriptAlias /cgi-bin/ "/srv/www/cgi-bin/"
<Directory "/srv/www/cgi-bin">
DocumentRoot "/srv/www/htdocs"
<Directory "/srv/www/htdocs">

# vi /etc/apache2/vhosts.d/vhost-ssl.conf
DocumentRoot "/srv/www/htdocs"
You need to edit /srv/www/htdocs to directory of your choice. Also, you need to change relative directories to /srv as well. Once you are done with editing, you need to restart the apache2 service and you are good to go.
server_id_usr_crc warning in Suse Manger
Repeatedly below warning is being logged in /var/log/messages in Suse Manager server 4.0
2019-08-07T20:38:02.832696+08:00 susemgr-test salt-master[12485]: [WARNING ] /usr/lib/python3.6/site-packages/salt/grains/core.py:2815: DeprecationWarning: This server_id is computed nor by Adler32 neither by CRC32. Please use "server_id_use_crc" option and define algorithm youprefer (default "Adler32"). The server_id will be computed withAdler32 by default.
Solution : Add server_id_use_crc: adler32 entry at end of the file /etc/salt/master.d/susemanager.conf and then restart the Suse Manager process.
smdba backup fails to run in cron on SUSE Manager
smdba is a DB backup tool by SUSE to be used on Suse Manager which runs on postgres database. smdba tool to be run by root and in the backend it switches to DB user to connect with database and execute database stuff. It runs manually well but when scheduled in cron it exits with the below error.
Backend error:
        Access denied to UID 'postgres' via sudo.
You can see this error in root mail or you need to redirect stderr of cron command to file and you can see it in there.
Solution: This is because the root is not able to sudo to postgres user since cron spawned process don’t have tty attached to it and your sudo most likely have Defaults requiretty active in /etc/sudoers. If you want you can disable it system-wide by putting # in front of it or add a dedicated entry for root Defaults:root !requiretty to move out of this restriction. Once done try running smdba commands via cron and they will run successfully.
/etc/resolv.conf resetting to default after reboot
Issue: My /etc/resolv.conf entries gets wiped out after reboot. Manual entries added in /etc/resolv.conf are getting deleted after reboot.
Solution: This is probably because your /etc/resolv.conf is being auto-generated by netconfig. It will be symlink to /var/run/netconfig/resolv.conf. You can disable this by setting NETCONFIG_DNS_POLICY='' in /etc/sysconfig/network/config file. It will be defined as auto, you set it to blank. Or you can edit below parameters in the same file if you want to keep the above policy parameter untouched.
Once done adjust /etc/resolv.conf by running command netconfig update -f. If after this your /etc/resolv.conf remains as it is then you are good otherwise you need to review the above settings again carefully.
If it is being reloaded by DHCP you will see below line in /etc/resolv.conf
; generated by /usr/sbin/dhclient-script
In that case you need to perform below actions.
# vi /etc/dhcp/dhclient-enter-hooks
#!/bin/sh
make_resolv_conf(){
    :
}
#chmod +x /etc/dhcp/dhclient-enter-hooks
Error while executing packages action: failed to retrieve repodata/filelists.xml.gz from Oraclelinux7-x86_64 error was [Errno -1] Metadata file does not match checksum
Solution :
Run below commands and you are good to go.
# yum clean all
# yum makecache
PAM module error
PAM unable to dlopen(/lib64/security/pam_gnome_keyring.so): /lib64/security/pam_gnome_keyring.so: cannot open shared object file: No such file or directory
PAM adding faulty module: /lib64/security/pam_gnome_keyring.so
pam_sss(sudo:auth): received for user shrikant: 10 (User not known to the underlying authentication module)
Solution :
This is because account shrikant does not exists in LDAP server account list. If this is local user to that perticular client then you can add it to ignore list in LDAP config file /etc/sssd/sssdconf in below parameters.
# mount -v -t nfs 10.10.1.2:/data /mnt/data
mount.nfs: timeout set for Wed Jan 29 08:29:01 2020
mount.nfs: trying text-based options 'vers=4,addr=10.10.1.2,clientaddr=10.10.1.3'
mount.nfs: mount(2): Connection timed out
mount.nfs: Connection timed out
Solution :
This is because client is not able to reach NFS server. There are couple of things you should check.
TCP and UDP port 2049 and 111 should be open between client and server. Use nc -v -u <nfs_server> port
NFS server service should be running on the server
NFS client service should be running on the client
If you have SEP 14 (Symantec Endpoint Protection) antivirus running on your machines then un-install and reboot both client and server.
Warning in xclock command
# xclock
Warning: Missing charsets in String to FontSet conversion
Solution:
This is just a warning about improper environment variables. You can avoid it by exporting –
export LC_ALL=C
You can add this in the user profile file as well so that it will be exported at login and no need to exporting manually.
sssd service is not starting up
After patching or system migration like activities your sssd dont start up. When you try to start sssd service you get below errors in systemd status sssd :
sssd[16866]: Exiting the SSSD. Could not restart critical service [kerneltalks.com].
systemd[1]: sssd.service: Main process exited, code=exited, status=1/FAILURE
systemd[1]: Failed to start System Security Services Daemon.
systemd[1]: sssd.service: Unit entered failed state.
systemd[1]: sssd.service: Failed with result 'exit-code'.
In such cases the best way to check actual errors is to check the log file located in /var/log/sssd/sssd*.log. You can see sssd logs as well as domain logs here. You need to check both.
In my case I got errors in domain log file –
[sssd[be[kerneltalks.com]]] [dp_target_init] (0x0010): Unable to load module krb5
[sssd[be[kerneltalks.com]]] [be_process_init] (0x0010): Unable to setup data provider [1432158209]: Internal Error
[sssd[be[kerneltalks.com]]] [main] (0x0010): Could not initialize backend [1432158209]
[sssd[be[kerneltalks.com]]] [dp_module_open_lib] (0x0010): Unable to load module [krb5] with path [/usr/lib64/sssd/libsss_krb5.so]: /usr/lib64/sssd/libsss_krb5.so: cannot open shared object file: No such file or directory
For this missing file, I installed sssd-krb5 package and my issue got resolved.
sssd service is running but user can not login
sssd service was running fine but showing below error in systemctl status sssd and the user was not able to log in –
sssd_be[2338]: GSSAPI Error: An invalid name was supplied (Success)
Solution :
Add below line under section [libdefaults] in /etc/krb5.conf
rdns = false
then restart sssd service using systemctl restart sssd
Learn how to resolve Authorisation not recognized error while using xterm in Linux
xclock error
Error :
Sometimes your users complain they can’t use GUI via X server from Linux box (in this case mobaXterm). They are receiving their display authorization is not recognized. An error like below –
appuser@kerneltalks@ xclock
MobaXterm X11 proxy: Authorisation not recognised
Error: Can't open display: localhost:10.0
Sometimes these errors show up when you switch user from the root account or any other account.
Quick Solution:
Login directly with user on which you want to use xclock
appuser needs to log in directly on the server and you won’t see this issue. Most of the time it arises once you su to appuser from root or different users.
Read further if you have to switch user and then use x-term.
appuser need to add its entry to authorization. This entry will be the last entry in .Xauthority file in a home directory of the previous user with which you have logged in the server in the first place. Let’s say its root in our case. i.e. we logged in as root and then su to appuser
So here we got values from root home directory file and then we added it in using xauth in currently su user i.e. appuser
and you are good to go!
Bit of an explanation :
This error occurs since your ID doesn’t have the authorization to connect to the X server. Let’s walk through how to resolve this error. List out authorization entries for displays using xauth list
Protocol name (MIT-MAGIC-COOKIE-1 referred to single period)
hexkey
If you have many sessions and you are on test/dev environment and you are the only one using your system you can remove all the above entries using xauth remove to make sure you have a clean slate and getting only your session cookie. Or, you can save this output for reference. Log in again, try xclock and new the entry will be generated. Compare the latest output with the older one and get your new entry filtered out. Or as mentioned above in a quick solution it will be last entry in .Xauthority file in a home directory of appuser. You can not read .Xauthority file like text file so you have to use xauth -f command to view its content.
Logout from all sessions. Login again with the app user and run xclock once. This will generate a new session cookie token which you can see in xauth list .
appuser@kerneltalks $ xauth list
kerneltalks/unix:10  MIT-MAGIC-COOKIE-1  df22dfc7df88b60f0653198cc85f543c
Now, grab this entry and add authorization using below command –
X11-forwarding : ✘ (disabled or not supported by server)
Solution :
The best way to make sure you have all X11 stuff installed is to run the install package xclock. Additionally, you need to install xauth package as well.
Secondly, make sure you have X11Forwarding yes set in your /etc/ssh/sshd_config. If not then set and restart sshd daemon.
That’s all! Try re-logging to the server and it should work. You should see the below message after login using MobXterm.
X11-forwarding : ✔ (remote display is forwarded through SSH)
Solution for VMware tools not running after Linux kernel upgrade in guest VM
VMware tools not running after Linux kernel upgrade
In this article, we will discuss solutions when VMware tools are not running after the Linux kernel upgrade.
Cause :
After kernel upgrade in the Guest VM Linux machine, you may see VMware tools are not running. This is because there are VMware tools modules that runs using kernel library files. After a kernel upgrade, they point to different library files than the one currently used by the kernel and hence failed to start.
Solution :
The issue can be resolved by reconfiguring VMware tools after the kernel upgrade. This process is on the fly and does not require downtime.
Login to Guest Linux operating system using root account and run reconfiguration script /usr/bin/vmware-config-tools.pl
You will be asked a few choices to make. If you know about those modules you choose your answers according to your requirement and just hit enter to accept defaults. See below sample output –
root@kerneltalks # /usr/bin/vmware-config-tools.pl
Initializing...
Making sure services for VMware Tools are stopped.
Found a compatible pre-built module for vmci.  Installing it...
Found a compatible pre-built module for vsock.  Installing it...
The module vmxnet3 has already been installed on this system by another
installer or package and will not be modified by this installer.

The module pvscsi has already been installed on this system by another
installer or package and will not be modified by this installer.

The module vmmemctl has already been installed on this system by another
installer or package and will not be modified by this installer.

The VMware Host-Guest Filesystem allows for shared folders between the host OS
and the guest OS in a Fusion or Workstation virtual environment.  Do you wish
to enable this feature? [no]

Found a compatible pre-built module for vmxnet.  Installing it...


The vmblock enables dragging or copying files between host and guest in a
Fusion or Workstation virtual environment.  Do you wish to enable this feature?
[no]

VMware automatic kernel modules enables automatic building and installation of
VMware kernel modules at boot that are not already present. This feature can
be enabled/disabled by re-running vmware-config-tools.pl.

Would you like to enable VMware automatic kernel modules?
[no]

Do you want to enable Guest Authentication (vgauth)? Enabling vgauth is needed
if you want to enable Common Agent (caf). [yes]

Do you want to enable Common Agent (caf)? [yes]

No X install found.

Creating a new initrd boot image for the kernel.

NOTE: both /etc/vmware-tools/GuestProxyData/server/key.pem and
      /etc/vmware-tools/GuestProxyData/server/cert.pem already exist.
      They are not generated again. To regenerate them by force,
      use the "vmware-guestproxycerttool -g -f" command.

vmware-tools start/running
The configuration of VMware Tools 10.0.6 build-3560309 for Linux for this
running kernel completed successfully.

You must restart your X session before any mouse or graphics changes take
effect.

You can now run VMware Tools by invoking "/usr/bin/vmware-toolbox-cmd" from the
command line.

To enable advanced X features (e.g., guest resolution fit, drag and drop, and
file and text copy/paste), you will need to do one (or more) of the following:
1. Manually start /usr/bin/vmware-user
2. Log out and log back into your desktop session; and,
3. Restart your X session.

Enjoy,

--the VMware team
If you are ok to accept the default and want the script to run non-interactive, run it with -d default switch.
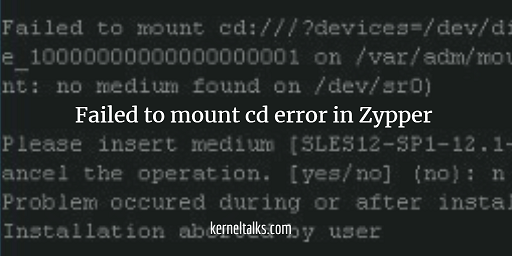
Failed to mount cd:///?devices=/dev/disk/by-id/ata-VMware_Virtual_IDE_CDROM_Drive_10000000000000000001 on /var/adm/mount/AP_0xFre2nn: Mounting media failed (mount: no medium found on /dev/sr0)
Detailed error snippet below :
# zypper in salt-minion
Loading repository data...
Reading installed packages...
Resolving package dependencies...

The following 16 NEW packages are going to be installed:
  libzmq3 python-Jinja2 python-MarkupSafe python-PyYAML python-backports.ssl_match_hostname python-futures python-msgpack-python python-netaddr python-psutil
  python-pycrypto python-pyzmq python-requests python-simplejson python-tornado salt salt-minion

The following 2 recommended packages were automatically selected:
  python-futures python-netaddr

The following 15 packages are not supported by their vendor:
  libzmq3 python-Jinja2 python-MarkupSafe python-PyYAML python-backports.ssl_match_hostname python-futures python-msgpack-python python-psutil python-pycrypto
  python-pyzmq python-requests python-simplejson python-tornado salt salt-minion

16 new packages to install.
Overall download size: 9.0 MiB. Already cached: 0 B. After the operation, additional 48.0 MiB will be used.
Continue? [y/n/? shows all options] (y): y
Retrieving package python-netaddr-0.7.10-8.5.noarch                                                                       (1/16), 896.9 KiB (  4.2 MiB unpacked)
Failed to mount cd:///?devices=/dev/disk/by-id/ata-VMware_Virtual_IDE_CDROM_Drive_10000000000000000001 on /var/adm/mount/AP_0xFre2nn: Mounting media failed (mount: no medium found on /dev/sr0)

Please insert medium [SLES12-SP1-12.1-0] #1 and type 'y' to continue or 'n' to cancel the operation. [yes/no] (no): n
Problem occured during or after installation or removal of packages:
Installation aborted by user

Please see the above error message for a hint.
Cause :
This error is nothing but zypper trying to read repo information from CD/DVD. Since one of the zypper repo is configured to look for mountable media, it’s doing its job. But, currently, that media is not connected to the system, and hence zypper is failing to read details from it.
Solution :
List your zypper repo using the command :
# zypper lr --details
# | Alias                | Name                 | Enabled | GPG Check | Refresh | Priority | Type   | URI                                                                                    | Service
--+----------------------+----------------------+---------+-----------+---------+----------+--------+----------------------------------------------------------------------------------------+--------
1 | SLES12-SP1-12.1-0    | SLES12-SP1-12.1-0    | Yes     | (r ) Yes  | No      |   99     | yast2  | cd:///?devices=/dev/disk/by-id/ata-VMware_Virtual_IDE_CDROM_Drive_10000000000000000001 |
2 | sles12-sp1-bootstrap | sles12-sp1-bootstrap | Yes     | ( p) Yes  | No      |   99     | rpm-md | http://repo.kerneltalks.com/pub/repositories/sle/12/1/bootstrap                 |
Here you can see first repo’s URI is pointing to a CD. Now you can mount the CD or you can disable that repo for time being and move ahead with the installation.
Use the below command to disable CD repo. Make sure you enter correct repo number in command (here it’s 1)
# zypper mr --disable 1
Repository 'SLES12-SP1-12.1-0' has been successfully disabled.
Once CD/DVD repo is disabled successfully, re-run zypper installation command and you will be able to execute it without any errors!
The article explaining How to resolve /bin/bash^M: bad interpreter: No such file or directory in Unix or Linux server.
How to resolve /bin/bash^M: bad interpreter: No such file or directory
Issue :
Sometimes we see below error while running scripts :
root@kerneltalks # ./test_script.sh
-bash: ./test_script.sh: /bin/bash^M: bad interpreter: No such file or directory
This is the issue with files that were created or updated in Windows and later copied over to Unix or Linux machine to execute. Since Windows (DOS) and Linux/Unix interpret line feeds and carriage returns differently. Window’s carriage returns interpreted as an illegal character ^M in *nix systems. Hence you can see ^M in the above error which is at the end of a very first line of script #!/bin/bash which invokes bash shell in the script.
To resolve this issue you need to convert the DOS file into Linux one. You can either re-write the whole file using text editors in Linux/Unix system or you can use tools like dos2unix or native commands like sed.
Solution:
Use dos2unix utility which comes pre-installed on almost all distributions nowadays. dos2unix project hosted here.
There are different encoding you can choose to convert your file. -ascii is default conversion mode & it only converts line breaks. I used here -iso which worked fine for me.
The syntax is pretty simple you need to give encoding format along with the source and destination filenames.
root@kerneltalks # dos2unix -iso -n test_script.sh script_new.sh
dos2unix: active code page: 0
dos2unix: using code page 437.
dos2unix: converting file backup.sh to file script_new.sh in Unix format ...
This way you can keep old files intact and don’t mess with the original file. If you are ok to directly edit the old file then you can try below command :
root@kerneltalks # dos2unix -k -o test_script.sh
dos2unix: converting file test_script.sh to Unix format ...
Where -k keeps the timestamp of the file intact and -o converts the file and overwrites changes to the same file.
Or
You can use streamline editor sed to globally search an replace
root@kerneltalks # sed -i -e 's/\r$//' test_script.sh
where, -i uses source file, edit, and overwrites to the same file. -e supplied the following script code to be run on the source file.
That’s it. You repaired your file from Windows to run fine on the Linux system! Go ahead… execute…!
Troubleshooting guide to reclaim space on disk after deleting files in Linux.
Space is not released after deleting files in Linux? Read this troubleshooting guide
One of the common issues Linux Unix system users face is disk space is not being released even after files are deleted. Sysadmins face some issues when they try to recover disk space by deleting high sized files in a mount point and then they found disk utilization stays the same even after deleting huge files. Sometimes, application users are moving/deleting large log files and still won’t be able to reclaim space on the mount point.
In this troubleshooting guide, I will walk you through steps that will help you to reclaim space on disk after deleting files. Here we will learn how to remove deleted open files in Linux. Most of the time files are deleted manually but processes using those files keep them open and hence space is not reclaimed. df also shows incorrect space utilization.
Process stop/start/restart
To resolve this issue, you need to gracefully or forcefully end processes using those deleted files. First, get a list of such deleted files that are still marked open by processes. Use lsof (list open files) command with +L1 switch for this or you can directly grep for deleted in lsof output without switch
Now, in above output check the PID 777and stop that process. If you can not stop it you can kill the process. In the case of application processes, you can refer application guides on how to stop, start, restart its processes. The restarting process helps in releasing the lock on that file which process made to hold it as open. Once the related process is stopped/restarted you can see space will be released and you can observe reduced utilization in df command output.
Clear from proc filesystem
Another way is to vacate the space used by file by de-allocating that space from /proc filesystem. As you are aware, every process in Linux has its allocations in /proc filesystem i.e. process filesystem. Make sure that the process/application has no impact if you are flushing files (which are held open by an app) from /proc filesystem.
You can find file allocation at /proc/<pid>/fd/<fd_number> location. Where PID and fd_number you can get from lsof output we saw above. If you check the type of this file then it’s a symbolic link to your deleted file.
root@kerneltalks # file /proc/777/fd/7
/proc/777/fd/7: broken symbolic link to `/tmp/ffiJEo5nz (deleted)
So, in our case we can do it using –
root@kerneltalks # > /proc/777/fd/7
That’s it! Flushing it will regain your lost space by those files which you already deleted.