A quick step by step process to configure Amazon Cognito authentication on AWS Application Load Balancer!
Pre-requisite or assumption:
- Application Load Balancer is up and running with HTTPS listner
- Load balancer has active backend serving webpage/webapp that you want to protect with Cognito authentication
- Amazon Cognito user pools is created. See our article on how to create user pool
Configuration
Let’s get into configurations now. First, we need to edit the ALB’s listener rule to add Cognito authentication.
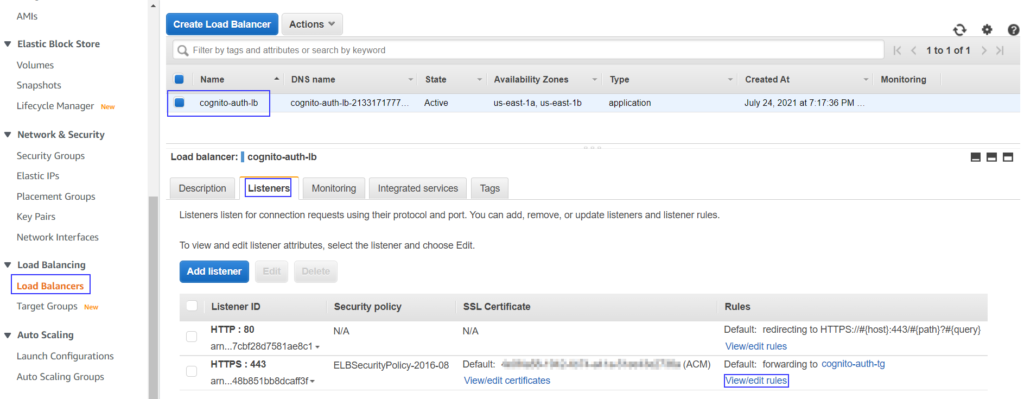
- Log into EC2 console
- Navigate to the Load Balancing > Load Balancers in left sidebar menu
- On Load balancers page, select the Application load balancer that needs to be configured
- Click on Listeners tab in below details pane.
- Click on View/Edit rules against HTTPS 443 listner
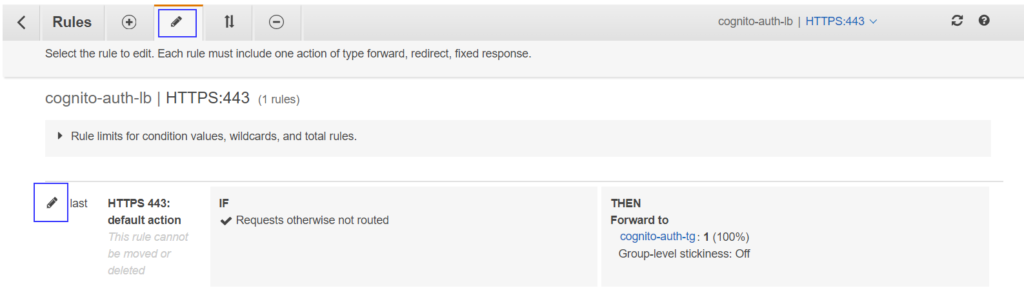
You should see the editor window where you need to click on pen icons to open up the rule editor.
Now, click on + Add action button. Select Authenticate from the drop-down. The rule will be listed in the editor where you need to select from dropdowns-
- Cognito user pool
- Client ID
Once you select Cognito user pool it will accordingly populate values for Client ID in that pool. Choose respectively. Keep other options untouched unless you have other requirements.
If you have not created a Cognito user pool or need any clarity around it, please go through our article on how to create an Amazon Cognito user pool for ALB authentication.
New Authenticate action will be prioritized to rule 1 and existing Forward to action will be getting down to number 2. Your rule windows should look like this –

Click on Update to save the rule.
If you are facing any issue to populate User pool ID and seeing Too many requests error in console then you can opt to re-create ALB with this configuration using AWS CLI or CloudFormation. Because using AWS CLI, you can not edit the default rule. If you have ALB created from the Cloudformation template already then you just need to tweak your template and add the below code for the ALB listener resource.
Type: AWS::ElasticLoadBalancingV2::Listener
    Properties:
      LoadBalancerArn: <ALB ARN>
      Port: 443
      Protocol: HTTPS
      Certificates:
        - CertificateArn: <HTTPS CERT ARN>
      DefaultActions:
        - Type: authenticate-cognito
          AuthenticateCognitoConfig:
            OnUnauthenticatedRequest: authenticate
            UserPoolArn: <AMAZON COGNITO USER POOL ARN>
            UserPoolClientId: <USER POOL CLIENT APP ID>
            UserPoolDomain: <USER POOL DOMAIN PREFIX>
          Order: 1
        - Type: forward
          ForwardConfig:
            TargetGroups:
              - TargetGroupArn: <TARGET GROUP ARN>
                Weight: 1
          Order: 2
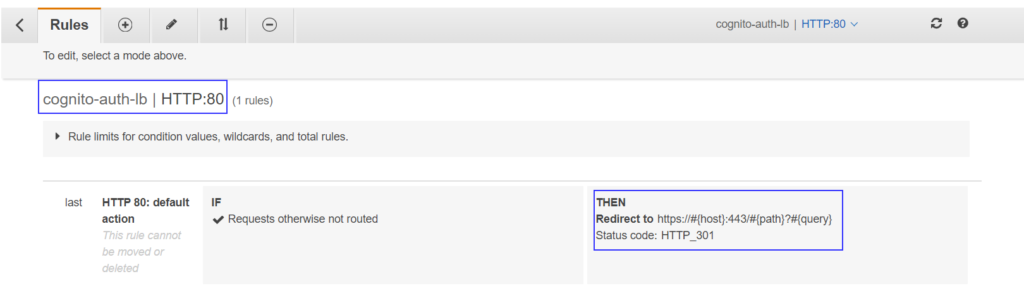
Make sure your HTTP listener rule (port 80) is set to redirect to HTTPS.
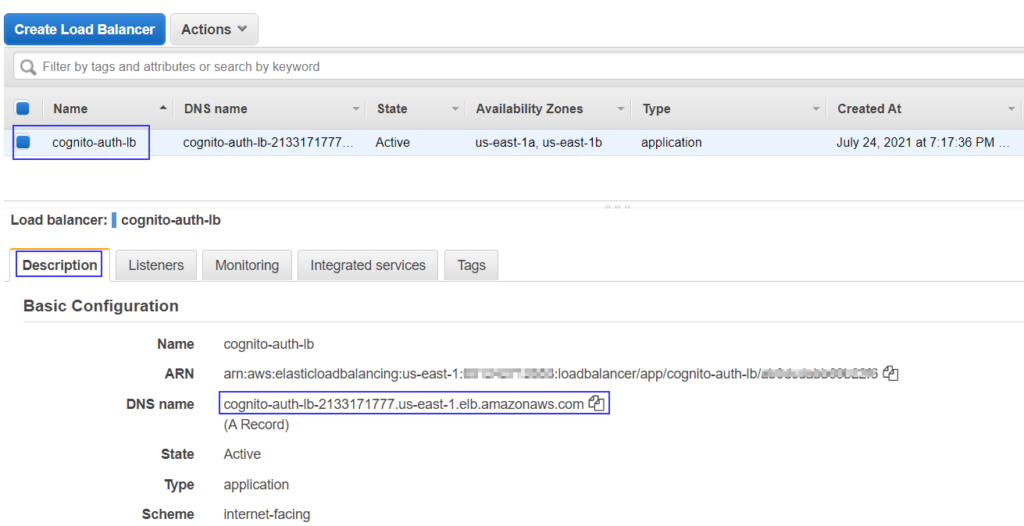
Now ALB is ready to authenticate users before their requests are forwarded to target group targets. Grab the ALB DNS from the load balancers page. If you are having CNAME/ALIAS entry for ALB then you should be using the custom DNS you have defined.
- Log into EC2 console
- Navigate to the Load Balancing > Load Balancers in left sidebar menu
- On Load balancers page, select the Application load balancer that needs to be configured
- Click on Description tab in below details pane.
- Copy DNS name
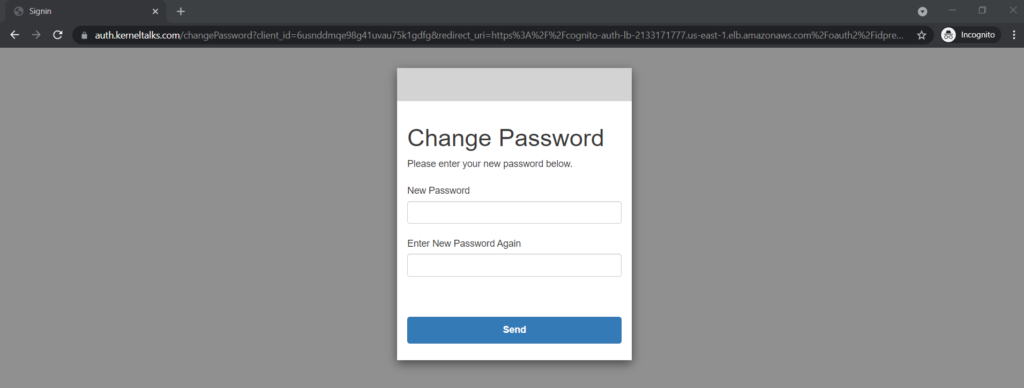
Paste DNS name in the browser and you should be redirected to the authentication page from Amazon Cognito. You can customise this page along with its domain as we explained in our earlier article on the Amazon Cognito user pool.

Notice that we configured a custom domain for Amazon Cognito hence our request is served with a custom domain auth.kerneltalks.com. If you observe the URL carefully, you can see Client ID, Callback URL, etc. details configured in Amazon Cognito when we created the user pool.
For any Cognito user, the default behaviour is to force change password on the first login which we observed here –
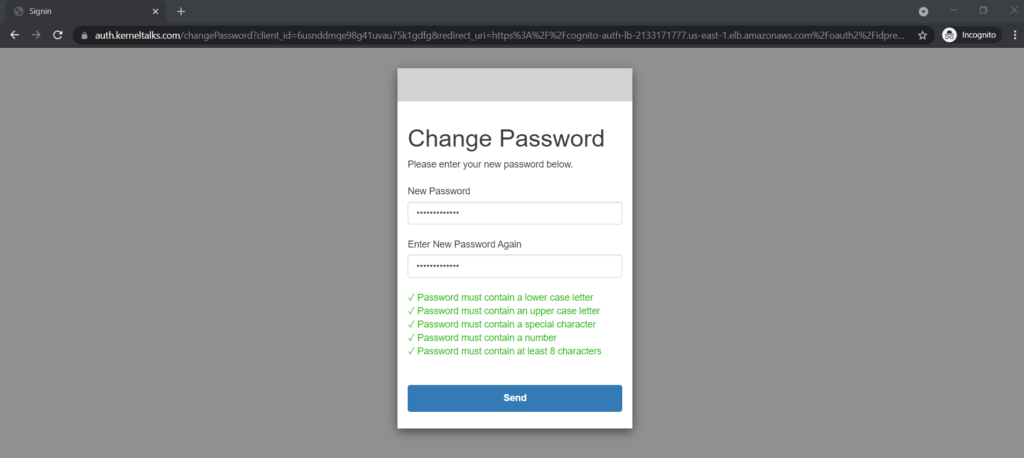
During change password, you can even see password policy applied while creating the Amazon Cognito user pool is being checked –
For testing purposes, if you want to bypass all the above password change procedures then you can set the password from AWS CLI using the below command –
aws cognito-idp admin-set-user-password --user-pool-id <pool-id> --username <user> --password <password> --permanent
Once the password is changed successfully, you will be redirected to the Callback URL configured in Amazon Cognito. We configured it to the ALB DNS name. So we redirected to it and backend EC2 target served us a sample webserver page!
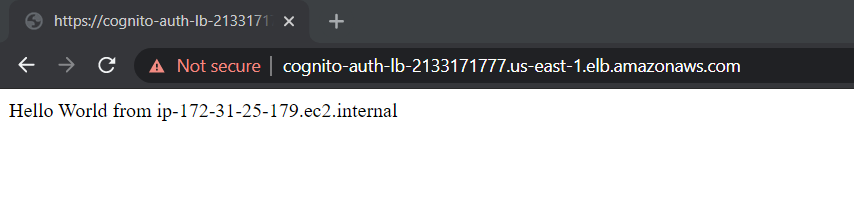
Thus we configured Amazon Cognito authentication on the Application Load balancer and secured our targets!
Share Your Comments & Feedback: