Learn how to disable direct root login to Linux and HPUX servers by altering parameters in SSH configuration files. Its one of the hardening step.
Many of the production / live environments has their server hardened. Once of the server hardening step is to disable direct root login to servers i.e. user can not login to server using root account. User need to login with normal account and then switch to root privilege account. This enables easy tracking when and who used superuser privilege. This adds extra layer of security to system prohibiting hackers trying to login with superuser privilege.
By editing SSH configuration file sshd_config we can disable direct root login. SSH configuration file in Linux located at /etc/ssh/sshd_config whereas in HPUX its at /opt/ssh/etc/sshd_config.
In above mentioned config files you need to check PermitRootLogin parameter :
This parameter defines if direct root access is permitted or not. By default its value is set to yes. This means direct root login is allowed on server. You need to hash out this entry by adding symbol # at the beginning as shown in above example. Once its hashed then SSH daemon ignores this value. Means it wont allow root login on server. This includes all accounts with root privileges i.e. with UID 0. You can even change value to no without hashing entry out and it will still works.
PermitRootLogin no
After hashing out entry you need to bounce SSH daemon sshd to read this new configuration by daemon.
# service sshd restart

OR

# systemctl restart sshd
But restarting sshd will terminate all user’s sessions currently active on server. To avoid this we need to kill it with HUP . HUP option restart sshd without disturbing existing sessions.
You can see new sshd has been spawned when we kill it by HUP signal. And your current logged in users wont observe any disconnections. Now, open new session and try to login with superuser account. It will fail!
Learn how to check the Linux kernel version using the command line. Helpful commands to check your kernel versions, releases, codenames, etc.
This post aims at checking your Linux kernel version using commands. We will be discussing different ways to fetch this data from your system. Below is a list of commands which can be used to get Linux kernel version details.
You can use below 7 ways to gather info about your distribution like kernel version in CentOS, RHEL, SUSE, OEL, Ubuntu, Debian Linux. All the below outputs are from my test machine running CentOS 7.
1. By reading version process file.
This gives you running kernel version.
[root@kerneltalks1 ~]# cat /proc/version
Linux version 3.10.0-693.5.2.el7.x86_64 (builder@kbuilder.dev.centos.org) (gcc version 4.8.5 20150623 (Red Hat 4.8.5-16) (GCC) ) #1 SMP Fri Oct 20 20:32:50 UTC 2017
3.10.0-693.5.2.el7.x86_64 is your current kernel distribution version.
2. By reading Distro release file in /etc
Almost all distributions of Linux come with a release file in /etc which contains the kernel version, release details in it. Its a text file hence cat can be used to read its content.
# cat /etc/enterprise-release OR /etc/oracle-release   ---For OEL
Enterprise Linux Enterprise Linux Server release 5.8 (Carthage)

[root@kerneltalks1 ~]# cat /etc/redhat-release         ---For RHEL/OEL
CentOS Linux release 7.4.1708 (Core)
OR simple use wildcard so that you can list the release file of any distro. All distro keeps diff filenames so using wildcard will be wise. In some distro, you will see /etc/os-release or /etc/system-release files as well. All these files will be covered when using wild cards.
[root@kerneltalks1 ~]# cat /etc/*release
CentOS Linux release 7.4.1708 (Core)
NAME="CentOS Linux"
VERSION="7 (Core)"
ID="centos"
ID_LIKE="rhel fedora"
VERSION_ID="7"
PRETTY_NAME="CentOS Linux 7 (Core)"
ANSI_COLOR="0;31"
CPE_NAME="cpe:/o:centos:centos:7"
HOME_URL="https://www.centos.org/"
BUG_REPORT_URL="https://bugs.centos.org/"

CENTOS_MANTISBT_PROJECT="CentOS-7"
CENTOS_MANTISBT_PROJECT_VERSION="7"
REDHAT_SUPPORT_PRODUCT="centos"
REDHAT_SUPPORT_PRODUCT_VERSION="7"

CentOS Linux release 7.4.1708 (Core)
CentOS Linux release 7.4.1708 (Core)
3. By listing release package
This command works for RPM-based systems like RHEL, SUSE, OEL, CentOS, etc. Search and grep for release which will show you release package. This package name convention includes release number in it.
lsb_release command is provided by redhat-lsb package. You need to install redhat-lsb package in order to use this command on RHEL, CentOS or Fedora systems.
[root@kerneltalks1 ~]# lsb_release -a
LSB Version:    :core-4.1-amd64:core-4.1-noarch:cxx-4.1-amd64:cxx-4.1-noarch:desktop-4.1-amd64:desktop-4.1-noarch:languages-4.1-amd64:languages-4.1-noarch:printing-4.1-amd64:printing-4.1-noarch
Distributor ID: CentOS
Description:    CentOS Linux release 7.4.1708 (Core)
Release:        7.4.1708
Codename:       Core
6. Using hostnamectl command
In newer kernels, hostnamectl command is introduced. Using this command without any argument will show you all details about your kernel. You can use it to set your hostname as well.
[root@kerneltalks1 ~]# hostnamectl
   Static hostname: kerneltalks1
         Icon name: computer-vm
           Chassis: vm
        Machine ID: 49688f1b932a41e790254b993d419ccc
           Boot ID: 4777133835544d599a46a53ae4b584e3
    Virtualization: xen
  Operating System: CentOS Linux 7 (Core)
       CPE OS Name: cpe:/o:centos:centos:7
            Kernel: Linux 3.10.0-693.5.2.el7.x86_64
      Architecture: x86-64
Learn how to install the EC2 Linux server of your favorite distro on the Amazon Web Services cloud platform. Free Linux server for learning and practicing.
Amazon Web Services AWS is one of the cloud platforms which offers various computing facilities online. For a free tier account, there are enough services offered for a normal user who aims for testing or learning new technologies without spending much. You can sign up for a free account (12 months free) here which will require your valid mobile number and credit card information for validation.
In this post, we will be using AWS to install the Linux server which we can use for practice/ hand-on experience at home. One of the other alternatives is to install Vmware on your desktop/laptop and then install Linux in its virtual machine. But this way requires a good hardware configuration of your laptop/desktop. Hosting your Linux on cloud is much easy and it’s not costing you anything for low usage!
AWS offers below a list of distros to install on its EC2 (server computing module) platform.
Redhat
Cent OS
Debian
Fedora
Gentoo
OpenSuse
Suse Linux
Ubuntu
Amazon Linux
You can have a hand on to all these distros within minutes after signing up for your account! Of course, you will be having root administrator access on these systems! Let’s walk through steps to get your Linux server ready in minutes on AWS.
Step 1.
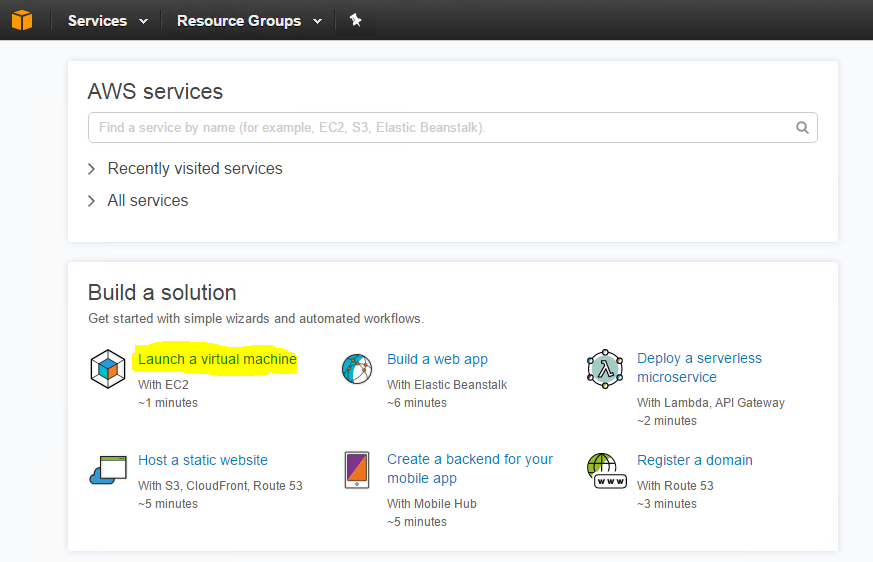
Login to AWS account and from landing page select “Launch a virtual machine” under ‘Build a solution’ screen.
Step 2.
You will be presented with the ‘Quick Launch EC2 Instance’ screen. Here you will be able to launch a wizard to get your task done fast or you can go through Advanced selections to decide your final virtual server config. We will be going with a normal wizard. Click the “Get Started” button here.
Step 3.
Now we will walk through wizard for creating our Linux virtual server.
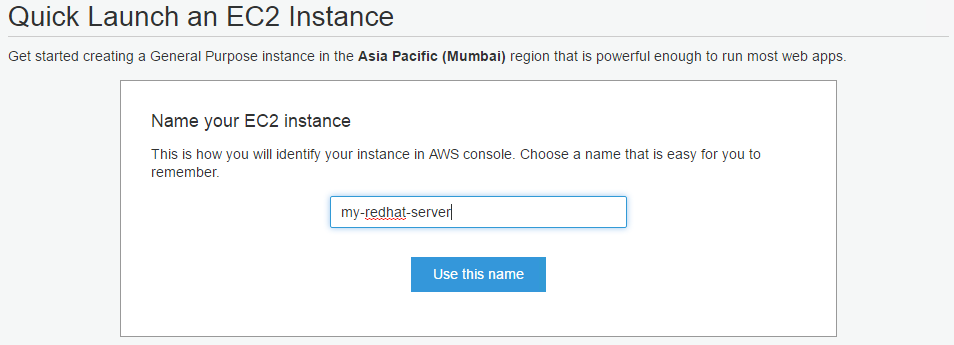
Name your EC2 instance :
Your EC2 linux virtual server name of your choice.
Select your operating system. We are selecting RedHat here.
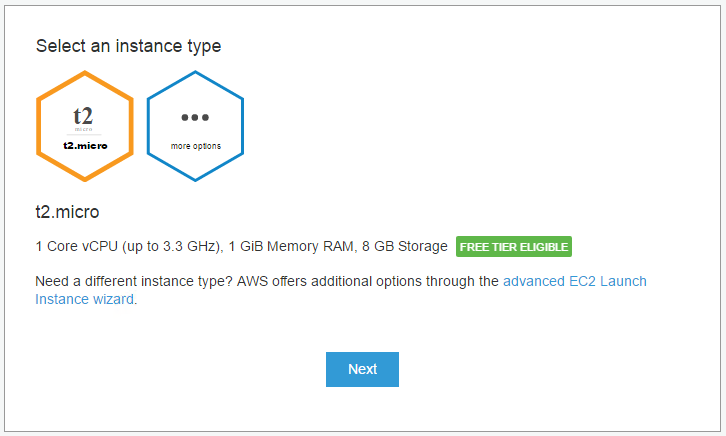
Select an instance type.
This is the type of hardware config you will be needing. For free account, you will be able to select those instances only which is tagged with “Free tier eligible”. Here we are selecting default t2.micro instance which has Single core CPU, 1 GB RAM, and 8GB of HDD.
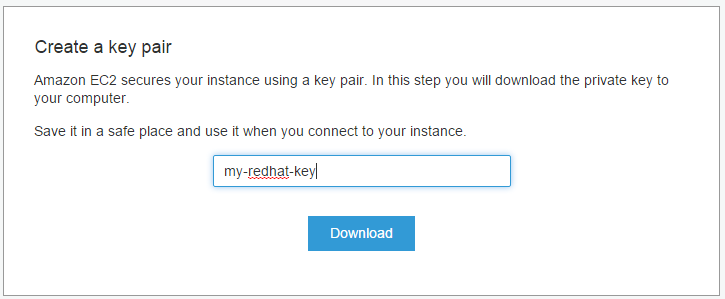
Create a key pair.
This is an important screen. Here you will be given one Private key to download. You will require this key to authenticate yourself while logging into this EC2 Linux server when ready. Give the name of your choice and download the key file and keep it safe.
Create this instance.
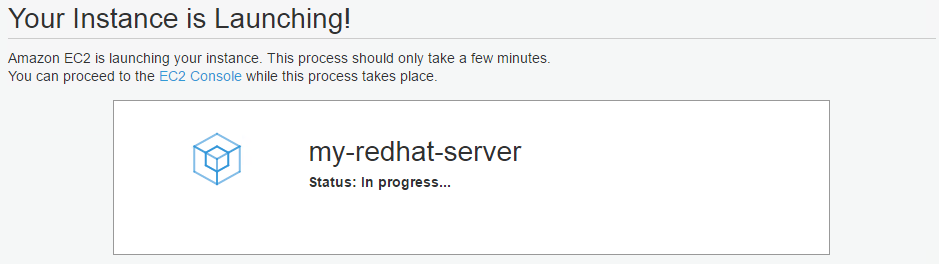
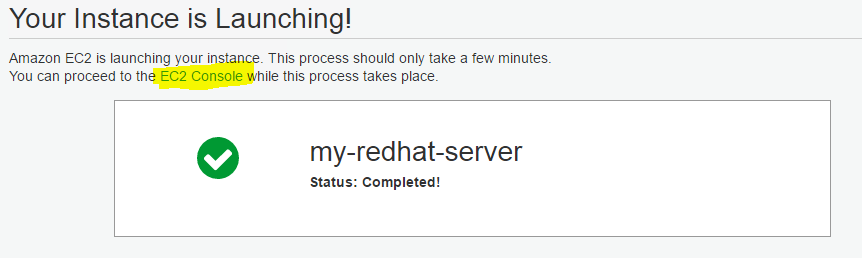
Finally hit create button and your server will be ready in 2 minutes. You will see installing screen.
Once complete, click EC2 console link and you will be presented with list of servers under your account.
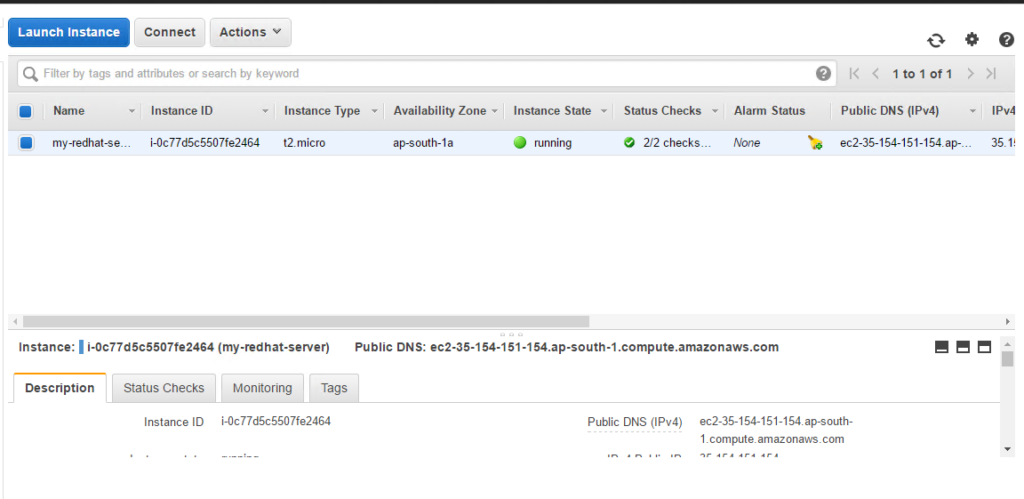
Step 4.
You can see below the EC2 screen with your server details like instance state, zone, DNS, etc.
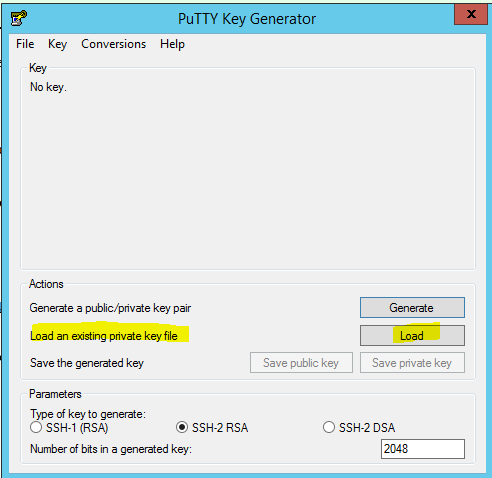
Now to connect to this server from your laptop/desktop, you need to use key pair as authentication. Download putty.exe and puttygen.exe from here.
Open puttygen.exe and load your private key which you have downloaded from AWS console in step 2.
Once, successfully loaded you need to click the “Save public key” button and save the key on your desktop/laptop.
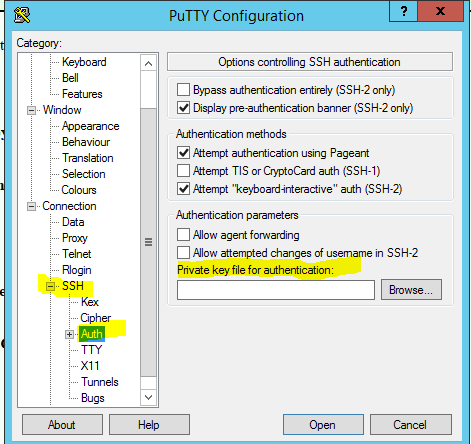
Now open putty.exe. Set your saved key file from puttygen (in the above task) as an SSH authentication. In left-hand side pane, expand SSH then select Auth and on the right-hand side, you will be able to browse your file.
Now your putty.exe is ready to connect with your AWS Linux server. Now head back to EC2 console and copy your server’s public DNS.
Use this it, in putty to connect. And you will be able to connect to the server. Once prompted for username use username from the below table as per your distro (official AMI). You won’t be prompted for a password. Your authentication will be done via key pair you configured in putty settings.
Default ssh usernames for famous Linux in EC2
Linux Distro
Username
Ubuntu
ubuntu
Debian
admin
Fedora
fedora
CentOS
centos
RHEL 6.4 & Later
ec2-user
RHEL 6.3 & previous
root
SUSE
root
login as: ec2-user
Authenticating with public key "imported-openssh-key"
[ec2-user@ip-172-31-23-115 ~] $ sudo su -
[root@ip-172-31-23-115 ~] # id
uid=0(root) gid=0(root) groups=0(root) context=unconfined_u:unconfined_r:unconfined_t:s0-s0:c0.c1023
Once logged in, use sudo su - command and you will be in root account! That’s it, you have an EC2 Linux server with root account in few minutes!
You can install any distro listed above in these instances. Make sure you are not expiring your free usage according to AWS free tier policy otherwise you will be billed on your card. Practice, learn, improve! Have a happy shell!!
Learn how to mount ISO disk image in Linux. ISO image file mounts using a loop device and iso9660 filesystem type enabling users to access data within as a normal mount point.
Many software distributions come on Compact Disc CD media. Since physical CD is difficult to maintain over the course of years, many people prefer to have an ISO image of discs. Also, it’s feasible to use such ISO file quicker on the server where native disc drive is absent. It’s quick to copy ISO file on the server and mount it rather than searching for a USB disk drive, connecting, identifying it on the server, and then using the disc in it.
In this post, we will be seeing how to mount ISO file in Linux to access data in it. It’s a very short procedure of a couple of commands and ISO file’s data will be available to you like any other data mount point.
Step 1.
First, we need to create a mount point directory on which ISO will be mounted. Preferable it should be under /mnt structure.
# mkdir /mnt/iso
Now, copy ISO to the server using FTP or SCP. Let’s say we have copied test.iso in /tmp directory.
Step 2.
Mount ISO file on /mnt/iso mount point using mount command using the loop device. The loop device is a pseudo-device that accesses the file as a block device. Since mount command deals with block devices and not files, we are using a loop option here.
# mount -o loop /tmp/test.iso /mnt/iso
mount: you must specify the filesystem type
Here you can see an error that we haven’t specified file system to mount. Proceed with specifying the iso9660 file system. iso9660 file system uses for CD/DVD ROM file structures.
# mount -o loop -t iso9660 /tmp/test.iso /mnt/iso
Using the above command with filesystem iso9660 and loop device we successfully mounted ISO file. You can verify it with df command and viewing content of ISO file.
# df -h
Filesystem            Size  Used Avail Use% Mounted on
/tmp/test.iso          82K   82K     0 100% /mnt/iso

# cd /mnt/iso
# ll
total 22
-r-xr-xr-x. 1 root root 12246 Dec 19 13:50 CPU_iowait.xlsx
-r-xr-xr-x. 1 root root  9357 Dec 19 13:53 RAM.xlsx
You can un-mount this ISO with simple unmount command. Unless you unmount it, ISO file will be in use by this mount and throws warnings if you try to work with it.
Here we are on the 100th block! Kerneltalks journey of 4 months reaching a milestone of 100 posts! Crawling web of Linux, Unix & scripts for the goodness of sysadmin!
And here we are!!!! on 100th post!!!!
kerneltalks.com was registered in Oct 2016, to take a journey of kerneltalks.blogspot.com further into wider space. In 3-4 months of the span, KT has grown to 100 posts database of Linux, Unix, and Script related stuff. We have observed 40K pageviews in this period and a continuously growing organic search number!
KT started getting feedback, questions from its readers over email. Social branding is one of the aspects KT just started and advancing at a low pace day by day. As of today, KT having 377 fans on its Facebook page, 5 Google+ followers, 15 Twitter followers, 19 Feed readers, and 28 email subscribers. Totaling 444 social followers. Although these numbers look pretty small they are growing and yes they are not paid ones!
KT also gained a leap in Alexa ranking. Currently its ranked 4,00,728th popular website in the world and 33,529th in India. If you are into blogging and know what is Alexa, you definitely love these numbers!
I hope the same continuity in the future and would like to see these numbers greatly raised when KT reaches 200 posts milestone! Till then, have a good time! Happy surfing!!
Small APA configuration testing script which will automate checking and verifying your Auto Port aggregation configuration in the HPUX server.
In the past, we have seen the configuration of Auto Port Aggregation in HPUX which explains what is APA and what is the purpose of using APA in your setup. In another post, we learned how to test APA if working perfectly or not. In this post, I will be sharing a script that I coded to automate this APA test.
Do not run this script on running live production. Since testing APA involves disabling of NIC.
Also, make a note that you need to run this script in normal terminal login and not on the server console. Since if the APA test fails you will lose server connectivity on primary NIC IP address. It is recommended to keep a continuous ping session on to IP address (configured on APA) to make sure that you monitor connectivity during the whole APA test. I have also explained the use of this continuous ping in manual APA test post.
Script code :
Execute this script on your own risk!
See below the APA configuration testing script. Save the below code in apa_test.sh file on your server. Execute script with root privileges using sh apa_test.sh or ./apa_test.sh command. Make sure executable permissions are set for the file.
Sample output :
******* APA Configuration Check *******
Caution !! Do not run this script from console

APA group : 900
IP	  : 10.10.5.2
Lan PPA	  : 0

APA group : 900
IP	  : 10.10.5.2
Lan PPA	  : 1

APA is working normally!
Write us suggestions/feedback/corrections in comments.
Learn APA configuration in HPUX. Auto port aggregation logic is similar to network teaming in Linux. Used for network card hardware-level redundancy.
APA stands for Auto Port aggregation. It is software i.e. operating system level configuration which offers NIC (Network Interface Card also referred to as LAN card) redundancy. We have already briefed about APA in this post, refer to the first paragraph.
Let’s run down to configuration steps for APA in HPUX in failover group mode.
Step 1.
You need to have teaming software installed on your system. The Teaming (Auto PORT Aggregation) application is inbuild in HP-UX 11i V2 EOE. If not you can download it from the HP software repository and install it on your HPUX server.
Step 2.
Make sure your primary network interface card (NIC) is configured with a proper IP address, mask, and gateway. Use netstat -in command.
# ioscan -funC lan

Class I H/W Path Driver S/W State H/W Type Description
===================================================================
lan 1 1/1/0 gelan CLAIMED INTERFACE HP A4926A PCI 1000Base-SX Adapter
/dev/gelan4
Let’s assume we have identified lan1 as a secondary NIC for our config. lan0 being the primary one.
Secondly, identify your second NIC which can be used as secondary card in APA configuration (Use ioscan -fnClan command). Make sure this card is connected to a different network switch, configured with the same VLAN as primary on the network end, and is physical does not reside in the same hardware module of primary NIC. This ensures high availability in case of network, switch, or card hardware failure.
To confirm both cards have same network reachability (i.e. on same VLAN) use below command :
# linkloop -i PPA_pri StationAddr_sec

# linkloop -i 1  0x00108323463C
Link connectivity to LAN station: 0x00108323463C
-- OK

---- failure output means no connectivity----
Link connectivity to LAN station: 0x00108323463C
error: get_msg2 getmsg failed, errno = 4
-- FAILED
frames sent : 1
frames received correctly : 0
reads that timed out : 1
where station address is MAC (can be obtained from lanscan output) and PPA number is lan0, lan1 number. Try in both ways. using MAC of primary and PPA of secondary and vice versa to make sure you have connectivity between both cards. If you get shown failed error then those two cards cant be used in APA config together.
Step 3.
Edit configuration file /etc/rc.config.d/hp_apaportconf and mention interface names (lan0 and lan1 in our case) like below:
# /sbin/init.d/hpapa start
/sbin/init.d/hpapa started.
         Please be patient. This may take about 40 seconds.
         HP_APA_DEFAULT_PORT_MODE = MANUAL
         /usr/sbin/hp_apa_util -S 0 LAN_MONITOR
         /usr/sbin/hp_apa_util -S 1 LAN_MONITOR
         /sbin/init.d/hpapa Completed successfully.

# /sbin/init.d/hplm start
Step 5.
Now, we will create a LAN configuration file that can be applied later to both NIC to make them aware they are working in a group under the same IP umbrella. lanqueryconf command creates ASCII file at /etc/lanmon/lanconfig.ascii
See the content of this ASCII file. It has node name, polling interval (microseconds, default is 10 sec). The dead count is the number of polling packets missed to consider failure and initiate failover (default is 3). The failover group is lan name which will be visible systemwide. lan900 will have our primary NIC address and lan0, lan1 will work together as lan900. IP is IP taken up by lan900. lan0 will be treated as primary NIC and lan1 as standby. Number 5,3 denotes priorities of respective NIC.
You can make changes in this file if you dont want to go with default values.
Step 6.
The above file is generated for admin to edit if any changes required. After that, the file will be checked for integrity and then can be applied to APA configuration like below :
# lancheckconf
Reading ASCII file /etc/lanmon/lanconfig.ascii
Verification of input file /etc/lanmon/lanconfig.ascii is complete.

# lanapplyconf
Reading ASCII file /etc/lanmon/lanconfig.ascii
Creating Fail-Over Group lan900
Updated binary file /etc/lanmon/lanconfig
Here lan900 is created and you APA is complete.
Step 7.
Now you can see lan0 and lan1 vanish from lanscan -q output and instead lan900 appeared with 0 and 1 as its members.
# lanscan -q
2
3
900 0 1
901
You can verify that lan900 will have an IP address which was configured on primary NIC lan0 before configuration (in netstat -in output).
You can even test if APA failover is happening correctly. Follow this testing procedure to make sure your APA works properly. Sometimes lan900 won’t appear and you need to restart your system. The rebooting system takes up a new APA configuration and you will able to see lan900 in action.
If there is more than one APA configured on the system then it will follow the series of lan901, lan902, and so on.
Learn everything about umask value. What is umask value? What is the best default umask? How to set it up in Linux and Unix? & How to calculate umask?
One of the basic topics in learning Linux or Unix is umask value. UMASK is a user file/directory permission mask value and is 4 digits octal value! Whenever a user creates a file or directory kernel grants it some by default permissions. Those are base permissions. For file, it’s 666 (i.e. rw-rw-rw) means read, write to all (owner, group, others), and for directory its 777 (i.e. rwxrwxrwx) means read, write, execute to all.
Here user mask plays its role. The user permission mask is the octal value that is used to determine file/directory permission when they are created by the user. Umask value subtracted bitwise from base permissions and final permission is determined for newly created files and directories.
How to calculate umask?
For example, if umask value is 0022 then newly created files will have permission 0666-0022=0644 (i.e. rw-r–r–) means read to all and write to the owner only. There are plenty of combinations can be used depending on your requirement. You can refer below calculation table for determining your expected umask value:
umask value (Bit from left to right)
For whom
File base permission
Directory base permission
1st
0
0
2nd
Owner
6
7
3rd
Group
6
7
4th
Others
6
7
So, you need to decide which final permission you want on newly created file and directories. Once that is finalized you can have reverse calculation with 666 & 777 and decide your umask value.
Below are few standard best default umask values which can be used :
umask value
Final File permission
Final directory permission
Useful for
022
644
755
Normal user. Others have read access only
002
664
775
Group usage. Only group members has access
077
600
700
Complete privacy. No other user can access your data
How to setup umask in Linux/Unix?
umask value can be set up using simple command umask followed by its value. But, this value will be set only for that current active shell session.
# umask 022
# touch testfile
# ll
total 0
-rw-r--r--. 1 root root 0 Feb  1 01:03 testfile

# umask 077
# touch testfile1
# ll
total 0
-rw-------. 1 root root 0 Feb  1 01:04 testfile1
Observe in the above output that file permissions defer when we set different umask values.
To set this up permanently, define this command in the login profiles of users. /etc/profile value can be overridden by the user’s own profile which executes after that. For all systemwide users define it /etc/profile or /etc/bashrc file. For user-specific values, define them in ~/.profile (Korn / Bourne shell) ~/.cshrc file (C shells), ~/.bash_profile (Bash shell) these shell specific profiles in their home directories.
You need to open a specific profile with vi editors and append umask <value> line at the end.
Setup umask with permission
If you are not good at remembering numbers and want to avoid octal notation, then you can define umask with permission letters too. Syntex will be as below :
# umask u=rwx,g=,o=

# ll
total 0
-rw-------. 1 root root 0 Feb  1 01:12 testfile3
Here, we set umask with defining permissions at the user, group, and owner level (500). Notice that there is no space in between but permissions are separated by commas.
Learn how to disable SELinux in most of the Linux distro. Understand what is SELinux; why and when you require to disable it.
You may have come across many app/tools or utility configurations on Linux like FTP when its stated to disable SELinux. You do it and your config runs smoothly. Have you ever wondered what is this SELinux thing? We are going to discuss this in this post!
SELinux is a short form of Security-Enhanced Linux. It’s a set of modules that implement access control policies in the kernel. To disable all this policy enforcement, we disable SELinux. These access control policies might interfere and won’t let your app/utility etc work properly. This is why we see disabling SELinux steps in configurations. Vendors like Red Hat strongly recommends using ‘Permissive mode’ rather than completely disabling SELinux.
SELinux exists to secure your server! Do not disable it unless you have a good reason or you know what you are doing.
SELinux modes:
There are three modes defined in SELinux config files.
Enforcing: Always enforce policies
Permissive: Prints warning messages rather than actually enforcing policies
Disabled: All SELinux policies disabled.
Its always to go with permissive mode if you are troubleshooting some system/app/utility behavior. So that it will give you a proper picture if SELinux really coming in your way and if you should permanently disable it or not.
Current SELinux mode can be checked using below command :
# getenforce
Permissive
Here SELinux is running in permissive mode.
How to disable SELinux temporarily :
Disabling SELinux permanently using the config file method (explained below) needs a reboot. If you want to avoid downtime then you can turn it into permissive mode temporarily using below method :
# echo 0 > /selinux/enforce
OR
# setenforce 0
Setting enforce file with value 0 makes it permissive. Turning it to 1 makes SELinux enforcing.
How to disable SELinux permanently:
SELinux has its own configuration file located at /etc/selinux/config. Here you can state SELINUX=disabled. But this file change needs a reboot to take effect. Here you can even choose permissive mode we talked about earlier.
# cat /etc/selinux/config

# This file controls the state of SELinux on the system.
# SELINUX= can take one of these three values:
#     enforcing - SELinux security policy is enforced.
#     permissive - SELinux prints warnings instead of enforcing.
#     disabled - No SELinux policy is loaded.
SELINUX=enforcing
# SELINUXTYPE= can take one of these two values:
#     targeted - Targeted processes are protected,
#     mls - Multi Level Security protection.
SELINUXTYPE=targeted
Save file changes and reboot the system. Once rebooted you can see SELinux status using getenforce command.
This method works on RHEL, CentOS, Fedora, Ubuntu.
SELinux mode selection from GRUB:
You can even decide which mode SELinux starts with system boot. Edit /boot/grub/grub.conf file and appending entry selinux=0 or selinux=1 in kernel line like below:
# cat /boot/grub/grub.conf
---- output clipped -----
splashimage=(hd0)/boot/grub/splash.xpm.gz
hiddenmenu
title Red Hat Enterprise Linux (2.6.32-431.29.2.el6.x86_64)
        root (hd0)
        kernel /boot/vmlinuz-2.6.32-431.29.2.el6.x86_64 ro root=LABEL=/ rhgb quite selinux=0
        initrd /boot/initramfs-2.6.32-431.29.2.el6.x86_64.img
Disabling SELinux for specific service:
Disabling SELinux for specific services also possible. So you can keep it in enforcing mode and only disable for your required services. You need to use setsebool command and feed it with service name nad required value like below.
# setsebool httpd_disable_trans 0
This sets its permissive mode for httpd services. Make a note that, you need to restart related service after disabling/enabling SELinux for it.
Step by step configuration guide for setting up the FTP server in RHEL6. FTP server is useful for small scale file sharing between cross-OS platforms.
FTP (file transfer protocol) is one of the famous methods to get centralized file storage on a low scale. FTP server implementation mainly is done to enable users to upload files in a centralized location. Many vendors have their FTP servers running where sysadmins upload logs when any case investigation is in progress with the vendor. This is almost a common thing in the life of sysadmin working in Corporate infrastructure.
In this post, we are going to see step by step configuring the FTP server in the RHEL server. Setting up FTP server can be staged in below parts :
Installing necessary packages
Starting up services
Setting up users
Testing
1. Installing necessary packages :
We need to have a very secure ftp, rpcbind and xinetd services installed on the server. You can check them if they are installed using the below command :
# service  iptables  stop
ip6tables: Setting chains to policy ACCEPT: filter         [  OK  ]
ip6tables: Flushing firewall rules:                        [  OK  ]
ip6tables: Unloading modules:                              [  OK  ]
# setenforce 0
Now start services one by one and check if they are running.
# service vsftpd start
Starting vsftpd for vsftpd:    [ OK ]
# service xinetd start
Starting xinetd:               [ OK ]
# service rpcbind status
rpcbind (pid 4855) is running...
3. Setting up users:
Users which are listed in file /etc/vsftpd/ftpusers are not allowed to access FTP server. Hence if you want to disable FTP access of any user, you need to put that username in this file. For security reasons, the root account is by default exist in this file i.e. not allowed to FTP.
# cat  /etc/vsftpd/ftpusers
# Users that are not allowed to login via ftp
root
bin
daemon
adm
lp
sync
shutdown
For testing, create a new user on the system. Login to the server from a new terminal with this new user. Create some test files in its home directory.
Bonus tip: You can even edit the welcome banner message the user sees after logging into FTP server. Edit “ftpd_banner=Welcome to blah FTP service.” line under /etc/vsftpd/vsftpd.conf file.
4. Testing:
Now, access the FTP server from a windows machine using the command prompt. Once successfully logged in using the above-created test user, you will be able to see the file created in the above step and even you will be able to download it!
C:/> ftp 10.10.15.2
Connected to 10.10.15.2.
220 (vsFTPd 2.2.2)
User (10.10.15.2:(none)): testuser
Password:
230 Login successful.
ftp>
ftp>dir
200 PORT command successful. Consider using PASV.
-rw-rw-r--      1   501   502     42 Jan 18 12:08  file1
226 Directory send OK.
ftp: 63 bytes received in 0.00Seconds 63000.00Kbytes/sec.
You can run get, put FTP commands, and verify full functionality! You have successfully configured a secure FTP server on Linux!