Learn how to use AWS Systems Manager’s Session Manager feature to access Linux EC2 instances.
AWS Systems Manager is a service offered by AWS to manage your instances in AWS and on-prem. Session Manager console lets you log into EC2 or on-prem instances using a browser-based shell or AWS CLI. This strikes out the need of managing bastion hosts, open ports in security groups or manage SSH keys. Session manager connects to instances using IAM roles. It also allows you to save fully auditable logs in CloudWatch logs stream or S3 bucket for every session you run.
Without further delay, let’s dive into Session Manager.
Pre-requisite
- Instance running SSM agent
- IAM role attached to the instance with proper permissions
- S3 bucket for saving logs (optional)
- CloudWatch log group to stream session logs (optional)
Lets go through all the pre-requisites one by one –
SSM agent
AWS Systems Manager Agent, i.e., SSM agent, is the small software installed and configured on instance so that AWS Systems Manager can communicate and execute the tasks on instances remotely. Agent receives requests from AWS systems Manager and executes them on an instance with administrative privileges.
SSM agent is open-sourced on GitHub. It is preinstalled on selected AMIs like Amazon Linux, Ubuntu server 16, 18 & 20, Windows Server 2016 and 2019. The complete list can be found on the Amazon documentation portal.
On the Linux server, you can verify agent installed or not using the below command –
[root@ip-172-31-44-63 ~]# rpm -qa |grep -i ssm-agent
amazon-ssm-agent-3.0.161.0-1.amzn2.x86_64
If not, you can follow the agent installation instructions to install the same. Instructions vary for different platforms and regions.
IAM role for AWS Systems Manager
EC2 instance to be used under AWS systems manager should be attached with the IAM role with AWS Managed policy AmazonSSMManagedInstanceCore attached to it. You can drill down and have a custom policy in place as per the scenario, but this is best to start.
Depending on which below 2 logging options you choose, those extra access rules to be added to the role.
S3 bucket for logs
Create the S3 bucket with standard procedure and keep it ready. You can select it under the session manager’s preferences later. Session logs will be stored in this S3 bucket, which you can refer to for debugging and troubleshooting.
Ensure appropriate access rules in the EC2 instance role to enable writing logs to the S3 bucket.
CloudWatch Log group
You can also upload/stream session logs to the CloudWatch log group. Uploading logs happens at the end of the session while streaming is on the go. Streaming logs are recommended.
Ensure appropriate access rules in the EC2 instance role to enable writing logs to the CloudWatch Log group.
Setting preferences
Once all the above pre-requisite is ready, proceed with setting the preferences for the session manager.
- Login to session manager console
- Click on Configure Preferences button on the right side introduction page.
- Configure settings as per your requirement –
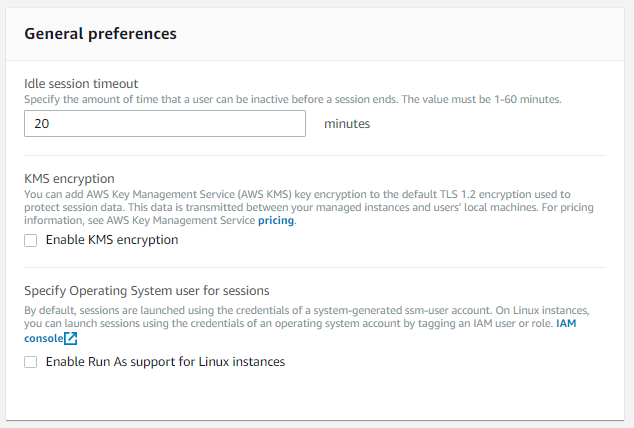
- General Preferences
- Idle session timeout: Duration for which session can be idle before ending. (Range 0-60 mins)
- KMS encryption: For encrypted communication from EC2 to the user’s machine.
- Specify Operating System user for sessions: Launch sessions with other OS accounts than the default
ssm-useraccount.
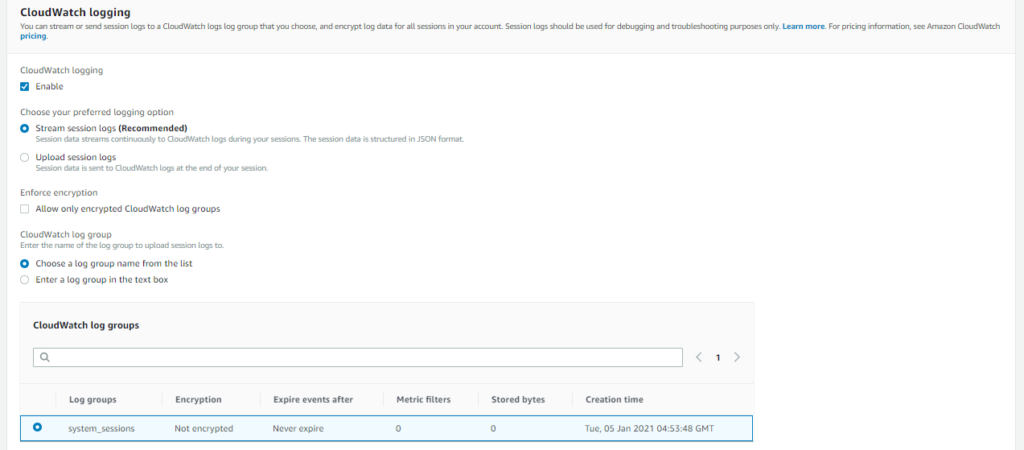
- CloudWatch logging
- Enable/Disable
- Choose logging options:
- Stream session logs: Recommended. Logs will be streamed to the CloudWatch log group throughout the session.
- Upload session logs: Logs will be uploaded to the CloudWatch log group at the end of the session.
- Enforce encryption: Encryption for added security.
- CloudWatch log group: Select the pre-created log group.
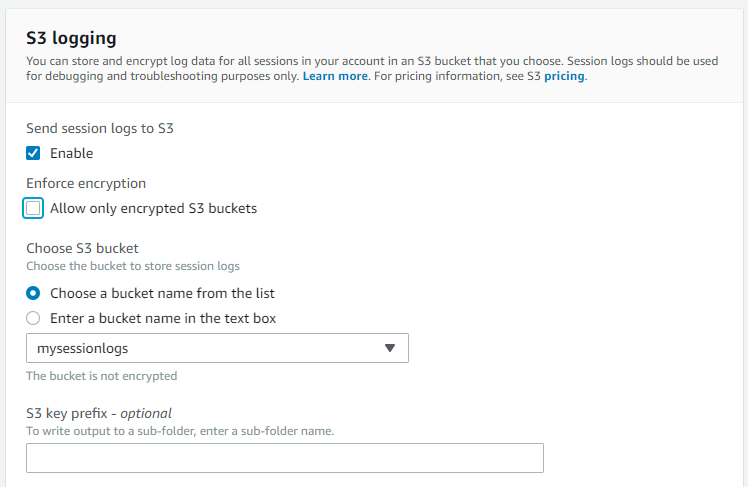
- S3 logging
- Enable/disable.
- Enforce encryption: Make sure only encrypted S3 bucket can be selected for delivery.
- Choose S3 bucket: Select pre-created S3 bucket for session log delivery.
- S3 Key prefix: For creating a hierarchical structure within the S3 bucket.
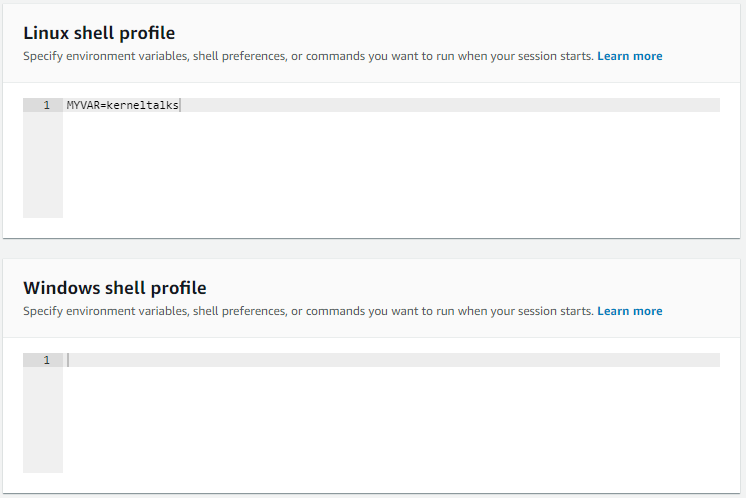
- Linux shell profile
- Add environmental variables, commands to be executed once a session starts. I added one variable for the test here.
Click Save button to save the preferences.
Running Linux EC2 session
- Login to Session manager dashboard
- Click on the Start session button.
- You should be presented with a list of EC2 instances on which the session can be started.
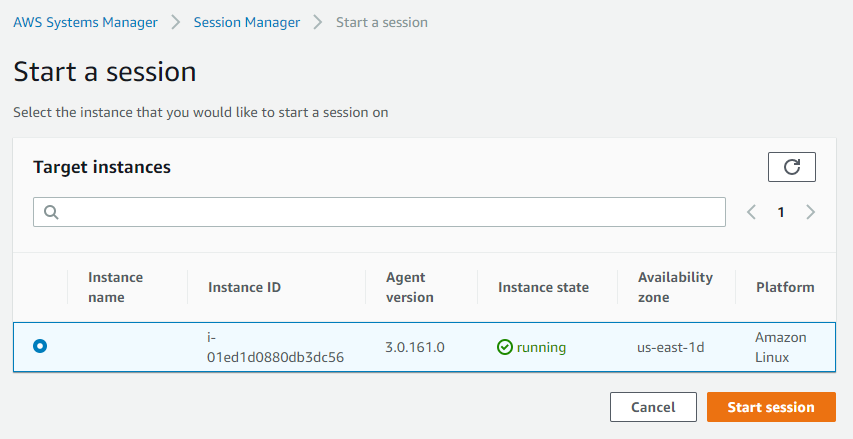
- Select the appropriate instance and click on the Start session button
- You may see the below message. In that case, it’s best to update the agent
The SSM Agent version installed on this instance doesn't support streaming logs to CloudWatch. Either update the SSM Agent to the latest version, or disable the streaming logs option in your preferences.
Server session should be started in new window.
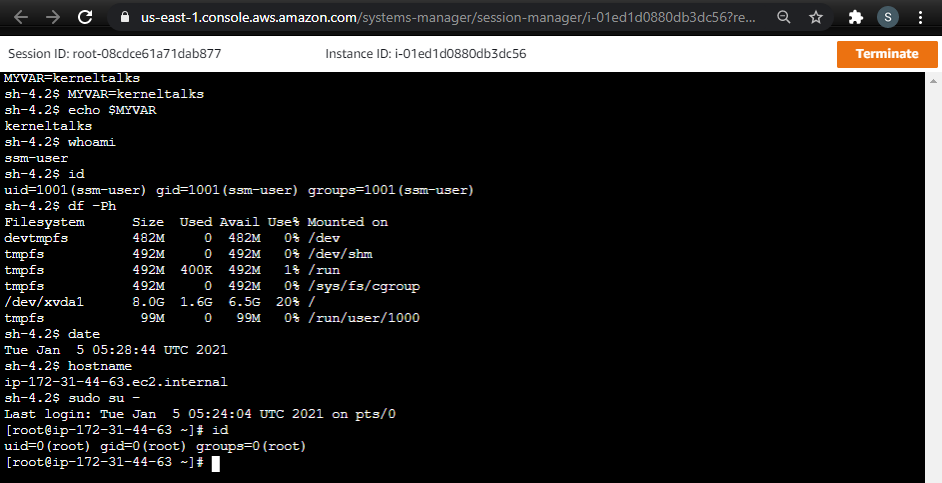
There are few things you can verify here –
- The variable we defined in the Linux shell profile is exported at the start of the session.
- the session will be started with user ssm-user
ssm-userhas passwordless sudo access to the root account.
On logging front, there should be logs created in S3 and CloudWatch.
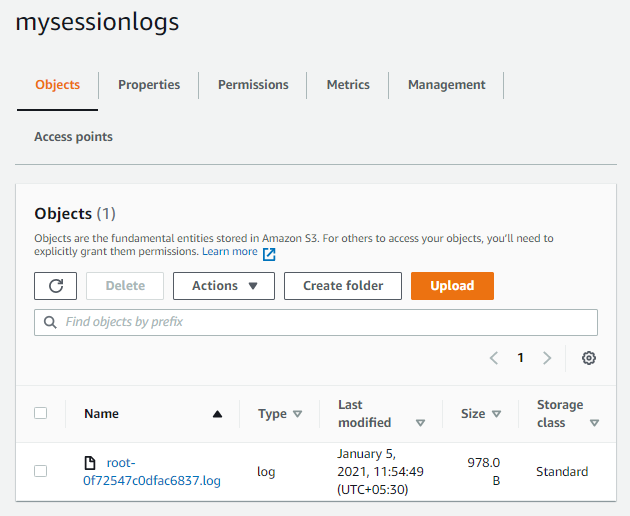
You can view the contents of this log file. It contains all the session output as-is. Commands entered, and their outputs are shown during the session.
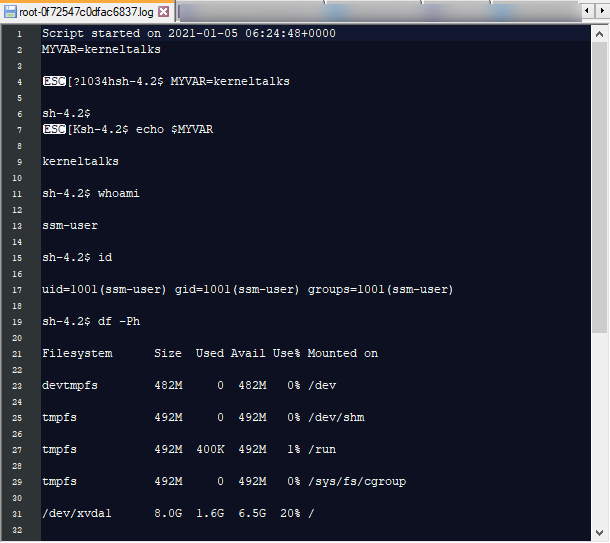
If you look closely, its using Linux tool script to log a session output!
Also, new logs can be found in CloudWatch.
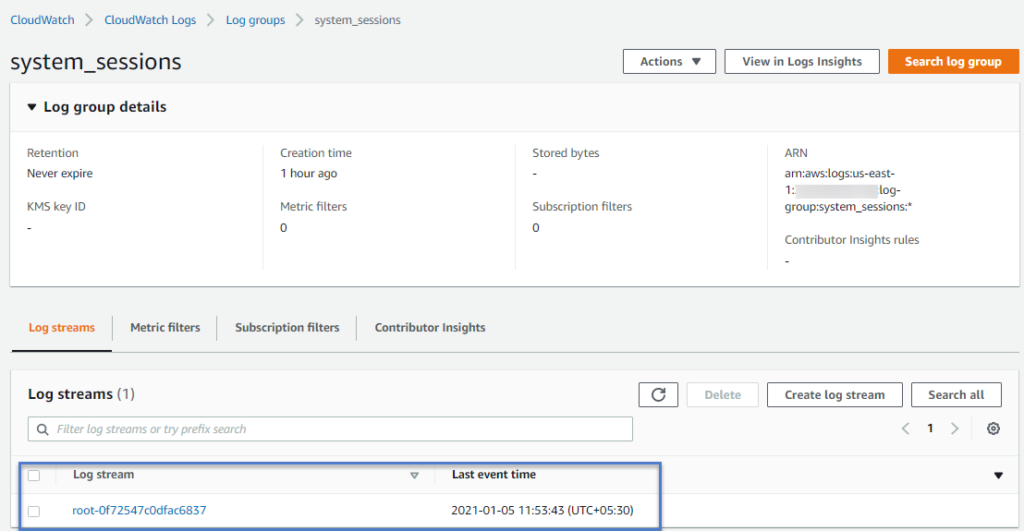
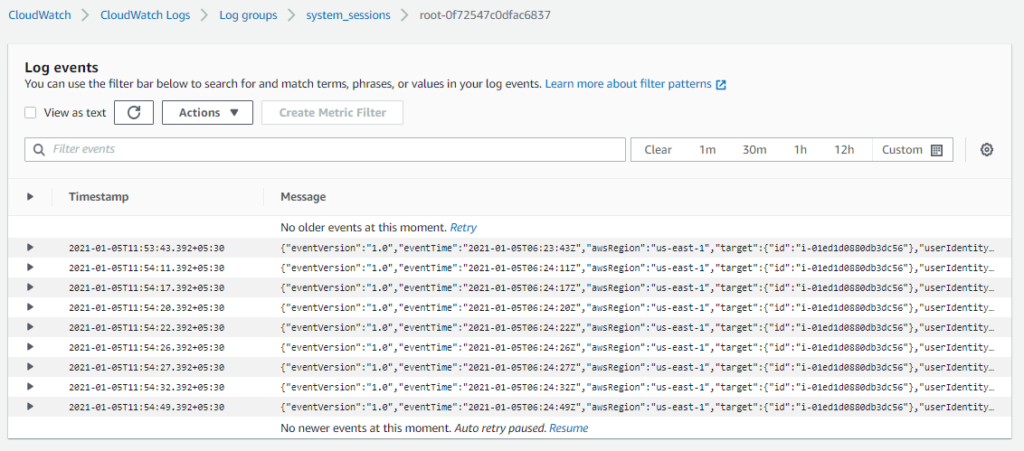
On opening each log event in the log stream, you can see each command entered in the session and output it returned.
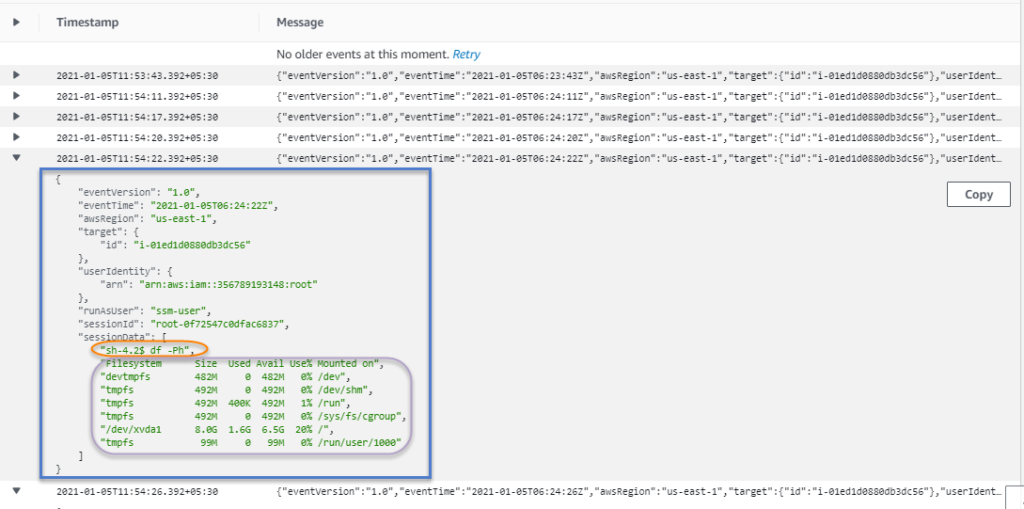
Here the sessionData key shows the command and its output from the session!
Once you are done working, you can use either exit shell as you normally use exit or cntl+D, or click the Terminate button in the web browser shell window.
Share Your Comments & Feedback: