Let’s Encrypt SSL certificate on Apache YUM based Linux system

Learn to configure the free, open-source, secure Let’s Encrypt SSL certificate on Apache webserver running on YUM based Linux server.

Lets Encrypt installation on Apache

What is Let’s Encrypt

Let’s Encrypt is free, open-source, and automatic SSL CA (Certificate Authority). Its managed by ISRG (Internet Security Research Group). SSL certificate always involved a cost which is recurring every year for renewal. Let’s encrypt aimed at open source and free SSL. This is an ideal choice for small websites, businesses which have less or no critical data on their websites and looking for SSL certificates.

If you are running a personal blog then SSL is essential for having a good search engine reputation. But before you dive into you need one dedicated IP for your domain name. If you are on shared hosting you are likely not having a dedicated IP. So for Let’s Encrypt SSL, you need to buy IP for your domain name.

Lets Encrypt SSL certificate

Let’s encrypt provides you fee SSL after your domain name validity which lasts for 3 months. You have to manually renew it every 3 months. The renewal process can be automatized too. Certbot is currently serving you deploying https on your server and configuring Let’s encrypt certs for you.

Before run into installation you should have these pre-requisite completed :

  1. Install EPEL repo
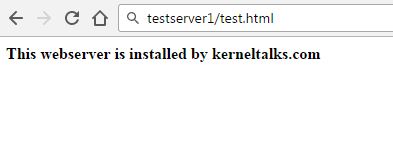
  2. You should have a webserver running
  3. The webpage is being displayed on your domain name (port 80) properly

Let’s encrypt installation on Apache & YUM Linux system

First of all, you need to clone git repository of letsencrypt. For that install package ‘git’ first. Once done run below git clone command :

# git clone https://github.com/letsencrypt/letsencrypt
Initialized empty Git repository in /root/letsencrypt/.git/
remote: Counting objects: 45178, done.
remote: Compressing objects: 100% (164/164), done.
remote: Total 45178 (delta 112), reused 0 (delta 0), pack-reused 45014
Receiving objects: 100% (45178/45178), 13.38 MiB | 2.15 MiB/s, done.
Resolving deltas: 100% (32345/32345), done.

Now goto letsencrypt directory which is created in your present directory by clone command. Under that directory run below command :

# ./letsencrypt-auto  certonly --standalone

Saving debug log to /var/log/letsencrypt/letsencrypt.log
Please enter in your domain name(s) (comma and/or space separated)  (Enter 'c'
to cancel):ktwebtest.ddns.net
Obtaining a new certificate
Performing the following challenges:
tls-sni-01 challenge for ktwebtest.ddns.net
Waiting for verification...
Cleaning up challenges
Generating key (2048 bits): /etc/letsencrypt/keys/0002_key-certbot.pem
Creating CSR: /etc/letsencrypt/csr/0002_csr-certbot.pem

IMPORTANT NOTES:
 - Congratulations! Your certificate and chain have been saved at
   /etc/letsencrypt/live/ktwebtest.ddns.net/fullchain.pem. Your cert
   will expire on 2017-07-02. To obtain a new or tweaked version of
   this certificate in the future, simply run letsencrypt-auto again.
   To non-interactively renew *all* of your certificates, run
   "letsencrypt-auto renew"
 - If you like Certbot, please consider supporting our work by:

   Donating to ISRG / Let's Encrypt:   https://letsencrypt.org/donate
   Donating to EFF:                    https://eff.org/donate-le

You can see above, after supplying domain name, Certbot creates a CSR file on its own, generates a key file, and fetch SSL certificate too. All paths are visible in the output. All files path are :

Key files directory/etc/letsencrypt/keys/
CSR files directory/etc/letsencrypt/csr/
SSL files directory/etc/letsencrypt/live/

It also shows you when your certificate going to expire. And command you can use to renew your certificate. Now you can follow the tutorial of how to install SSL which you obtained in the above step.

You can even automatize this SSL installation steps by using command :

# ./letsencrypt-auto  -d ktwebtest.ddns.net --apache

With this command, it will create key, CSR, fetch SSL, install SSL on your domain webserver!

Certificate renewal

You can renew certificate manually using :

# ./letsencrypt-auto renew
Saving debug log to /var/log/letsencrypt/letsencrypt.log

-------------------------------------------------------------------------------
Processing /etc/letsencrypt/renewal/ktwebtest.ddns.net.conf
-------------------------------------------------------------------------------
Cert not yet due for renewal

The following certs are not due for renewal yet:
  /etc/letsencrypt/live/ktwebtest.ddns.net/fullchain.pem (skipped)
No renewals were attempted.


As you can see, it will scan through all fetched let’s encrypt certificates on the server and their due date. If found due, those certificates will be renewed in no time!

If you want to renew certificate regardless of the due date then you can use force renew as below :

# ./letsencrypt-auto renew  --force-renewal

Saving debug log to /var/log/letsencrypt/letsencrypt.log

-------------------------------------------------------------------------------
Processing /etc/letsencrypt/renewal/ktwebtest.ddns.net.conf
-------------------------------------------------------------------------------
Renewing an existing certificate
Performing the following challenges:
tls-sni-01 challenge for ktwebtest.ddns.net
Waiting for verification...
Cleaning up challenges
Generating key (2048 bits): /etc/letsencrypt/keys/0003_key-certbot.pem
Creating CSR: /etc/letsencrypt/csr/0003_csr-certbot.pem

-------------------------------------------------------------------------------
new certificate deployed without reload, fullchain is
/etc/letsencrypt/live/ktwebtest.ddns.net/fullchain.pem
-------------------------------------------------------------------------------

Congratulations, all renewals succeeded. The following certs have been renewed:
  /etc/letsencrypt/live/ktwebtest.ddns.net/fullchain.pem (success)

You can even schedule crontab with a little bit of scripting to have an automatic renewal of certificates.

How to install EPEL repository in YUM based Linux

Learn how to install EPEL repository (Extra Packages for Enterprise Linux) in YUM based Linux. It enables you to install open source packages.

EPEL repository installation

What is EPEL

EPEL stands for Extra Packages for Enterprise Linux. EPEL repository is helpful and rich with packages that are normally used/needed for commonly used Linux software. This repository is managed by the EPEL group. This repository contains all 100% free open source packages which may not available in the core

EPEL repos should be used in production with extra caution.

As you know EPEL group is the Fedora project, EPEL repository can be enabled for YUM based systems like RHEL, Oracle Linux, Fedora, CentOS, etc distributions.

How to configure EPEL

Adding EPEL repository can take a different route than adding https, FTP repositories in YUM. For EPFL, you need to download related RPM from link  using any Linux downloaders. Choose correct distro and architecture while choosing a download link for the EPEL package. Or you can choose noarch rpm as I did below.

I downloaded rpm using wget as below :

# wget https://dl.fedoraproject.org/pub/epel/epel-release-latest-6.noarch.rpm
--2017-04-03 13:18:35--  https://dl.fedoraproject.org/pub/epel/epel-release-latest-6.noarch.rpm
Resolving dl.fedoraproject.org... 209.132.181.25, 209.132.181.23, 209.132.181.24
Connecting to dl.fedoraproject.org|209.132.181.25|:443... connected.
HTTP request sent, awaiting response... 200 OK
Length: 14540 (14K) [application/x-rpm]
Saving to: “epel-release-latest-6.noarch.rpm”

100%[===================================================================================================================>] 14,540      51.5K/s   in 0.3s

2017-04-03 13:18:37 (51.5 KB/s) - “epel-release-latest-6.noarch.rpm” saved [14540/14540]

You should have rpm file in your current directory.

# ll
total 680
-rw-r--r--. 1 root root  14540 Nov  5  2012 epel-release-latest-6.noarch.rpm

You need to install rpm using yum command.

# yum install ./epel-release-latest-*.noarch.rpm
Loaded plugins: amazon-id, rhui-lb, security
Setting up Install Process
Examining ./epel-release-latest-6.noarch.rpm: epel-release-6-8.noarch
Marking ./epel-release-latest-6.noarch.rpm to be installed
Resolving Dependencies
--> Running transaction check
---> Package epel-release.noarch 0:6-8 will be installed
--> Finished Dependency Resolution

Dependencies Resolved

=============================================================================================================================================================
 Package                              Arch                           Version                     Repository                                             Size
=============================================================================================================================================================
Installing:
 epel-release                         noarch                         6-8                         /epel-release-latest-6.noarch                          22 k

Transaction Summary
=============================================================================================================================================================
Install       1 Package(s)

Total size: 22 k
Installed size: 22 k
Is this ok [y/N]: y
Downloading Packages:
Running rpm_check_debug
Running Transaction Test
Transaction Test Succeeded
Running Transaction
  Installing : epel-release-6-8.noarch                                                                                                                   1/1
  Verifying  : epel-release-6-8.noarch                                                                                                                   1/1

Installed:
  epel-release.noarch 0:6-8

Complete!

Thats it. EPEL repository is accommodated by your YUM configuration now.

EPEL repository test

Let’s test the EPEL repository if it’s configured properly. You should see below the new repo in directory /etc/yum.repos.d This is the first indication EPEL is configured.

# pwd
/etc/yum.repos.d

# ll
total 32
-rw-r--r--. 1 root root  957 Nov  4  2012 epel.repo
-rw-r--r--. 1 root root 1056 Nov  4  2012 epel-testing.repo

Now extract repolist from yum to verify configuration.

# yum repolist
Loaded plugins: amazon-id, rhui-lb, security
repo id                                                         repo name                                                                              status
epel                                                            Extra Packages for Enterprise Linux 6 - x86_64                                         12,361
rhui-REGION-client-config-server-6                              Red Hat Update Infrastructure 2.0 Client Configuration Server 6                             0
rhui-REGION-rhel-server-releases                                Red Hat Enterprise Linux Server 6 (RPMs)                                               19,422
rhui-REGION-rhel-server-releases-optional                       Red Hat Enterprise Linux Server 6 Optional (RPMs)                                      11,057
rhui-REGION-rhel-server-rh-common                               Red Hat Enterprise Linux Server 6 RH Common (RPMs)                                        129
repolist: 48,031

You can see EPEL is configured and identified properly by YUM (highlighted line).

How to install Apache webserver in Linux

Step by step procedure to install and configure Apache webserver in Linux. It also includes troubleshooting steps for errors during install.

Apache webserver installation in Linux

In this tutorial, we are going to see how to install and configure Apache webserver in Linux. Apache is the most widely used web server that is developed and maintained by Apache Software Foundation. Its an open-source software and available for free to download and use.

What is webserver

The webserver is aimed to serve web pages to its clients. In our daily life websites, we visit from browsers that are hosted on webservers! Webserver commonly runs on port 80 (HTTP protocol) and 443 (https protocol, more secured). Communication between the web server and its client over https protocol is encrypted and hence secured.

Apache webserver

Apache webserver is an open-source web server developed by Apache Software Foundation. It is named as Apache HTTP Server Project and details can be viewed here. Apache webserver is also a part of the LAMP stack. Read more about LAMP here. Let’s see how to set up the Apache web server on the Linux box.

Apache installation

If you have configured YUM repositories then you can install ‘httpd’ package. If you don’t have YUM or apt-get repositories configured you can download the latest Apache source, compile and then install it.

Number of errors and their solutions :

Error: configure: error: APR not found.
Solution: Install apr and apr-utils packages (download here if you don’t have yum)

Error: configure: error: no acceptable C compiler found in $PATH
Solution: Install GCC package

Error: configure: error: pcre-config for libpcre not found.
Solution: Install pcre package (download here, unzip, /configure --prefix=/usr/local/pcre, make, make install)

Finally, you should be able to install it using : ./configure --prefix=/apache, make, make install (you can change /apache directory to diff where it will be installed)

Apache configuration

Post-installation you will have /var/www/html/ directory in which you should place your HTML pages which can be fetched from browser. httpd service will come to existence.

Read also : Let’s encrypt (free, open source) SSL configuration for Apache

If you keep files and directories in /var/www/html/ then its listing will be shown in a browser like this example we saw in another post. We will put below HTML file in /var/www/html/  for test :

# cat test.html
<html>
<body>
<h4>This webserver is installed by kerneltalks.com</h4>
</body>
</html>

Now once you make changes in the directory structure, restart httpd service. Verify httpd service is running and port 80 is listening.

# service httpd status
httpd (pid  27920) is running...

Now, try to fetch that page from browser. Use your server IP as website address i.e. http://IP/test.html

Testing webserver

You will be greeted with such a page! Your webserver is up and running. Accepting and serving requests from browsers.

Apache config files

Apache configuration file located at /etc/httpd/conf/httpd.conf In this configuration file you can set your error file path, SSL certificate path, SSL cert key file path, port, IP (virtual hosts), access log path, etc. There is a lot more customization that can be done using this file but I stated only general tweaking parameters.

Apache log files can be found at :

  1. /etc/httpd/logs/access_log: all access logs logged here.
  2. /etc/httpd/logs/error_log: All errors logged here. They also include start-stop service messages.

How to start / stop Apache webserver

To start Apache webserver

# service httpd start
# service apache2 start   #If you are running Apache2

To stop Apache webserver

# service httpd stop
# service apache2 stop   #If you are running Apache2

How to load Apache2 modules

One of the common issues found is when the PHP module is not loaded into Apache webserver, .php links on webserver will download files in the browser instead of displaying them. To correct this you need to load the PHP module in Apache.

To load PHP or any other module in Apache, you need to add it in file /etc/sysconfig/apache2 in below line :

APACHE_MODULES="actions alias auth_basic authn_file authz_host authz_groupfile authz_core authz_user autoindex cgi dir env expires include log_config mime negotiation setenvif ssl socache_shmcb userdir reqtimeout authn_core php5"

Here you can see we are loading the php5 module in our Apache2 webserver. Then you need to restart Apache2 webserver. Once done, check if the PHP module is loaded or not. Use command apache2ctl -M to check loaded modules in Apache.

How to list Apache modules in Linux

 # apache2ctl -M
Loaded Modules:
 core_module (static)
 so_module (static)
 http_module (static)
 mpm_prefork_module (static)
 unixd_module (static)
 systemd_module (static)
 actions_module (shared)
 alias_module (shared)
 auth_basic_module (shared)
 authn_file_module (shared)
 authz_host_module (shared)
 authz_groupfile_module (shared)
 authz_core_module (shared)
 authz_user_module (shared)
 autoindex_module (shared)
 cgi_module (shared)
 dir_module (shared)
 env_module (shared)
 expires_module (shared)
 include_module (shared)
 log_config_module (shared)
 mime_module (shared)
 negotiation_module (shared)
 setenvif_module (shared)
 ssl_module (shared)
 socache_shmcb_module (shared)
 userdir_module (shared)
 reqtimeout_module (shared)
 authn_core_module (shared)
 php5_module (shared)

You can see our php5 module is loaded in Apache.

What is difference between Server Root and Document Root in Apache ?

Server root is where Apache executable binaries reside rather its an installation path for Apache. Whereas document root is where website pages reside i.e. from where webserver loads web pages. So, you can change Document Root if you don’t want to use default /srv/www/htdocs directory. You can change it to any directory where you keep your website pages.

List WWN of online FC in HPUX server

List of commands to check WWN of online FC in the HPUX server. The article also includes a small script that can do this task in seconds!

WWN of online FC in HPUX

For FC connectivity to storage on the HPUX server, we must share the WWN of the online FC. Getting WWN is a three-step process :

Step 1:

Identify FC devices under ioscan output.

# ioscan -fnCfc
Class     I  H/W Path    Driver S/W State   H/W Type     Description
==================================================================
fc        0  2/0/10/1/0  fcd   CLAIMED     INTERFACE    HP AB379-60101 4Gb Dual Port PCI/PCI-X Fibre Channel Adapter (FC Port 1)
                        /dev/fcd0
fc        1  2/0/10/1/1  fcd   CLAIMED     INTERFACE    HP AB379-60101 4Gb Dual Port PCI/PCI-X Fibre Channel Adapter (FC Port 2)
                        /dev/fcd1
fc        2  2/0/12/1/0  fcd   CLAIMED     INTERFACE    HP AB379-60101 4Gb Dual Port PCI/PCI-X Fibre Channel Adapter (FC Port 1)
                        /dev/fcd2
fc        3  2/0/12/1/1  fcd   CLAIMED     INTERFACE    HP AB379-60101 4Gb Dual Port PCI/PCI-X Fibre Channel Adapter (FC Port 2)
                        /dev/fcd3

In above output, you can see /dev/fcd0 to 3 are FC devices.

Step 2:

Check which FCs are online i.e. have cable connectivity with fcmsutil output.

# fcmsutil /dev/fcd0

                           Vendor ID is = 0x1077
                           Device ID is = 0x2422
            PCI Sub-system Vendor ID is = 0x103C
                   PCI Sub-system ID is = 0x12D7
                               PCI Mode = PCI-X 133 MHz
                       ISP Code version = 5.4.0
                       ISP Chip version = 3
                               Topology = PTTOPT_FABRIC
                             Link Speed = 4Gb
                     Local N_Port_id is = 0x010300
                  Previous N_Port_id is = None
            N_Port Node World Wide Name = 0x50060b00006975ed
            N_Port Port World Wide Name = 0x50060b00006975ec
            Switch Port World Wide Name = 0x200300051e046c0f
            Switch Node World Wide Name = 0x100000051e046c0f
              N_Port Symbolic Port Name = server1_fcd0
              N_Port Symbolic Node Name = server1_HP-UX_B.11.31
                           Driver state = ONLINE
                       Hardware Path is = 2/0/10/1/0
                     Maximum Frame Size = 2048
         Driver-Firmware Dump Available = NO
         Driver-Firmware Dump Timestamp = N/A
                                   TYPE = PFC
                         NPIV Supported = YES
                         Driver Version = @(#) fcd B.11.31.1103 Dec  6 2010

Check the driver state in the above output (highlighted). If it’s ONLINE that means this FC has cable connectivity. If its Awaiting Link UP then it does not have cable connectivity.

Step 3:

If it’s online check its WWN by checking N_Port Port World Wide Name value! That’s it. So WWN of above FC is 0x50060b00006975ec.

I have compiled all the above steps in a single script that you can run and get the WWN of online FC in seconds.

First test script in test server. Run it on your own risk.

Sample output :

# sh test.sh

FC : /dev/fcd0
0x50060b00006975ec

FC : /dev/fcd2
0x50060b00006973c8

pvcreate error: Device /dev/xyz not found (or ignored by filtering).

Solution for pvcreate error:  Device /dev/xyz not found (or ignored by filtering). Troubleshooting steps and resolution for this error.

Solution for pvcreate error: Device /dev/xyz not found (or ignored by filtering).

Sometimes when adding new disk/LUN to Linux machine using pvcreate you may come across below error :

  Device /dev/xyz not found (or ignored by filtering).

# pvcreate /dev/sdb
  Device /dev/sdb not found (or ignored by filtering).

This is due to disk was used in different volume managers (possibly Linux own fdisk manager) and now you are trying to use it in LVM. To resolve this error, first, check if it has fdisk partitions using fdisk command :

# fdisk /dev/sdb

WARNING: DOS-compatible mode is deprecated. It's strongly recommended to
         switch off the mode (command 'c') and change display units to
         sectors (command 'u').

Command (m for help): p

Disk /dev/sdb: 859.0 GB, 858993459200 bytes
255 heads, 63 sectors/track, 104433 cylinders
Units = cylinders of 16065 * 512 = 8225280 bytes
Sector size (logical/physical): 512 bytes / 512 bytes
I/O size (minimum/optimal): 512 bytes / 512 bytes
Disk identifier: 0x62346fee6

    Device Boot      Start         End      Blocks   Id  System
/dev/sdb1               1      104433   838858041   83  Linux

In the above example, you can print the current partition table of the disk using p option under fdisk menu.

You can see there is one primary partition detected using fdisk. Because of this LVM command to initialize this disk (pvcreate) failed.

To resolve this you need to remove this partition and re-initialize disk in LVM.  To delete partition use d option under fdisk menu.

# fdisk /dev/sdb

WARNING: DOS-compatible mode is deprecated. It's strongly recommended to
         switch off the mode (command 'c') and change display units to
         sectors (command 'u').

Command (m for help):d
Selected partition 1

Command (m for help): w
The partition table has been altered!

Calling ioctl() to re-read partition table.
Syncing disks.

After issuing delete d command under fdisk menu, you need to write (w) changes on disk. This will remove your existing partition on the disk. Once again you can use print p option to make sure that there is no fdisk partition on the disk.

You can now use disk in LVM without any issue.

# pvcreate /dev/sdb
  Physical volume "/dev/sdb" successfully created

If this solution doesn’t work for you or there were no partitions on disk previously and still, if you get this error then you may want to look at your multipath configurations. The hint is to look at your verbose pvcreate output to check where it’s failing. Use pvcreate -vvv /dev/<name> command.

YUM cheat sheet

All YUM related articles in one place! Helpful YUM cheat sheet to learn, understand, revise YUM related sysadmin tasks on a single page.

YUM cheat sheet

YUM is Yellow dog Updater Modified. Its a package management tool for RPM-based systems. It has below a list of features that make it must use for every sysadmin.

  1. Simple install, uninstall, upgrade operations for packages
  2. Automatic resolves software dependency while installing or upgrading
  3. Looks for more than one source for software (supports multiple repositories)
  4. Supports CLI and GUI
  5. Automatically detects architecture of the system and search for best-fit software version
  6. Works well with remote (network connectivity) and local (without network connectivity) repositories.

In this article, I am gathering all YUM related posts in one place so that you don’t have to search them through our site!

Package Operations

  1. How to install package
  2. How to upgrade package
  3. How to remove package

Configurations

  1. YUM server configuration
  2. YUM config basics
  3. Package naming conventions
  4. Configure internet proxy for YUM

Services

  1. Automatic scheduled package updates 
  2. Download only packages without installing

Miscellaneous

  1. How to check if package is installed

How to configure yum server in Linux

Learn to configure the yum server in RPM-based Linux systems. The article explains yum server configs over HTTP and FTP protocol.

YUM server Configuration

In our last article, we saw yum configurations. We learned what is yum, why to use it, what is repository, yum config file locations, config file format, how to configure DVD, HTTP locations as a repository. In this article, we will walk through YUM server configuration i.e. configuring serverA as a YUM server so that other clients can configure serverA as a repo location.

Other YUM related articles :

In this article, we will see how to set up a yum server over FTP and HTTP protocol. Before proceeding with configurations make sure you have three packages deltarpm, python-deltarpm, createrepo installed on your yum server.

YUM server http configuration

First of all, we need to install a web server on the system so that the HTTP page can be served by the system. Install httpd package using yum. Post-installation you will have /var/www/html directory which is home of your webserver. Create packages directory within it which will hold all packages. Now we have /var/www/html/packages directory to hold packages of our YUM server.

Start httpd service and verify you are able to access http://ip-address/packages in the browser. It should look like below :

Webserver directory listing

Now, we need to copy package files (.rpm) into this directory. You can manually copy them from your OS DVD or you can download using wget from online official package mirrors. Once you populate /var/www/html/packages directory with .rpm files they are available to download from the browser but YUM won’t be able to recognize them.

For YUM (on client side) to fetch packages from the above directory you need to create an index of these files (.xml). You can create it using below command –

# createrepo /var/www/html/packages/
Spawning worker 0 with 3 pkgs
Workers Finished
Gathering worker results
Saving Primary metadata
Saving file lists metadata
Saving other metadata
Generating sqlite DBs
Sqlite DBs complete

Here I kept only 3 RPMs in the directory so you can see it started with 0 of 3 pkg! After completion of the above command, you can observe directory repodata is created in packages directory. And it contains repo detail files along with xml file.

# ll /var/www/html/packages/repodata/
total 40
-rw-r--r--. 1 root root 10121 Mar 23 15:38 196f88dd1e6b0b74bbd8b3a689e77a8f632650da7fa77db06f212536a2e75096-primary.sqlite.bz2
-rw-r--r--. 1 root root  4275 Mar 23 15:38 1fc168d13253247ba15d45806c8f33bfced19bb1bf5eca54fb1d6758c831085f-filelists.sqlite.bz2
-rw-r--r--. 1 root root  2733 Mar 23 15:38 59d6b723590f73c4a65162c2f6f378bae422c72756f3dec60b1c4ef87f954f4c-filelists.xml.gz
-rw-r--r--. 1 root root  3874 Mar 23 15:38 656867c9894e31f39a1ecd3e14da8d1fbd68bbdf099e5a5f3ecbb581cf9129e5-other.sqlite.bz2
-rw-r--r--. 1 root root  2968 Mar 23 15:38 8d9cb58a2cf732deb12ce3796a5bc71b04e5c5c93247f4e2ab76bff843e7a747-primary.xml.gz
-rw-r--r--. 1 root root  2449 Mar 23 15:38 b30ec7d46fafe3d5e0b375f9c8bc0df7e9e4f69dc404fdec93777ddf9b145ef3-other.xml.gz
-rw-r--r--. 1 root root  2985 Mar 23 15:38 repomd.xml

Now your location http://ip-address/packages is ready to be identified by client YUM to fetch packages. The next thing is to configure another Linux machine (client) with this HTTP path as repo and try installing packages (which you kept in packages directory obv).

YUM server ftp configuration

In the FTP scenario, we are keeping packages accessible to other machines over FTP rather than HTTP protocol. You need to configure FTP and keep packages directory in the FTP share.

Go through createrepo step explained above for the FTP share directory. Once done you can configure the client with FTP address to fetch packages from the yum server. Repo location entry in the client repo configuration file will be –

baseurl=ftp://ip-address/ftp-share

YUM configuration in Linux

Learn YUM configuration in Linux. Understand what is yum, features of yum, what is a repository, and how to configure it.

YUM Configuration

YUM is Yellow dog Updated Modified. It is developed to maintain an RPM-based system. RPM is the Redhat Package Manager. YUM is a package manager with below features –

  1. Simple install, uninstall, upgrade operations
  2. Automatic resolves software dependency
  3. Looks for more than one source for software
  4. Supports CLI and GUI
  5. Automatically detects architecture of the system and search for best-fit software version
  6. Works well with remote (network connectivity) and local (without network connectivity) repositories.

All these features made it the best package manager. In this article, we will walk through Yum configuration steps. You can also browse through below yum related posts :

YUM configuration basics

Yum configuration has repositories defined. Repositories are the places where package files .rpm are located and yum searches, downloads files from repositories for installations. Repositories can be the local mount point file://path, remote FTP location ftp://link, HTTP location link http://link or http://login:password@link, https link or remote NFS mount point.

Yum configuration file is /etc/yum.conf and repository configuration files are located under /etc/yum.repos.d/ directory. All repository configuration files must have .repo extension so than yum can identify them and read their configurations.

Typical repo configuration file entry looks like below :

[rhel-source-beta]
name=Red Hat Enterprise Linux $releasever Beta - $basearch - Source
baseurl=ftp://ftp.redhat.com/pub/redhat/linux/beta/$releasever/en/os/SRPMS/
enabled=0
gpgcheck=1
gpgkey=file:///etc/pki/rpm-gpg/RPM-GPG-KEY-redhat-beta,file:///etc/pki/rpm-gpg/RPM-GPG-KEY-redhat-release

here –

  • [rhrl-source-beta] is a unique repository id.
  • name is a human readable repository name
  • baseurl is the location from where packages should be scanned and fetched
  • enabled denotes if this repo is enabled or not i.e. yum should use it or not
  • gpgcheck enable/disable GPG signature check
  • gpgkey is the location of GPG key

Out of these first 4 entries are mandatory for every repo location. Let’s see how to create a repo from the DVD ISO file.

Remember one repo configuration file can have more than one location listed.

You can even configure internet proxy for yum in this configuration file.

YUM repo configuration for DVD ISO

RPM-based Linux installation DVD has RPM files in it which are used to install packages at the time of OS installation. We can use this package and build our repo so that yum can use those packages!

First, you have to mount ISO file on system. Let’s assume we have mounted it on /mnt/dvdNow we have to create a yum repo file for it. Lets create file dvdiso.repo under /etc/yum.repos.d/ directory. It should look like :

[dvdiso]
name=RedHat DVD ISO
baseurl=file:///mnt/dvd
enabled=1
gpgcheck=1
gpgkey=file:///mnt/dvd/RPM-GPG-KEY-redhat-6

Male sure you check the path of GPG key on your ISO and edit accordingly. baseurl path will be a directory where repodata directory & gpg file lives.

Thats it! Your repo is ready. You can check using yum repolist command.

# yum repolist
Loaded plugins: refresh-packagekit, security
...
repo id                          repo name                                status
dvdiso                         RedHat DVD ISO                             25,459

In the above output, you can see repo is identified by yum. Now you can try installing any software from it with yum install command.

Make sure your ISO is always mounted on the system even after a reboot (add an entry in /etc/fstab to run this repo successfully.

YUM repo configuration for http repo

There are many official and unofficial repositories are hosted on the internet and can be accessed over HTTP protocol. These repositories are large and may contain more packages than your DVD has. To use them in yum, your server should have an active internet connection and it should be able to connect with HTTP locations you are trying to configure.

Once connectivity is confirmed create new repo file for them e.g. named weblocations.repo under directory /etc/yum.repos.d/ with content as below (for example) :

[centos]
name=CentOS Repository
baseurl=http://mirror.cisp.com/CentOS/6/os/i386/
enabled=1
gpgcheck=1
gpgkey=http://mirror.cisp.com/CentOS/6/os/i386/RPM-GPG-KEY-CentOS-6
[rhel-server-releases-optional]
name=Red Hat Enterprise Linux Server 6 Optional (RPMs) mirrorlist=https://redhat.com/pulp/mirror/content/dist/rhel/rhui/server/6/$releasever/$basearch/optional/os enabled=0 gpgcheck=1 gpgkey=file:///etc/pki/rpm-gpg/RPM-GPG-KEY-redhat-release sslverify=1 sslclientkey=/etc/pki/rhui/content-rhel6.key sslclientcert=/etc/pki/rhui/product/content-rhel6.crt sslcacert=/etc/pki/rhui/cdn.redhat.com-chain.crt  

In the above example, you can see 2 web locations are configured in the repo. First is HTTP for centOS whereas the second one is RHEL supplied with https mirror list. Since https protocol is used other SSL related config can be seen following it.

Time to check repo –

# yum repolist
Loaded plugins: rhui-lb, security
repo id                                                         repo name                                                                              status
centos                                                          CentOS Repository                                                                       5,062
rhui-REGION-rhel-server-releases-optional                       Red Hat Enterprise Linux Server 6 Optional (RPMs)                                      11,057

Both repo are identified by yum. Configuration is successful.

Read about yum server configuration for FTP, HTTP, and client-side yum configuration in our other articles.

YUM certificate error

If you have an issue with your Red Hat Network certificate you will see below error while executing yum commands.

The certificate /usr/share/rhn/ULN-CA-CERT is expired. Please ensure you have the correct certificate and your system time is correct.

You need to update rhn-client-tools package and it will update certificate details.

If rhn-client-tools package is not installed properly you may see below error while executing yum commands-

rhn-plugin: ERROR: can not find RHNS CA file: /usr/share/rhn/ULN-CA-CERT

In this case, you need to reinstall or update rhn-client-tools package. If you are not using RHN on your server you can even safely remove this package from the system and get your yum working.

lolcat: a tool to rainbow color Linux terminal

Paint your command outputs with rainbow color! Use lolcat (Ruby gem) tool and add some spice to the black putty terminal!

Rainbow color outputs with lolcat

Another article to have some fun on your Linux terminal. In the past, we have seen few articles about fun in Linux terminal –

In this article, we will cover lolcat command which colors your terminal texts in rainbow fashion! See below GIF to start with –

lolcat command sample output

See how lolcat command colors output in rainbow color scheme!

lolcat is available at its Git Repository for download. Lets setup lolcat on your server.

How to install lolcat tool

lolcat is Ruby gem hence you need to install Ruby first. Install packages rubygems ruby-devel & ruby on your system using yum or apt-get. Once successfully install, download the latest version of lolcat  from its Git repository using wget and any Linux downloader.

Once downloaded, unzip it

# unzip master.zip
Archive:  master.zip
dfc68649f6bdac255d5be052d2123f3fbe3f555c
   creating: lolcat-master/
 extracting: lolcat-master/.gitignore
  inflating: lolcat-master/Gemfile
  inflating: lolcat-master/LICENSE
  inflating: lolcat-master/README.md
 extracting: lolcat-master/Rakefile
   creating: lolcat-master/ass/
  inflating: lolcat-master/ass/screenshot.png
   creating: lolcat-master/bin/
  inflating: lolcat-master/bin/lolcat
   creating: lolcat-master/lib/
  inflating: lolcat-master/lib/lolcat.rb
   creating: lolcat-master/lib/lolcat/
  inflating: lolcat-master/lib/lolcat/cat.rb
  inflating: lolcat-master/lib/lolcat/lol.rb
 extracting: lolcat-master/lib/lolcat/version.rb
  inflating: lolcat-master/lolcat.gemspec

and install it using Ruby gems.

# cd lolcat-master/bin
# gem install lolcat
Successfully installed lolcat-42.24.0
Parsing documentation for lolcat-42.24.0
1 gem installed

This confirms your successful installation of lolcat!

lolcat command to rainbow color output!

Its time to see lolcat in action. You can pipe it with any output of your choice and it will color your command output in rainbow color (a few examples below)!

# ps -ef |lolcat
# date | lolcat

Want some more fun?

lolcat comes with few options which will make it more fun on the terminal. Run command with -d and duration and it will color your output in running mode.

Running colors in terminal using lolcat

You can even combine it with text banners like figlet or toilet and have fun!

How to find the process using high memory in Linux

Learn how to find the process using high memory on the Linux server. This helps in tracking down issues and troubleshooting utilization problems.

Find process using high memory in Linux

Many times you came to know system memory is highly utilized using a utility like sar. You want to find processes hogging on memory. To find that, we will be using the sort function of process status ps command in this article. We will be sorting ps output with RSS values. RSS is Resident Set Size. These values show how much memory from physical RAM allocated to a particular process. It does not include swapped out memory numbers. Since we troubleshooting processes using high physical memory RSS fits our criteria.

Lets see below example :

# ps aux --sort -rss |head -10
USER           PID %CPU %MEM    VSZ   RSS     TTY STAT START   TIME COMMAND
oracle_admin  14400  0.0 11.8 36937384 31420276 ?   Ss    2016  86:41 ora_mman_DB1
oracle_admin  14405  0.2 11.3 36993676 30023868 ?   Ss    2016 1676:11 ora_DB3
oracle_admin  14416  0.2 11.3 36993676 30023656 ?   Ss    2016 1722:47 ora_DB3
oracle_admin  14410  0.2 11.3 36993676 30020400 ?   Ss    2016 1702:09 ora_DB3
oracle_admin  14421  0.2 11.3 36993676 30018272 ?   Ss    2016 1754:25 ora_DB3
oracle_admin  14440  0.0 10.5 36946868 27887152 ?   Ss    2016 130:30 ora_mon_DB3
oracle_admin 15855  0.0  6.9 19232424 18298484 ?   Ss    2016  41:01 ora_mman_DB4
oracle_admin 15857  0.1  6.7 19288720 17966276 ?   Ss    2016 161:45 ora_DB4
oracle_admin 15864  0.1  6.7 19288720 17964584 ?   Ss    2016 173:36 ora_DB4

In the above output, we sorted processes with RSS and shown only the top 10 ones. RSS value in output is in Kb. Let’s verify this output for the topmost process with PID 14400.

# free
             total       used       free     shared    buffers     cached
Mem:     264611456   96146728  168464728          0    1042972   75377436
-/+ buffers/cache:   19726320  244885136
Swap:     67108860     539600   66569260

On our system, we have 264611456Kb physical RAM (highlighted entry in the above output). Out of which 11.8% is used by process 14400 (from ps output above) which comes to 31224151Kb. This value matches the RSS value of 31420276Kb (in ps output above)!

So the above method works well when you try to find processes using the highest physical memory on the system!

You can even use other methods to get high memory using processes like top, htop, etc. but this article aimed at using ps.