An assorted collection of one-liner scripts that are helpful in Linux sysadmin’s day to day tasks.
One liner scripts!
In this article, I am consolidating many one-liner scripts that I used or came across which will help you to perform Linux day to day tasks. Great way to save your time in repetitive work ensuring zero human errors!
Setting up hostname in SUSE (older versions)
I always prefer hostnamectl to set hostname in systems running on newer kernels.
Add your own domain instead of labs.kerneltalks.com
Configure sudo so that it asks user’s password when user tries to execute sudo
# sed --in-place 's/Defaults targetpw/#Defaults targetpw/' /etc/sudoers
Remove existing NTP servers and add new in /etc/ntp.conf
# sed -e '/^server/s/^/#/g' -i /etc/ntp.conf
# echo "server 10.8.14.8 #Lab NTP1
server 10.8.14.9 #Lab NTP2">>/etc/ntp.conf
Commands to enable root access in Linux server
Below is a list of the commands you can execute to enable root access on the Cloud server or AWS Linux server.
# sed --in-place 's/PermitRootLogin no/PermitRootLogin yes/' /etc/ssh/sshd_config

# sed --in-place 's/PasswordAuthentication no/PasswordAuthentication yes/' /etc/ssh/sshd_config
# service sshd restart
# passwd root
If you are doing it on a public cloud server make sure that you reset the root account password since cloud server spin up with key-based authentication and their root does not carry a password initially.
Test port connectivity using telnet and exit in single command
# echo 'exit' | telnet 10.10.0.1 7657
Trying 10.10.0.1...
Connected to 10.10.0.1.
Escape character is '^]'.
Connection closed by foreign host.
Short article to demonstrate how to upgrade SUSE 12 SP1 to SP3 and SP4
Upgrade SUSE12 SP1 to SP4
First, you need to install zypper-migration-plugin . This plugin helps you in the migration from a lower service pack to the higher service pack.
kerneltalks:~ # zypper in zypper-migration-plugin
Refreshing service 'SMT-http_smt-ec2_susecloud_net'.
Refreshing service 'cloud_update'.
Loading repository data...
Reading installed packages...
Resolving package dependencies...

The following NEW package is going to be installed:
  zypper-migration-plugin

1 new package to install.
Overall download size: 10.5 KiB. Already cached: 0 B. After the operation, additional 16.7 KiB will be used.
Continue? [y/n/? shows all options] (y): y
Retrieving package zypper-migration-plugin-0.10-9.1.noarch                                                                         (1/1),  10.5 KiB ( 16.7 KiB unpacked)
Retrieving: zypper-migration-plugin-0.10-9.1.noarch.rpm ..........................................................................................................[done]
Checking for file conflicts: .....................................................................................................................................[done]
(1/1) Installing: zypper-migration-plugin-0.10-9.1.noarch ........................................................................................................[done]
Then make sure your system is patched to the current patch level. You can use the below command to install all the latest patches.
kerneltalks:~ # zypper patch
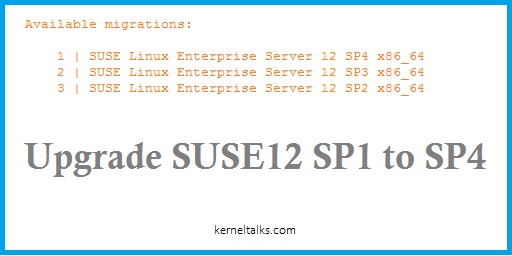
Now, once you are ready with the backup of the current system, proceed to migrate from SP1 to SP2. Use command zypper migration and you can see a list of service pack upgrades for your system. Although, we see that we can skip SP and upgrade to higher service packs, its
kerneltalks:~ # zypper migration

Executing 'zypper  refresh'

Refreshing service 'cloud_update'.
........
All repositories have been refreshed.

Executing 'zypper  --no-refresh patch-check --updatestack-only'

Loading repository data...
Reading installed packages...
0 patches needed (0 security patches)

Unavailable migrations (product is not mirrored):

        SUSE Linux Enterprise High Performance Computing 12 SP3 x86_64 (not available)
        SUSE Linux Enterprise Software Development Kit 12 SP3 x86_64
        Advanced Systems Management Module 12 x86_64 (already installed)
        Containers Module 12 x86_64 (already installed)
        Public Cloud Module 12 x86_64 (already installed)
        Legacy Module 12 x86_64 (already installed)
        Web and Scripting Module 12 x86_64 (already installed)
        Toolchain Module 12 x86_64 (already installed)

        SUSE Linux Enterprise High Performance Computing 12 SP2 x86_64 (not available)
        SUSE Linux Enterprise Software Development Kit 12 SP2 x86_64
        Advanced Systems Management Module 12 x86_64 (already installed)
        Containers Module 12 x86_64 (already installed)
        Public Cloud Module 12 x86_64 (already installed)
        Legacy Module 12 x86_64 (already installed)
        Web and Scripting Module 12 x86_64 (already installed)
        Toolchain Module 12 x86_64 (already installed)


Available migrations:

    1 | SUSE Linux Enterprise Server 12 SP4 x86_64
        SUSE Linux Enterprise Software Development Kit 12 SP4 x86_64
        Advanced Systems Management Module 12 x86_64 (already installed)
        Containers Module 12 x86_64 (already installed)
        Public Cloud Module 12 x86_64 (already installed)
        Legacy Module 12 x86_64 (already installed)
        Web and Scripting Module 12 x86_64 (already installed)
        Toolchain Module 12 x86_64 (already installed)

    2 | SUSE Linux Enterprise Server 12 SP3 x86_64
        SUSE Linux Enterprise Software Development Kit 12 SP3 x86_64
        Advanced Systems Management Module 12 x86_64 (already installed)
        Containers Module 12 x86_64 (already installed)
        Public Cloud Module 12 x86_64 (already installed)
        Legacy Module 12 x86_64 (already installed)
        Web and Scripting Module 12 x86_64 (already installed)
        Toolchain Module 12 x86_64 (already installed)

    3 | SUSE Linux Enterprise Server 12 SP2 x86_64
        SUSE Linux Enterprise Software Development Kit 12 SP2 x86_64
        Advanced Systems Management Module 12 x86_64 (already installed)
        Containers Module 12 x86_64 (already installed)
        Public Cloud Module 12 x86_64 (already installed)
        Legacy Module 12 x86_64 (already installed)
        Web and Scripting Module 12 x86_64 (already installed)
        Toolchain Module 12 x86_64 (already installed)


[num/q]:
You can see the migration plugin gave us the choice to jump from SP1 to SP2 or SP3 or SP4. Enter numeric against your choice and then it will upgrade related packages on your system. Here we select to go from SP1 to SP2 by tying 3.
[num/q]: 3

Executing 'snapper create --type pre --cleanup-algorithm=number --print-number --userdata important=yes --description 'before online migration''

sh: snapper: command not found
Upgrading product SUSE Linux Enterprise Server 12 SP2 x86_64.
Upgrading product SUSE Linux Enterprise Software Development Kit 12 SP2 x86_64.
Upgrading product Advanced Systems Management Module 12 x86_64.
Upgrading product Containers Module 12 x86_64.
Upgrading product Public Cloud Module 12 x86_64.
Upgrading product Legacy Module 12 x86_64.
Upgrading product Web and Scripting Module 12 x86_64.
Upgrading product Toolchain Module 12 x86_64.

Executing 'zypper --releasever 12.2 ref -f'
...................................
Once completed reboot system. Check OS version and you can see we are upgraded from SP1 to SP2
kerneltalks:~ # cat /etc/os-release
NAME="SLES"
VERSION="12-SP2"
VERSION_ID="12.2"
PRETTY_NAME="SUSE Linux Enterprise Server 12 SP2"
ID="sles"
ANSI_COLOR="0;32"
CPE_NAME="cpe:/o:suse:sles:12:sp2"
Now, repeat process to upgrade OS from SP2 to SP3 and SP4.
I am consolidating errors I came across and their solution in quick words for easy reference to me and you as well!
Troubleshooting Linux errors!
Error saw while starting the MariaDB server process on RHEL 6
# service mysql start
mysql: unrecognized service
Solution: You do not have MariaDB installed on your server. Install MariaDB
Error while starting MariaDB server process n RHEL 7
# systemctl start mariadb
Failed to issue method call: Unit mariadb.service failed to load: No such file or directory.
Solution: You do not have MariaDB installed. Install mariadb-server package
Error while installing Symantec Antivirus
which: no uudecode in (/usr/sbin:/usr/bin:/bin)
ERROR: Required utility missing: uudecode. Please install this
utility before using this Intelligent Updater package.
Solution : uudecode is provided by sharutils package. Install sharutils package.
Error while exporting a filesystem
# exportfs -ra
exportfs: 34.89.123.45:/data: Function not implemented
Solution: Check and start the nfs-server process.
Error while listing directory files
# ls -lrt
ls: cannot open directory '.': Permission denied
Solution: Your directory does not have read permission to the owner. Sometimes due to windows to Linux file copy etc. Set permission and you are good to go. Use the command in the same directory # chmod -R +r .
Error while querying NTP
# ntpq -p
localhost: timed out, nothing received
***Request timed out
Solution : Edit /etc/ntp.conf and replace restrict 127.0.0.1 to restrict localhost then restart ntpd service with systemctl restart ntpd
Error during mounting of the file system
# mount /dev/vg01/lvol0 /dump
mount: unknown filesystem type '(null)'
Solution: You are trying to mount a file system which is not formatted yet. Format filesystem and then try mounting.
Error while mounting other system’s disk
I was trying to mount a disk from another server in AWS and it was not mounting. I checked dmesg and got below error :
[ 792.138218] XFS (xvdh2): Filesystem has duplicate UUID d295b18a-2a70-4260-9f59-60e51432ea92 - can't mount
Solution: Since I was doing some research I temporarily mounted it without UUID. using below command –
root@kerneltalks # mount -t xfs -o nouuid /dev/xvdh2 /disk1
But ideally, you should have unique UUID to all disks on the system and you can generate UUID in such a case using XFS utility.
keytool command not found
keytool is used to generate key or CSR for SSL certificate.
# keytool -genkey -alias server -keyalg RSA -keystore kerneltalks.jks                                                             -keysize 2048
If 'keytool' is not a typo you can use command-not-found to lookup the package that contains it, like this:
    cnf keytool
Solution: Make sure you have JRE installed (Java Runtime Environment). Goto JRE binary directory and then run this command.
java version typo
# /usr/bin/java version
Error: Could not find or load main class version
Its java trying to load the program named version. You missed hyphen there!
Solution: Try below command
# java -version
java version "1.7.0_211"
OpenJDK Runtime Environment (rhel-2.6.17.1.0.1.el7_6-x86_64 u211-b02)
OpenJDK 64-Bit Server VM (build 24.211-b02, mixed mode)
Bad magic number in super-block
Error below seen while trying to resize filesystem in RHEL7
# resize2fs /dev/mapper/vg01-data
 resize2fs 1.42.9 (28-Dec-2013)
 resize2fs: Bad magic number in super-block while trying to open /dev/mapper/vg01-data
 Couldn't find valid filesystem superblock.
Solution: This is because RHEL7 has the XFS filesystem by default so you need to use xfs_growfs command to resize the filesystem.
How to change DocumentRoot in Apache2 to different directory than /srv/www/htdocs
Apache2 has by default DocumentRoot set to /srv/www/html. If you want to change it to some different directory you need to change it in a couple of configuration files.
Easy way to search all those files is searched in the directory –
Here are few files and the lines within them you need to edit.
# vi /etc/apache2/default-server.conf
ScriptAlias /cgi-bin/ "/srv/www/cgi-bin/"
<Directory "/srv/www/cgi-bin">
DocumentRoot "/srv/www/htdocs"
<Directory "/srv/www/htdocs">

# vi /etc/apache2/vhosts.d/vhost-ssl.conf
DocumentRoot "/srv/www/htdocs"
You need to edit /srv/www/htdocs to directory of your choice. Also, you need to change relative directories to /srv as well. Once you are done with editing, you need to restart the apache2 service and you are good to go.
server_id_usr_crc warning in Suse Manger
Repeatedly below warning is being logged in /var/log/messages in Suse Manager server 4.0
2019-08-07T20:38:02.832696+08:00 susemgr-test salt-master[12485]: [WARNING ] /usr/lib/python3.6/site-packages/salt/grains/core.py:2815: DeprecationWarning: This server_id is computed nor by Adler32 neither by CRC32. Please use "server_id_use_crc" option and define algorithm youprefer (default "Adler32"). The server_id will be computed withAdler32 by default.
Solution : Add server_id_use_crc: adler32 entry at end of the file /etc/salt/master.d/susemanager.conf and then restart the Suse Manager process.
smdba backup fails to run in cron on SUSE Manager
smdba is a DB backup tool by SUSE to be used on Suse Manager which runs on postgres database. smdba tool to be run by root and in the backend it switches to DB user to connect with database and execute database stuff. It runs manually well but when scheduled in cron it exits with the below error.
Backend error:
        Access denied to UID 'postgres' via sudo.
You can see this error in root mail or you need to redirect stderr of cron command to file and you can see it in there.
Solution: This is because the root is not able to sudo to postgres user since cron spawned process don’t have tty attached to it and your sudo most likely have Defaults requiretty active in /etc/sudoers. If you want you can disable it system-wide by putting # in front of it or add a dedicated entry for root Defaults:root !requiretty to move out of this restriction. Once done try running smdba commands via cron and they will run successfully.
/etc/resolv.conf resetting to default after reboot
Issue: My /etc/resolv.conf entries gets wiped out after reboot. Manual entries added in /etc/resolv.conf are getting deleted after reboot.
Solution: This is probably because your /etc/resolv.conf is being auto-generated by netconfig. It will be symlink to /var/run/netconfig/resolv.conf. You can disable this by setting NETCONFIG_DNS_POLICY='' in /etc/sysconfig/network/config file. It will be defined as auto, you set it to blank. Or you can edit below parameters in the same file if you want to keep the above policy parameter untouched.
Once done adjust /etc/resolv.conf by running command netconfig update -f. If after this your /etc/resolv.conf remains as it is then you are good otherwise you need to review the above settings again carefully.
If it is being reloaded by DHCP you will see below line in /etc/resolv.conf
; generated by /usr/sbin/dhclient-script
In that case you need to perform below actions.
# vi /etc/dhcp/dhclient-enter-hooks
#!/bin/sh
make_resolv_conf(){
    :
}
#chmod +x /etc/dhcp/dhclient-enter-hooks
Error while executing packages action: failed to retrieve repodata/filelists.xml.gz from Oraclelinux7-x86_64 error was [Errno -1] Metadata file does not match checksum
Solution :
Run below commands and you are good to go.
# yum clean all
# yum makecache
PAM module error
PAM unable to dlopen(/lib64/security/pam_gnome_keyring.so): /lib64/security/pam_gnome_keyring.so: cannot open shared object file: No such file or directory
PAM adding faulty module: /lib64/security/pam_gnome_keyring.so
pam_sss(sudo:auth): received for user shrikant: 10 (User not known to the underlying authentication module)
Solution :
This is because account shrikant does not exists in LDAP server account list. If this is local user to that perticular client then you can add it to ignore list in LDAP config file /etc/sssd/sssdconf in below parameters.
# mount -v -t nfs 10.10.1.2:/data /mnt/data
mount.nfs: timeout set for Wed Jan 29 08:29:01 2020
mount.nfs: trying text-based options 'vers=4,addr=10.10.1.2,clientaddr=10.10.1.3'
mount.nfs: mount(2): Connection timed out
mount.nfs: Connection timed out
Solution :
This is because client is not able to reach NFS server. There are couple of things you should check.
TCP and UDP port 2049 and 111 should be open between client and server. Use nc -v -u <nfs_server> port
NFS server service should be running on the server
NFS client service should be running on the client
If you have SEP 14 (Symantec Endpoint Protection) antivirus running on your machines then un-install and reboot both client and server.
Warning in xclock command
# xclock
Warning: Missing charsets in String to FontSet conversion
Solution:
This is just a warning about improper environment variables. You can avoid it by exporting –
export LC_ALL=C
You can add this in the user profile file as well so that it will be exported at login and no need to exporting manually.
sssd service is not starting up
After patching or system migration like activities your sssd dont start up. When you try to start sssd service you get below errors in systemd status sssd :
sssd[16866]: Exiting the SSSD. Could not restart critical service [kerneltalks.com].
systemd[1]: sssd.service: Main process exited, code=exited, status=1/FAILURE
systemd[1]: Failed to start System Security Services Daemon.
systemd[1]: sssd.service: Unit entered failed state.
systemd[1]: sssd.service: Failed with result 'exit-code'.
In such cases the best way to check actual errors is to check the log file located in /var/log/sssd/sssd*.log. You can see sssd logs as well as domain logs here. You need to check both.
In my case I got errors in domain log file –
[sssd[be[kerneltalks.com]]] [dp_target_init] (0x0010): Unable to load module krb5
[sssd[be[kerneltalks.com]]] [be_process_init] (0x0010): Unable to setup data provider [1432158209]: Internal Error
[sssd[be[kerneltalks.com]]] [main] (0x0010): Could not initialize backend [1432158209]
[sssd[be[kerneltalks.com]]] [dp_module_open_lib] (0x0010): Unable to load module [krb5] with path [/usr/lib64/sssd/libsss_krb5.so]: /usr/lib64/sssd/libsss_krb5.so: cannot open shared object file: No such file or directory
For this missing file, I installed sssd-krb5 package and my issue got resolved.
sssd service is running but user can not login
sssd service was running fine but showing below error in systemctl status sssd and the user was not able to log in –
sssd_be[2338]: GSSAPI Error: An invalid name was supplied (Success)
Solution :
Add below line under section [libdefaults] in /etc/krb5.conf
rdns = false
then restart sssd service using systemctl restart sssd
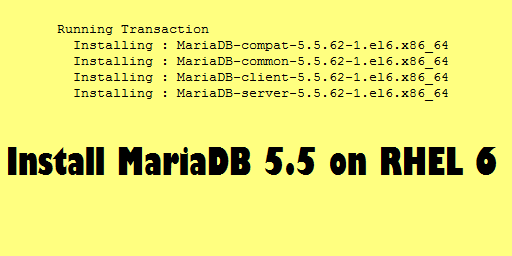
Learn how to install MariaDB 5.5 in RHEL 6 along with how to secure it and how to connect MariaDB from shell prompt.
MariaDB 5.5. installation
MariaDB is a MySQL based database management system. It is one of the components of the famous LAMP stack. In this article, we will walk you through how to install MariaDB, how to secure MariaDB installation, and how to connect MariaDB from shell prompt.
Without any further delay lets jump in to mariadb installation.
Create repo for downloading MariaDB packages
Mostly, package managers don’t come with MariaDB packages listed in RHEL 6 or lower. So, you have to add below the repo file on your server so that you can download and install the MariaDB server using yum.
Run below commands to start MariaDB with the boot. chkconfig manages processes at boot so use it here.
root@kerneltalks # chkconfig --add mysql
root@kerneltalks # chkconfig --level 345 mysql on
root@kerneltalks # chkconfig |grep mysql
mysql           0:off   1:off   2:on    3:on    4:on    5:on    6:off
Now, start MariaDB server process
root@kerneltalks # service mysql start
Starting MariaDB.190110 07:15:32 mysqld_safe Logging to '/var/lib/mysql/kerneltalks.test.err'.
190110 07:15:32 mysqld_safe Starting mysqld daemon with databases from /var/lib/mysql
.                                                          [  OK  ]
Use the below command to secure your MariaDB installation. Answer queries asked according to your requirement.
root@kerneltalks # mysql_secure_installation
/usr/bin/mysql_secure_installation: line 393: find_mysql_client: command not found

NOTE: RUNNING ALL PARTS OF THIS SCRIPT IS RECOMMENDED FOR ALL MariaDB
      SERVERS IN PRODUCTION USE!  PLEASE READ EACH STEP CAREFULLY!

In order to log into MariaDB to secure it, we'll need the current
password for the root user.  If you've just installed MariaDB, and
you haven't set the root password yet, the password will be blank,
so you should just press enter here.

Enter current password for root (enter for none):
OK, successfully used password, moving on...

Setting the root password ensures that nobody can log into the MariaDB
root user without the proper authorisation.

Set root password? [Y/n] y
New password:
Re-enter new password:
Password updated successfully!
Reloading privilege tables..
 ... Success!


By default, a MariaDB installation has an anonymous user, allowing anyone
to log into MariaDB without having to have a user account created for
them.  This is intended only for testing, and to make the installation
go a bit smoother.  You should remove them before moving into a
production environment.

Remove anonymous users? [Y/n] y
 ... Success!

Normally, root should only be allowed to connect from 'localhost'.  This
ensures that someone cannot guess at the root password from the network.

Disallow root login remotely? [Y/n] y
 ... Success!

By default, MariaDB comes with a database named 'test' that anyone can
access.  This is also intended only for testing, and should be removed
before moving into a production environment.

Remove test database and access to it? [Y/n] y
 - Dropping test database...
 ... Success!
 - Removing privileges on test database...
 ... Success!

Reloading the privilege tables will ensure that all changes made so far
will take effect immediately.

Reload privilege tables now? [Y/n] y
 ... Success!

Cleaning up...

All done!  If you've completed all of the above steps, your MariaDB
installation should now be secure.

Thanks for using MariaDB!
Test MariaDB server connection
Test connection to MariaDB server using below command and root account.
root@kerneltalks # mysql -u root -p
Enter password:
Welcome to the MariaDB monitor.  Commands end with ; or \g.
Your MariaDB connection id is 10
Server version: 5.5.62-MariaDB MariaDB Server

Copyright (c) 2000, 2018, Oracle, MariaDB Corporation Ab and others.

Type 'help;' or '\h' for help. Type '\c' to clear the current input statement.

MariaDB [(none)]> SELECT VERSION();
+----------------+
| VERSION()      |
+----------------+
| 5.5.62-MariaDB |
+----------------+
1 row in set (0.00 sec)

MariaDB [(none)]>
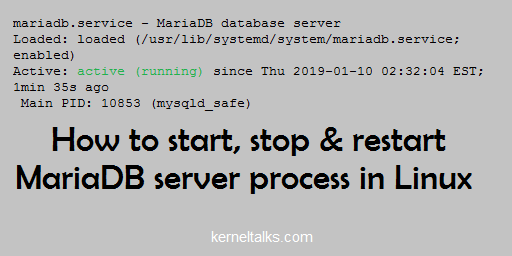
Learn how to start, stop & restart the MariaDB server in Linux. Also, know how to check the MariaDB server status.
Managing MariaDB server process
MariaDB is a MySQL database management system and popular nowadays. It is one of the pillars of the LAMP stack popular among developers. In this article, we will walk you through steps to manage the MariaDB server process from the command line shell prompt.
In newer systems like RHEL 7, Debian 8, Ubuntu 15.04, Suse 12 and later system V init daemon is replaced by systemd. We will see both systemd and system V init commands to manage the MariaDB server process. Be noted that we are dealing with the MariaDB server process only. You have to take care of the databases you build within for their graceful shutdown and startup.
How to start MariaDB server
On newer systems with systemd
# systemctl start mariadb
On older systems with system V init
# service mysql start
Starting MariaDB.190110 07:15:32 mysqld_safe Logging to '/var/lib/mysql/kerneltalks.test.err'.
190110 07:15:32 mysqld_safe Starting mysqld daemon with databases from /var/lib/mysql
.                                                          [  OK  ]
Systems like RHEL, CentOS, SUSE uses chkconfig to manage processes at boot.
# chkconfig --add mysql
# chkconfig --level 345 mysql on
Systems like Debian, ubuntu uses update-rc.d
# update-rc.d mysql defaults
How to stop MariaDB server
On newer systems with systemd
# systemctl stop mariadb
On older systems with system V init
# service mysql stop
Shutting down MariaDB.                                     [  OK  ]
How to check MariaDB server status
On newer systems with systemd
# systemctl status mariadb
mariadb.service - MariaDB database server
   Loaded: loaded (/usr/lib/systemd/system/mariadb.service; enabled)
   Active: active (running) since Thu 2019-01-10 02:32:04 EST; 1min 35s ago
 Main PID: 10853 (mysqld_safe)
   CGroup: /system.slice/mariadb.service
           ├─10853 /bin/sh /usr/bin/mysqld_safe --basedir=/usr
           └─11015 /usr/libexec/mysqld --basedir=/usr --datadir=/var/lib/mysql --plugin-dir=/usr/lib64/mysql/plugin --log-error=/var/log/mariadb/mariadb.log --pid-fi...

Jan 10 02:32:00 ip-172-31-89-93.ec2.internal mariadb-prepare-db-dir[10775]: MySQL manual for more instructions.
Jan 10 02:32:00 ip-172-31-89-93.ec2.internal mariadb-prepare-db-dir[10775]: Please report any problems at http://mariadb.org/jira
Jan 10 02:32:00 ip-172-31-89-93.ec2.internal mariadb-prepare-db-dir[10775]: The latest information about MariaDB is available at http://mariadb.org/.
Jan 10 02:32:00 ip-172-31-89-93.ec2.internal mariadb-prepare-db-dir[10775]: You can find additional information about the MySQL part at:
Jan 10 02:32:00 ip-172-31-89-93.ec2.internal mariadb-prepare-db-dir[10775]: http://dev.mysql.com
Jan 10 02:32:00 ip-172-31-89-93.ec2.internal mariadb-prepare-db-dir[10775]: Consider joining MariaDB's strong and vibrant community:
Jan 10 02:32:00 ip-172-31-89-93.ec2.internal mariadb-prepare-db-dir[10775]: https://mariadb.org/get-involved/
Jan 10 02:32:01 ip-172-31-89-93.ec2.internal mysqld_safe[10853]: 190110 02:32:01 mysqld_safe Logging to '/var/log/mariadb/mariadb.log'.
Jan 10 02:32:01 ip-172-31-89-93.ec2.internal mysqld_safe[10853]: 190110 02:32:01 mysqld_safe Starting mysqld daemon with databases from /var/lib/mysql
Jan 10 02:32:04 ip-172-31-89-93.ec2.internal systemd[1]: Started MariaDB database server.
On older systems with system V init
# service mysql status
MariaDB running (2122)                                     [  OK  ]
How to restart MariaDB server process
On newer systems with systemd
root@kerneltalks # systemctl restart mariadb
On older systems with system V init
root@kerneltalks # service mysql restart
Shutting down MariaDB....                                  [  OK  ]
Starting MariaDB.190110 07:35:01 mysqld_safe Logging to '/var/lib/mysql/ip-172-31-90-145.ec2.internal.err'.
190110 07:35:01 mysqld_safe Starting mysqld daemon with databases from /var/lib/mysql
.                                                          [  OK  ]
The article helps you to understand /etc/services file in Linux. Learn about content, format & importance of this file.
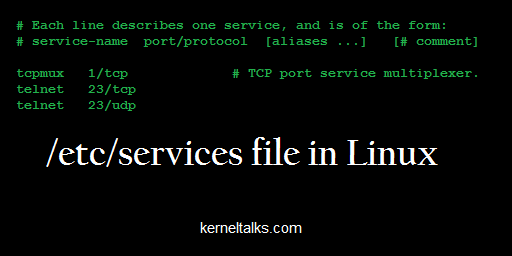
/etc/services file in Linux
Internet daemon is an important service in the Linux world. It takes care of all network services with the help of /etc/services file. In this article, we will walk you through the content, format of this file, and what it means to a Linux system.
/etc/services file contains a list of network services and ports mapped to them. inetd or xinetd looks at these details so that it can call a particular program when a packet hits respective port and demand for service.
As a normal user, you can view this file since the file is world-readable. To edit this file you need to have root privileges.
Last two fields are optional hence denoted in [] where –
service-name is the name of the network service. e.g. telnet, FTP, etc.
port/protocol is the port being used by that network service (numerical value) and protocol (TCP/UDP) used for communication by service.
alias is an alternate name for service.
a comment is a note or description you can add to service. Starts with # mark
Sample /etc/services file
# Each line describes one service, and is of the form:
#
# service-name  port/protocol  [aliases ...]   [# comment]

tcpmux          1/tcp                           # TCP port service multiplexer
rje             5/tcp                           # Remote Job Entry
echo            7/udp
discard         9/udp           sink null
Here, you can see the use of optional last two fields as well. discard service has an alternate name as sink or null.
Learn to install LAMP in RHEL. Linux, Apache, Mysql/MariaDB, Php/PHPmyadmin i.e. LAMP is a complete application stack used for development, testing & hosting dynamic websites.
LAMP installation
LAMP is an application stack which helps you to develop, test, and host dynamic website. You can test dynamic applications as well with this stack. Basically LAMP stands for Linux Apache Mysql/MariaDB and PHP/PHPMyadmin.
Linux gives a kernel platform on which the rest of the stack runs. Apache provides your web-server which is front-end for your application or website. Mysql/MariaDB is a database you could use for data on your site or app. PHP is as you know server-side strong scripting language just fit for web application development.
Without any further delay, let’s run through commands to setup and configure your LAMP stack. For the demonstration, I will be using RHEL 7 on AWS here to setup LAMP.
Setting Linux in LAMP
Nothing to tell you here! Having a Linux server already pass you through this. Here are a few installations articles from our factory.
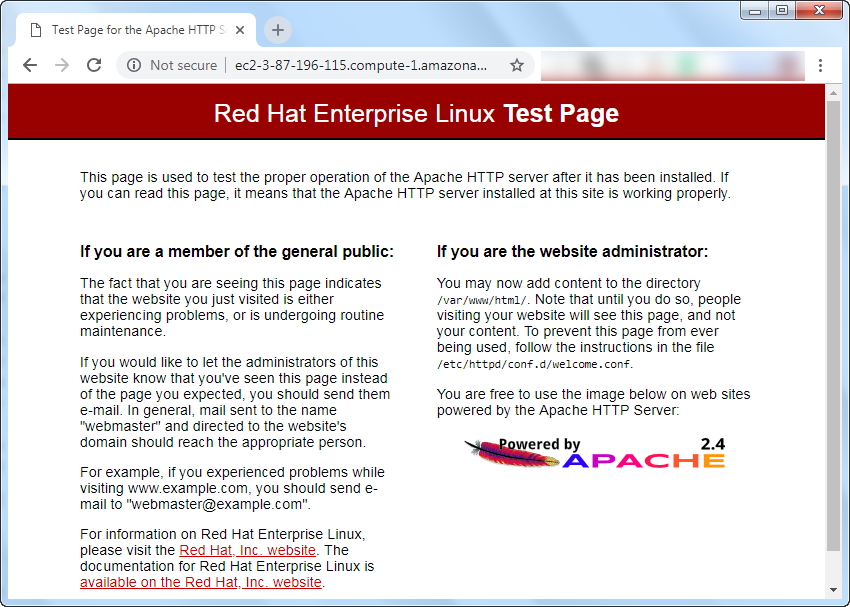
Check and make sure you get Apache welcome page in the browser after entering the IP address of the server. Open port 80 in Linux firewall, network firewall, or AWS security group if necessary.
Secure your MariaDB setup by running below command –
root@kerneltalks # /usr/bin/mysql_secure_installation

NOTE: RUNNING ALL PARTS OF THIS SCRIPT IS RECOMMENDED FOR ALL MariaDB
      SERVERS IN PRODUCTION USE!  PLEASE READ EACH STEP CAREFULLY!

In order to log into MariaDB to secure it, we'll need the current
password for the root user.  If you've just installed MariaDB, and
you haven't set the root password yet, the password will be blank,
so you should just press enter here.

Enter current password for root (enter for none):
OK, successfully used password, moving on...

Setting the root password ensures that nobody can log into the MariaDB
root user without the proper authorisation.

Set root password? [Y/n] Y
New password:
Re-enter new password:
Password updated successfully!
Reloading privilege tables..
 ... Success!

By default, a MariaDB installation has an anonymous user, allowing anyone
to log into MariaDB without having to have a user account created for
them.  This is intended only for testing, and to make the installation
go a bit smoother.  You should remove them before moving into a
production environment.

Remove anonymous users? [Y/n] Y
 ... Success!

Normally, root should only be allowed to connect from 'localhost'.  This
ensures that someone cannot guess at the root password from the network.

Disallow root login remotely? [Y/n] n
 ... skipping.

By default, MariaDB comes with a database named 'test' that anyone can
access.  This is also intended only for testing, and should be removed
before moving into a production environment.

Remove test database and access to it? [Y/n] Y
 - Dropping test database...
 ... Success!
 - Removing privileges on test database...
 ... Success!

Reloading the privilege tables will ensure that all changes made so far
will take effect immediately.

Reload privilege tables now? [Y/n] Y
 ... Success!

Cleaning up...

All done!  If you've completed all of the above steps, your MariaDB
installation should now be secure.

Thanks for using MariaDB!
Now you are running the MySQL database i.e. MariaDB and secured it too. You can test by connecting to database and running simple command –
root@kerneltalks # mysql -u root -p
Enter password:
Welcome to the MariaDB monitor.  Commands end with ; or \g.
Your MariaDB connection id is 18
Server version: 5.5.60-MariaDB MariaDB Server

Copyright (c) 2000, 2018, Oracle, MariaDB Corporation Ab and others.

Type 'help;' or '\h' for help. Type '\c' to clear the current input statement.

MariaDB [(none)]> SELECT VERSION();
+----------------+
| VERSION()      |
+----------------+
| 5.5.60-MariaDB |
+----------------+
1 row in set (0.00 sec)
Setting up PHP in LAMP
Install PHP to complete this step. Install PHPMyAdmin if you are planning to host a dynamic website using CMS like WordPress.
root@kerneltalks # yum install php
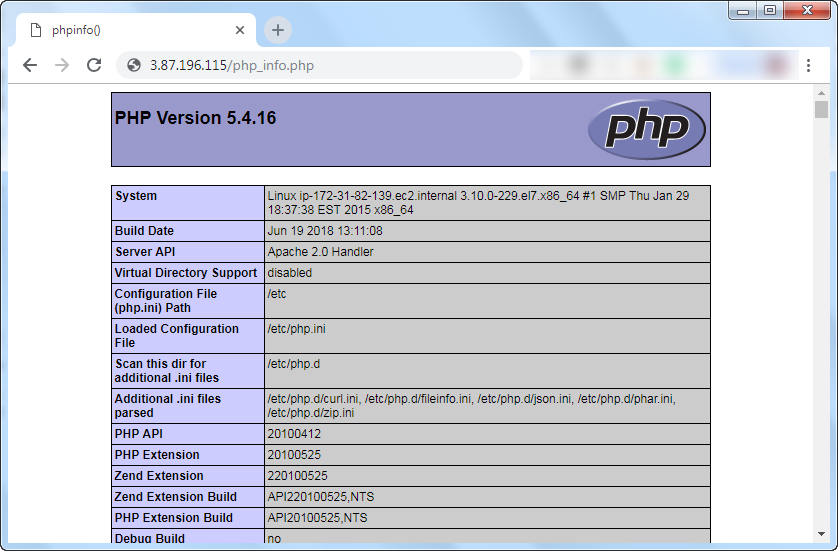
You can test sample PHP code like one below by placing it in /var/www/html (default webserver directory)
It will shows PHP information in web browser when you hit http://ip-address/php_info.php
PHP version test page
How to list PHP extensions in Linux
You can check active PHP modules using the below command. If an extension is missing you need to install its corresponding package on the system. Generally, it follows naming convention like PHP-extension i.e. for curl extension you need to search and install php-curl or phpX-curl where X is PHP version
# php -m
[PHP Modules]
Core
ctype
date
dom
filter
hash
iconv
json
libxml
mbstring
mysqli
mysqlnd
pcre
PDO
pdo_mysql
pdo_sqlite
Reflection
session
SimpleXML
SPL
sqlite3
standard
tokenizer
xml
xmlreader
xmlwriter
zlib

[Zend Modules]
That’s it. You have a working web server (Apache), Database (MariaDB), and web development scripting language (PHP) running on Linux! Complete LAMP stack is at your service!
Learn how to install Apache 9 in Linux like RedHat, CentOs, Suse, OEL etc.
Apache Tomcat 9 installation
This is a quick post to a list of steps for Apache Tomcat 9 installation on Linux. Let’s start with download the software. Get your Apache Tomcat 9 from the official download page.
Apache being a webserver is part of LAMP stack. Red more about LAMP here.
First download core binary file from the official download page. Use tools like wget to download a file right on your server itself.
Now extract the tarball. You will have apache-tomcat-9.0.14 directory after unzipping.
root@kerneltalks # tar -xvf apache-tomcat-9.0.14.tar.gz
Now move the directory or its content to your required directory where you want your Apache Tomcat binaries should stay & you are done. For demonstration, I moved them in /opt
root@kerneltalks # mv apache-tomcat-9.0.14 /opt
You have startup.sh and shutdown.sh scripts in the bin directory. Test them and you are all set. If you do not have java installed on your server, you will see below error while you try to start Apache.
root@kerneltalks #  cd /opt/apache-tomcat-9.0.14/bin
root@kerneltalks # sh startup.sh
Neither the JAVA_HOME nor the JRE_HOME environment variable is defined
At least one of these environment variable is needed to run this program
Install java package using your package manager according to Linux you use. The package installation will set the above variables automatically. Then you can try starting Apache again.
root@kerneltalks # ]# sh startup.sh
Using CATALINA_BASE: /opt/apache-tomcat-9.0.14
Using CATALINA_HOME: /opt/apache-tomcat-9.0.14
Using CATALINA_TMPDIR: /opt/apache-tomcat-9.0.14/temp
Using JRE_HOME: /
Using CLASSPATH: /opt/apache-tomcat-9.0.14/bin/bootstrap.jar:/opt/apache-tomcat-9.0.14/bin/tomcat-juli.jar
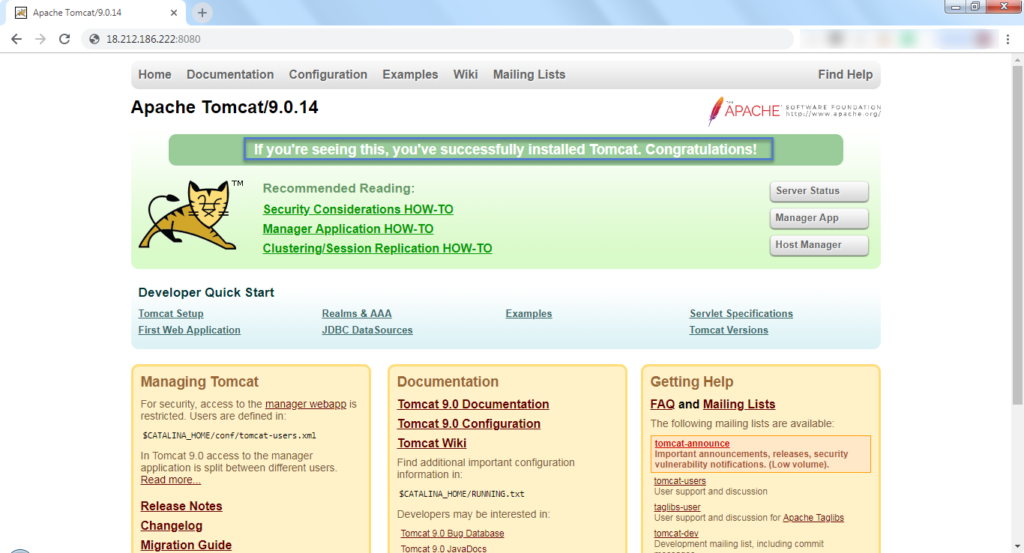
Tomcat started.
And here you go. Your Apache instance is started with the default configuration. It listens on port 8080 by default. You can open your server IP in a browser and make sure you get default Apache page like below –
Learn how to install sar utility in SUSE Linux. Also, it lists commands to enable sar to collect monitoring data in the background.
sar command in SUSE Linux
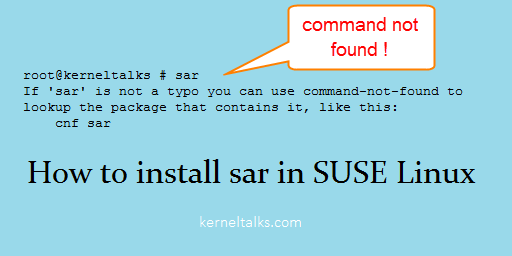
sar is a monitoring utility mostly native to Linux. But with SUSE Linux you can not find sarpre-installed. There you will see an error like one below :
root@kerneltalks # sar
If 'sar' is not a typo you can use command-not-found to lookup the package that contains it, like this:
    cnf sar
To make sar available on SUSE, you need to install package named sysstat. If you have zypper repo configured then you can directly run below command :
root@kerneltalks # zypper in sysstat
Refreshing service 'SUSE_Linux_Enterprise_Server_12_SP3_x86_64'.
Loading repository data...
Reading installed packages...
Resolving package dependencies...

The following NEW package is going to be installed:
  sysstat

1 new package to install.
Overall download size: 358.7 KiB. Already cached: 0 B. After the operation,
additional 1.3 MiB will be used.
Continue? [y/n/...? shows all options] (y): y
Retrieving package sysstat-12.0.2-10.15.1.x86_64
                                           (1/1), 358.7 KiB (  1.3 MiB unpacked)
Retrieving: sysstat-12.0.2-10.15.1.x86_64.rpm ..............[done (160.0 KiB/s)]
Checking for file conflicts: .............................................[done]
(1/1) Installing: sysstat-12.0.2-10.15.1.x86_64 ..........................[done]
If zypper repo is not configured you can download appropriate rpm for your kernel version and install using rpm command. We used SUSE12SP3 here for a demonstration.
Once done you need to start sysstat service so that it will start collecting monitoring data in the background. Also, enable this service at boot so that after reboot it starts itself and keeps on collecting data in the background.
root@kerneltalks # systemctl enable sysstat
Created symlink from /etc/systemd/system/multi-user.target.wants/sysstat.service to /usr/lib/systemd/system/sysstat.service.

root@kerneltalks # systemctl start sysstat
That’s it. You have installed sar on SUSE Linux and started collecting monitoring data.
Learn how to disable GUI in SUSE Linux. Also, how to enable GUI at boot time in SUSE Linux.
Disable GUI in SUSE Linux
Sometimes when installing with ISO you end up in booting the Suse Linux system in GUI mode. In this short article, we will walk you through how to disable GUI and how to enable GUI in Suse Linux.
For the demonstration, we used SUSE12 in this article. You can use system control systemctl to set the default for the next reboot. We will be using this feature to enable or disable GUI in SUSE Linux
Disable GUI in SUSE Linux
Note that, you will require downtime for this activity. You can disable GUI for the next reboot. So once you run the command you need to reboot your server. To disable GUI in SUSE Linux run below command –
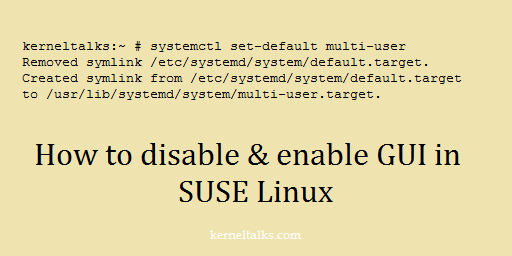
kerneltalks:~ # systemctl set-default multi-user
Removed symlink /etc/systemd/system/default.target.
Created symlink from /etc/systemd/system/default.target to /usr/lib/systemd/system/multi-user.target.
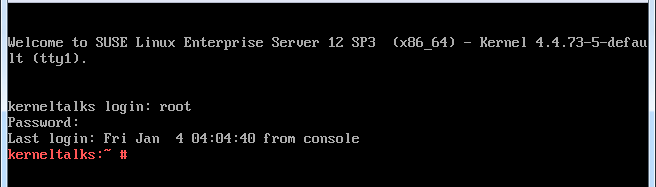
This will set the system to boot into CLI mode only. Now reboot your server and you can see server boots into CLI.
Suse CLI login screen
Enable GUI in SUSE Linux
If you want to go back into GUI mode again, run below command –
kerneltalks:~ # systemctl set-default graphical
Removed symlink /etc/systemd/system/default.target.
Created symlink from /etc/systemd/system/default.target to /usr/lib/systemd/system/graphical.target.
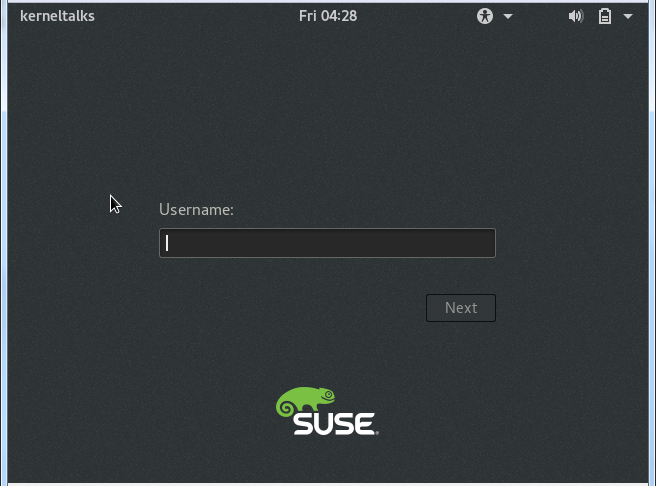
Reboot the server and you will be back greeted with GUI login screen.
SUSE GUI login
That’s it. You can toggle CLI or GUI using systemctl command. The only thing is you need a reboot each time you toggle.