The process to remove the missing disk from LVM configuration.
In this article, we will see how to remove a physical volume from the volume group when the disk is removed from the server. Normally, you need to remove the disk from the volume group first using vgreduce and then remove disk physically. But in some cases where disk went bad or you accidentally remove the disk from the server before you remove from VG, PV status will be shown as unknown in vgdisplay like below.
  --- Physical volumes ---
  PV Name               [unknown]
  PV UUID               fPFkBx-lbnG-R6Zo-3kq5-KOLA-U1ou-LdNIMD
  PV Status             allocatable
  Total PE / Free PE    1535 / 1535
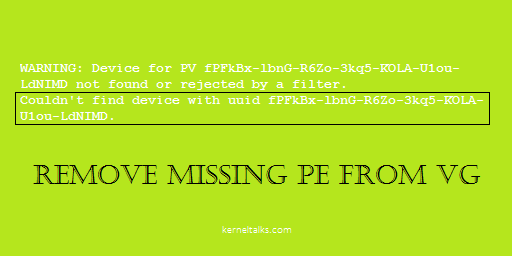
WARNING: Device for PV fPFkBx-lbnG-R6Zo-3kq5-KOLA-U1ou-LdNIMD not found or rejected by a filter.
Couldn't find device with uuid fPFkBx-lbnG-R6Zo-3kq5-KOLA-U1ou-LdNIMD.
This is because the disk was removed from the server or disk is disappeared from the server without being gracefully removed from LVM.
How to remove missing PV from VG
Now to clean VG after PV is deleted or removed you need to use vgreduce command with --removemissing switch-
# vgreduce  --removemissing datavg
  WARNING: Device for PV fPFkBx-lbnG-R6Zo-3kq5-KOLA-U1ou-LdNIMD not found or rejected by a filter.
  Couldn't find device with uuid fPFkBx-lbnG-R6Zo-3kq5-KOLA-U1ou-LdNIMD.
  Wrote out consistent volume group datavg.
It will clean up all missing physical volumes from the volume group and thus making VG consistent. You will see no more missing PV warnings now!
Article explaining how to convert java keystore jks into PEM formatted certificate or key file for Apache configuration
JKS to KEY
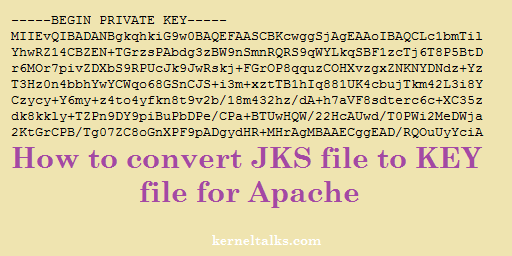
Scenario: I have a key file (*.jks) and CSR file generated in using keytool command i.e. in java. I wanted to convert this jks file to *.key file so that it can be used in Apache webserver configuration.
To use this key file in Apache configuration you need to strip off a header. Delete all parts till -----BEGIN PRIVATE KEY----- and save the file. Now you are good to use this *.key file in Apache SSL configuration.
How to export certificate from JKS file
As an addon to this post, I will walk you through how to export a certificate from java Keystore to PEM format. This is again two-step exercise as below –
Export certificate in binary
You read from the Keystore file certificate associated with alias and export it to a binary file. I used alias as server while creating this jks file hence options are –
-export : To export data. This is same as exportcert in newer versions
-alias : Enter same alias you used while creating this java key file
-file : Destination binary file in which you will export
-keystore : Your jks key file
[root@kerneltalks ~]# keytool -export -alias server -file kerneltalks.com.der -keystore kerneltalks.com.jks
Enter keystore password:
Certificate stored in file <kerneltalks.com.der>

Warning:
The JKS keystore uses a proprietary format. It is recommended to migrate to PKCS12 which is an industry standard format using "keytool -importkeystore -srckeystore kerneltalks.com.jks -destkeystore kerneltalks.com.jks -deststoretype pkcs12".
Convert exported certificate data to PEM format
Now we will convert certificate binary to PEM format using below command where –
-in : Input binary means exported file in last command
In this short tutorial, we will walk you through how to get UUID of the filesystem so that it can be used in /etc/fstab.
UUID entry in /etc/fstab
First of all, keep in mind you need to format your logical volume to get UUID registered in the kernel for it. Logical volume without filesystem on it won’t be having UUID attached to it. If you are using partitioning volume manager then disk partitions will have PARTUUID (partition UUID) even if you don’t format them. But it’s not useful in /etc/fstab since fstab deals with formatted partitions.
How to find UUID for logical volume
For this tutorial consider below setup –
[root@kerneltalks ~]# lsblk
NAME           MAJ:MIN RM  SIZE RO TYPE MOUNTPOINT
xvda           202:0    0    8G  0 disk
└─xvda1        202:1    0    8G  0 part /
xvdf           202:80   0    1G  0 disk
└─datavg-lvol0 253:0    0 1020M  0 lvm
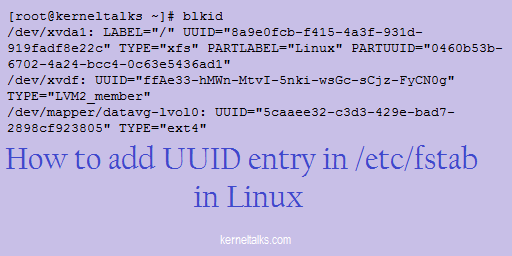
We have one logical volume named lvol0 in the volume group datavg and now we need to find UUID for it. Use command blkid and grep for your logical volume name to get your desired output –
We are mounting it on /data directory with default mount options and no fschecks. Add this entry to fstab and run mount -a and mount point established!
[root@kerneltalks ~]# df -Ph /data1
Filesystem                Size  Used Avail Use% Mounted on
/dev/mapper/datavg-lvol0  988M  2.6M  919M   1% /data
How to find UUID for disk partition
Consider below setup for finding UUID for disk partition.
[root@kerneltalks ~]# lsblk
NAME    MAJ:MIN RM  SIZE RO TYPE MOUNTPOINT
xvda    202:0    0    8G  0 disk
└─xvda1 202:1    0    8G  0 part /
xvdf    202:80   0    1G  0 disk
└─xvdf1 202:81   0 1023M  0 part
Here we have one non-root disk /dev/xvdf with one full partition /dev/xvdf1 on it. And it’s not yet formatted with any filesystem. Now if you run blkid command you will find PARTUUID for this partition.
You can compare this output with earlier one and you can see after formatting with ext4 you get UUID which can be used in /etc/fstab as explained earlier in this post.
Different steps to troubleshoot check_mk agent in Linux
check_mk agent checks
Before we start you may want to check our tutorial about setting up check_mk monitoring in Linux. You might experience issues when adding a server into check_mk monitoring. Below are a few steps, you can check to validate your configuration and communication between check_mk server and client works well.
Port 6556 communication
check_mk communicate over port 6556 by default. You need to check if port 6556 is open between client and server.
Also, you need to check if port 6556 is listening on your check_mk client so that server can fetch details by querying the client on port 6556.
You can even check using telnet on client and from server to client.
root@kerneltalks # telnet localhost 6556
Trying 127.0.0.1...
Connected to localhost.
Escape character is '^]'.
Connection closed by foreign host.
How to restart check_mk agent
check_mk agent runs on top of xinetd service in Linux. So if you make any changes to the config file then you need to reload configuration or restart the agent.
Reload check_mk configuration using below command –
root@kerneltalks # service xinetd reload
Redirecting to /bin/systemctl reload xinetd.service
Restart check_mk agent using below command –
root@kerneltalks # service xinetd stop
root@kerneltalks # service xinetd start
check_mk configuration file
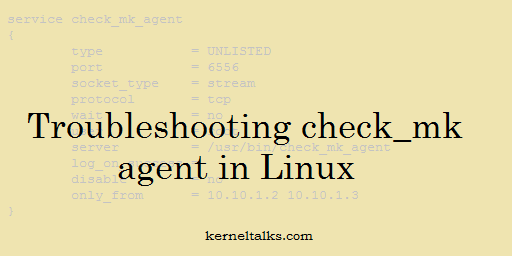
Make sure you have a proper configuration file in place. check_mk configuration file is located at /etc/xinetd.d/check_mk_agent. The sample configuration file is as below –
# Created by Check_MK Agent Bakery.
# This file is managed via WATO, do not edit manually or you
# lose your changes next time when you update the agent.


service check_mk_agent
{
        type           = UNLISTED
        port           = 6556
        socket_type    = stream
        protocol       = tcp
        wait           = no
        user           = root
        server         = /usr/bin/check_mk_agent
        log_on_success =
        disable        = no
        only_from      = 10.10.1.2 10.10.1.3
}
only_from field denotes check_mk server IPs to which your agent will communicate. It will be populated by RPM you used to install. If it doesn’t reflect proper values you can edit it and reload check_mk configuration by using commands mentioned above.
check_mk agent updater
Check update for check_mk agent and download from the server using check_mk updater.
root@kerneltalks #  cmk-update-agent -v -v
+-------------------------------------------------------------------+
|                                                                   |
|  Check_MK Agent Updater - Update                                  |
|                                                                   |
+-------------------------------------------------------------------+
Read /etc/cmk-update-agent.state.
Getting target agent configuration from deployment server
Fetching URL: http://kerneltalks1/master/check_mk/deploy_agent.py?...
Response from deployment server:
AgentAvailable: False

Read /etc/cmk-update-agent.state.
Saved deployment status to /etc/cmk-update-agent.state.
No agent available for us.
Using this command you can even see to which server client is registered. If the client is not registered with check_mk server then you will see below error –
root@kerneltalks # cmk-update-agent -v -v
+-------------------------------------------------------------------+
|                                                                   |
|  Check_MK Agent Updater - Update                                  |
|                                                                   |
+-------------------------------------------------------------------+
Read /etc/cmk-update-agent.state.
Getting target agent configuration from deployment server
Fetching URL: http://kerneltalks1/master/check_mk/deploy_agent.py?...
ERROR This host is not registered for deployment
cmk-update-agent can not execute binary error
If you come across below error while executing cmk-update-agent command then it’s probably you are running binary of architecture it is not meant to run. e.g. you are running x86 binary on ARM server
/usr/bin/cmk-update-agent: line 8: /usr/lib/check_mk_agent/plugins/21600/cmk-update-agent: cannot execute binary file
Solution: Make sure you install the proper architecture package on your server which matches your server architecture. Generally x86 check_mk package is marked as noarch package but it will land you up in the above issue when you install it on the ARM arch server.
check_mk xinetd error
---------------------------------------------
WARNING
This package needs xinetd to be installed.
Currently you do not have installed xinetd.
Please install and start xinetd or install
and setup another inetd manually.
It's also possible to monitor via SSH without
an inetd.
---------------------------------------------
Solution: Install xinetd package. Start and enable xinetd service. If you are running a newer kernel/OS like Suse 15 SP1, xinetd is not available in it. Its sockets being served by systemd. You need to install a higher version of check_mk agent RPM which identifies systemd sockets and it won’t show you above error. e.g. version 1.4 packages were showing above error to me while when I used version 1.5 package, it got away and installation succeeded.
check_mk python error
---------------------------------------------
ERROR
Failed to install agent: Could not find a
'python' interpreter.
---------------------------------------------
Solution: It means you have a higher version of python like python3 and agent rpm is looking for python. Use the higher version of check_mk agent which understands the latest python binaries (which has nomenclature with like python3 and not python)
Step by step procedure to add disk in Linux machine
New disk addition in Linux
In this article, we will walk you through steps to add a new disk in the Linux machine. Adding a raw disk to the Linux machine may vary depending upon the type of server you have but once the disk is presented to the machine, the procedure of getting it to mount points is almost the same.
Objective: Add a new 10GB disk to the server and create a 5GB mount point out of it using LVM and newly created volume group.
Adding raw disk to Linux machine
If you are using the AWS EC2 Linux server, you may follow these steps to add raw disk. If you are on VMware Linux VM you will have a different set of steps to follow to add disk. If you are running a physical rack-mount/blade server then adding disk will be a physical task.
Now once the disk is attached to the Linux machine physically/virtually, it will be identified by the kernel and then our rally starts.
Identifying newly added disk in Linux
After the attachment of the raw disk, you need to ask the kernel to scan a new disk. Mostly it’s done now automatically by the kernel in new versions.
First thing is to identify the newly added disk and its name in the kernel. There are numerous ways to achieve this. I will list a few –
You can observer lsblk output before and after adding/scanning disk to get a new disk name.
Check newly created disk files in /dev filesystem. Match timestamp of file and disk addition time.
Observer fdisk -l output before and after adding/scanning disk to get a new disk name.
For our example, I am using the AWS EC2 server and I added 5GB disk to my server. here is my lsblk output –
[root@kerneltalks ~]# lsblk
NAME    MAJ:MIN RM SIZE RO TYPE MOUNTPOINT
xvda    202:0    0  10G  0 disk
├─xvda1 202:1    0   1M  0 part
└─xvda2 202:2    0  10G  0 part /
xvdf    202:80   0  10G  0 disk
You can see xvdf is our newly added disk. Full path for disk is /dev/xvdf.
Now, you have a logical volume created. You need to format it with the filesystem on your choice and mount it. We are choosing ext4 filesystem here and formatting using mkfs.ext4 .
[root@kerneltalks ~]# mkfs.ext4 /dev/vgdata/lvdata
mke2fs 1.42.9 (28-Dec-2013)
Filesystem label=
OS type: Linux
Block size=4096 (log=2)
Fragment size=4096 (log=2)
Stride=0 blocks, Stripe width=0 blocks
327680 inodes, 1310720 blocks
65536 blocks (5.00%) reserved for the super user
First data block=0
Maximum filesystem blocks=1342177280
40 block groups
32768 blocks per group, 32768 fragments per group
8192 inodes per group
Superblock backups stored on blocks:
        32768, 98304, 163840, 229376, 294912, 819200, 884736

Allocating group tables: done
Writing inode tables: done
Creating journal (32768 blocks): done
Writing superblocks and filesystem accounting information: done
Mounting volume from new disk on mount point
Lets mount the logical volume of 5GB which we created and formatted on /data mount point using mount command.
[root@kerneltalks ~]# mount /dev/vgdata/lvdata /data
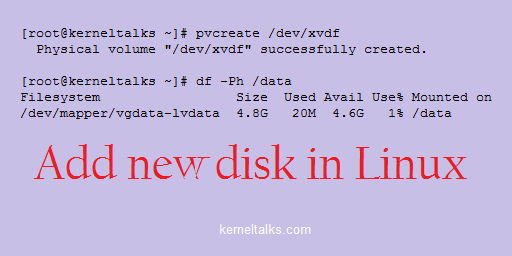
[root@kerneltalks ~]# df -Ph /data
Filesystem Size Used Avail Use% Mounted on
/dev/mapper/vgdata-lvdata 4.8G 20M 4.6G 1% /data
Verify your mount point with df command as above and you are all done! You can always add an entry in /etc/fstab to make this mount persistent over reboots.
You have attached a 10GB disk to the Linux machine and created a 5GB mount point out of it!
Learn how to use sudo access in winSCP with screenshots.
sudo access in winSCP
Before you move into configurations, make sure that the user is having NOPASSWD access to sudo to target user or root account. This means /etc/sudoers file must have entry something like below –
user1 ALL=(root) NOPASSWD: ALL
Once you have proper sudo configuration you can go ahead with WinSCP config. This is to ensure that once shell tries sudo it should be non-interactive.
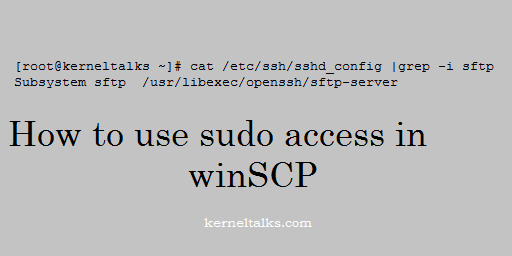
First of all, you need to check where is your SFTP server binary located on the server you are trying to connect with WinSCP.
You can check SFTP server binary location with below command –
Here you can see sftp server binary is located at /usr/libexec/openssh/sftp-server
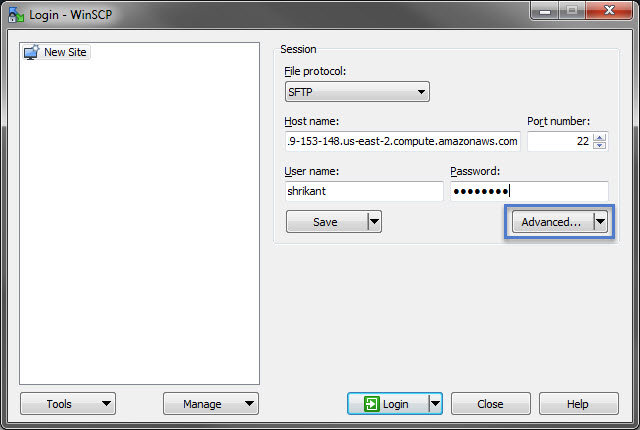
Now open winSCP and click Advanced button to open up advanced settings.
winSCP advance settings
It will open up an advanced setting window like one below. Here select SFTP under Environment on the left-hand side panel. You will be presented with an option on the right hand side.
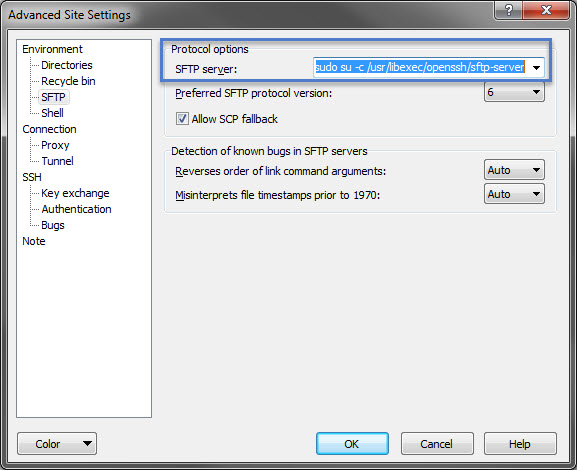
Now, add SFTP server value here with the command sudo su -c here as displayed in the screenshot below –
SFTP server setting in winSCP
So we added sudo su -c /usr/libexec/openssh/sftp-server in settings here. Now click Ok and connect to the server as you normally do.
After connection, you will be able to transfer files from the directory where you normally need sudo permission to access.
That’s it! You logged to server using WinSCP and sudo access.
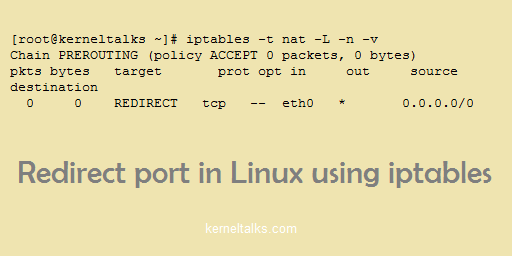
Short post to explain how to redirect port in Linux using iptables.
Port redirection using iptables
In this short tutorial, we will walk you through the process to redirect port using iptables. How to check port redirection in Linux and how to save iptables rules.
If you have an interface name other than eth0 then you need to edit your command accordingly. You can even add your source and destinations as well in same command using --src and --dst options. Without them, it’s assumed to any source and any destination.
How to check port redirection in iptable
Verify port redirect rule in iptables using below command –
You can see port 80 is being redirected to port 8080 on the server. Note here target is REDIRECT. Do not get confused with port redirection with port forwarding.
How to save iptables rules
To save iptables rules and make them persistent over reboots use below command –
Quick article to demonstrate how to configure port forwarding in Linux using iptables.
Port forwarding using iptables
In this article, we will walk you through port forwarding using iptables in Linux. First of all, you need to check if port forwarding is enabled or not on your server. For better understanding, we will be using eth0 as a reference interface and all our command executions will be related to eth0 in this article.
How to check if port forwarding is enabled in Linux
Either you can use sysctl to check if forwarding is enabled or not. Use below command to check –
Again here process FS with zero values confirms port forwarding is disabled on our system. Now we need to first enable port forwarding on our system then we will configure port forwarding rules in iptables.
How to enable port forwarding in Linux
As we checked above, using the same methods you can enable port forwarding in Linux. But its recommended using sysctl command rather than replacing 0 by 1 in proc files.
Enable port forwarding in Linux using sysctl command –
Change interface, IP and ports as per your requirement. The first command tells us to redirect packets coming to port 80 to IP 172.31.40.29 on port 8080. Now packet also needs to go through FORWARD chain so we are allowing in in the second command.
Now rules have been applied. You need to verify them.
Here is a little script to create a mount point using CSV file which has a mount point name, size, and VG name.
Script to create mount points in LVM
Caution : Use script on your own risk!
Do not use it on production servers. Test it and use it on newly built/dev/testing servers.
Below is the script code. Save it under /tmp/lvm_script.sh and also save your CSV file under the same directory with the name list.csv
CSV file format is mount point name,size in GB,VG name. For example : /data,10,data_vg
Script code :
#Script to create mount point using CSV file
#Author : Shrikant Lavhate (kerneltalks.com)
#Save CSV file as list.csv in current working directory with format mount point name,size in GB,VG name

chckfail()
{
        if [ $? -ne 0 ];then
                echo "Check error above. Halting..."
                exit 1
        fi
}

for i in `cat list.csv`
do
        kt_mountname=`echo $i | cut -d, -f1`
        kt_lvname=`echo $i |cut -d, -f1|cut -c 2-|tr / _`
        kt_vgname=`echo $i | cut -d, -f3`
        kt_lvsize=`echo $i | cut -d, -f2`
        kt_lvsize="${kt_lvsize}G"
        lvcreate -n $kt_lvname -L $kt_lvsize $kt_vgname >/dev/null
        chckfail
        mkfs.ext4 /dev/$kt_vgname/$kt_lvname >/dev/null
        chckfail
        mkdir -p $kt_mountname >/dev/null
        chckfail
        mount /dev/$kt_vgname/$kt_lvname $kt_mountname>/dev/null
        chckfail
        echo "/dev/$kt_vgname/$kt_lvname $kt_mountname ext4 defaults 0 0">>/etc/fstab
        chckfail
done
Breaking the code :
Quick walk through above code.
Part one is chckfail function which used to check if the command ran is successful or not. If the command failed, it will stop the execution of the script and exits.
Variable part extracts mount point name, size, VG to be used details from CSV file. It also creates LV names out of mount point name in CSV
Standard LVM commands to create LV, format it with EXT4, create mount point directory, and mount LV on it.
Finally, it adds an entry to /etc/fstab for the persistent mount.
Modifying script for your requirement :
If you are using size in MB then remove line kt_lvsize="${kt_lvsize}G"
If you are using size in TB then replace G with T in above mentioned line.
If you are using filesystem other than ext4 then change mkfs.ext4 & /etc/fstab command accordingly.
An assorted collection of one-liner scripts that are helpful in Linux sysadmin’s day to day tasks.
One liner scripts!
In this article, I am consolidating many one-liner scripts that I used or came across which will help you to perform Linux day to day tasks. Great way to save your time in repetitive work ensuring zero human errors!
Setting up hostname in SUSE (older versions)
I always prefer hostnamectl to set hostname in systems running on newer kernels.
Add your own domain instead of labs.kerneltalks.com
Configure sudo so that it asks user’s password when user tries to execute sudo
# sed --in-place 's/Defaults targetpw/#Defaults targetpw/' /etc/sudoers
Remove existing NTP servers and add new in /etc/ntp.conf
# sed -e '/^server/s/^/#/g' -i /etc/ntp.conf
# echo "server 10.8.14.8 #Lab NTP1
server 10.8.14.9 #Lab NTP2">>/etc/ntp.conf
Commands to enable root access in Linux server
Below is a list of the commands you can execute to enable root access on the Cloud server or AWS Linux server.
# sed --in-place 's/PermitRootLogin no/PermitRootLogin yes/' /etc/ssh/sshd_config

# sed --in-place 's/PasswordAuthentication no/PasswordAuthentication yes/' /etc/ssh/sshd_config
# service sshd restart
# passwd root
If you are doing it on a public cloud server make sure that you reset the root account password since cloud server spin up with key-based authentication and their root does not carry a password initially.
Test port connectivity using telnet and exit in single command
# echo 'exit' | telnet 10.10.0.1 7657
Trying 10.10.0.1...
Connected to 10.10.0.1.
Escape character is '^]'.
Connection closed by foreign host.